• Skip to primary navigation
  • Skip to main content
  • Skip to primary sidebar
  • Skip to footer

A House We Built

Custom House Designed by Husband & Wife Team | Modern Farmhouse Inspired

  • Shop Our Home
  • Sources by Room
    • All Sources & FAQs
    • Kitchen Sources
    • Pantry Sources
    • Living Room Sources
    • Dining Room Sources
    • Home Office Sources
    • Laundry Room Sources
    • Entryway Sources
    • Mudroom Sources
    • Gallery Wall Sources
    • Reading Room Sources
    • Theater Room Sources
    • Game Room Sources
    • Guest Bedroom Sources
    • Primary Bedroom Sources
    • Primary Closet Sources
    • Primary Bathroom Sources
    • Powder Bathroom Sources
    • Buffalo Check Bathroom Sources
    • Basement Bathroom Sources
    • Basement Sources
    • Stairs, Landings & Hallways
    • Paint Colors and Stain Recap
    • Cleaning Sources & Routines
  • Tutorials
    • How to Make a Staircase Gallery Wall
    • How to Make Textured Canvas Art
    • How to Install Shiplap
    • How to Build a Slat Wall
    • How to Paint an Ikea Dresser
    • How to Build Bypass Barn Doors
    • How to Build a Farmhouse Table and Benches
    • How to Build a Rustic Sideboard
    • How to Build a Slat Sideboard
    • How to Make a Sofa Pit
    • How to DIY a Faux Brick Wall
    • How to Build a Window Seat
    • How to Build a Paneled Accent Wall
    • How to DIY a Functional Play Kitchen
    • How to Stencil a Wall
    • How to Build a Round Table
    • How to Build a Console Table
    • How to Make Paper Stars
    • How to Make Paper Mache Bowls
    • How to Make Clay Links
    • How to Texture Bowls & Vases
    • How to Install Open Shelves
    • How to Make Wood Block Art
    • How to Make a Wood Bead Garland
    • How to Build Cabinet Doors
    • How to Build a Wood Countertop
    • How to DIY a Nightstand Charging Drawer
    • How to Make a Wheat Wreath
    • How to Hang Gallery Wall Frames
    • How to Stain Stairs and Paint Risers
    • How to Make Industrial Stair Railings
    • How to Build a Window Seat Cushion
    • How to Make Salt Dough Ornaments
    • How to DIY a Modern Mantel Christmas Tree
    • How to DIY a Wooden Christmas Village
    • How to Build a Wood Christmas Tree Collar Box
    • How to Make Paper Christmas Trees
  • Cats
    • Cat Room Tour & Litterboxes
    • Cat-Related Sources & Cleaning Tips
    • How to Cat-Proof Christmas Trees & Decor
    • How to Stop Cats from Scratching Furniture
    • How to Stop Cats from Playing with Decor
    • How to Train Cats and Kittens
    • How to Cope with Cat Allergies
    • How to Introduce New Kittens to Older Cats
  • Christmas
    • Christmas Decor Favorites 2023
    • How to Build a Wood Christmas Tree Collar Box
    • Neutral Christmas Present Wrapping
    • How to Make Paper Christmas Stars
    • How to Make Paper Christmas Trees
    • How to Make Salt Dough Ornaments
    • DIY Holiday Art Ideas
    • How to Cat-Proof Christmas Trees & Decor
    • How to Make Modern Tabletop Trees
    • How to Make a Wooden Christmas Village
    • Holiday Cheese & Snack Boards
    • Christmas Decor 2021
    • Christmas Decor 2020
    • Christmas Decor 2019
    • Gingerbread House & Cookies Recipe
    • Puff Tastry Christmas Tree Recipe
    • Christmas Decor 2018
  • Cleaning
    • Cleaning Sources & Routines
    • Minimalism: How To Get Started
    • Cat-Related Cleaning Tips
  • Recipes
    • Apple Turnovers Recipe
    • Baked Pumpkin Donuts Recipe
    • Banana Chocolate Chip Bread Recipe
    • Blueberry Lemon Cake Recipe
    • Cheese & Cracker Snack Boards
    • Chocolate Chip Cookie Recipe
    • Christmas Crack Recipe
    • Chocolate Crinkle Cookies Recipe
    • Cinnamon Rolls Recipe
    • Cinnamon Star Pastry Recipe
    • Coconut Curry Squash Soup Recipe
    • Creamy No-Cheese Pasta Sauce Recipe
    • Crumble Recipe
    • Easy Veggie Pasta Recipe
    • Fresh Rolls Recipe
    • Garlic Flatbread Recipe
    • Gingerbread Biscotti Recipe
    • Gingerbread House & Cookies Recipe
    • Healthy Hearty Salad Recipe
    • Homemade Bread Recipe
    • Lasagna Recipe
    • Molasses Cookies Recipe
    • Oatmeal Raisin Cookies Recipe
    • Pad Thai Recipe
    • Pesto Pasta Recipe
    • Potato Curry + Naan Bread
    • Puff Pastry Christmas Tree Recipe
    • Pumpkin Donut Bites Recipe
    • Pumpkin Loaf Recipe
    • Pumpkin Oat Muffins Recipe
    • Roasted Red Pepper Pasta Recipe
    • Rocky Road Bars Recipe
    • Vegan Bolognese Pasta Sauce
    • Vegetable Soup Recipe
  • About
    • About Us
    • Website Roadmap
    • Shop Our Home
    • Minimalism: How To Get Started
    • Privacy Policy
  • Blog

admin

How to Prevent Cats from Playing with Decor

March 23, 2019 by admin Leave a Comment

Here are a few tips I’ve found help me when it comes to cats and decor:

  1. The first tip is to train your cats/kittens. I have a detailed post on How to Train Cats & Kittens that explains our methods in detail. This is the biggest thing because it’s creating good habits in your kitties. The idea is to teach them your house rules in a way where it becomes ingrained in their habits so that them being “good” isn’t reliant on your presence and action. Of course, this doesn’t mean it’ll be 100% effective in completely stopping them. Just like us humans, cats also make mistakes or give in to temptation, but as a general rule, these training tips and methods are what keeps the decor all around our house safe from curious kitties even though we literally have a houseful of cats.
  2. If you’re changing out the decor in a space (like table decor, for example), do it when the cats are not around. They have no understanding of decor, so to them, all the things you’re picking up, moving around, fluffing etc is just one giant game. We have no way to properly explain to them that this is decor and not a toy, so the best thing is to make the whole thing uninteresting to them. So just put them away in their cat room, or another zone in your house (somewhere they feel safe and happy so that it’s not stressful for them), change your decor, and then when they come out, don’t make a big deal of anything. If they notice it, let them sniff it and understand it (cats are very curious and need to catalogue everything that’s in their space), if they try to play with or nibble it, just firmly but gently say “no”. You might have to do this a few times but firm and gentle is the key. Never yell or spray them with water as that only creates a negative situation that now has no connection to the actual thing you’re trying to stop for them. So just keep things calm and firm.
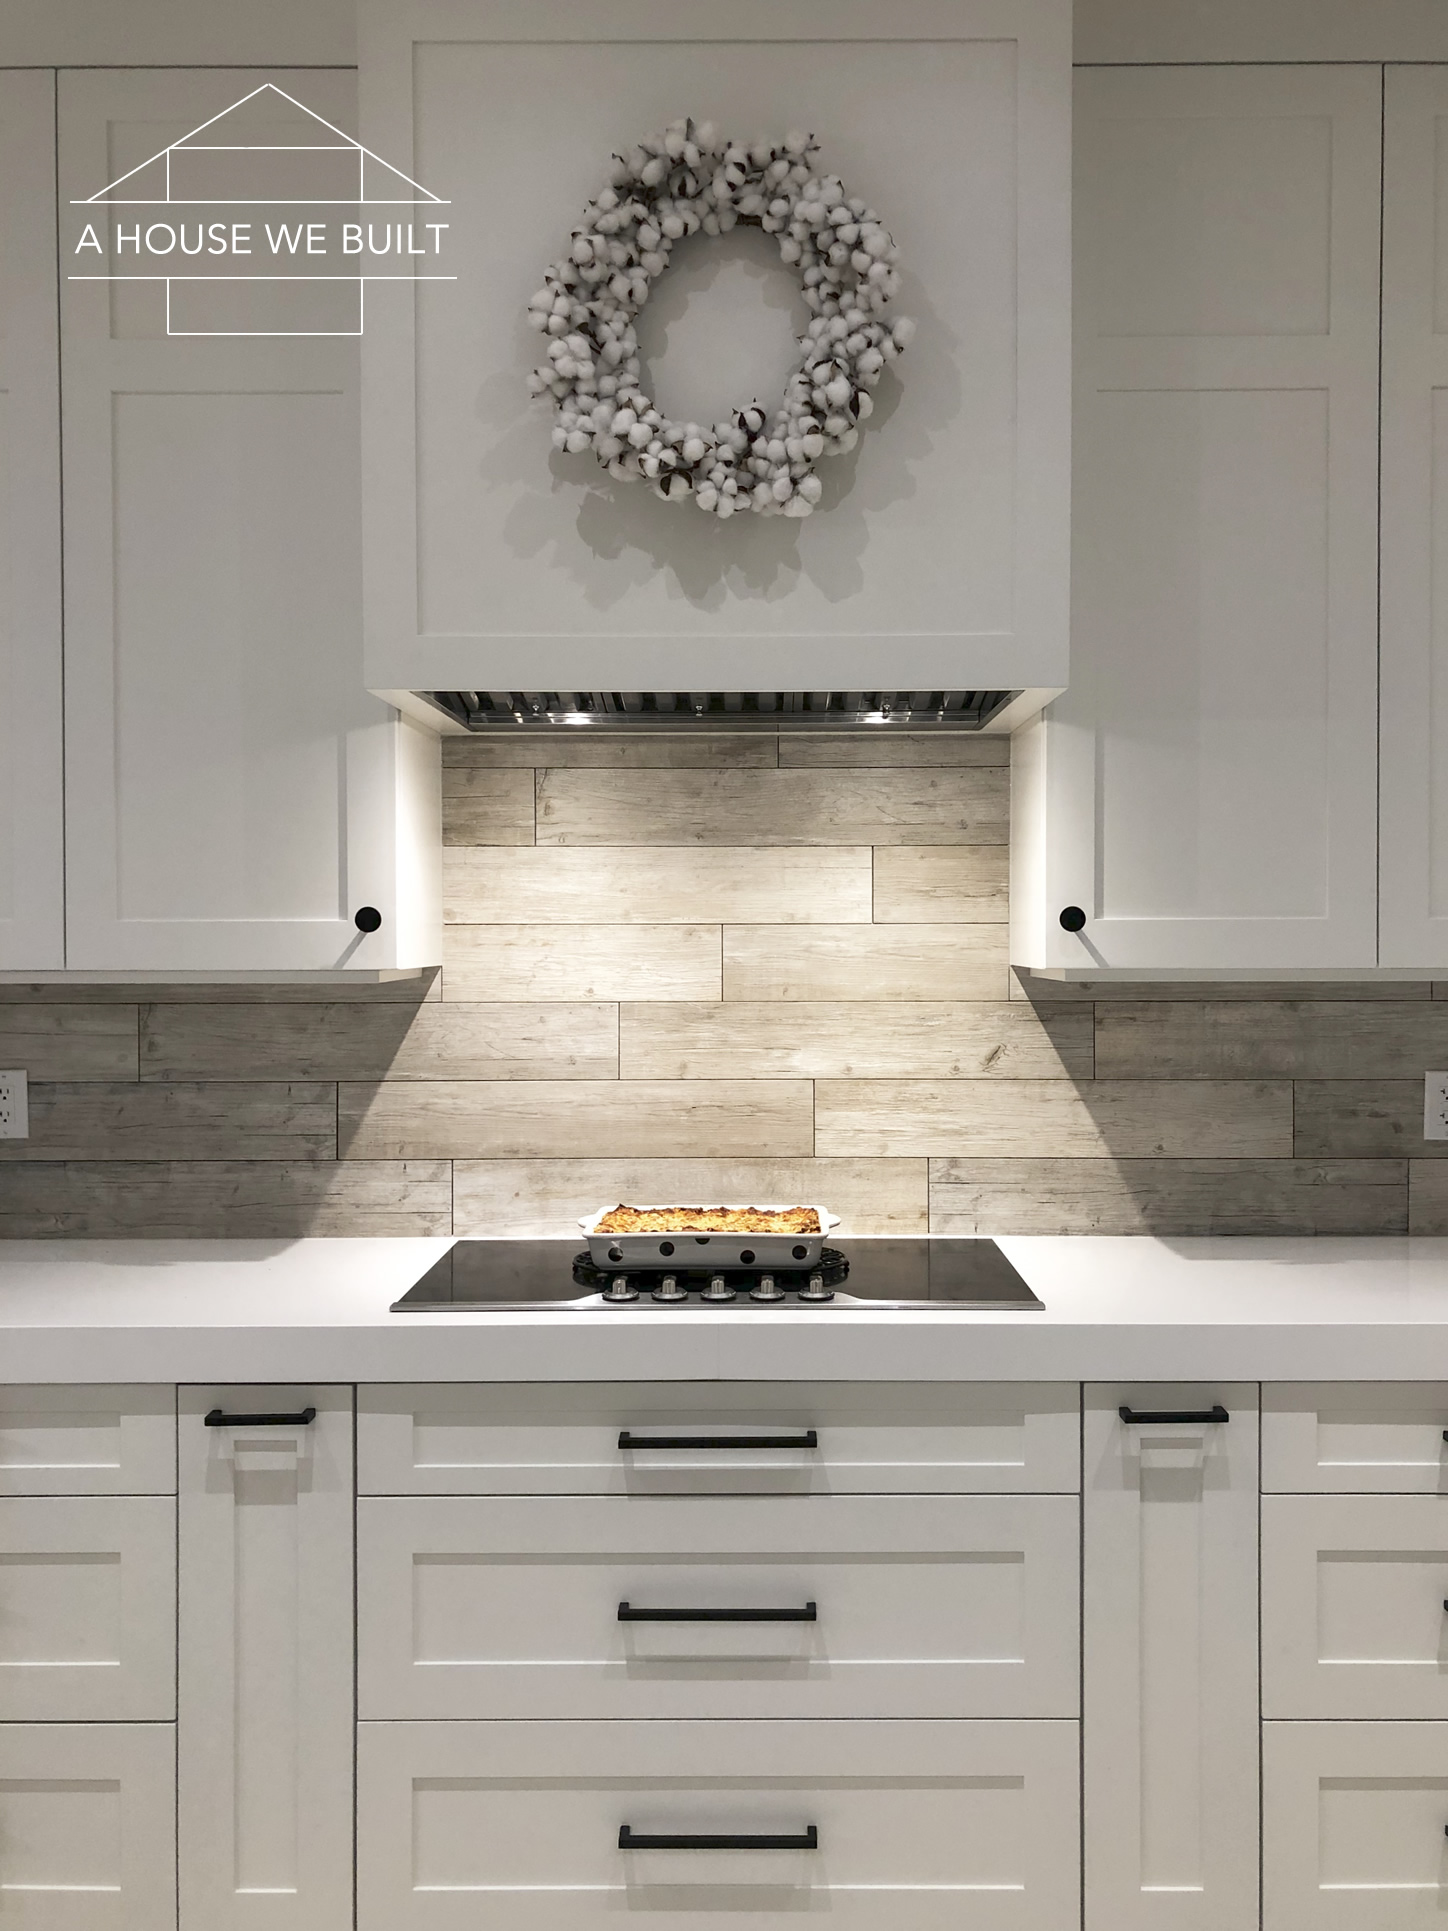
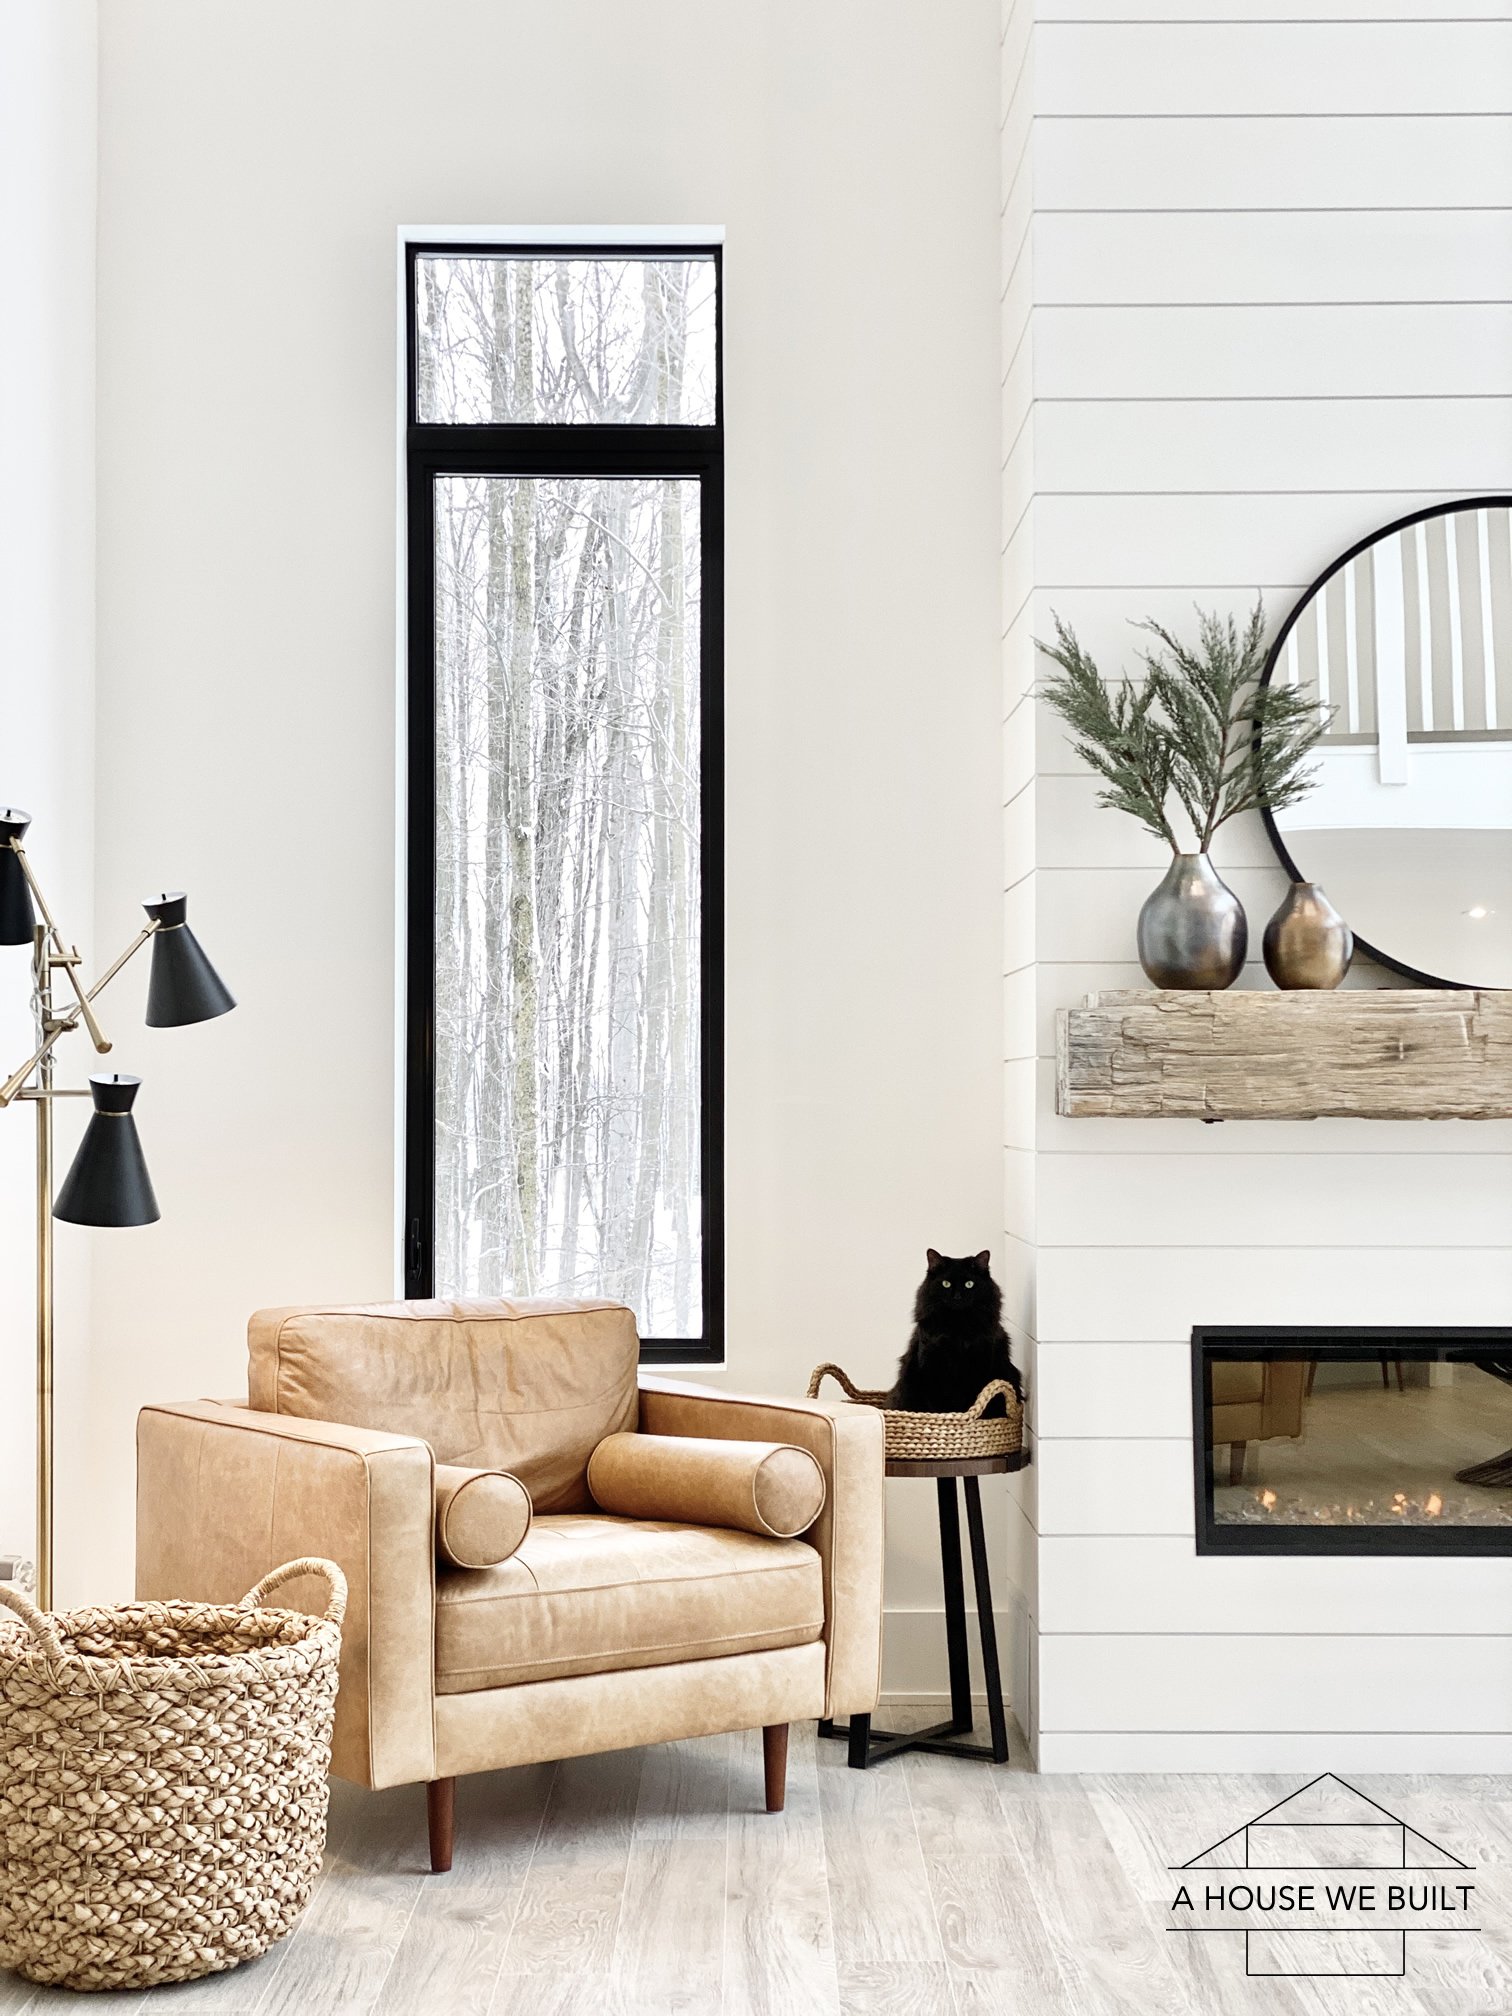
  3. If you have decor that’s at “cat level”, make good choices as to what types of pieces you have. For example, I have this clear glass vase on our living room coffee table. I chose it because it’s big, heavy, has thick glass, and is weighted in a way where it won’t tip even if the cats are leaning right on it with their paws. It’s safe to have in their space, but it’s also pretty which serves my decor purposes as well. Another example, I have this white vase on our entry way table and while it’s taller which makes it a little easier to tip than the previous case I talked about, it’s extremely heavy which makes it weighted down and unlikely to tip. One last example is in our laundry room where I use these glass canisters as part of our functional decor. They’re basically cat-proof so again, they’re safe to have in “cat space”. So it’s about making good choices that give you the look you want while creating a space where your cat can coexist without issue.
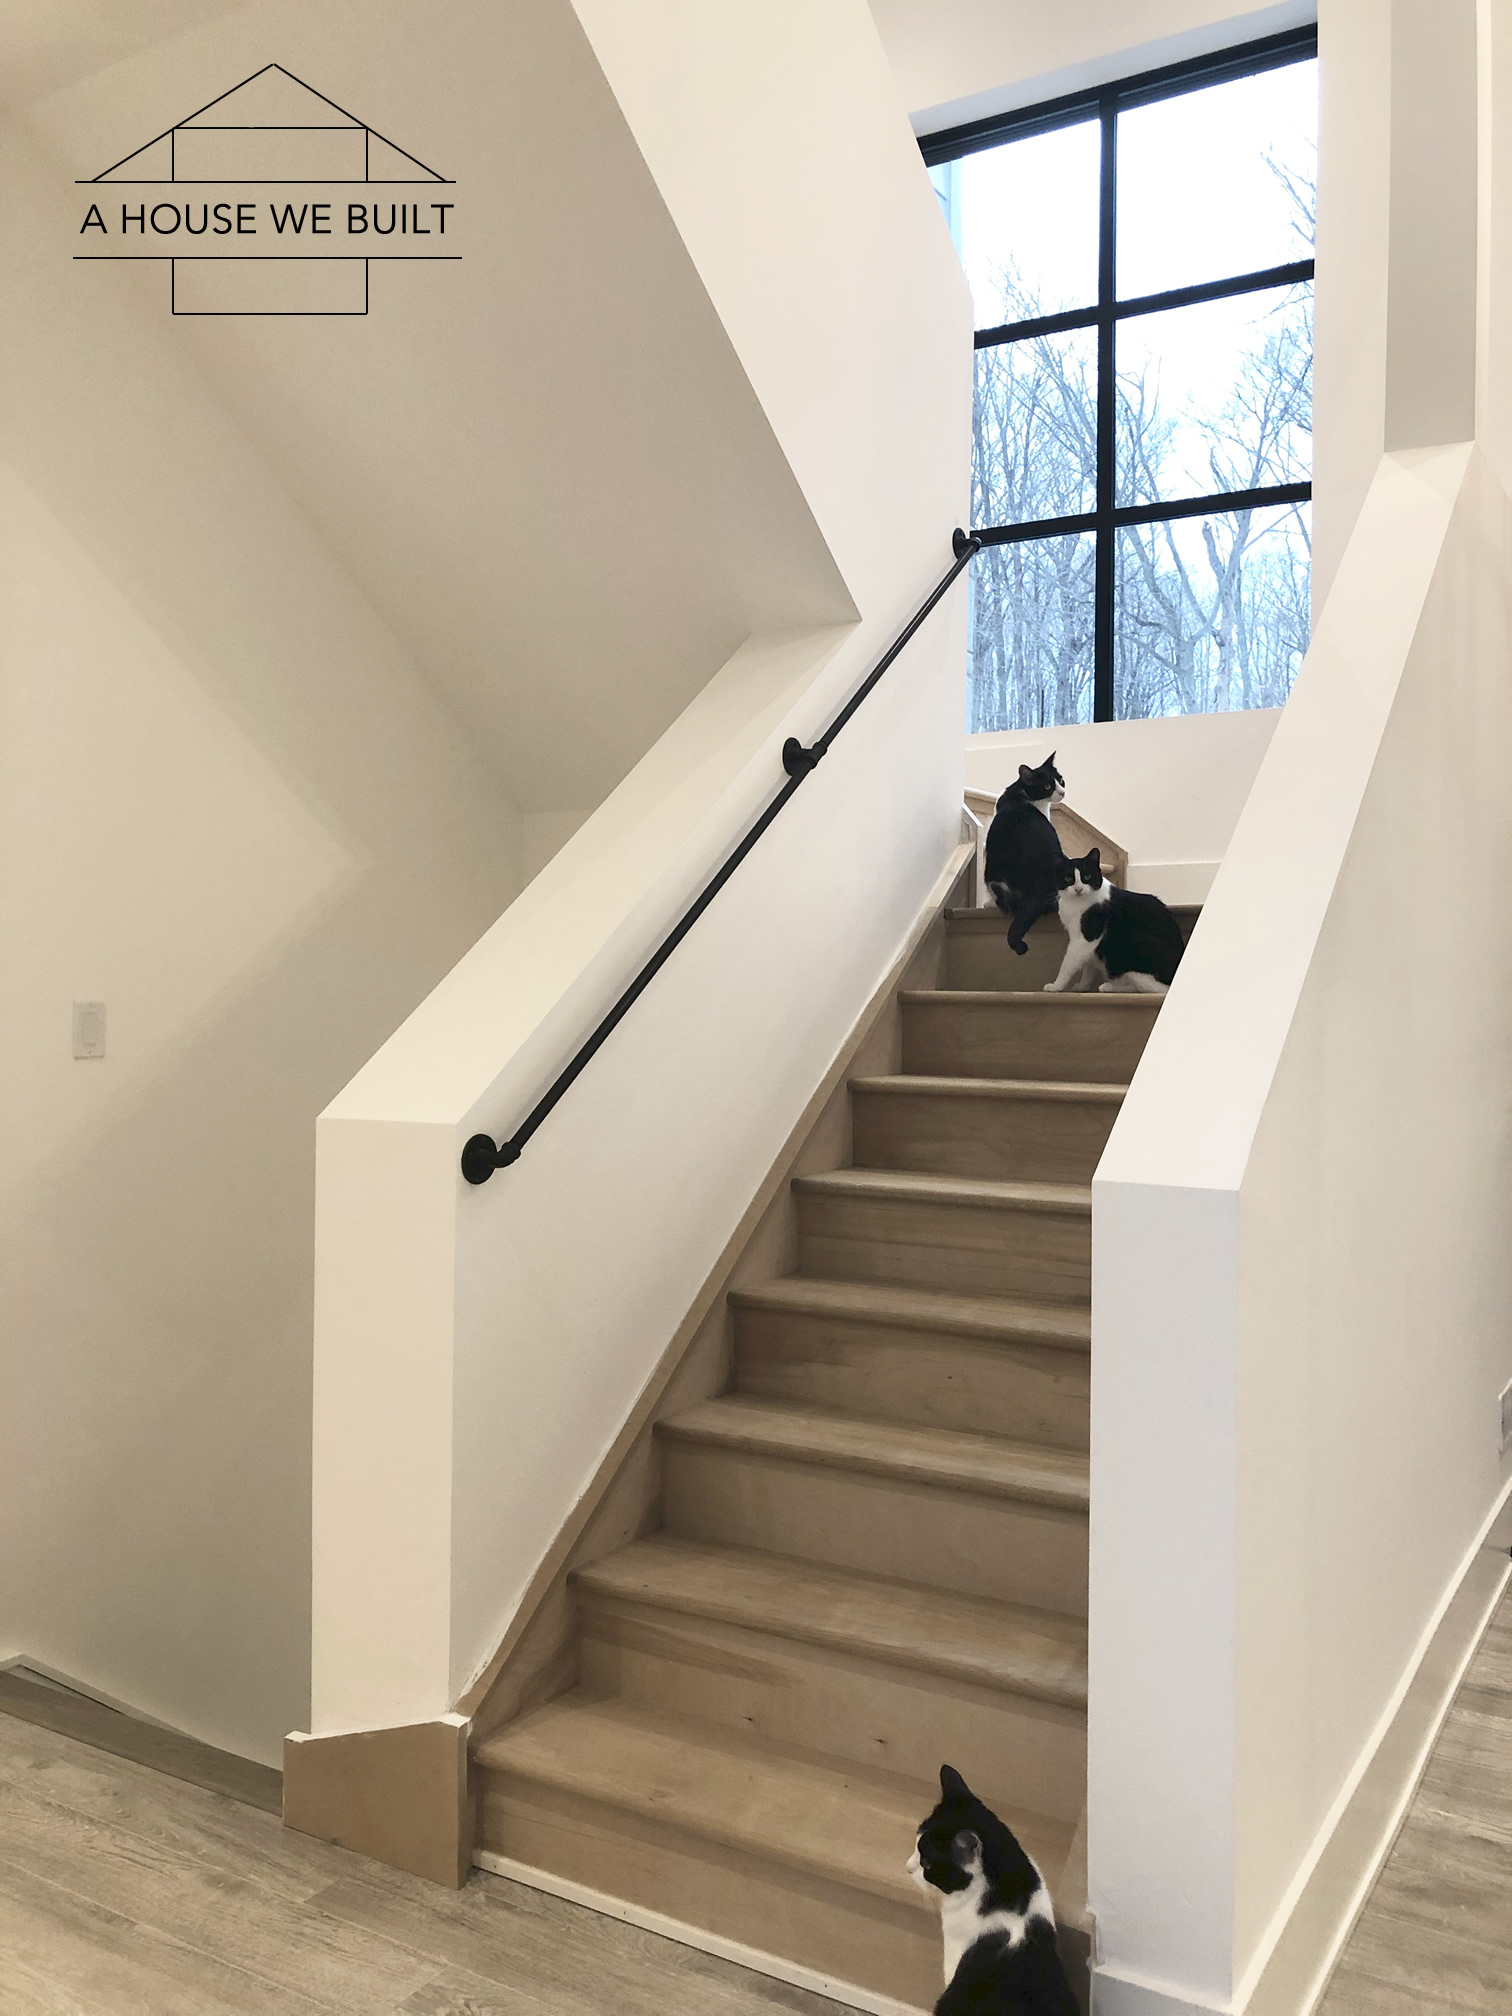
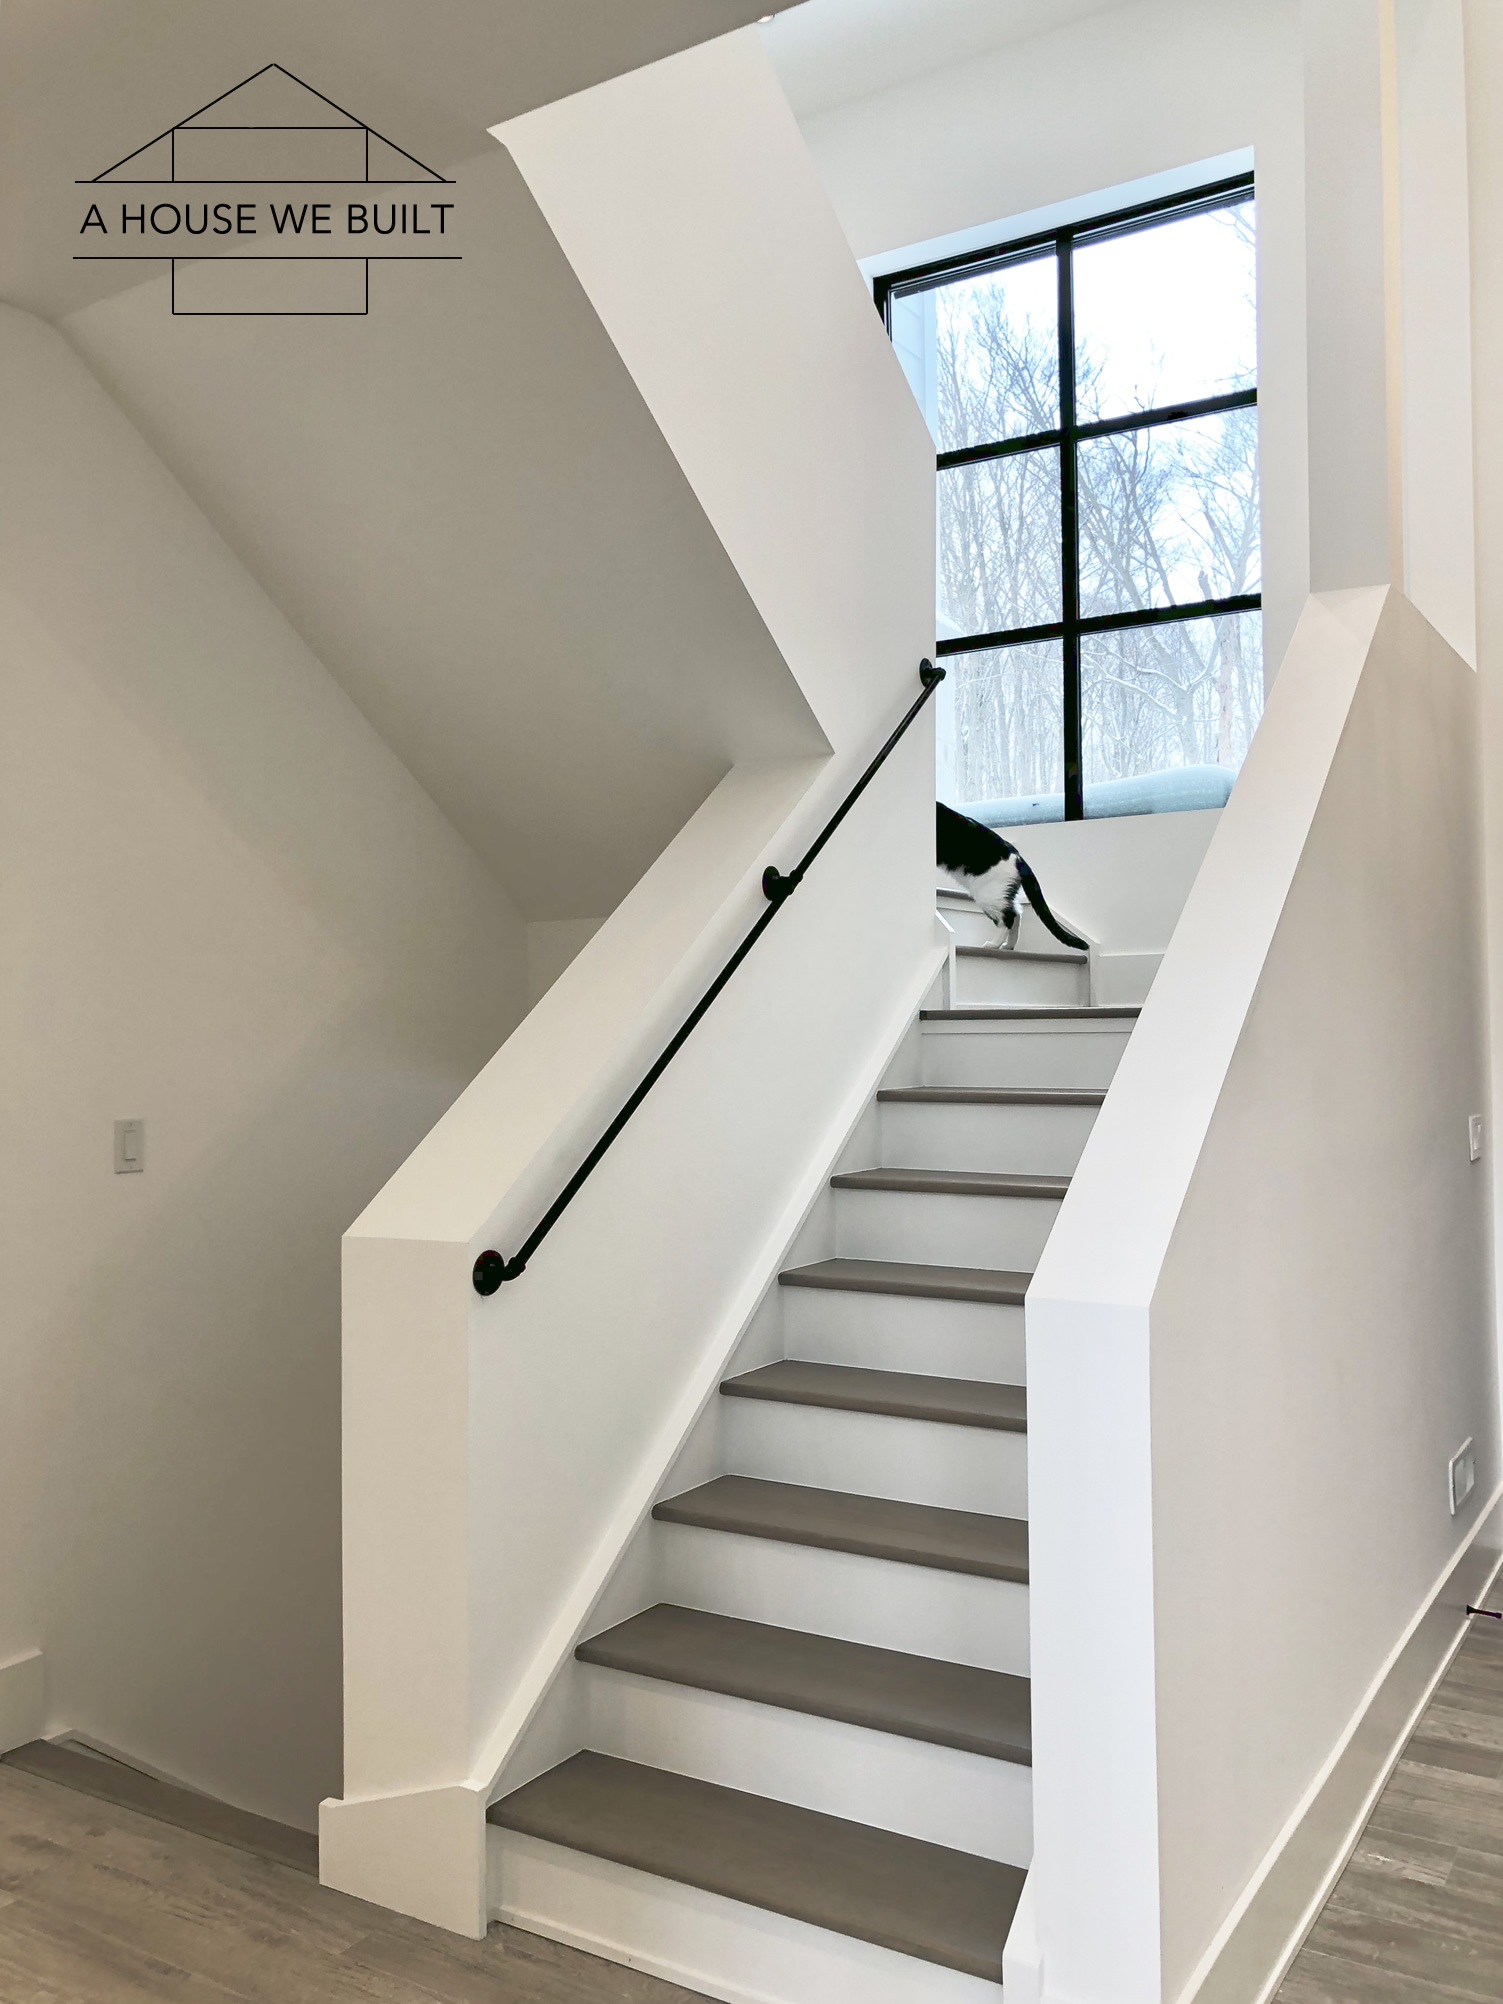
  4. If your cat is really, really, really curious about something new you added, I find it sometimes helps to just let them sniff it. Some cats just like to ‘catalogue’ everything in their space and if they can ‘know’ the piece, sometimes that’s enough for them. So even if it’s a piece that I won’t let them play with, I’ll often let them sniff it to ‘learn’ it if they’ve already discovered it and will keep trying to access it.
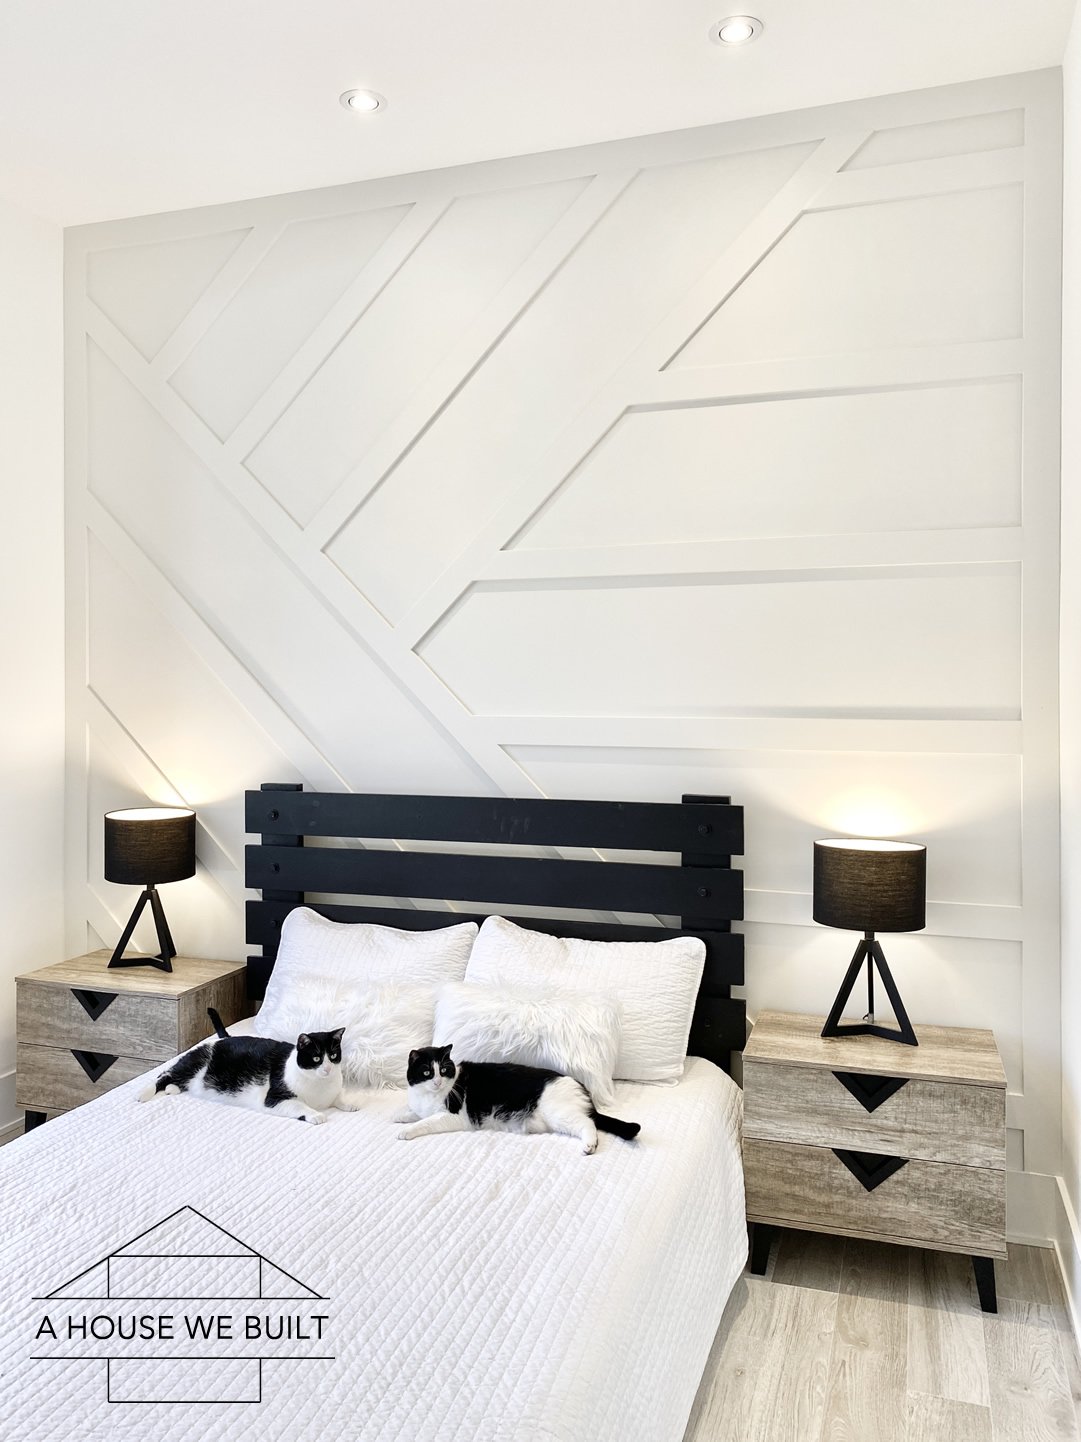
  5. In regards to beds & bedding, I use these lightweight quilts on our beds _over_ our regular bedding. They’re pretty to look at, but also quite light so they’re super easy to throw in the wash on a more regular basis than I would want to do all the laundry from the bed. This keeps cat hair off the bed and makes my life a lot easier.
  6. If you’re curious about how to keep cats from scratching furniture, I have a whole separate post about that that you can read here: How to Stop Cats from Scratching Furniture.

More cat-related posts that might help:

  • Cat Room Tour: click here
  • Cat-related Sources & Cleaning Tips: click here
  • How to Stop Cats from Scratching Furniture: click here
  • Cat Training Tips: click here
  • How to Introduce New Kittens to Older Cats: click here
  • How to Cope with Cat Allergies: click here

Filed Under: Cats

How to Build a Paneled Accent Wall

March 13, 2019 by admin 52 Comments

We built this accent wall our guest bedroom so I thought I’d share how we did it along with some tips & tricks. I love accent walls and have wanted to do them ever since we first designed this house but I couldn’t decide which pattern to do on this wall — a grid, herringbone, random pattern, board & batten, etc so I drew up over a dozen different design variations before deciding on this one. It took us one night to put up the boards, another night to fill the holes and sand, then another night to paint it.

Note: these instructions can be used for any pattern of wall paneling – they are not specific to my particular paneling design. So, no matter what type of paneling you want to do (squares, straight board and batten, herringbone, something completely different) the basic “how-to” instructions are the same.

PANELING SUPPLIES:

  • Pre-primed boards: Home Depot (you can use any size you want but this is what we went with)
  • Miter saw: Home Depot | Amazon (to cut the boards)
  • Carpenter’s square: Home Depot | Amazon (to draw straight lines where to saw the boards)
  • Nail gun (+ nails): Home Depot | Amazon (to attach boards to the wall)
  • Paneling adhesive: Home Depot (to attach boards to the wall)
  • Measuring tape: Home Depot | Amazon (I hope this one is self-explanatory)
  • Painter’s tape: Home Depot | Amazon (if you’re using 1x2s like I did, then I suggest getting ~1.5″ painter’s tape as it is close to the size of the 1x2s and you can use it for templating)

FINISHING SUPPLIES:

  • Caulk: Home Depot | Amazon (to fill in seams after installation)
  • Caulk gun: Home Depot (for your adhesive and caulk)
  • Wood filler: Home Depot | Amazon (to fill in nail holes)
  • Putty knife: Home Depot | Amazon (to apply wood filler to nail holes)
  • Sandpaper: Home Depot | Amazon (to sand wood filler after nail holes are filled)

PAINTING SUPPLIES:

  • Microfiber roller: Home Depot (though I got a kit like this one: Home Depot)
  • Angled paint brush: Home Depot
  • Paint: I chose BM Classic Gray in satin, but you can do any color you like

INSTRUCTIONS:

  1. Design. My goal was to design a wall with a distinct but simple pattern that could work well with different room configurations. I came up with about a dozen variations and this one was my favorite.
  2. Plan your wall. This was the hardest part. It involves a lot of math and patience. We decided to start with out perimeter trim first. Then the longest diagonal on the left next and worked down from there. Then the upper diagonal section (starting with the longest piece first). And finally we ended with the horizontal pieces on the right (where we also had to work around an outlet).
  3. Cut boards and attach them to the wall. Use a line of construction adhesive on the backs of the boards AND some kind of fastener (either screws or nails, depending on how you want to do it). Start with the perimeter and then strategically work through your pattern. Cut as you go so that you can adjust any measurements needed along the way. (Note: Our accent wall was on an exterior wall and we didn’t want any penetrations in our vapor barrier so we didn’t want to nail/screw the boards to studs so we came up with a creative solution where we predrilled holes in our boards and found screws that were less than the thickness of the board + drywall. After applying the adhesive, we then screwed the boards into place for about a day to dry, then removed the screws and filled the holes. This way our exterior wall assembly remained completely in tact.)
  4. Sand down anything uneven with a heavier sandpaper.
  5. Fill all nail holes and joins between boards with wood filler using a putty knife.
  6. Caulk every place were the board meets the wall by running a line of caulk down each join, then run your finger over it to smooth it out. Have a damp towel on hand to wipe your finger.
  7. Sand everything you used wood filler on. You have to get this pretty smooth or it will show through once you’ve painted it.
  8. Paint. Be sure to either use primed boards or prime before painting. I used an angled paint brush for the edges first, then a microfiber roller for all the boards and drywall.

RANDOM THOUGHTS:

  • If you’re kinda thinking this all sounds a bit too hard I recommend trying a board & batten look or a simple grid wall since it’ll all be 90 angle cuts and should generally be easier to tackle.
  • Paint the wall first if you can. I mean, why not?? I didn’t because at the time we started putting up the boards I still hadn’t decided on my final color. But it would have made painting sooooo much faster to at least have the first coat on the wall done.
  • I highly recommend trying to work “around” outlets etc instead of incorporating them into the design. It’s just easier. Personally I’m not a fan of trimming them out as it just draws even more attention to them. In our case, we unfortunately couldn’t go around one of our outlets so I kind of got creative around it but in a perfect world, we would have just avoided it. I wasn’t too worried about ours though since eventually it’ll be behind furniture anyway so it’s not like it would be visible.

Note regarding the paint color: I’ve included pictures taken at several different times of day and night, and both in direct sunlight and on a cloudy day so you can really see how different this paint color can look!

Below are finished pictures of this wall. More details on our guest bedroom page

For more sources from our Guest Bedroom, click here.
For more of our DIY tutorials, click here.
To explore the other rooms in our house, click here.

Filed Under: Tutorials

Apple or Blueberry Crumble Recipe

February 20, 2019 by admin Leave a Comment

Apple Crumbles (and actually all crumbles) are one of my favorite fast-and-easy desserts so I thought I’d share my recipe because there are a lot of different ones out there and this one is very flexible (so it can work for any quantity you want to make) and it’s super yummy!

Filling: chop up however many apples (or any other fruit) fit into the baking dish you want to use (I’ve used everything from brownie pans, to this bigger one, to pie plates, to tiny little individual serving baking bowls). In a separate bowl, add the juice of one lemon, some cinnamon, and a couple big spoonfuls of brown sugar to the apples. Mix and spread into pan.

(My other favorite filling is blueberries. I use frozen blueberries (unthawed) and literally just fill a pan with them along with the juice of 2 limes and some nutmeg and cinnamon and that’s it. No sugar is needed. As the frozen blueberries cook, they’ll release their liquid which will make the filling the right consistency even without the sugar.)

Topping: my topping recipe is all about ratios rather than amounts. It’s: equal parts flour & brown sugar, and double that large flake oats (so for example 1/2 cup flour and 1/2 cup brown sugar to 1 cup oats). Then add enough melted butter or sunflower oil to make the crumble topping the consistency you want. I start with a few tablespoons and then add more as needed. With this ratio rule, you can modify the recipe for any quantity of topping you need pretty easily. When it’s done, sprinkle topping over apples.

Bake at 350 for 30-45 mins, or until the top starts to turn dark golden brown.
And I like to serve it with vanilla ice cream.
ENJOY!!!

Sources:

  • Black/white polka dot baking dish: Wayfair
  • Long matte black drawer pulls: Amazon
  • Short matte black drawer pulls: Amazon
  • Black knobs: CB2
  • Barstools are from West Elm (mine are sold out so here are similar options or other ones I just like): #1 West Elm | #2 CB2 | #3 All Modern | #4 World Market | #5 Lulu and Georgia | #6 Wayfair
  • Patterned island vase: Crate & Barrel
  • Stems in island vase: Amazon
  • Rectangular cutting board: Amazon
  • Utensil crock (white/tan): Wayfair
  • Glass & twine vases (different sizes set): Amazon
  • Black island lights: Rejuvenation
  • Double sink: Blanco (Wayfair)
  • Faucet: Moen Align (Wayfair)
  • Soap dispenser: Moen (Wayfair)

Filed Under: Recipes

Chocolate Chip Banana Bread Recipe

February 16, 2019 by admin Leave a Comment

We made our favorite chocolate chip banana bread today and I thought I’d share the recipe because even though it’s a pretty common recipe it took me a long time before I found one I loved enough to make over and over again and the best part is that if you mix the ingredients in the exact order that I share here, you can do all your mixing in ONE bowl with just a fork!!! Less cleanup, more win, much yum!

  1. Mash 3-4 ripe bananas with a fork in a medium mixing bowl.
  2. Add in 2 eggs (just blend ’em up with a fork in the middle of the bananas), 1/2 cup melted butter (or sunflower oil), 3/4 cup sugar, and a couple dashes of vanilla extract. Mix well
  3. Add in 1 1/2 cup flour, 1/2 tsp salt, 1 tsp baking soda and kinda mix them together with your fork right on top of the wet ingredients in the same bowl before fully mixing them into the whole mixture.
  4. Throw in a couple handfuls of chocolate chips and that’s it!

Bake in a greased 8×4 loaf pan at 350 for an hour (do the poke test around 55 mins to check).

Allow to cool for 20-30 mins and enjoy!!!

Sources:

  • Loaf pan: Amazon
  • Log serving platter (similar): Amazon | Wayfair | Crate and Barrel
  • Long matte black drawer pulls: Amazon
  • Short matte black drawer pulls: Amazon
  • Black knobs: CB2
  • 3 white ceramic vases (set of 3): Amazon | Wayfair
  • Round cutting board (similar, same size): Amazon
  • White cotton wreath (similar, my exact one is no longer available): Amazon

Filed Under: Recipes

Blueberry Lemon Cake Recipe

February 14, 2019 by admin 2 Comments

This delicious glazed Blueberry Lemon Cake/Loaf is one of my easiest dessert recipes so I thought I’d share it if you wanted to try it out. You can use fresh or frozen blueberries and if you mix everything together in the exact order I list, you can make the whole batter in one bowl with a fork! Here’s how:

First, zest the peel of one lemon and juice it.

Mix the following ingredients together in a bowl:

  • 2 eggs
  • 3/4 cup sugar
  • 3 tbsp lemon juice
  • 2 dashes vanilla extract
  • 1/3 cup melted butter (or sunflower oil)

Then mix in:

  • 1 1/2 cup flour
  • 1 1/4 tsp baking powder
  • 1/2 tsp salt

Then mix in:

  • 1/2 cup milk (or soy milk)

Then mix in:

  • 1 cup blueberries
  • 1/4 cup grated lemon zest
  • 1/2 cup chopped nuts (optional)

Bake in a greased 8×4 loaf pan at 350 for about an hour (do the poke test around 60 mins to check).

While it’s baking, make your glaze: ~2 tbsp lemon juice + 2-3 tbsp sugar. Should be thick. Set aside.

As soon as it’s done baking, immediately pour/brush the glaze over the cake while it’s HOT!!!

Allow to cool for 20-30 mins and enjoy!!!

Sources:

  • Loaf pan (similar): Amazon
  • Log serving platter (similar): Crate and Barrel
  • Coasters: Crate & Barrel
  • Rectangular cutting board: Amazon
  • Utensil crock (similar): McGee & Co
  • Wood utensils (similar): Bed Bath & Beyond | Bed Bath & Beyond
  • Glass & twine vases (different sizes set): Amazon
  • Salt cellar (similar): Crate & Barrel

Filed Under: Recipes

How to Stain and Paint Stairs

February 12, 2019 by admin 6 Comments

I took on the huge task of staining and painting our staircase myself and thought I’d share my experience since I actually couldn’t find many resources on how to do this online and basically had to figure it out for myself along the way. NOTE: I’m not a professional so if you’re a pro, please don’t judge! For reference: our stairs are white oak hardwood and our flooring is brushed white oak laminate. So this is what I did:

For staining treads:

  1. Heavy sand with 150 (Home Depot).
  2. Stain (Ours is a custom gray color. I apply stain with a rag dipped in the stain then I spread it around until everything is coated and wipe away the excess.)
  3. Light sand with 320 (Home Depot) after the stain is fully dry
  4. Top coat (Ours is Low Luster. I brush it on with a paint brush and do even, parallel brush strokes. I start at one end of the stair and move evenly across to the other. )
  5. Light sand after the top coat is fully dry.
  6. Top coat again same as before.
  7. Light sand once fully dry.
  8. Top coat one last time. Since this is the final coat, really make sure it’s very even.

For painting risers and trim:

  1. Caulk corners with this product: Home Depot. Make sure to do very even lines – it helps to practice elsewhere first.
  2. Primer. I used this product: Home Depot.
  3. Main paint color first coat. I used the same paint sheen as our walls so that it would make cutting the edges easier and faster.
  4. Main paint color second coat. Final coat so make sure it’s very even.

Couple things I learned or experienced along the way:

Our staircase was challenging because it’s so big. We have multiple flights of stairs so I broke them up into sections and started with the least visible area. If this is your first time staining/painting stairs, I strongly recommend starting with the least visible area because you will always have a learning curve and it’s better to learn where it won’t be seen.

Timing was another challenge since we actually were living in this house at the time that I did this project and that meant that we were normally using these stairs each day. So I did the first sand during the day because it didn’t matter if people walked on it. Then I did the rest of the work in the evenings after everyone had gone to bed so that it could have the most uninterrupted time to dry overnight.

Also, always start at the top of your stairs and work your way down so you don’t have to worry about what you’re sitting on/touching as you work.

I debated over whether to paint or stain first and there are some pretty intense opinions out there but ultimately I determined that my best approach would be to stain first, then paint because a good primer covers any stain that gets on the risers but it would’ve been a nightmare to tape off the risers. Also the line I got with taping wasn’t straight enough for me so the answer I found was caulking the corners and that gave the paint a solid termination point which was easy to freehand.

Note: the trim in these pictures is still not fully complete.

The reason we didn’t do this before we moved in was that stain and top coat needs solid drying time before it properly sets especially when you’re not doing high gloss and I wanted to wait until we could ensure that nobody was going to stomp on them with shoes so I decided to do them after construction.

I hope that helps!!

Be sure to follow us on Instagram (@ahousewebuilt) to keep up with our house projects and decor! And check out our Sources Page for more details on everything in our house!

Filed Under: Tutorials

Veggie Lasagna Recipe

February 4, 2019 by admin 2 Comments

This veggie lasagna is one of our family favorite go-to dishes so I thought I’d share the recipe for anyone interested. It’s SO easy to make and takes 10 mins of prep time. Note: I use fresh lasagna sheet noodles that I get at a local Italian deli. The ones I get come in big rectangular sheets (2 cover my lasagna pan).

PS: I love this lasagna pan. You can get it here if you want: Wayfair

  1. Sauce: First chop all your veg and throw it in a big pot. I do: 2 white onions, big handful chopped garlic, 1 diced green bell pepper, 2 big handfuls of sliced mushrooms, 2 stalks of sliced celery. Salt it and add 2 big glugs of olive oil and stir it on med-high for about 5 minutes until all the veggies soften and the volume shrinks by about half (the salt helps). Once the veg has softened down, season to taste. I do: red chili flakes, dried oregano & basil, and black pepper. Stir. Add in either about 16oz of crushed tomatos, or you can use a premade sauce. That’s it!
  2. Separately, slice one zucchini and set aside.
  3. Layer up your lasagna. This is how I do my layers: Sauce. Noodles. Sauce. Zucchini. Cheese. Noodles. Sauce. Cheese. (see pics below)
  4. Bake covered at 375 for 30 mins. Then 5 mins uncovered. Then broil 2-3 mins to get the top golden brown.

I serve it with salad. Tonight it was mixed baby greens, chopped kale, cucumber, avocado, roasted sunflower & pumpkin seeds. Dressing: 2 big glugs of olive oil, 2 dashes of balsamic vinegar, bit of garlic powder, couple drops of honey, salt & pepper to taste.

ENJOY!!!!!

Be sure to follow us on Instagram (@ahousewebuilt) to keep up with our house projects and decor! And check out our Sources Page for more details on everything in our house including our kitchen!

Filed Under: Recipes

Pumpkin Oat Muffins Recipe

February 1, 2019 by admin Leave a Comment

I discovered these oatmeal pumpkin muffins totally by accident when I was craving something baked but couldn’t find a particular recipe I wanted so I heavily modified a few different recipes and created this ‘experiment’ muffin that actually turned out SO good that we’re going to make them again!! So I thought I’d share the recipe here for anyone else interested along with optional modifications!

Combine wet ingredients:

  • 1/2 cup melted butter (or sunflower oil)
  • 1 cup sugar (golden sugar is my preference)
  • 1 1/2 cup canned pumpkin
  • 1/2 cup water
  • 3 eggs

Combine dry ingredients:

  • 2 1/2 cups flour
  • 1/2 cup large oats
  • 1 tsp baking soda
  • 1 1/2 tsp baking powder
  • 1 tsp salt
  • 1 tsp cinnamon
  • 1/2 tsp ginger
  • 1/2 tsp nutmeg
  • 1/2 tsp cloves

Combine wet and dry ingredients and mix. Then stir in 1 1/2 cup raisins. (You could also do cranberries, chopped walnuts or pecans, or anything else your heart desires).

Bake in lined muffin cups at 400 for 20 mins. Do the ‘poke’ test to be sure they’re done til whatever you’ve poked them with comes out clean.

If you’re feeling extra, after they’re baked (but still warm), you can brush the tops with a little oil and dunk them in cinnamon sugar.

ENJOY!!!

Sources:

  • Island vase: Crate & Barrel
  • Items in island vase: Amazon
  • Long matte black drawer pulls: Amazon
  • Short matte black drawer pulls: Amazon
  • Black knobs: CB2
  • 3 white ceramic vases (set of 3): Amazon | Wayfair
  • Round cutting board (similar, same size): Amazon
  • Barstools are from West Elm (mine are sold out so here are similar options or other ones I just like): #1 West Elm | #2 West Elm | #3 Wayfair | #4 Wayfair | #5 Wayfair | #6 CB2 | #7 World Market
  • Island lights: Rejuvenation

Filed Under: Recipes

Winter Decor 2018

December 31, 2018 by admin Leave a Comment

As things change throughout the year, I’m just going to do little recaps of the looks I style here so that you can go back in time and source a look you might love as easily as possible.

Fireplace mantle:

  • Round mirror on mantle: Amazon | Wayfair
  • White vase (similar): #1 Wayfair | #2 Wayfair | #3 Target
  • White/grey vase (similar): Amazon
  • Geometric candle holders (similar): Amazon | Wayfair (lg) | Wayfair (sm)
  • Sugar pine cones (large): Amazon

Kitchen (island & right side):

  • Tall geometric white vase (island): Amazon | Short matching vase: Amazon
  • Eucalyptus stems (greenery in geometric vase): Amazon
  • 3 white ceramic vases (set of 3): Amazon | Wayfair
  • Round cutting board (similar, same size): Amazon

Hardware + plumbing sources all on main page.

Filed Under: Past Decor

Christmas Decor 2018

December 31, 2018 by admin Leave a Comment

Christmas decor sources:

  • Burlap 12″ x 10 Yards : Amazon (what I used to wrap the pinecones & mini tree pots)
  • Burlap 3″ x 10 Yards: Amazon
  • Black Paper Gift Tags with Natural Jute Twine: Amazon
  • Natural Twine Gift Wrap String: Amazon
  • Natural Brown Wrapping Paper (100% recycled): Amazon
  • ‘Wonderful time’ throw pillow: Amazon
  • 3′ Christmas tree: Wayfair
  • 2′ Christmas tree: Wayfair
  • Small flocked Christmas tree: Wayfair
  • Wicker tree collar (large): Amazon
  • Galvanized Metal Tree Collar: Home Depot
  • Birch logs: Crate & Barrel | Similar: Amazon
  • Christmas lights (our tree took 1.5 spools): Home Depot
  • Shaped ornament (similar): Crate & Barrel | Target | Target | Target | West Elm | H&M Home
  • Starburst ornament (similar): West Elm (gold) | West Elm (silver) | Target (blush)
  • White decorative houses (similar): Crate & Barrel | Amazon

Filed Under: Holidays, Past Decor

Gingerbread House & Cookies Recipe

December 22, 2018 by admin Leave a Comment

We made gingerbread houses!! This was our first time making them from scratch so I went with a structural recipe rather than a cookie recipe and we had some extra dough left over so we decided to also make some cookies to decorate for fun. So here’s the recipe:

Make 3 bowls of ingredients, mix each one together and set aside:

BOWL #1:

  • 6 tbsp butter or margarine (room temp)
  • 3/4 cup brown sugar

BOWL #2:

  • 1 egg
  • 2 tbsp water
  • 1/2 cup molasses

BOWL #3:

  • 3 cups flour (all-purpose)
  • 2 1/2 tsp cinnamon
  • 2 1/2 tsp ginger
  • 1/2 tsp nutmeg
  • 1/2 tsp salt
  • 1/4 tsp baking soda

In a mixer (this is the one I have: Amazon), mix the contents of BOWL #1 on medium speed for 2 mins until creamy. Then add in the contents of BOWL #2 and mix on high speed. Finally, mix in BOWL #3 contents on low speed until combined. Note: it will be very thick but that’s ok!

Make 2 balls out of the dough and flatten them out a bit and place in fridge for 2 hours or overnight. If you leave them in overnight, you’ll have to let them warm up for about 30 mins when you’re ready to use them.

When you’re ready to make cookies (or house pieces), place the flat dough balls between 2 sheets of parchment paper and roll them out until they’re about 1/4 inch thick. You don’t want them too thick or to thin as they should hold their structure when baked.

Cut out your shapes and place them on a cookie sheet lined with parchment paper.

Bake at 350. Larger pieces need about 18-19 mins. Smaller pieces may need as few as 13-14. They should not be squishy when they come out but the edges also should not be browned.

Allow them to cool completely before decorating.

Use Royal Icing to glue the pieces of the gingerbread house together.

DECORATING ICING (for cookies):

  • 4 cups icing sugar
  • 1/2 cup shortening (room temp)
  • 1/2 cup butter or margarine (room temp)
  • 3 tbsp milk
  • 1/4 tsp vanilla
  • couple pinches of salt

In a mixer (this is the one I have: Amazon), blend until creamy. Then just put them into piping bags (like this: Amazon) and cut a small hole in the bottom for precision work or a larger hole if needed.

Filed Under: Christmas, Recipes

Puff Pastry Christmas Tree Recipe

December 21, 2018 by admin Leave a Comment

Our Christmas baking day is underway!! We made this quick and easy chocolate puff pastry Christmas tree while waiting for our gingerbread houses to set so we can decorate them! This was such a fun/easy and super pretty thing to bake!

You need 2 sheets of puff pastry dough. Melt some chocolate (or whatever else you want to use) and spread it in a tree shape. Then add the second piece of dough on top. Cut out the triangle tree shape. Then slice the ends on the left and right all the way up the tree and twist them.

Bake at 350 for about 20 mins or until golden and sprinkle with sugar before serving!!!

And I just love how our dining table garland works as a backdrop!!!

  • Dining Table Eucalyptus Garland: Wayfair
  • Round wood cutting board (similar): Amazon

Filed Under: Christmas, Recipes

  • « Go to Previous Page
  • Go to page 1
  • Interim pages omitted …
  • Go to page 6
  • Go to page 7
  • Go to page 8
  • Go to page 9
  • Go to page 10
  • Go to Next Page »

Primary Sidebar

SHOP OUR HOME

Click any image below for sources from our pics!

WEBSITE ROADMAP

  • Shop Our Home
  • Sources by Room
    • All Sources & FAQs
    • Kitchen Sources
    • Pantry Sources
    • Living Room Sources
    • Dining Room Sources
    • Home Office Sources
    • Laundry Room Sources
    • Entryway Sources
    • Mudroom Sources
    • Gallery Wall Sources
    • Reading Room Sources
    • Theater Room Sources
    • Game Room Sources
    • Guest Bedroom Sources
    • Primary Bedroom Sources
    • Primary Closet Sources
    • Primary Bathroom Sources
    • Powder Bathroom Sources
    • Buffalo Check Bathroom Sources
    • Basement Bathroom Sources
    • Basement Sources
    • Stairs, Landings & Hallways
    • Paint Colors and Stain Recap
    • Cleaning Sources & Routines
  • Tutorials
    • How to Make a Staircase Gallery Wall
    • How to Make Textured Canvas Art
    • How to Install Shiplap
    • How to Build a Slat Wall
    • How to Paint an Ikea Dresser
    • How to Build Bypass Barn Doors
    • How to Build a Farmhouse Table and Benches
    • How to Build a Rustic Sideboard
    • How to Build a Slat Sideboard
    • How to Make a Sofa Pit
    • How to DIY a Faux Brick Wall
    • How to Build a Window Seat
    • How to Build a Paneled Accent Wall
    • How to DIY a Functional Play Kitchen
    • How to Stencil a Wall
    • How to Build a Round Table
    • How to Build a Console Table
    • How to Make Paper Stars
    • How to Make Paper Mache Bowls
    • How to Make Clay Links
    • How to Texture Bowls & Vases
    • How to Install Open Shelves
    • How to Make Wood Block Art
    • How to Make a Wood Bead Garland
    • How to Build Cabinet Doors
    • How to Build a Wood Countertop
    • How to DIY a Nightstand Charging Drawer
    • How to Make a Wheat Wreath
    • How to Hang Gallery Wall Frames
    • How to Stain Stairs and Paint Risers
    • How to Make Industrial Stair Railings
    • How to Build a Window Seat Cushion
    • How to Make Salt Dough Ornaments
    • How to DIY a Modern Mantel Christmas Tree
    • How to DIY a Wooden Christmas Village
    • How to Build a Wood Christmas Tree Collar Box
    • How to Make Paper Christmas Trees
  • Cats
    • Cat Room Tour & Litterboxes
    • Cat-Related Sources & Cleaning Tips
    • How to Cat-Proof Christmas Trees & Decor
    • How to Stop Cats from Scratching Furniture
    • How to Stop Cats from Playing with Decor
    • How to Train Cats and Kittens
    • How to Cope with Cat Allergies
    • How to Introduce New Kittens to Older Cats
  • Christmas
    • Christmas Decor Favorites 2023
    • How to Build a Wood Christmas Tree Collar Box
    • Neutral Christmas Present Wrapping
    • How to Make Paper Christmas Stars
    • How to Make Paper Christmas Trees
    • How to Make Salt Dough Ornaments
    • DIY Holiday Art Ideas
    • How to Cat-Proof Christmas Trees & Decor
    • How to Make Modern Tabletop Trees
    • How to Make a Wooden Christmas Village
    • Holiday Cheese & Snack Boards
    • Christmas Decor 2021
    • Christmas Decor 2020
    • Christmas Decor 2019
    • Gingerbread House & Cookies Recipe
    • Puff Tastry Christmas Tree Recipe
    • Christmas Decor 2018
  • Cleaning
    • Cleaning Sources & Routines
    • Minimalism: How To Get Started
    • Cat-Related Cleaning Tips
  • Recipes
    • Apple Turnovers Recipe
    • Baked Pumpkin Donuts Recipe
    • Banana Chocolate Chip Bread Recipe
    • Blueberry Lemon Cake Recipe
    • Cheese & Cracker Snack Boards
    • Chocolate Chip Cookie Recipe
    • Christmas Crack Recipe
    • Chocolate Crinkle Cookies Recipe
    • Cinnamon Rolls Recipe
    • Cinnamon Star Pastry Recipe
    • Coconut Curry Squash Soup Recipe
    • Creamy No-Cheese Pasta Sauce Recipe
    • Crumble Recipe
    • Easy Veggie Pasta Recipe
    • Fresh Rolls Recipe
    • Garlic Flatbread Recipe
    • Gingerbread Biscotti Recipe
    • Gingerbread House & Cookies Recipe
    • Healthy Hearty Salad Recipe
    • Homemade Bread Recipe
    • Lasagna Recipe
    • Molasses Cookies Recipe
    • Oatmeal Raisin Cookies Recipe
    • Pad Thai Recipe
    • Pesto Pasta Recipe
    • Potato Curry + Naan Bread
    • Puff Pastry Christmas Tree Recipe
    • Pumpkin Donut Bites Recipe
    • Pumpkin Loaf Recipe
    • Pumpkin Oat Muffins Recipe
    • Roasted Red Pepper Pasta Recipe
    • Rocky Road Bars Recipe
    • Vegan Bolognese Pasta Sauce
    • Vegetable Soup Recipe
  • About
    • About Us
    • Website Roadmap
    • Shop Our Home
    • Minimalism: How To Get Started
    • Privacy Policy
  • Blog

WHERE WE SHOP

Amazon

Wayfair

West Elm

Crate & Barrel

CB2

Pottery Barn

McGee & Go

Overstock

Rejuvenation

Joss and Main

All Modern

Target

Home Depot

World Market

Etsy

H&M Home

Lulu and Georgia

Serena & Lily 

Schoolhouse

Anthropologie

RECENT POSTS

  • Christmas 2023
  • Christmas Decor Favorites 2023
  • How to Make a Staircase Gallery Wall
  • Functional Play Kitchen DIY
  • Christmas Decor 2022
  • Cinnamon Rolls Recipe

Meta

  • Log in
  • Entries feed
  • Comments feed
  • WordPress.org

Footer

RECENT POSTS

  • Christmas 2023
  • Christmas Decor Favorites 2023
  • How to Make a Staircase Gallery Wall
  • Functional Play Kitchen DIY
  • Christmas Decor 2022
  • Cinnamon Rolls Recipe
  • Christmas Decor 2021
  • Cinnamon Star Pastry Recipe

SHOP OUR HOME

FOLLOW US

ON INSTAGRAM

For daily updates on our house projects and rescue kitties, follow us on Instagram @ahousewebuilt

ON SHOP.LTK

To shop our home pics daily, follow ahousewebuilt in the free SHOP.LTK app (formerly LIKEtoKNOW.it) now available from the App Store to get product sources from our pics. With this app, you can instantly shop your screenshot of any of our Instagram pics! We always link exactly what we have when available and often offer similar options as well!

Copyright © 2025 · Metro Pro on Genesis Framework · WordPress · Log in