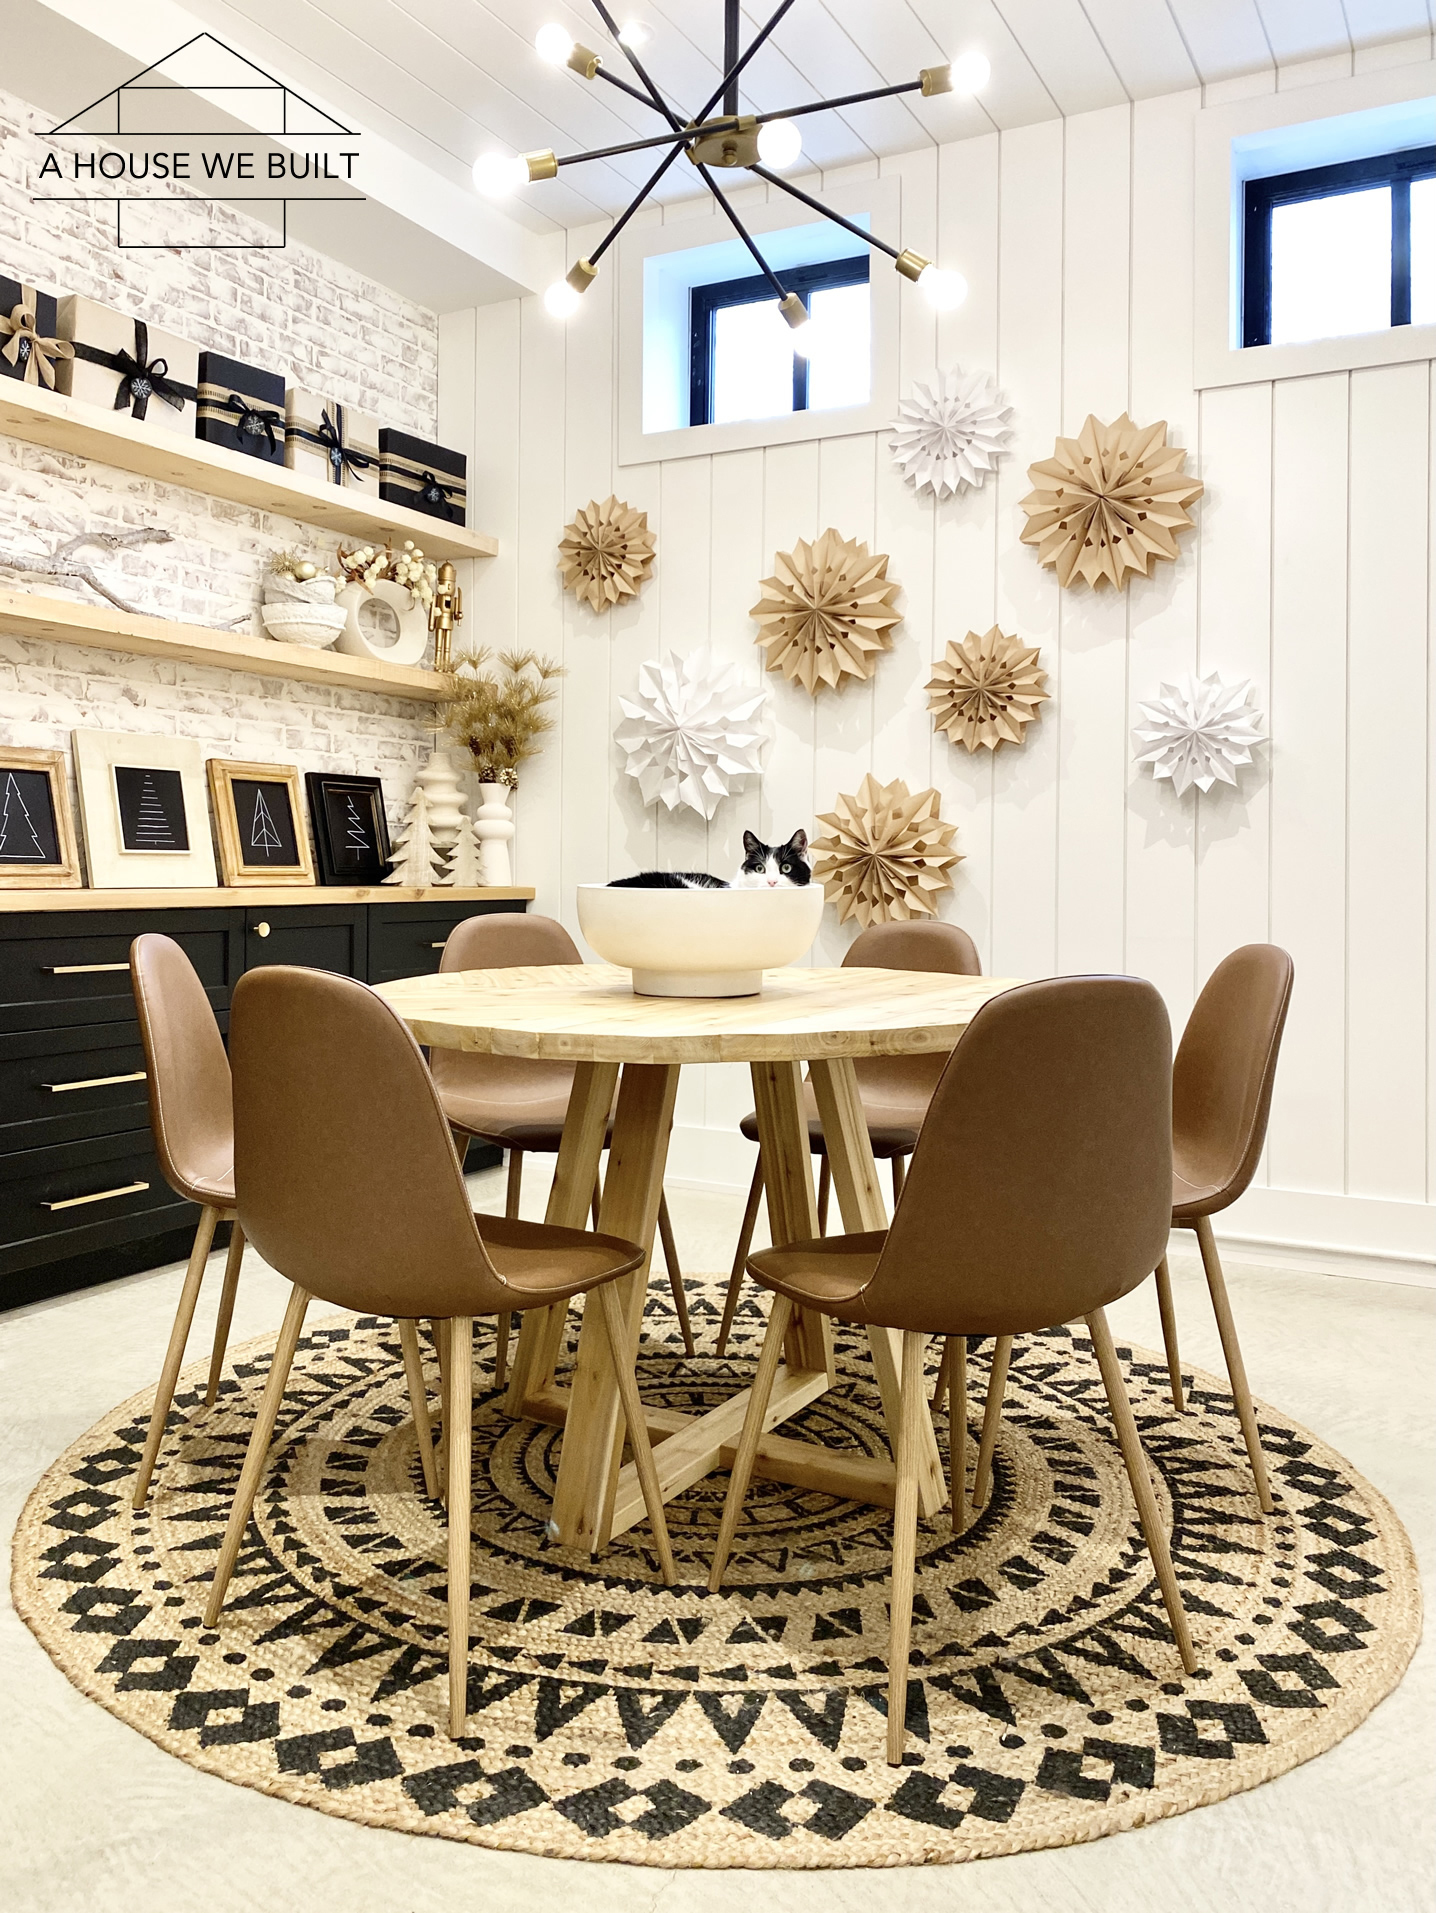
Christmas decor:
- Holiday art | White marker: Walmart | Black card stock: Walmart
- Paper stars: How to Make Paper Stars Tutorial
- Present wrapping sources: Neutral Christmas Present Wrapping blog post
Rug:
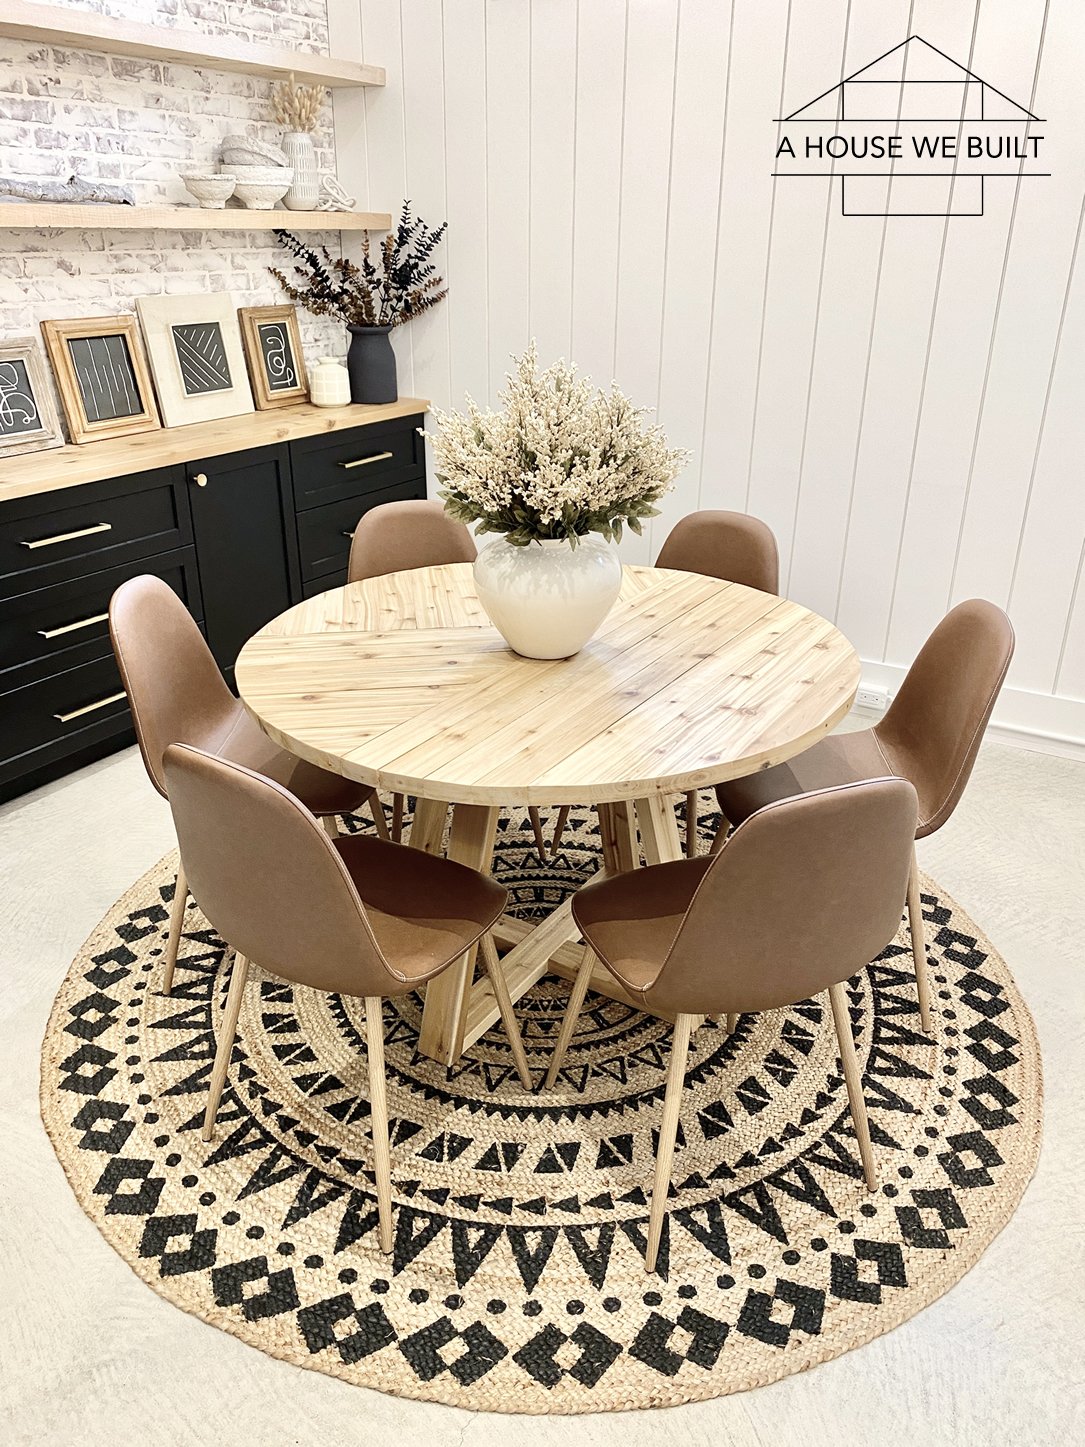
- Round rug: Wayfair | Home Depot | Target | Similar: Wayfair | Overstock
Lighting:
Furniture:
- Chairs: Wayfair | Amazon | Similar: West Elm | World Market | Pottery Barn
- Round table: How to Build a Round Table Tutorial | Similar: McGee & Co | Pottery Barn | Wayfair | West Elm | Lulu & Georgia | Alternative bases: Crate & Barrel | Crate & Barrel | West Elm
Decor:
- White pedestal bowl: Pottery Barn
- White rounded vase: H&M Home | Similar: Pottery Barn | Pottery Barn
- Stems in white vase: Michaels
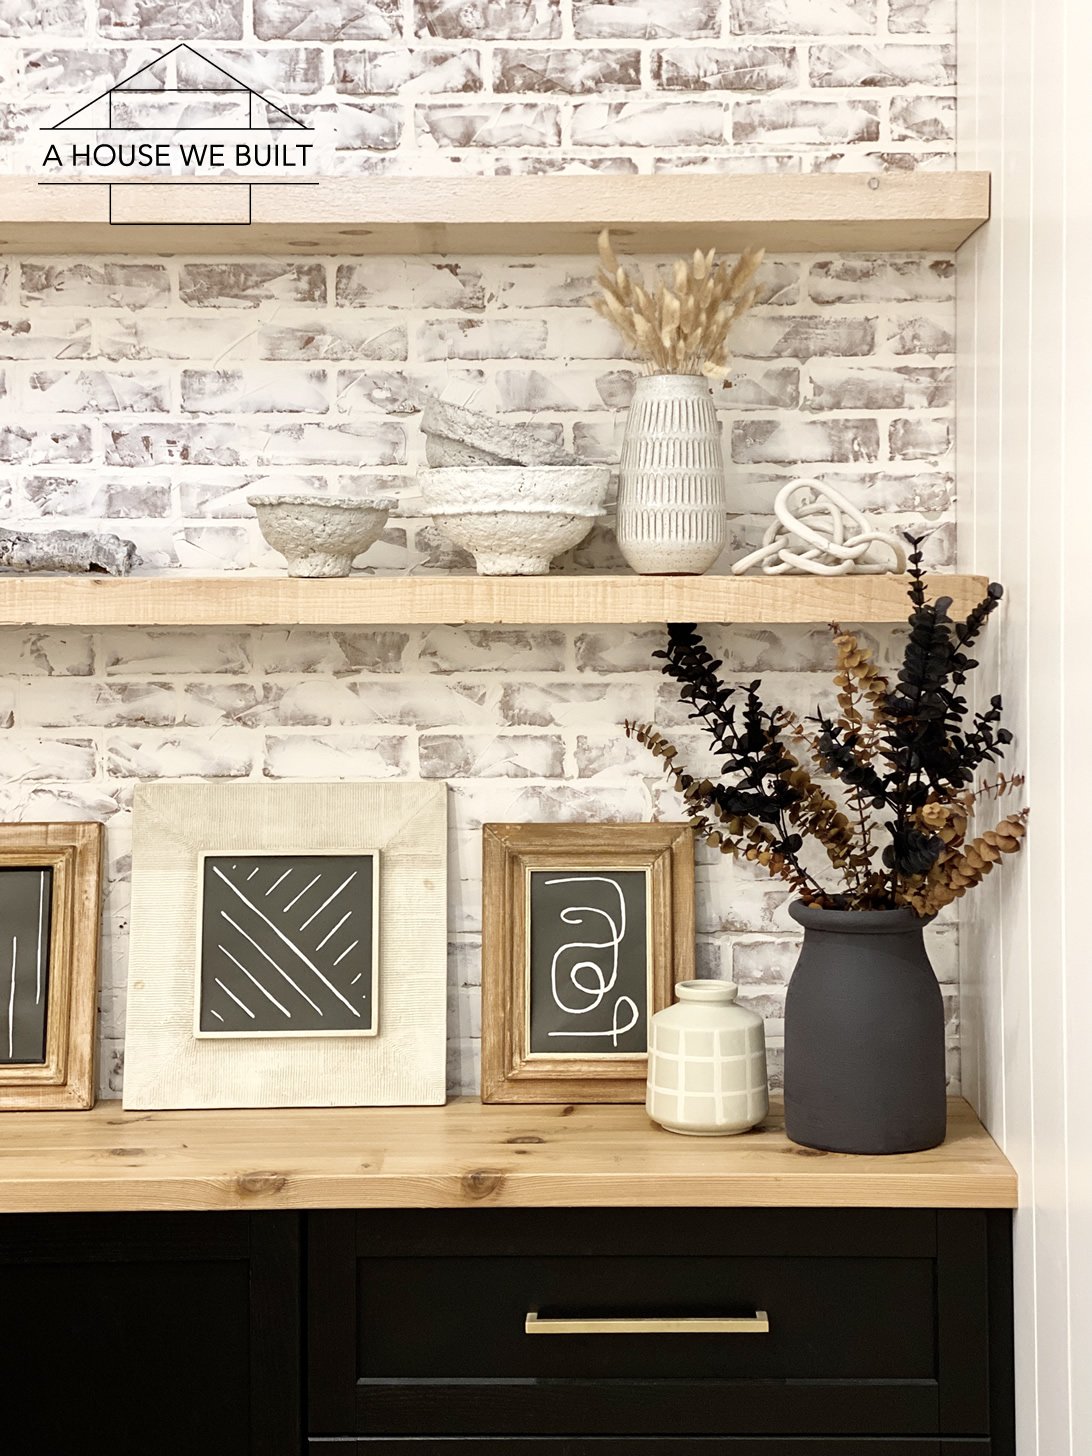
- Paper mache bowls: Tutorial | Similar: Bloomist
- Grid vase: Crate & Barrel
- Black vase: Tutorial | Similar: West Elm
- Clay links: Tutorial | Similar: Bloomist | CB2
- Vintage wooden frames & art: DIY (frames by my dad, art by me)
Florals:
- Cream heather florals (with greenery): Michaels
- Amber eucalyptus: Michaels
- Black eucalyptus: Michaels
- Green eucalyptus: West Elm
- Bunny tail bunch: CB2 | Crate & Barrel
Hardware:
- Gold cabinet knobs: CB2
- Gold drawer pulls: Amazon | Similar: Home Depot | Schoolhouse
Tutorials:
- Open shelving tutorial: How to Install Floating Open Shelves
- Faux brick wall tutorial: How to DIY a Faux Brick Wall | Brick panels: Home Depot
- Shiplap: How to Install Shiplap Tutorial & Info
- Wood countertop tutorial: How to Build a Wood Countertop
- Round table tutorial: How to Build a Round Table
- Paper mache bowls: How to Make Paper Mache Bowls Tutorial
- Clay links: How to Make Clay Links Tutorial
General info:
- Paint colors: BM Simply White & BM Black Panther
- Flooring: polished concrete. We did the work ourselves and polished it until it was smooth but not glossy. We chose to leave the imperfections and markings as we liked their organic, natural look, but you can totally polish concrete until it’s flawlessly perfect and glossy if that’s a look you prefer. Our concrete has no stain or color treatment, but we did put on (clear) hardeners and sealers. The products we used had no effect on the color or look and are purely there to strengthen and protect the concrete. Basically, what our floor looks like was a personal, intentional choice based on how far we wanted to grind the surface down but there are many different possible polished concrete looks. A very general overview of the polishing process we did was to start with a heavier grind, then apply the hardener, then do a medium grind, then the sealer, then finish off with a final soft grind/buff. Our floor is also heated though we’ve never actually had need to turn it on because we insulated our slab really well so it doesn’t get all that cold even in winter. We’re not concrete experts though so I don’t want to give any advice on this topic further to this information. We just googled the process and researched heavily before starting. I’ll be honest though, this was THE most miserable construction project we’ve ever done (and that’s coming from someone who has done almost every construction task myself so I have some perspective). It’s slow (the grinder literally moved at a snail’s pace and when you’re doing 2000sf that can feel eternal), tedious, and SO dusty. You must have proper PPE or exposure to the concrete dust can be very dangerous. Also, the necessary PPE is much harder to source these days than it was back when we did this project so that’s a big factor too. But we saved a lot of $$ doing this work ourselves, plus we learned a new skill (that I sincerely hope I will never ever ever ever ever have to use again lol). — On the plus side, these floors are low maintenance, easy to clean, and we love the look! Because they’re sealed, most spills just wipe right off them, and day-today, we just vacuum them. So there are pros and cons to this type of flooring, but we have no regrets about our decision to do them.
- Windows: SW Tricorn Black | Fiberglass, custom made
- Ceiling height: 10-ft
To explore other rooms in our home, click here for our website roadmap.
To follow our daily progress and house projects, follow us on Instagram @ahousewebuilt.
Leave a Reply
You must be logged in to post a comment.