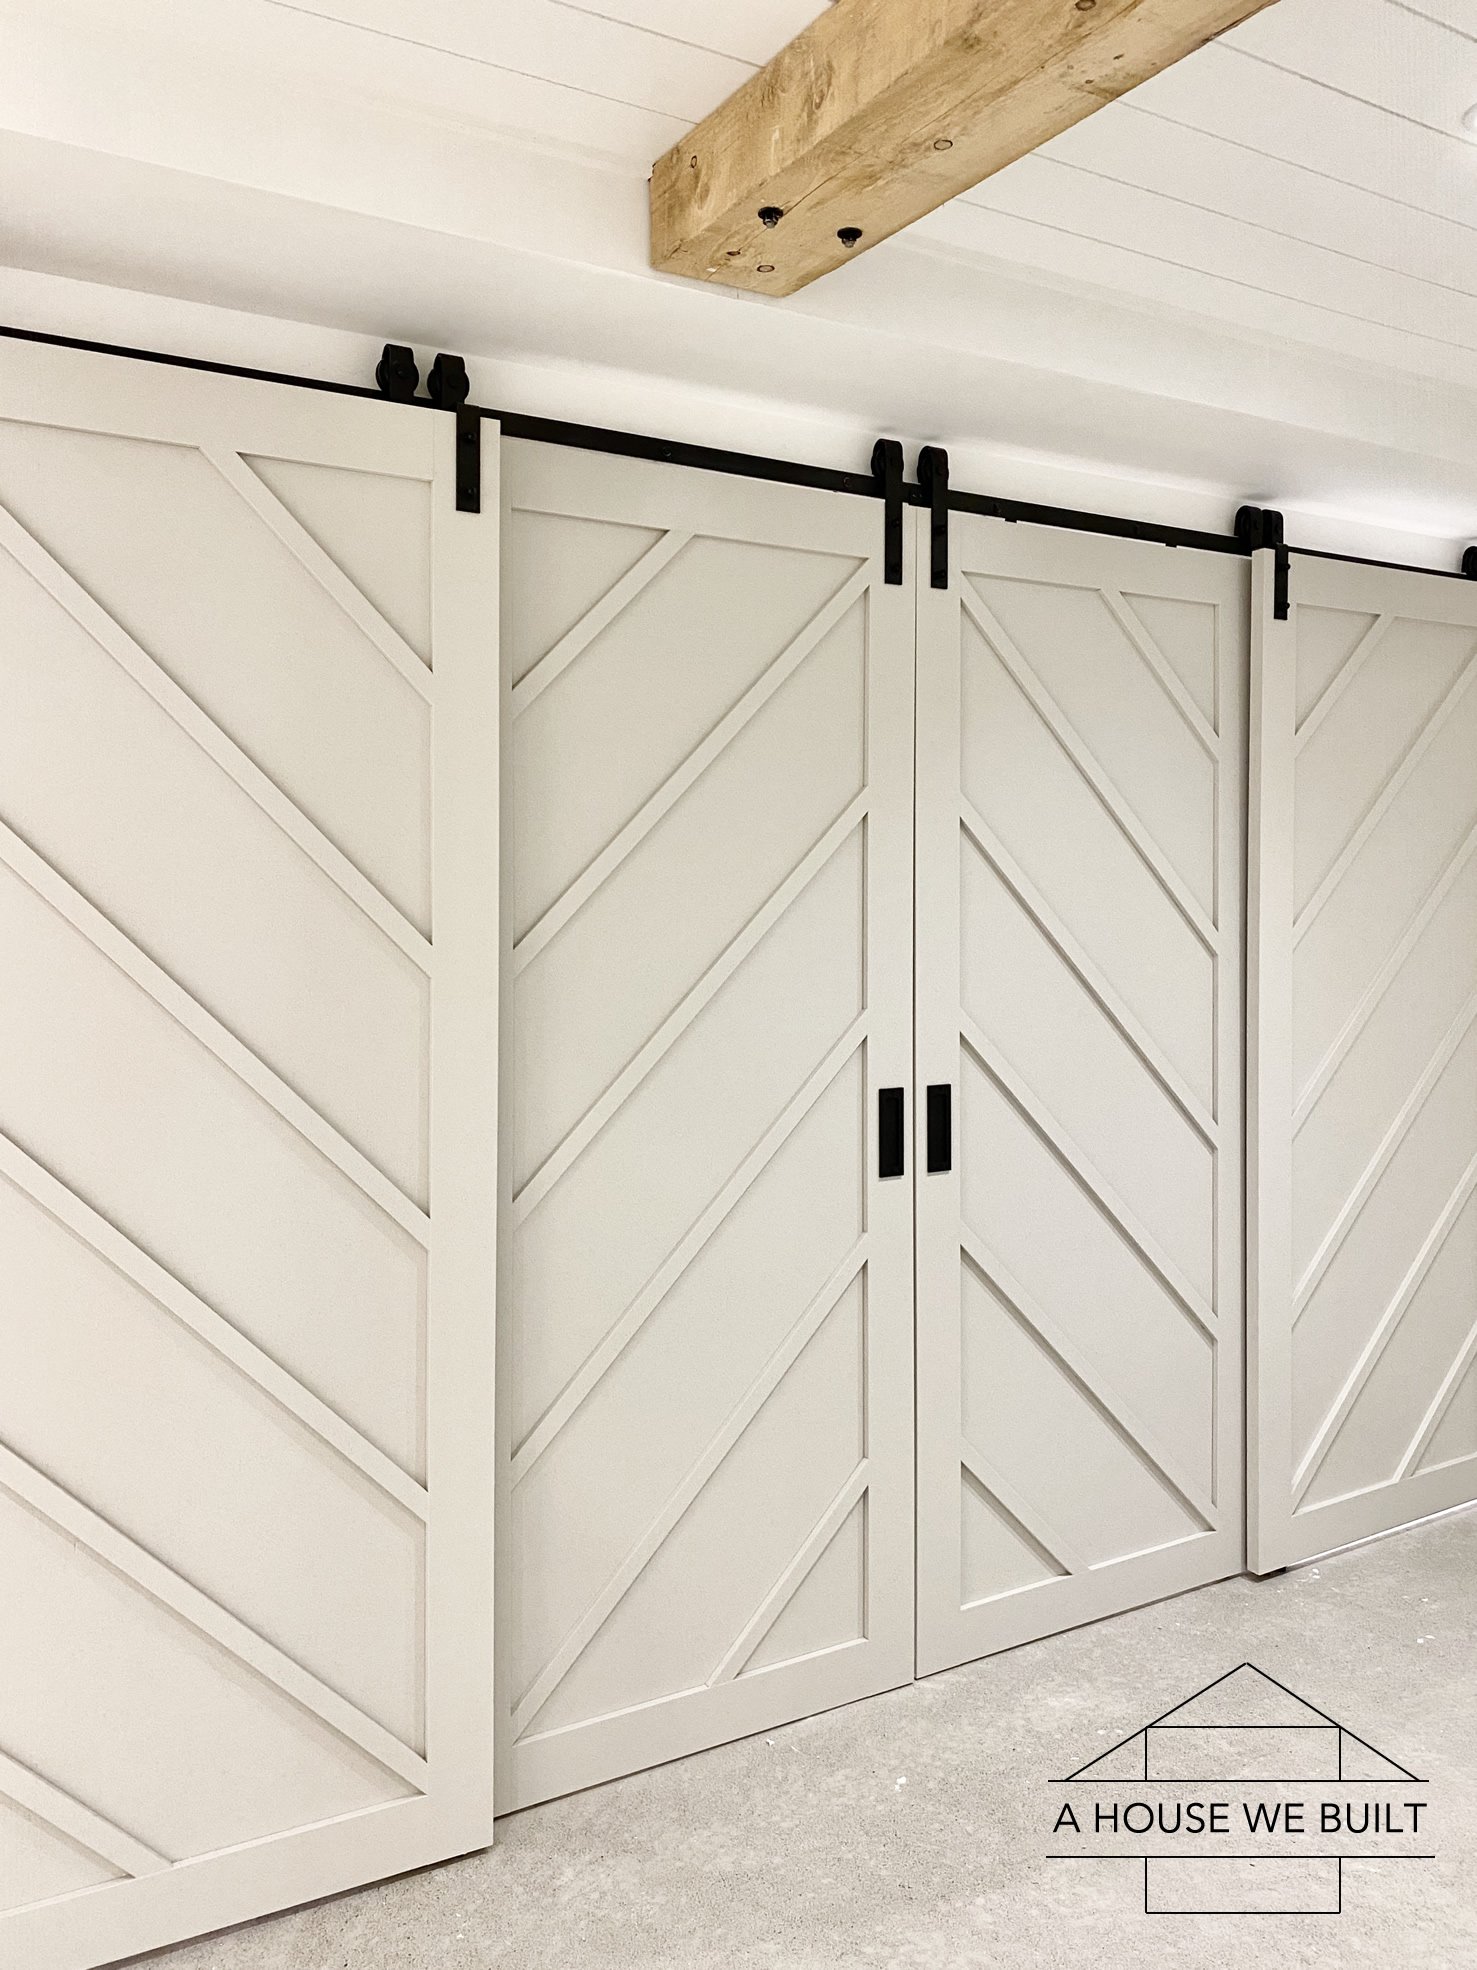
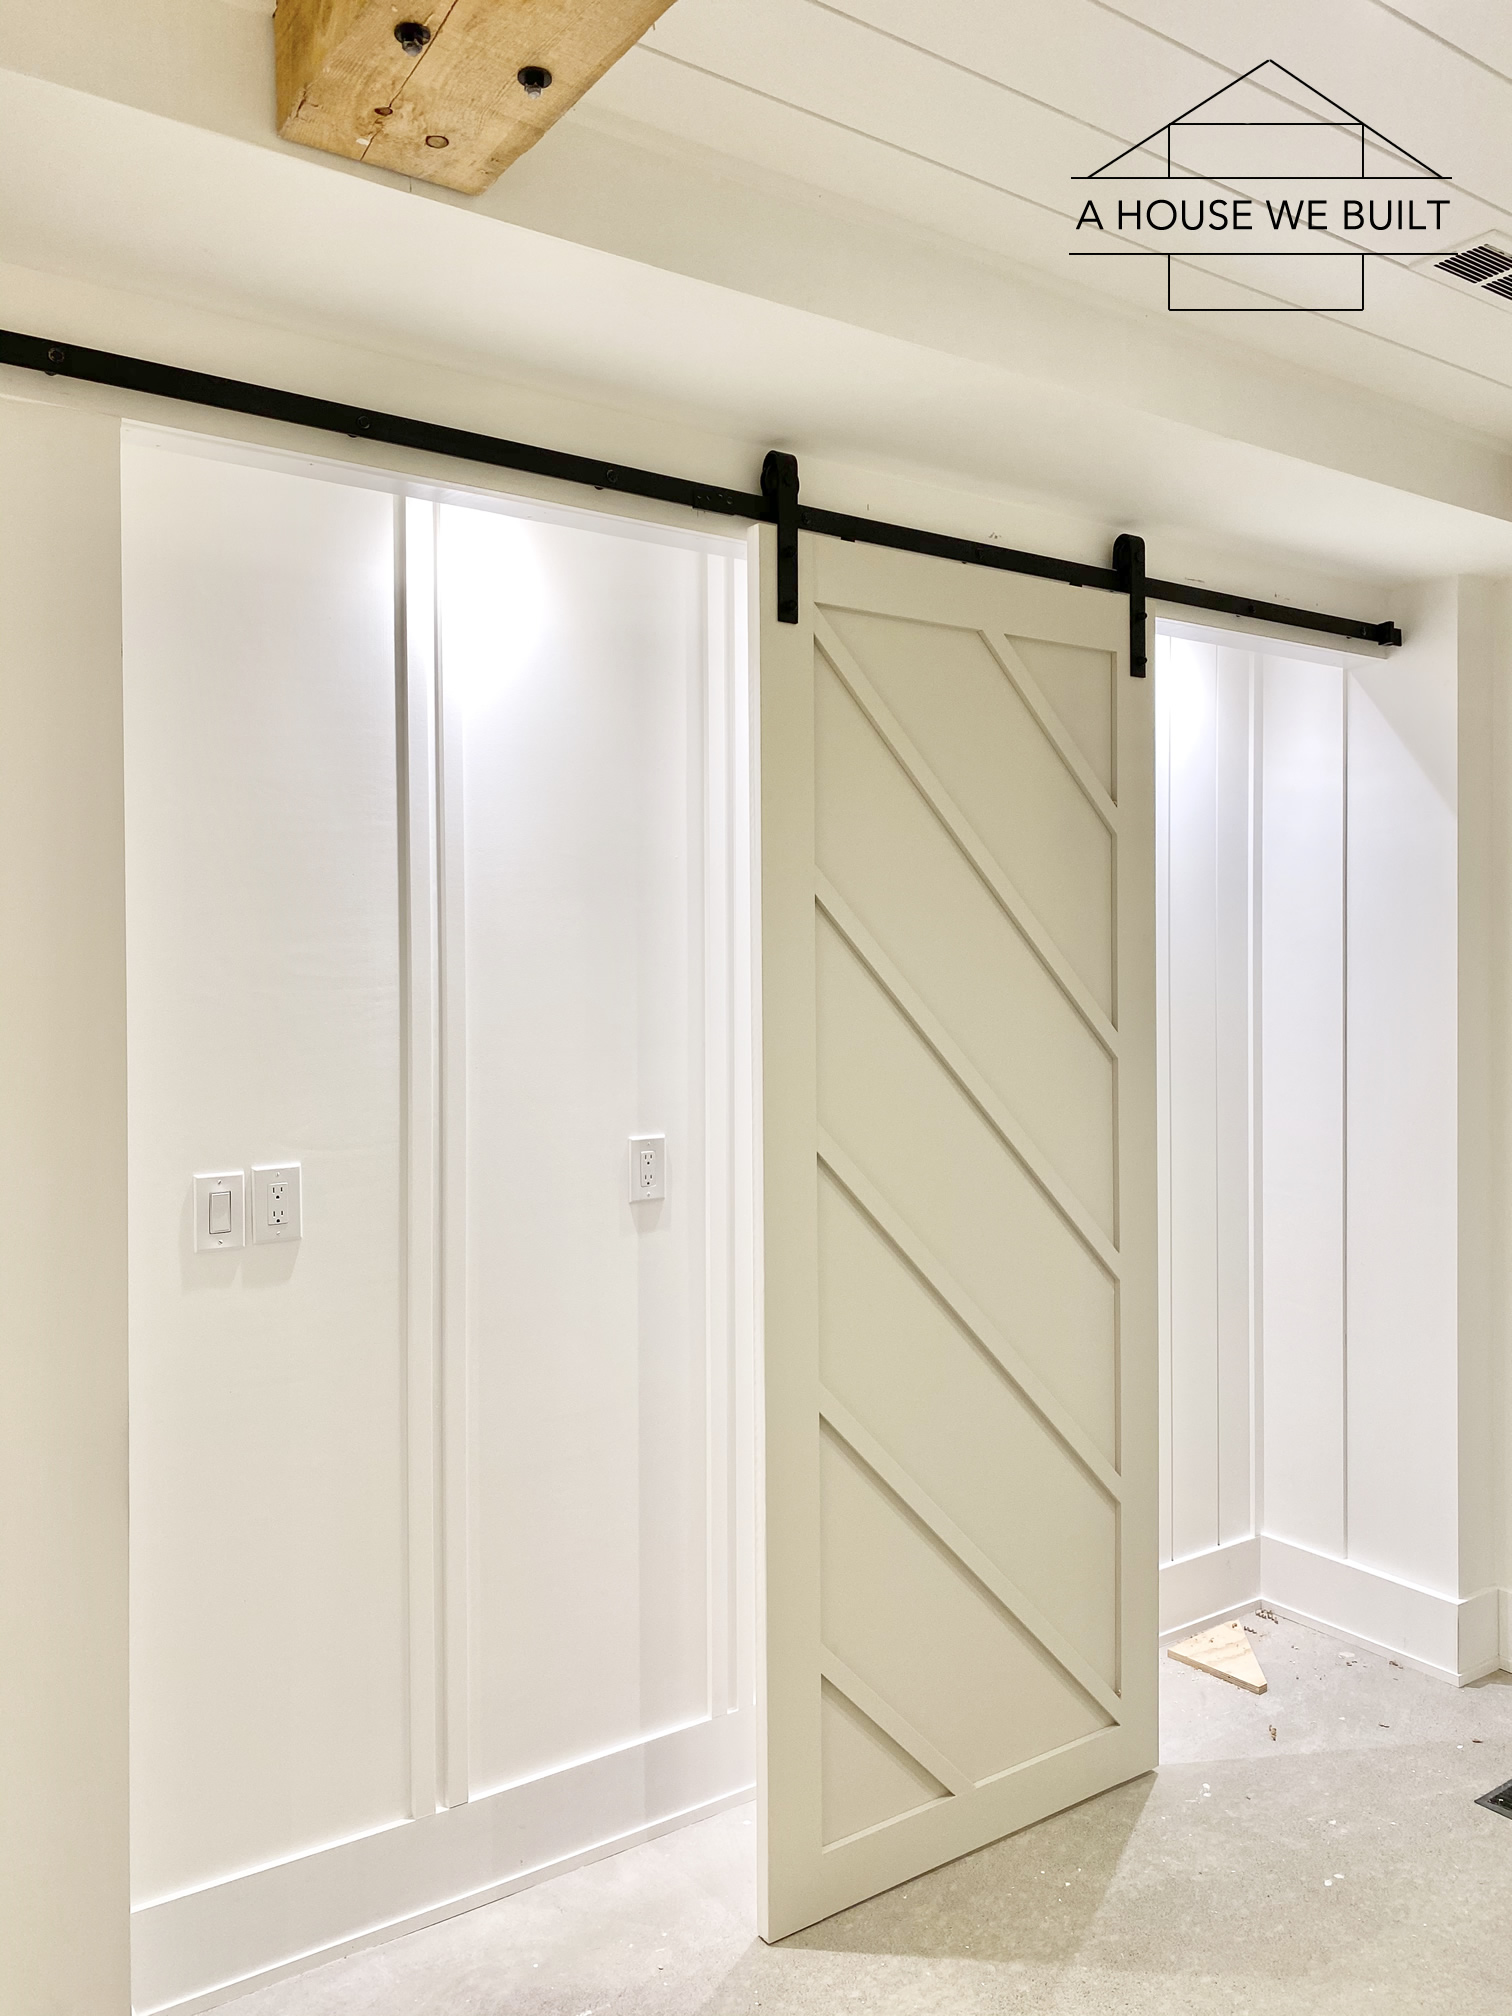
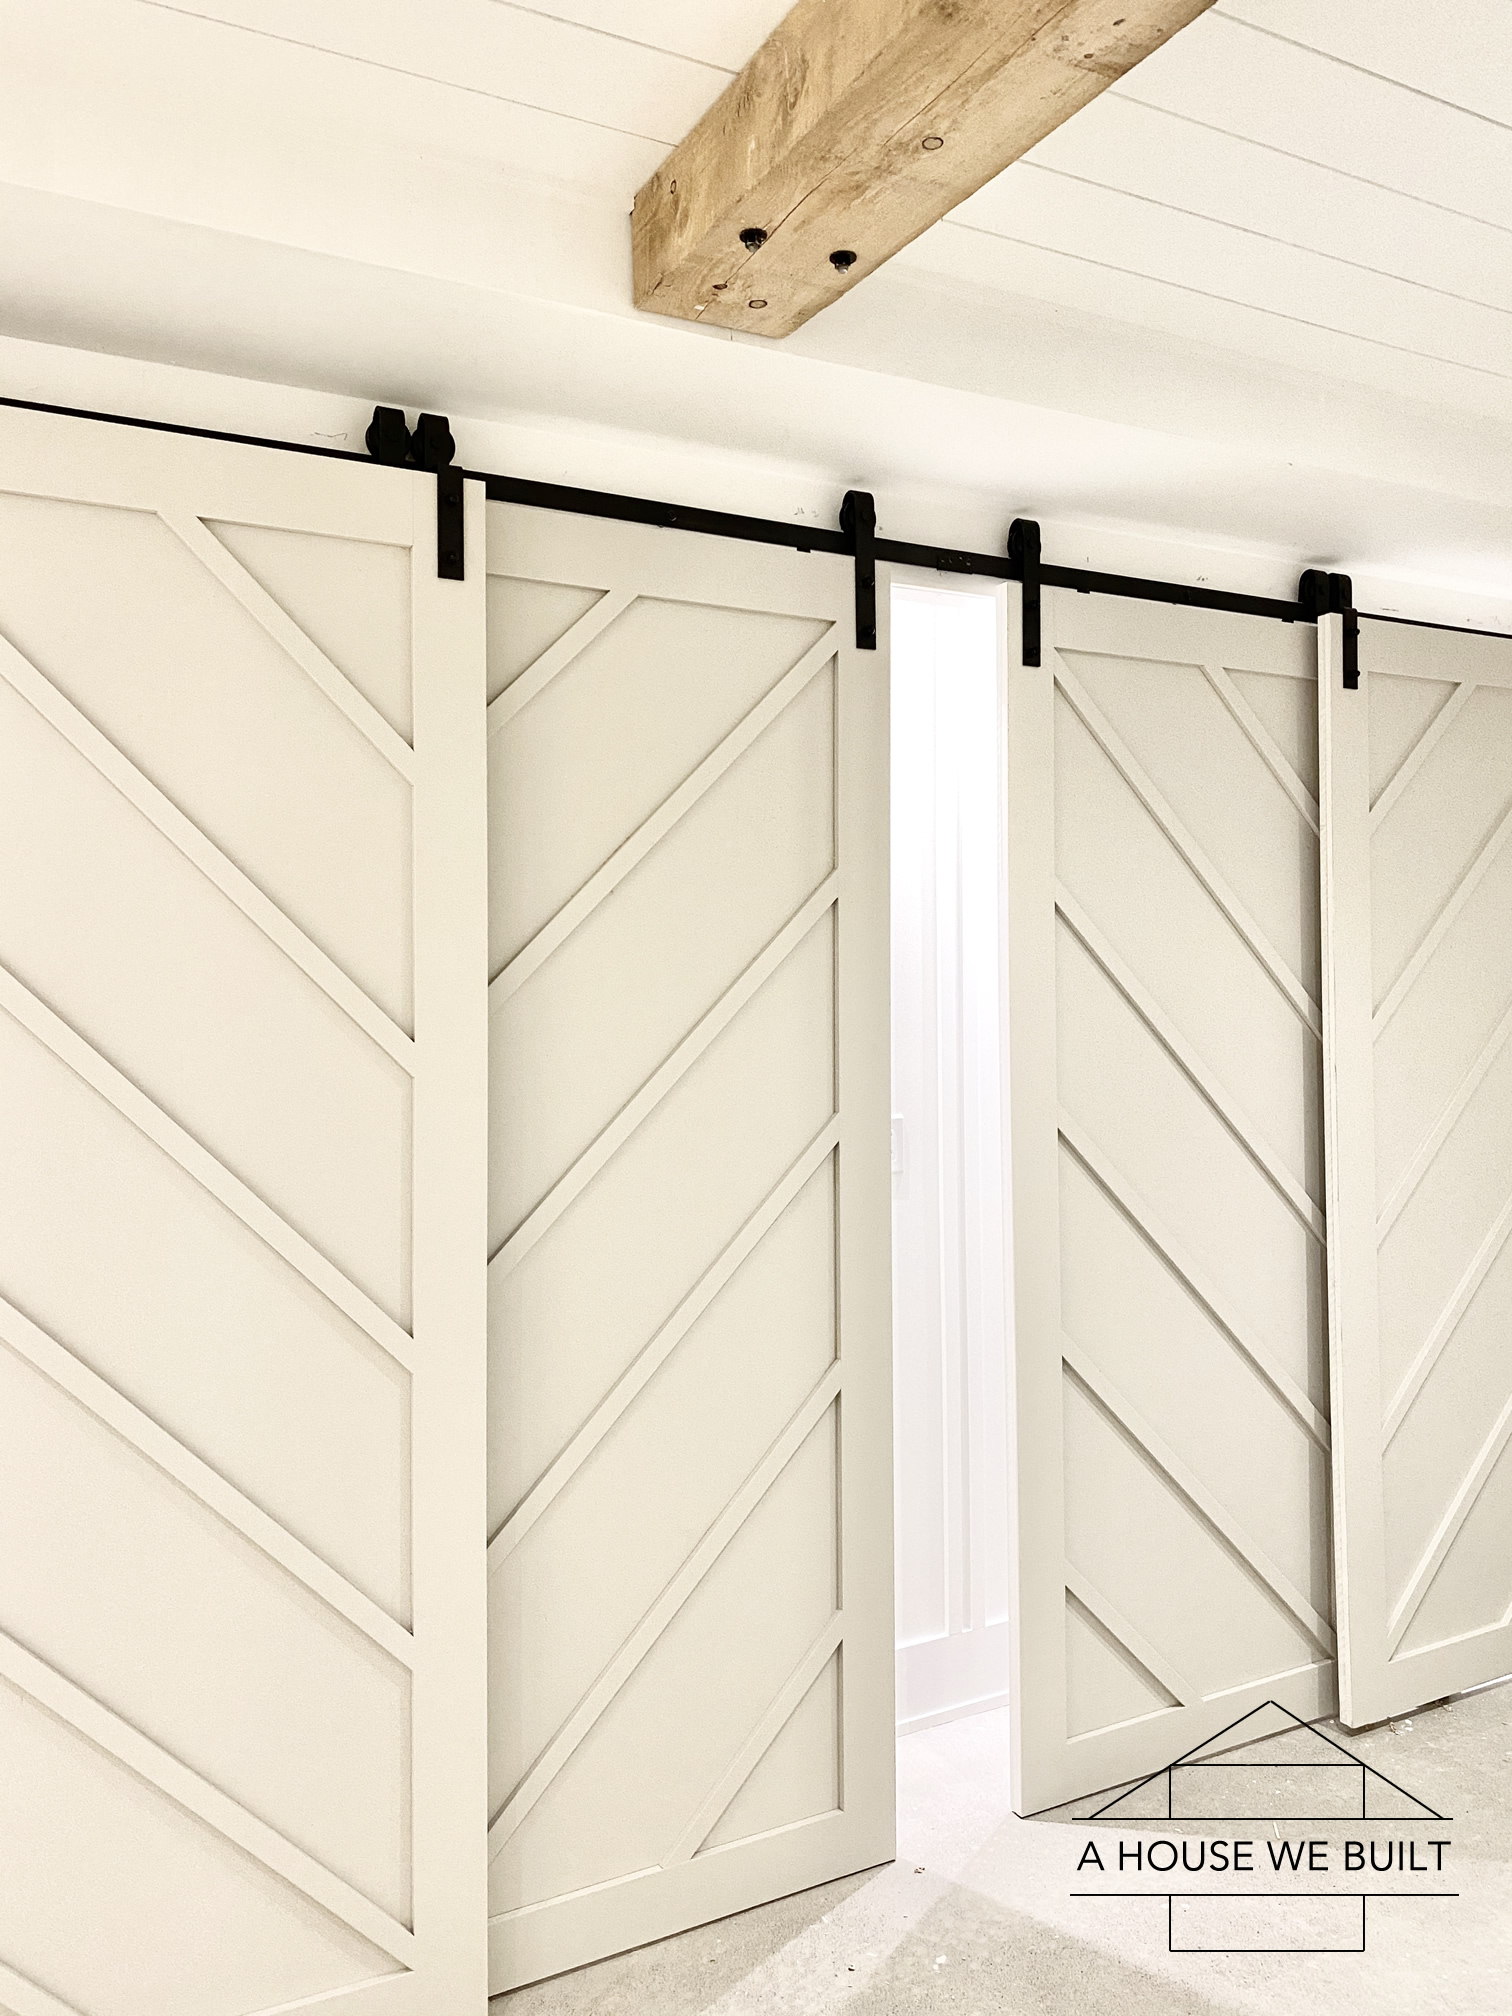
We built 6 barn doors in 5 days for our basement and in this tutorial I’m going to share how we made them along with a really important tip that makes all the difference in creating a cohesive and balanced look in bypass barn doors. In total for this project, we built 6 barn doors: 4 double bypass barn doors for our basement, as well as 2 other single doors we used in our master closet entry. And yes, all of the 4 bypass barn doors pictured above are fully functional doors (meaning none are fixed in place).
There are many different ways to build barn doors but the process simply breaks down into two parts: First is the hardware (track, hangers, fasteners etc). Second is the door (usually a backer board plus trim).
After building 6 doors, we became veryyyy good at this process. I’m pretty sure I could build a barn door in my sleep at this point. For some context, it took us four full days to build the first four doors, but the second two doors we fully built and painted and hung in less than ONE day! But since we’d never done this before, we made some mistakes and had some “learning experiences” so in this tutorial, I’m going to share not only how to build barn doors, but I’m also going to share what we did wrong along the way and how we fixed those things so hopefully you can learn both from our mistakes and our successes.
Our gray paint color is BM Revere Pewter.
STEP 1: DESIGNING YOUR BARN DOORS:
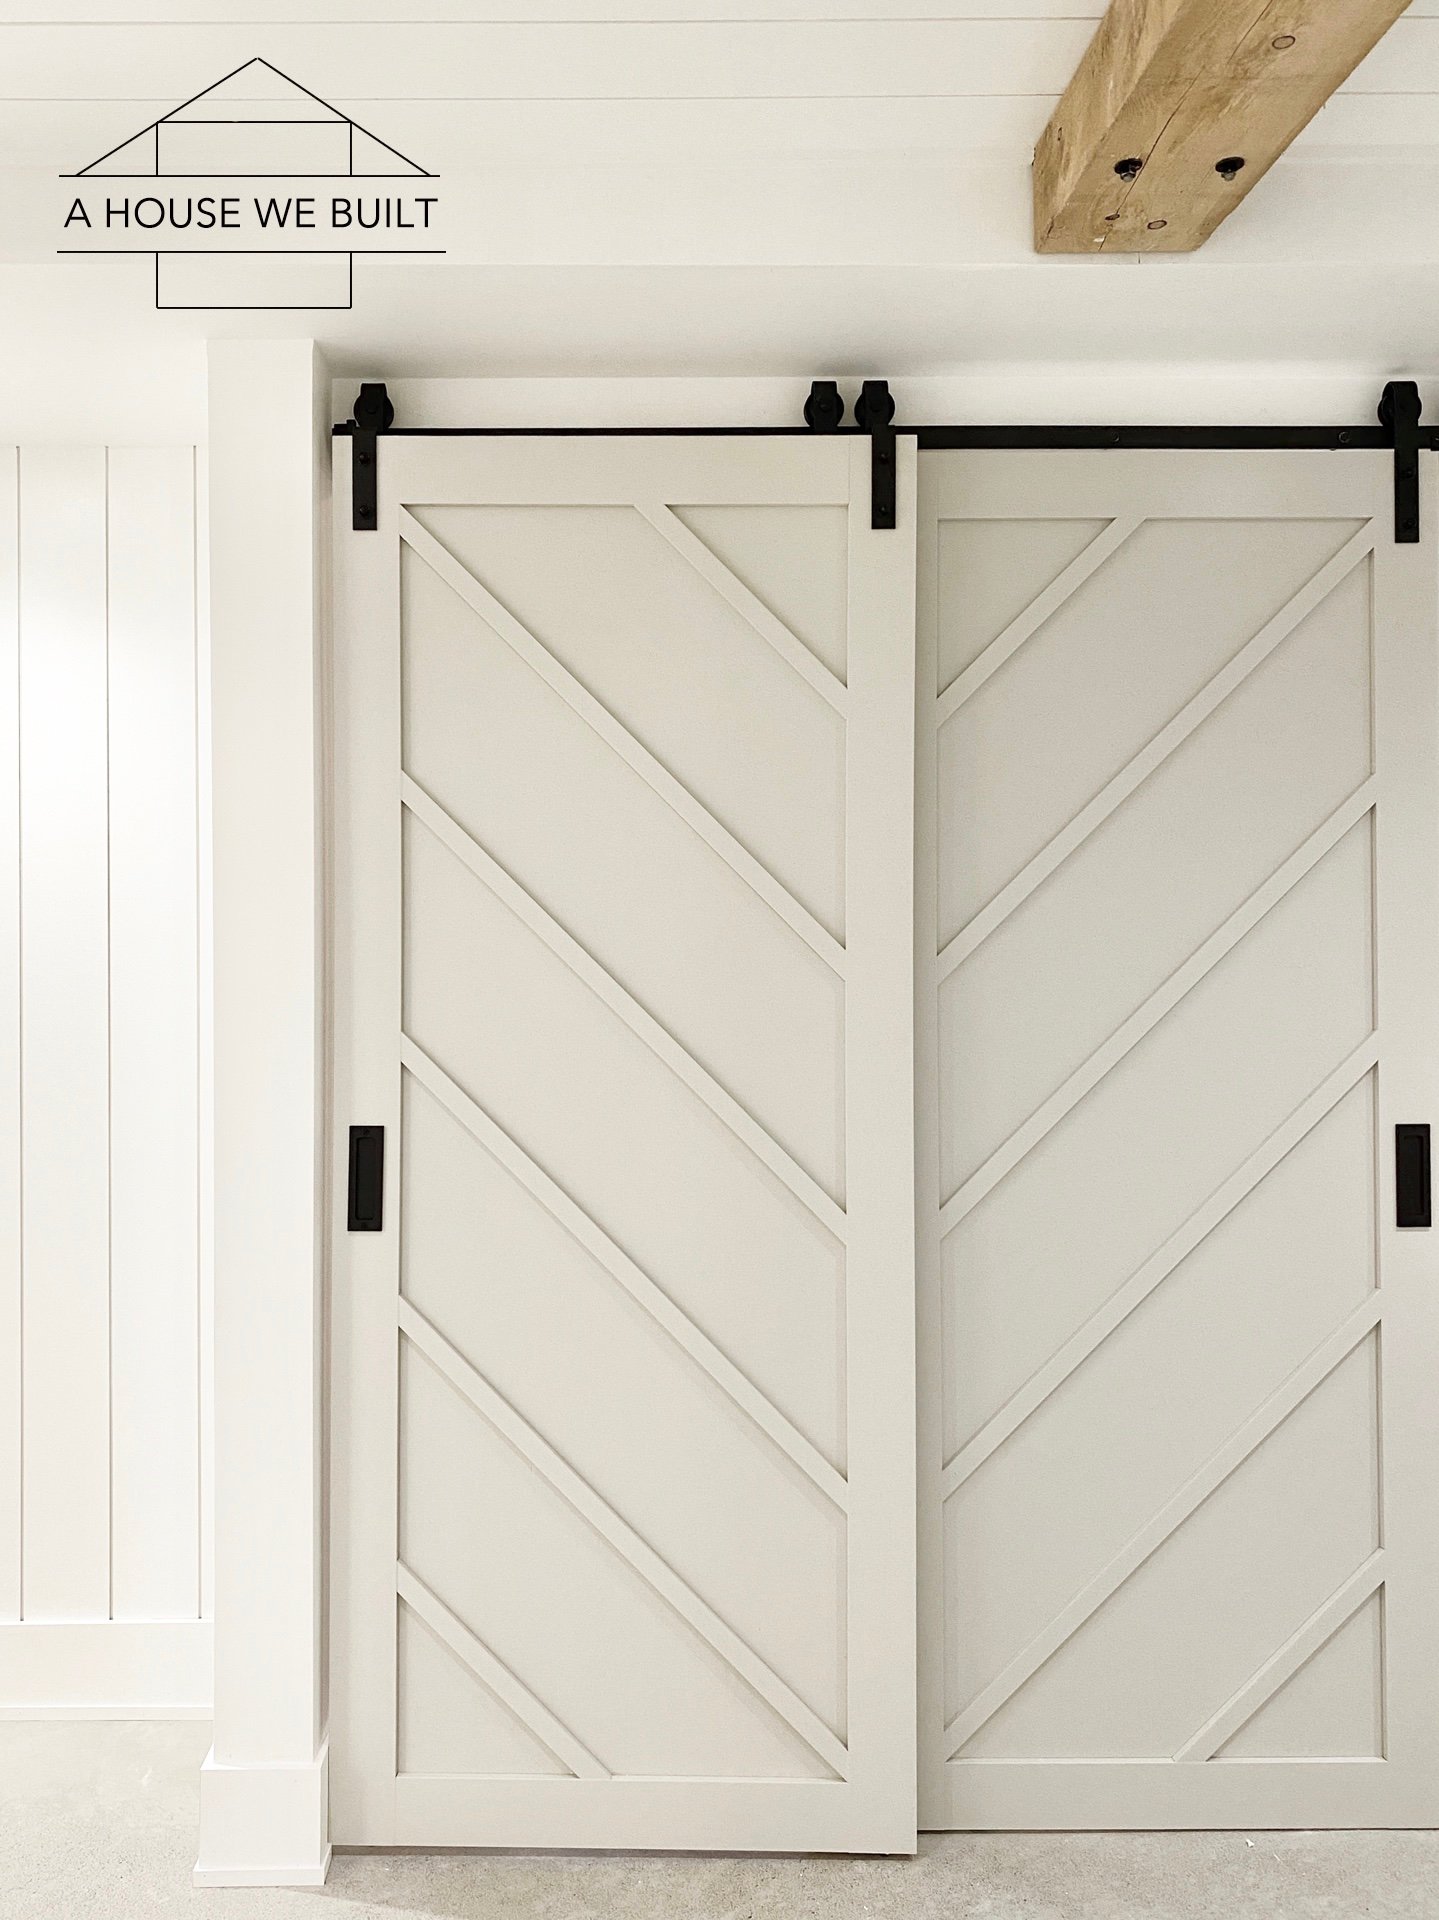
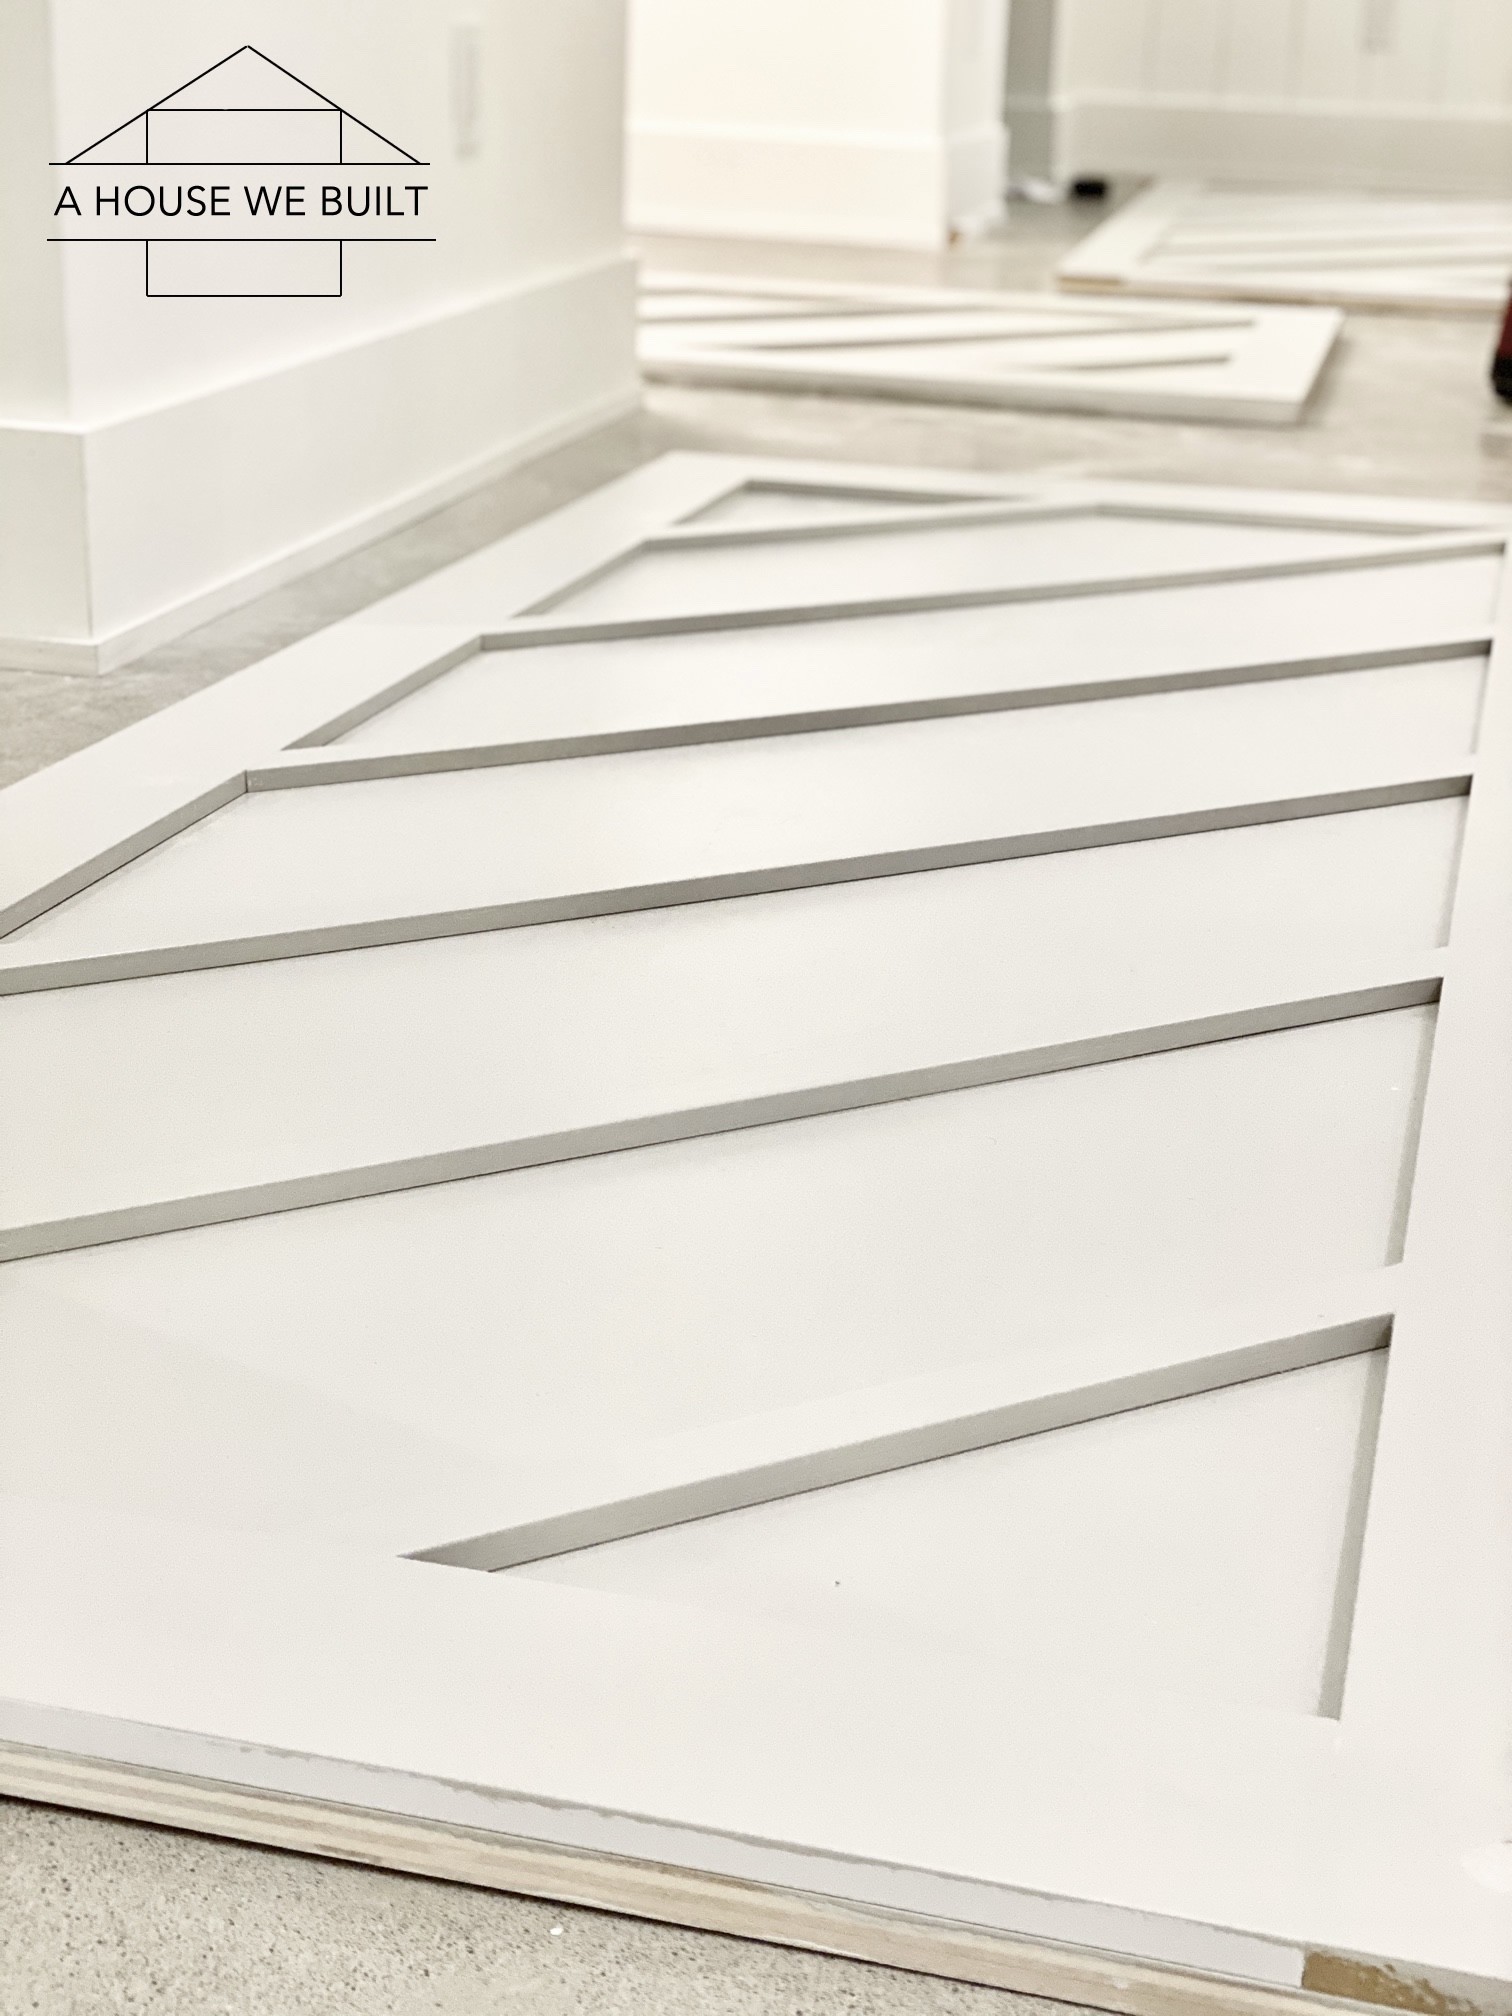
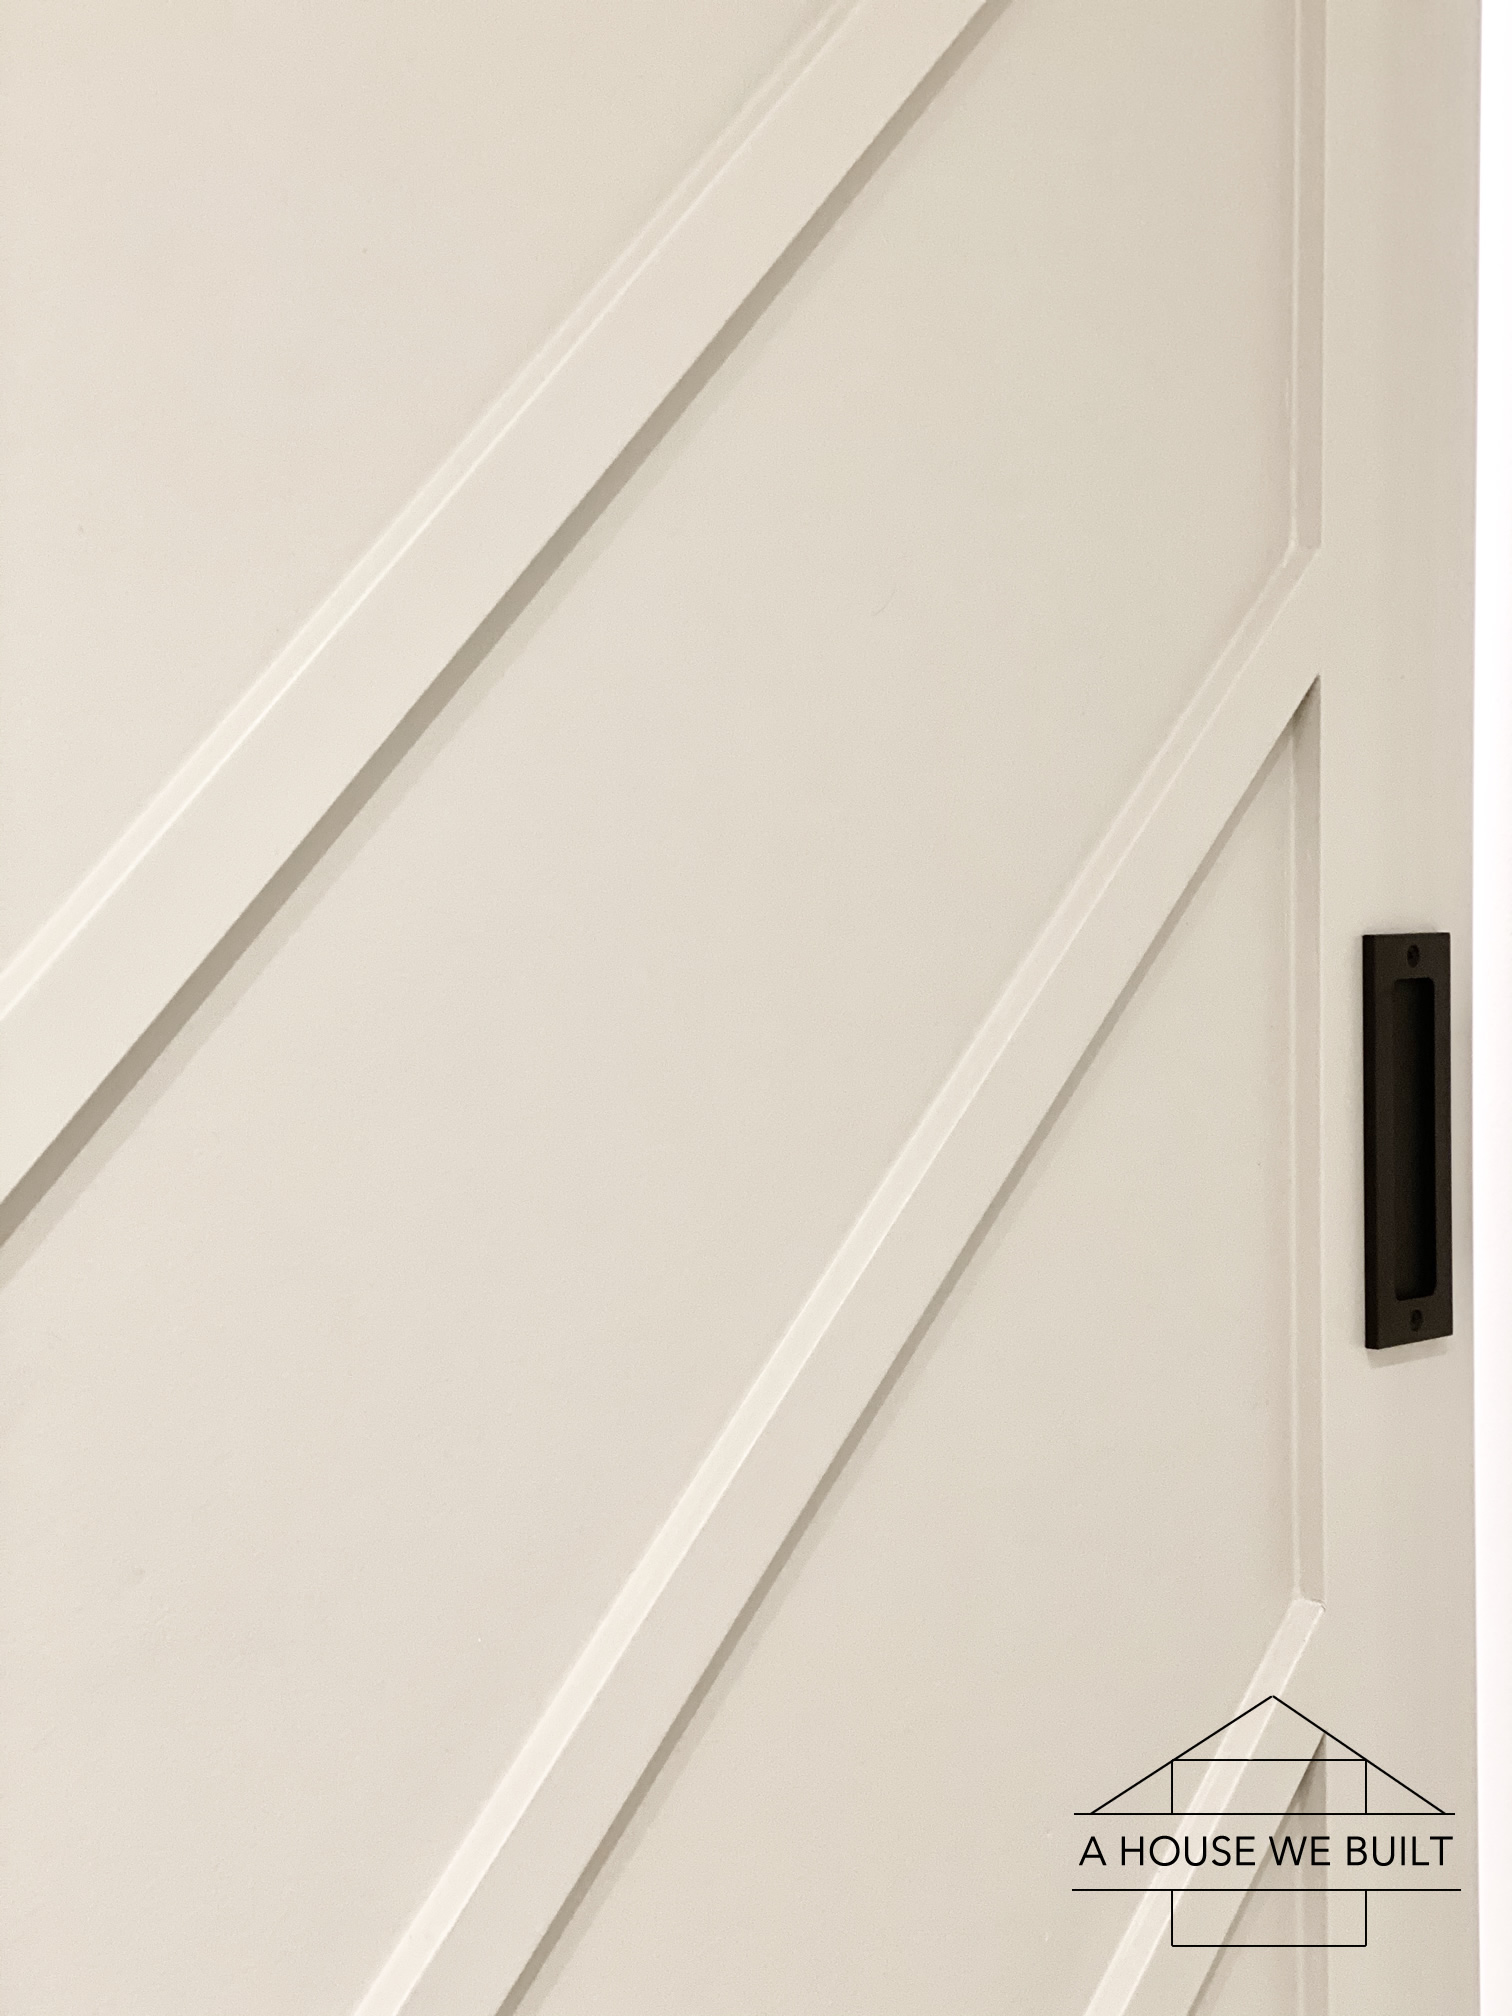
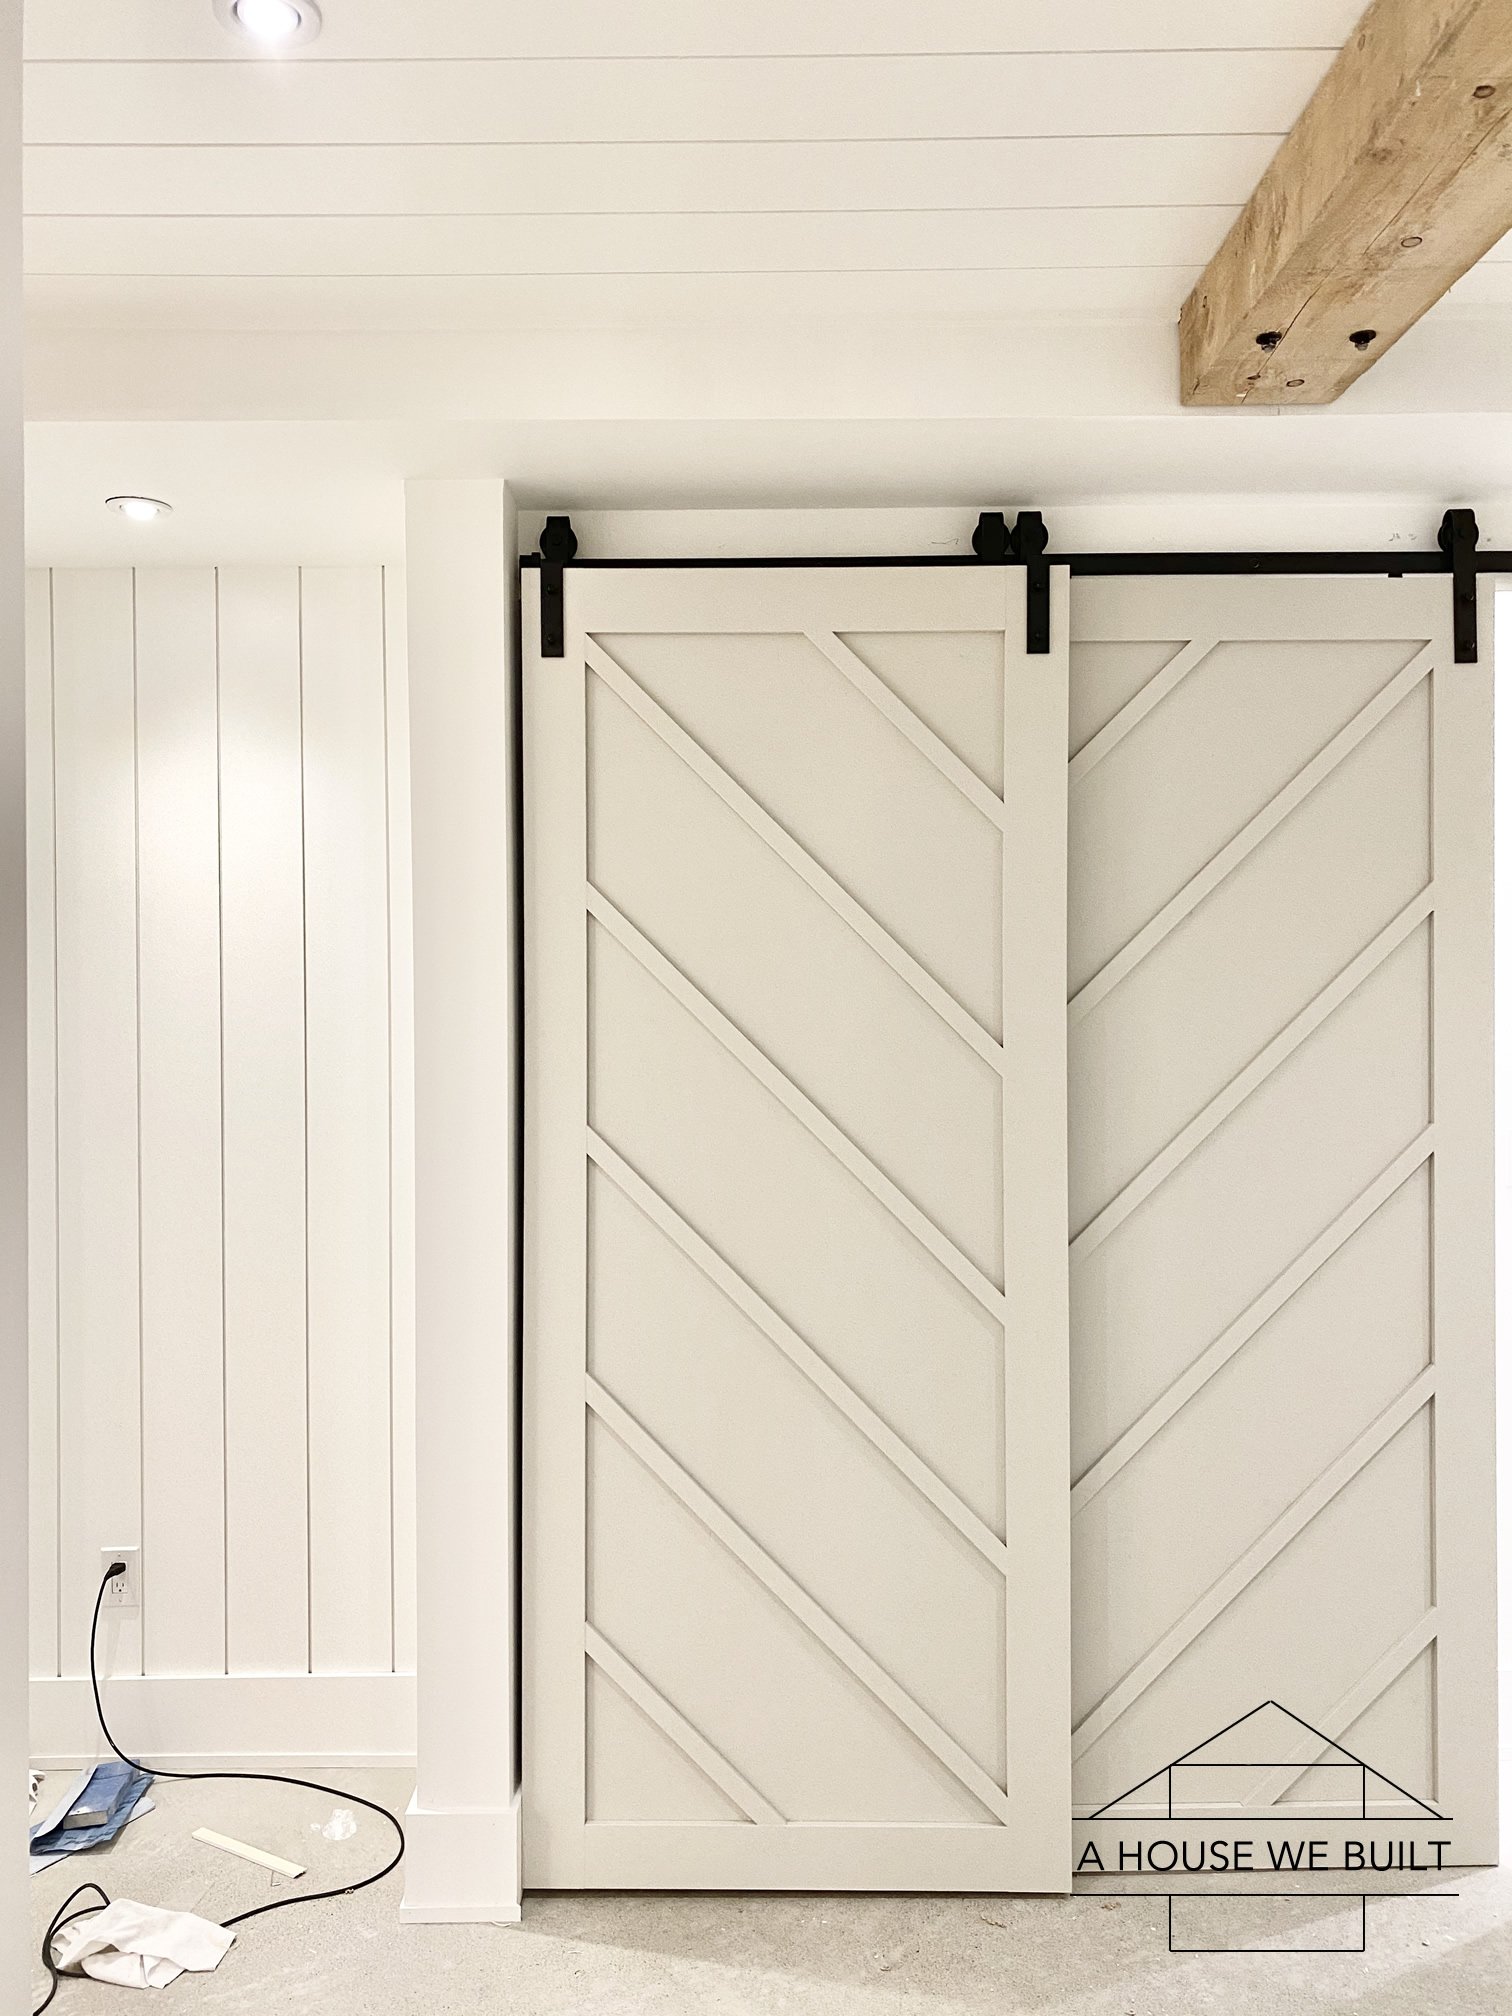
I chose to do repeating and reversing chevron pattern across all four of our barn doors. So, each door alone was asymmetrical but once all the doors were hung side-by-side, they created a chevron pattern.
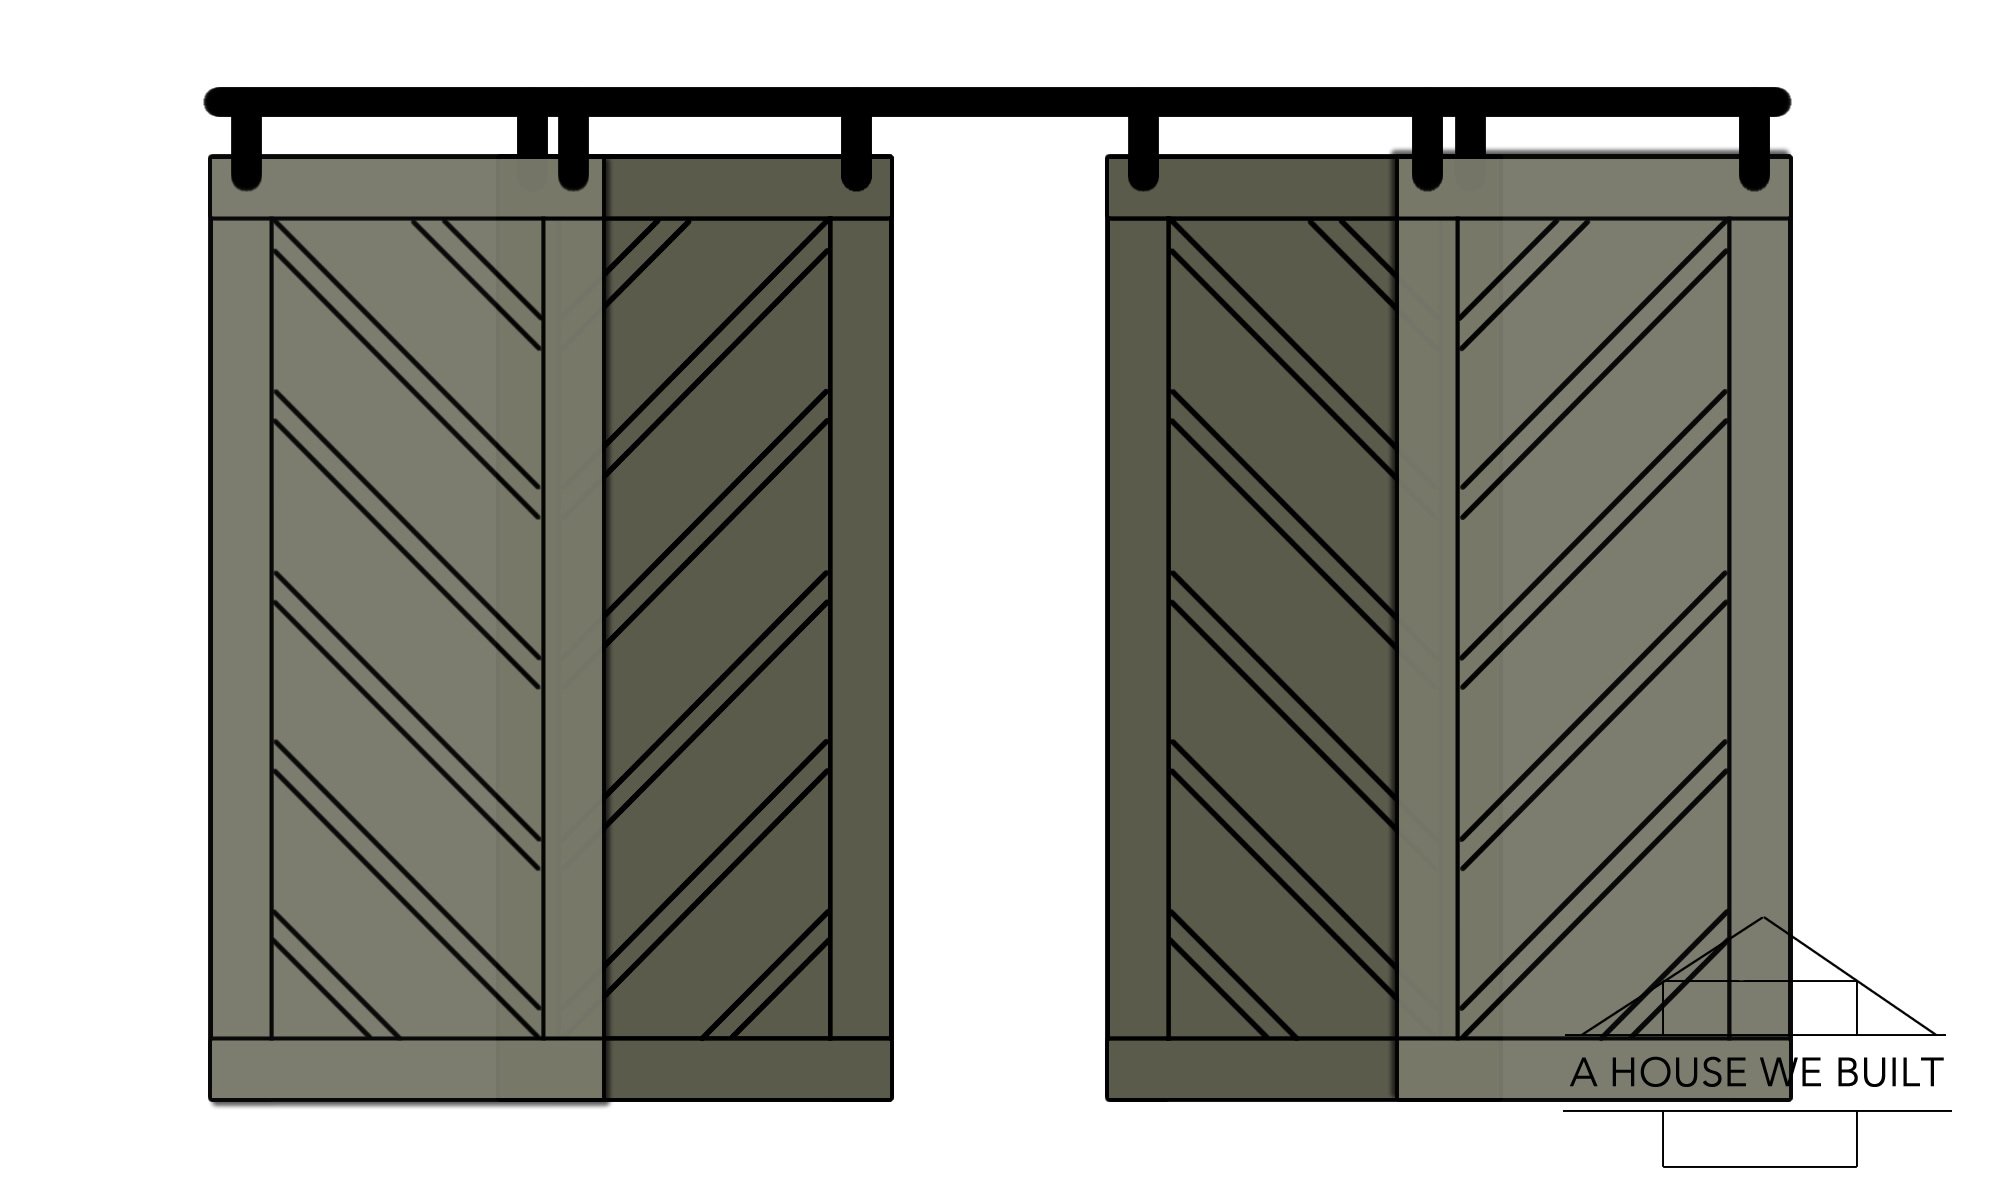
Below was my original design concept for our doors (I say “concept” because this was what I generally wanted the doors to look like, but it was not the practical representation of how they’d align):
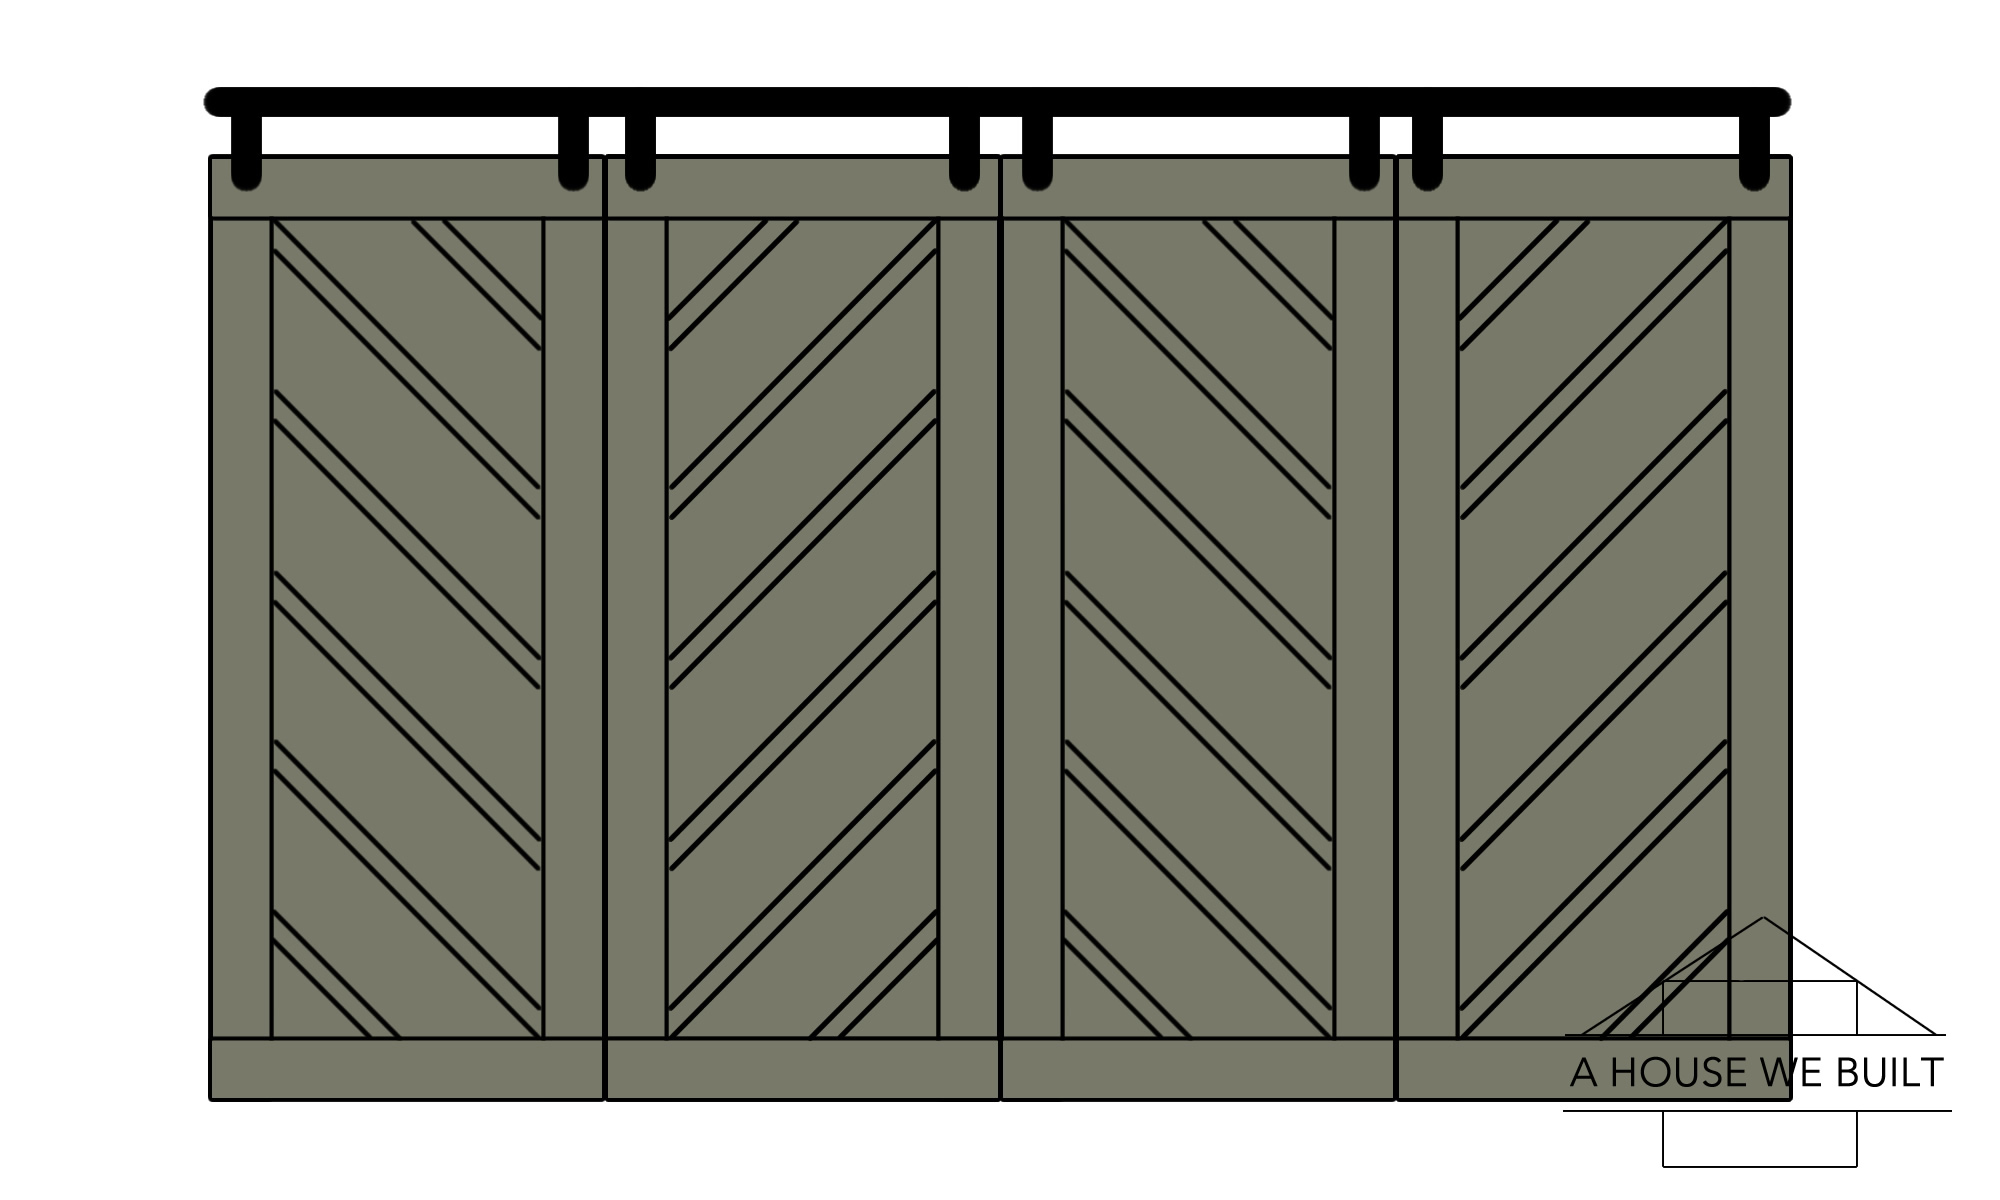
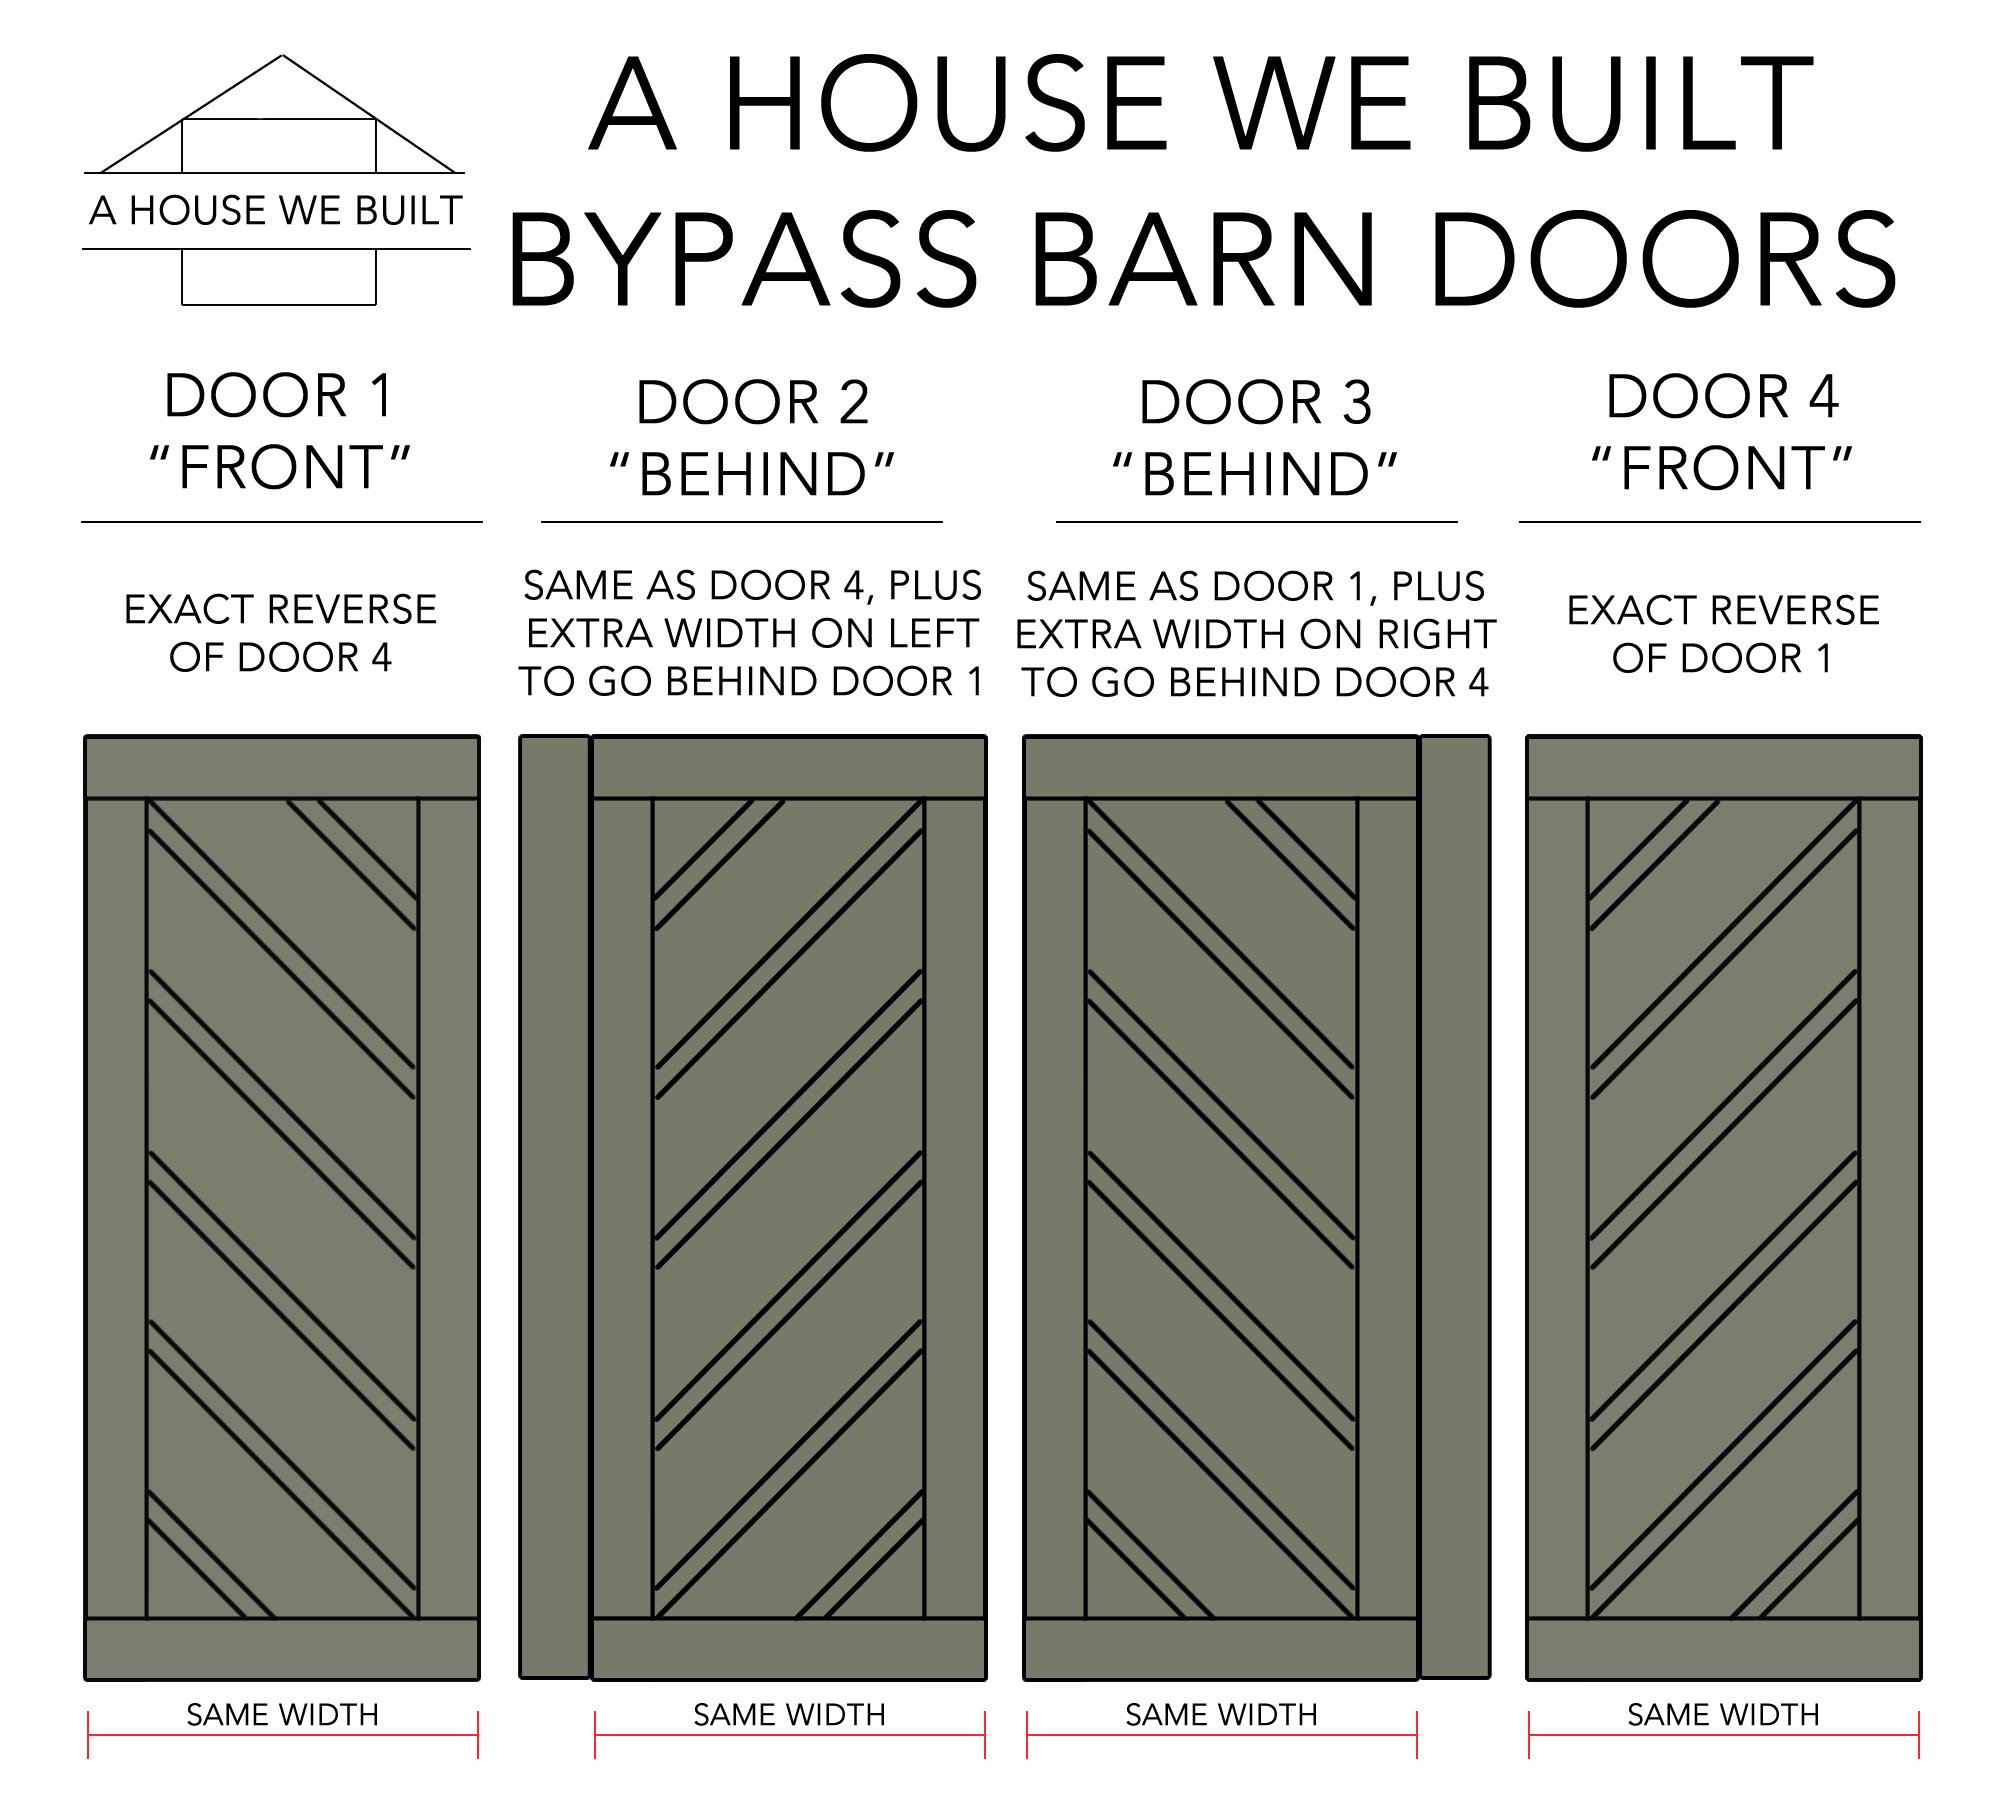
However, we chose a single track double bypass hardware system, so our final design is shown below. All 4 doors we built on our bypass track are fully functional (none of them are fixed in place) so each of them lead somewhere and each of them can be opened by sliding in front or behind each other.
Each of the doors is actually different than the other. The graphic below breaks it down, and the reason why is fully explained at the bottom of this tutorial under “Accounting for Overlap in Bypass Barn Doors”.
Our doors are about 3.5′ wide x 8′ tall and we did 45 degree angles everywhere.
STEP 2: CHOOSING BARN DOOR HARDWARE:
If you choose to do one barn door alone, or two barn doors just beside each other (without the ability to slide behind each other), then you have two options:
- For one barn door alone, you just need a single track plus the necessary hardware. There are lots of different styles available out there, but this is my favorite style: Amazon | Home Depot.
- For two barn doors side-by-side, you need something like this: Amazon | Home Depot.
If you choose to do bypass barn doors as we did (meaning that the doors can slide in front of or behind each other), then you have two options:
- A double rail bypass system like this: Amazon | Home Depot
- A single rail bypass system like this: Amazon | Walmart (the style type we chose)
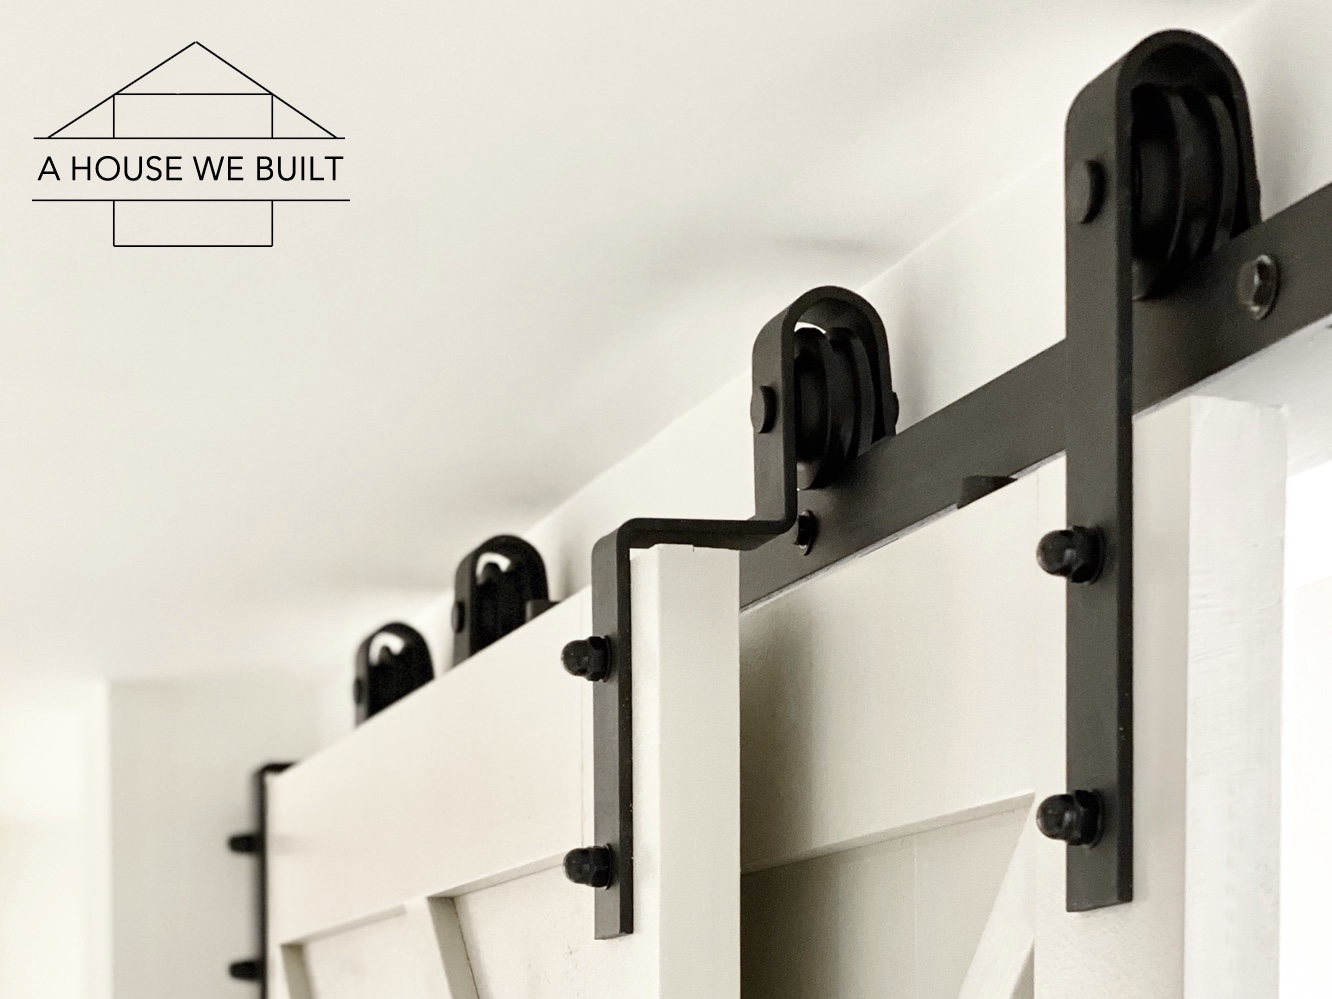
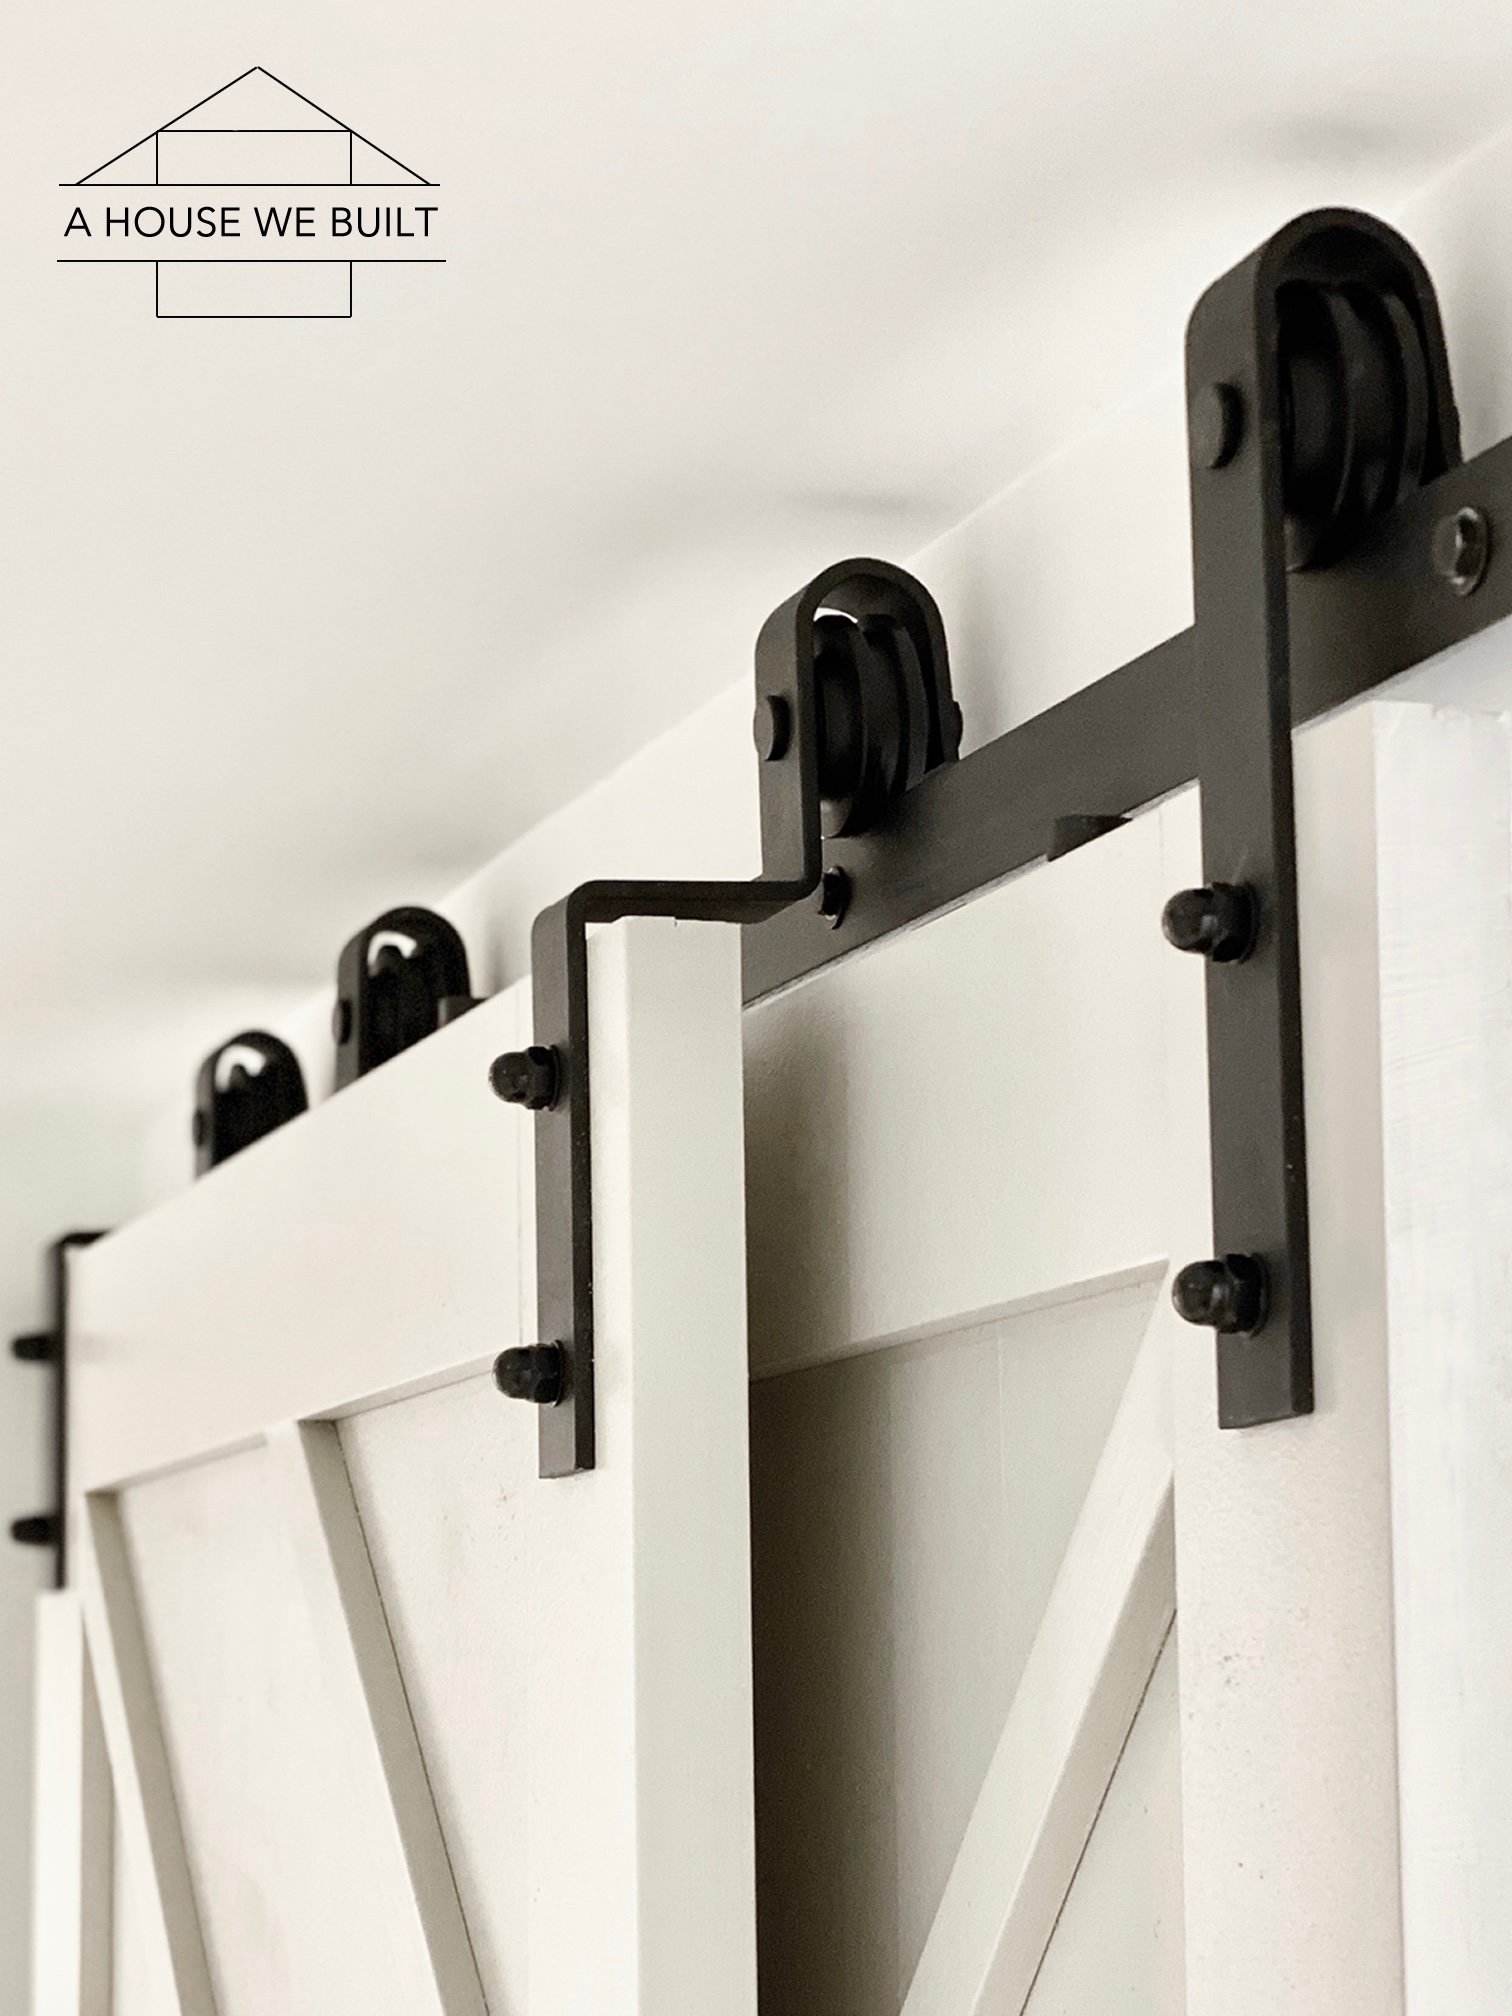
So, we chose to do a single rail bypass system with all 4 barn doors hanging off one track. Meaning that two doors are “in front” and two doors are “behind”. The “behind doors” are on straight hangers, while the “front” doors have angled hanger that lifts them to hang in front so that back doors can slide behind them.
With this (and any) 4-door bypass system, you next have to pick which doors are “front” doors and which doors hang “behind” and there are 4 configurations you can choose from:
Option A = Door 1: In front | Door 2: Behind | Door 3: In front | Door 4: Behind
Option B = Door 1: Behind | Door 2: In front | Door 3: Behind | Door 4: In front
Option C = Door 1: Behind | Door 2: In front | Door 3: In front | Door 4: Behind
Option D = Door 1: In front | Door 2: Behind | Door 3: Behind | Door 4: In front
We chose Option D because, in our hallway, Doors 1 & 4 will be our most-used doors so we wanted them to hang in the front. Also I’m personally drawn more to the symmetry of Options C & D overall.
MATERIALS LIST FOR BARN DOORS
Note 1: the “trim” materials you need will differ based on your door design. I’ve listed the materials we needed for our door design but a different door design will naturally require different trim materials.
Note 2: I used primed MDF trim since I planned to paint my doors. If you plan to stain them instead, then you will need to use real wood trim.
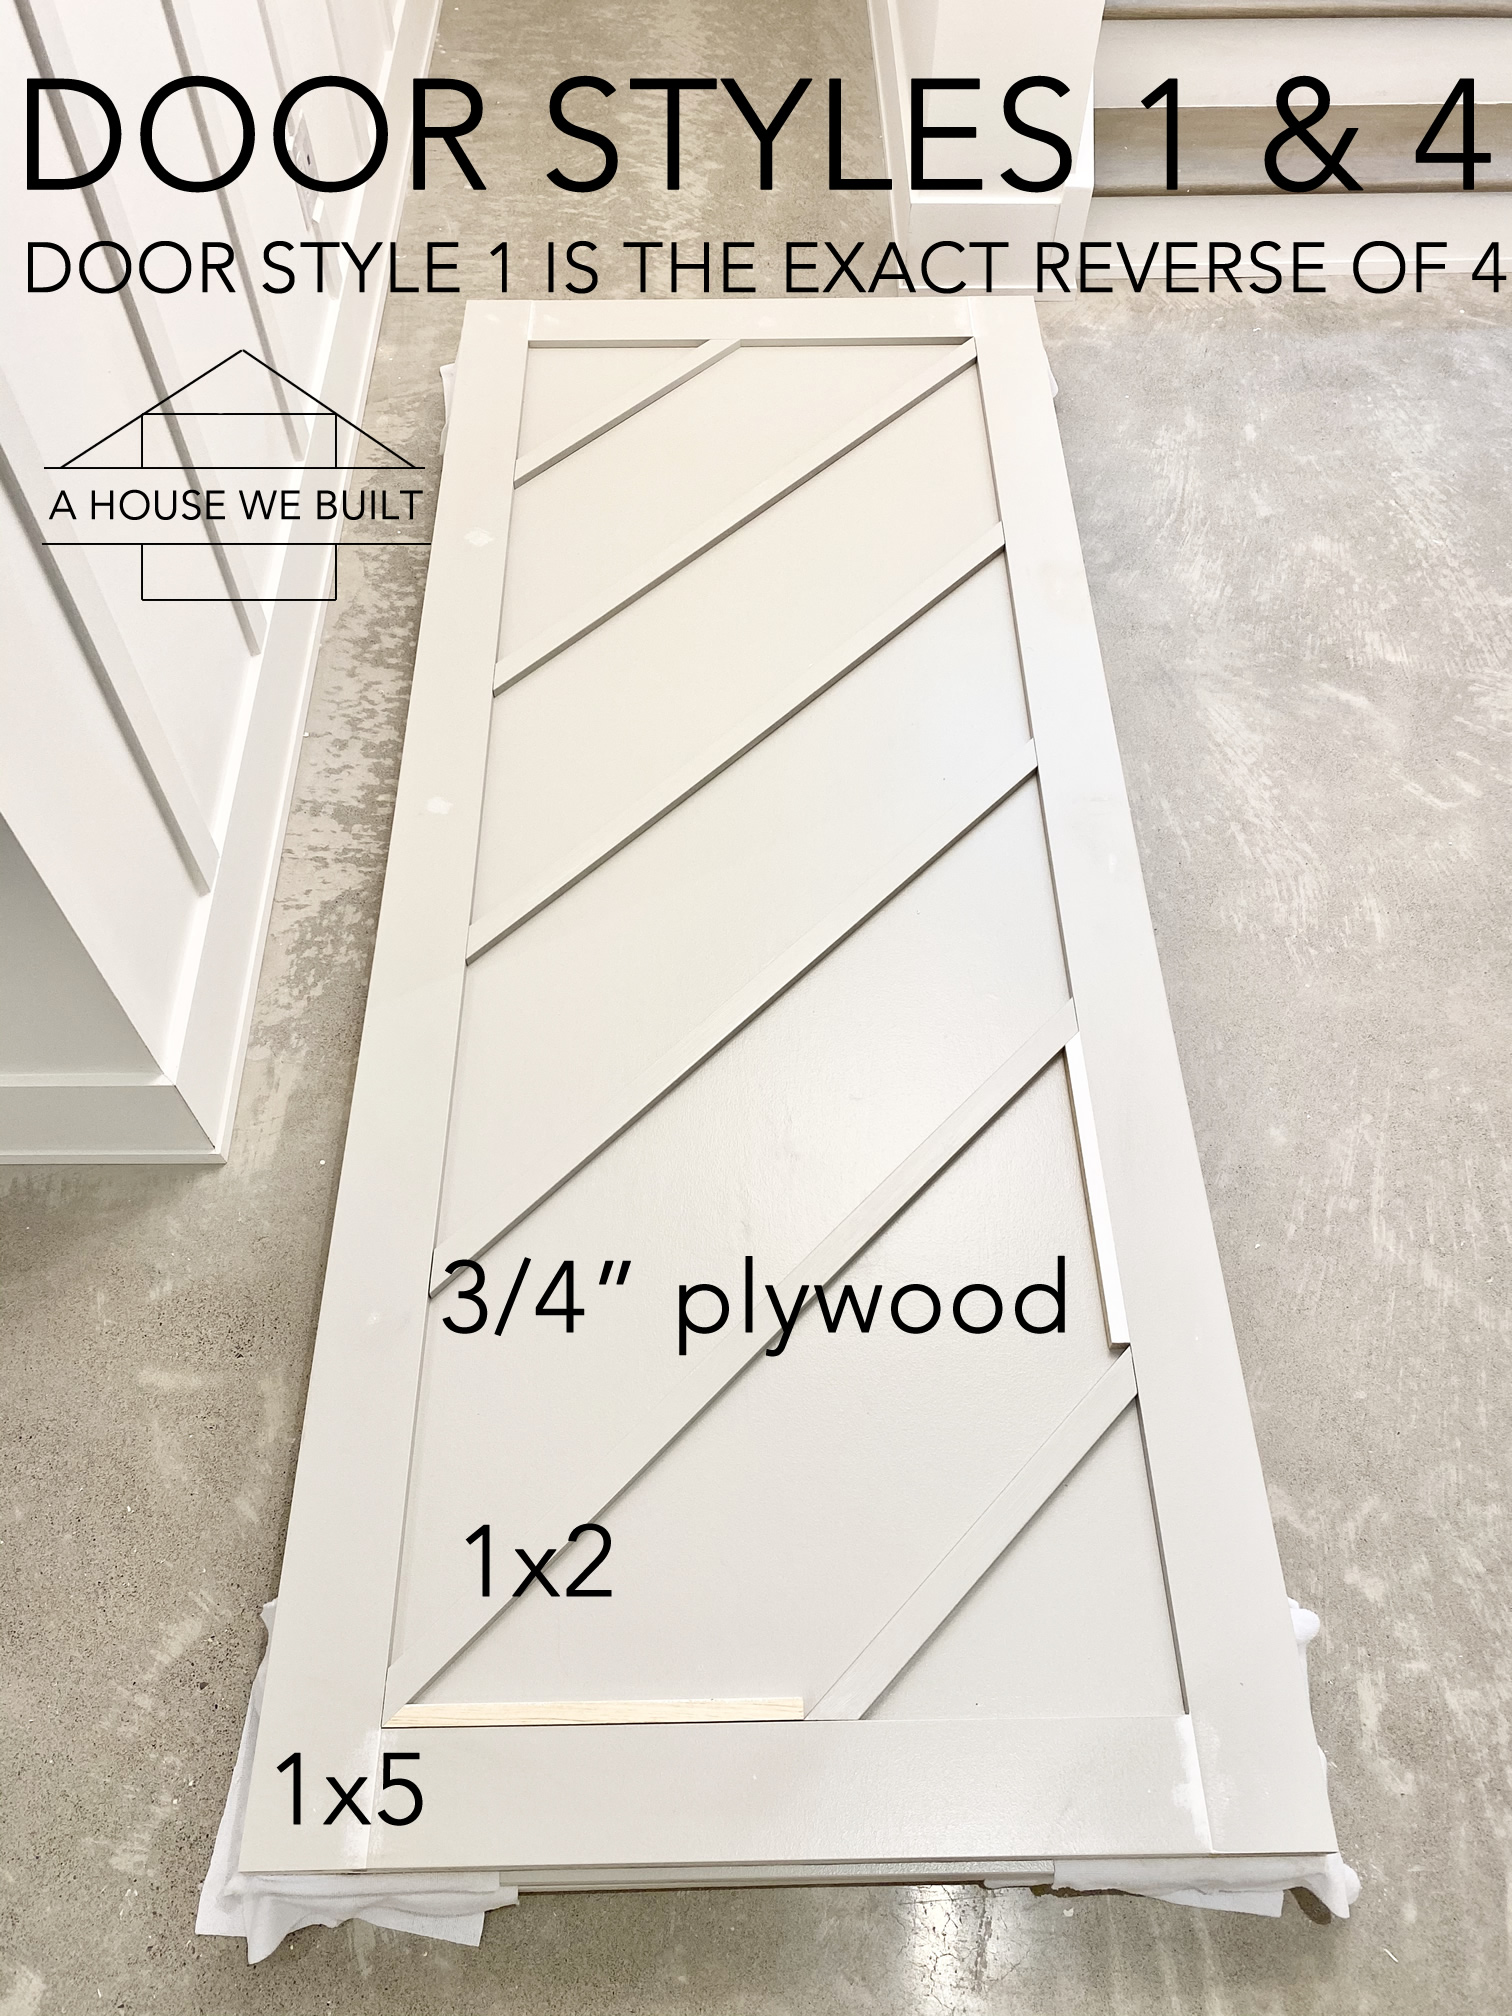
Raw materials for Doors 1 & 4, or our “Front Doors” (so we needed this x 2):
- 1 x 3/4″x4’x8′ sanded plywood backer board cut down to size, per door
- 3 x 1″x5″x8′ MDF trim around the perimeter of each door, per door
- 3 x 1″x2″x8′ MDF trim for the slanted battens, per door
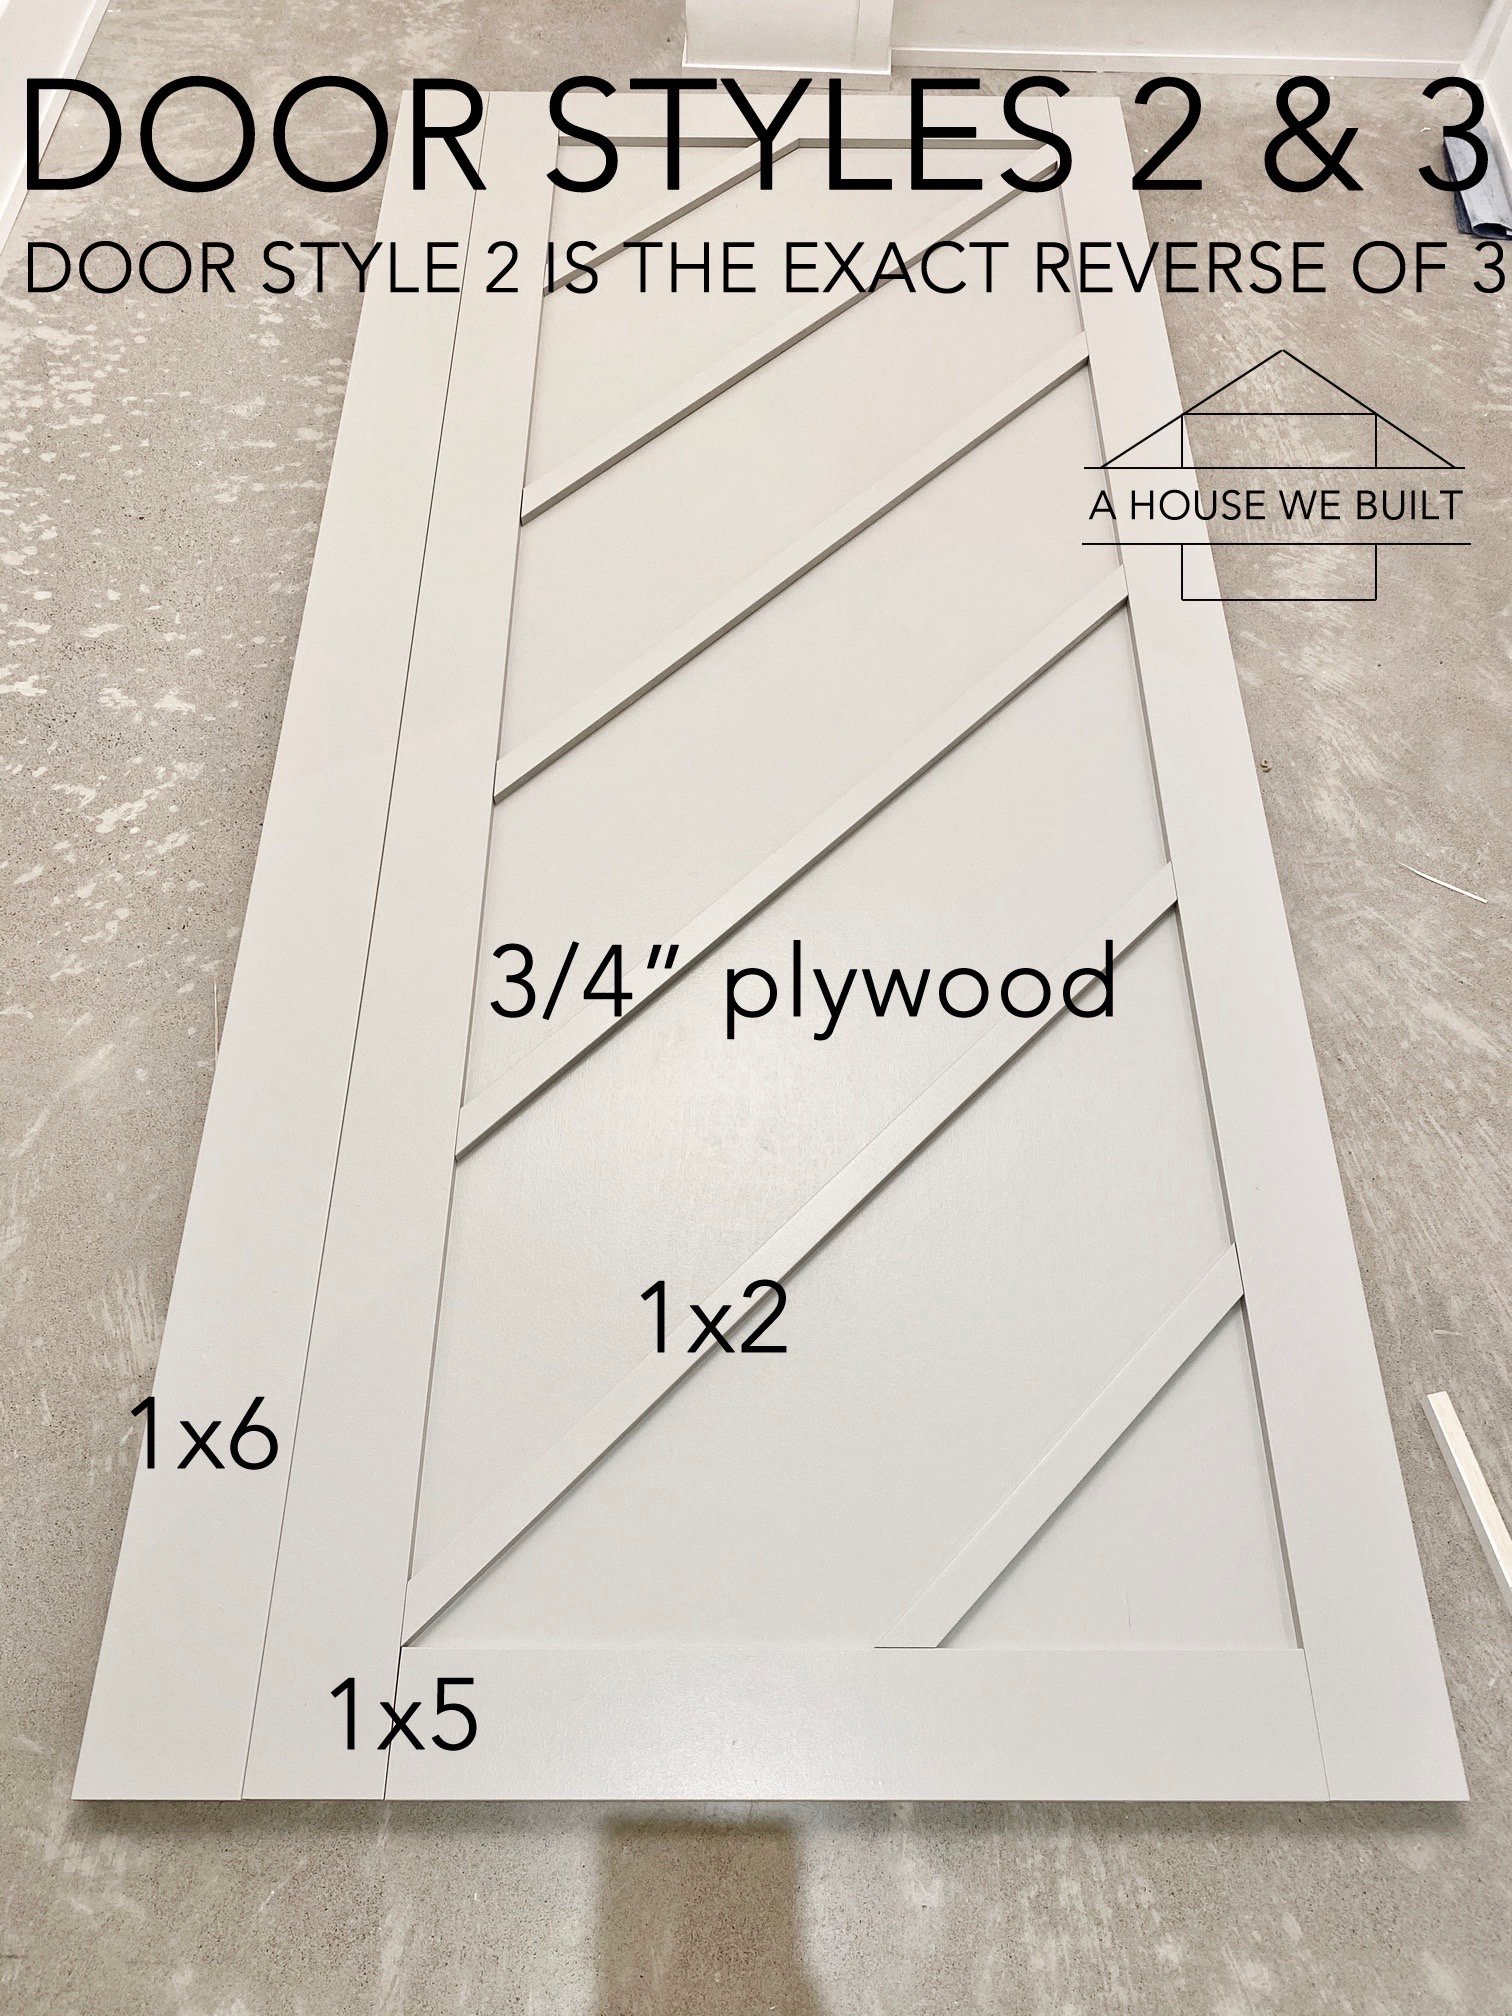
Raw materials for Doors 2 & 3, or our “Behind Doors” (so we needed this x 2):
- 1 x 3/4″x4’x8′ sanded plywood backer board cut down to size, per door
- 3 x 1″x5″x8′ MDF trim around the perimeter of each door, per door
- 3 x 1″x2″x8′ MDF trim for the slanted battens, per door
- 1 x 1″x6″x8′ MDF trim to cover the extra width, per door *
* This is explained in the “Accounting for Overlap” section of this tutorial below.
SUMMARY OF ALL RAW MATERIALS NEEDED FOR OUR 4 BARN DOORS:
- 4 x 3/4″x4’x8′ sanded plywood backer board cut down to size *
- 12 x 1″x5″x8′ MDF trim around the perimeter of each door
- 12 x 1″x2″x8′ MDF trim for the slanted battens
- 2 x 1″x6″x8′ MDF trim to cover the extra widths on “behind” doors
* Our doors are approximately 3.5 ft x 8 ft.
TOOLS NEEDED TO BUILD THE DOORS:
- Miter saw: Home Depot | Amazon
- Drill: Home Depot | Amazon
- Level: Home Depot | Amazon
- Measuring tape: Home Depot | Amazon
- Carpenter’s square: Home Depot | Amazon
- Nail gun (+ nails): Home Depot | Amazon
- Putty knife: Home Depot | Amazon
OTHER MATERIALS NEEDED:
- Wood filler: Home Depot | Amazon
- Sandpaper: Home Depot | Amazon
- Construction adhesive: Home Depot
- Paint: We used BM Revere Pewter in Satin
ACCESSORIES:
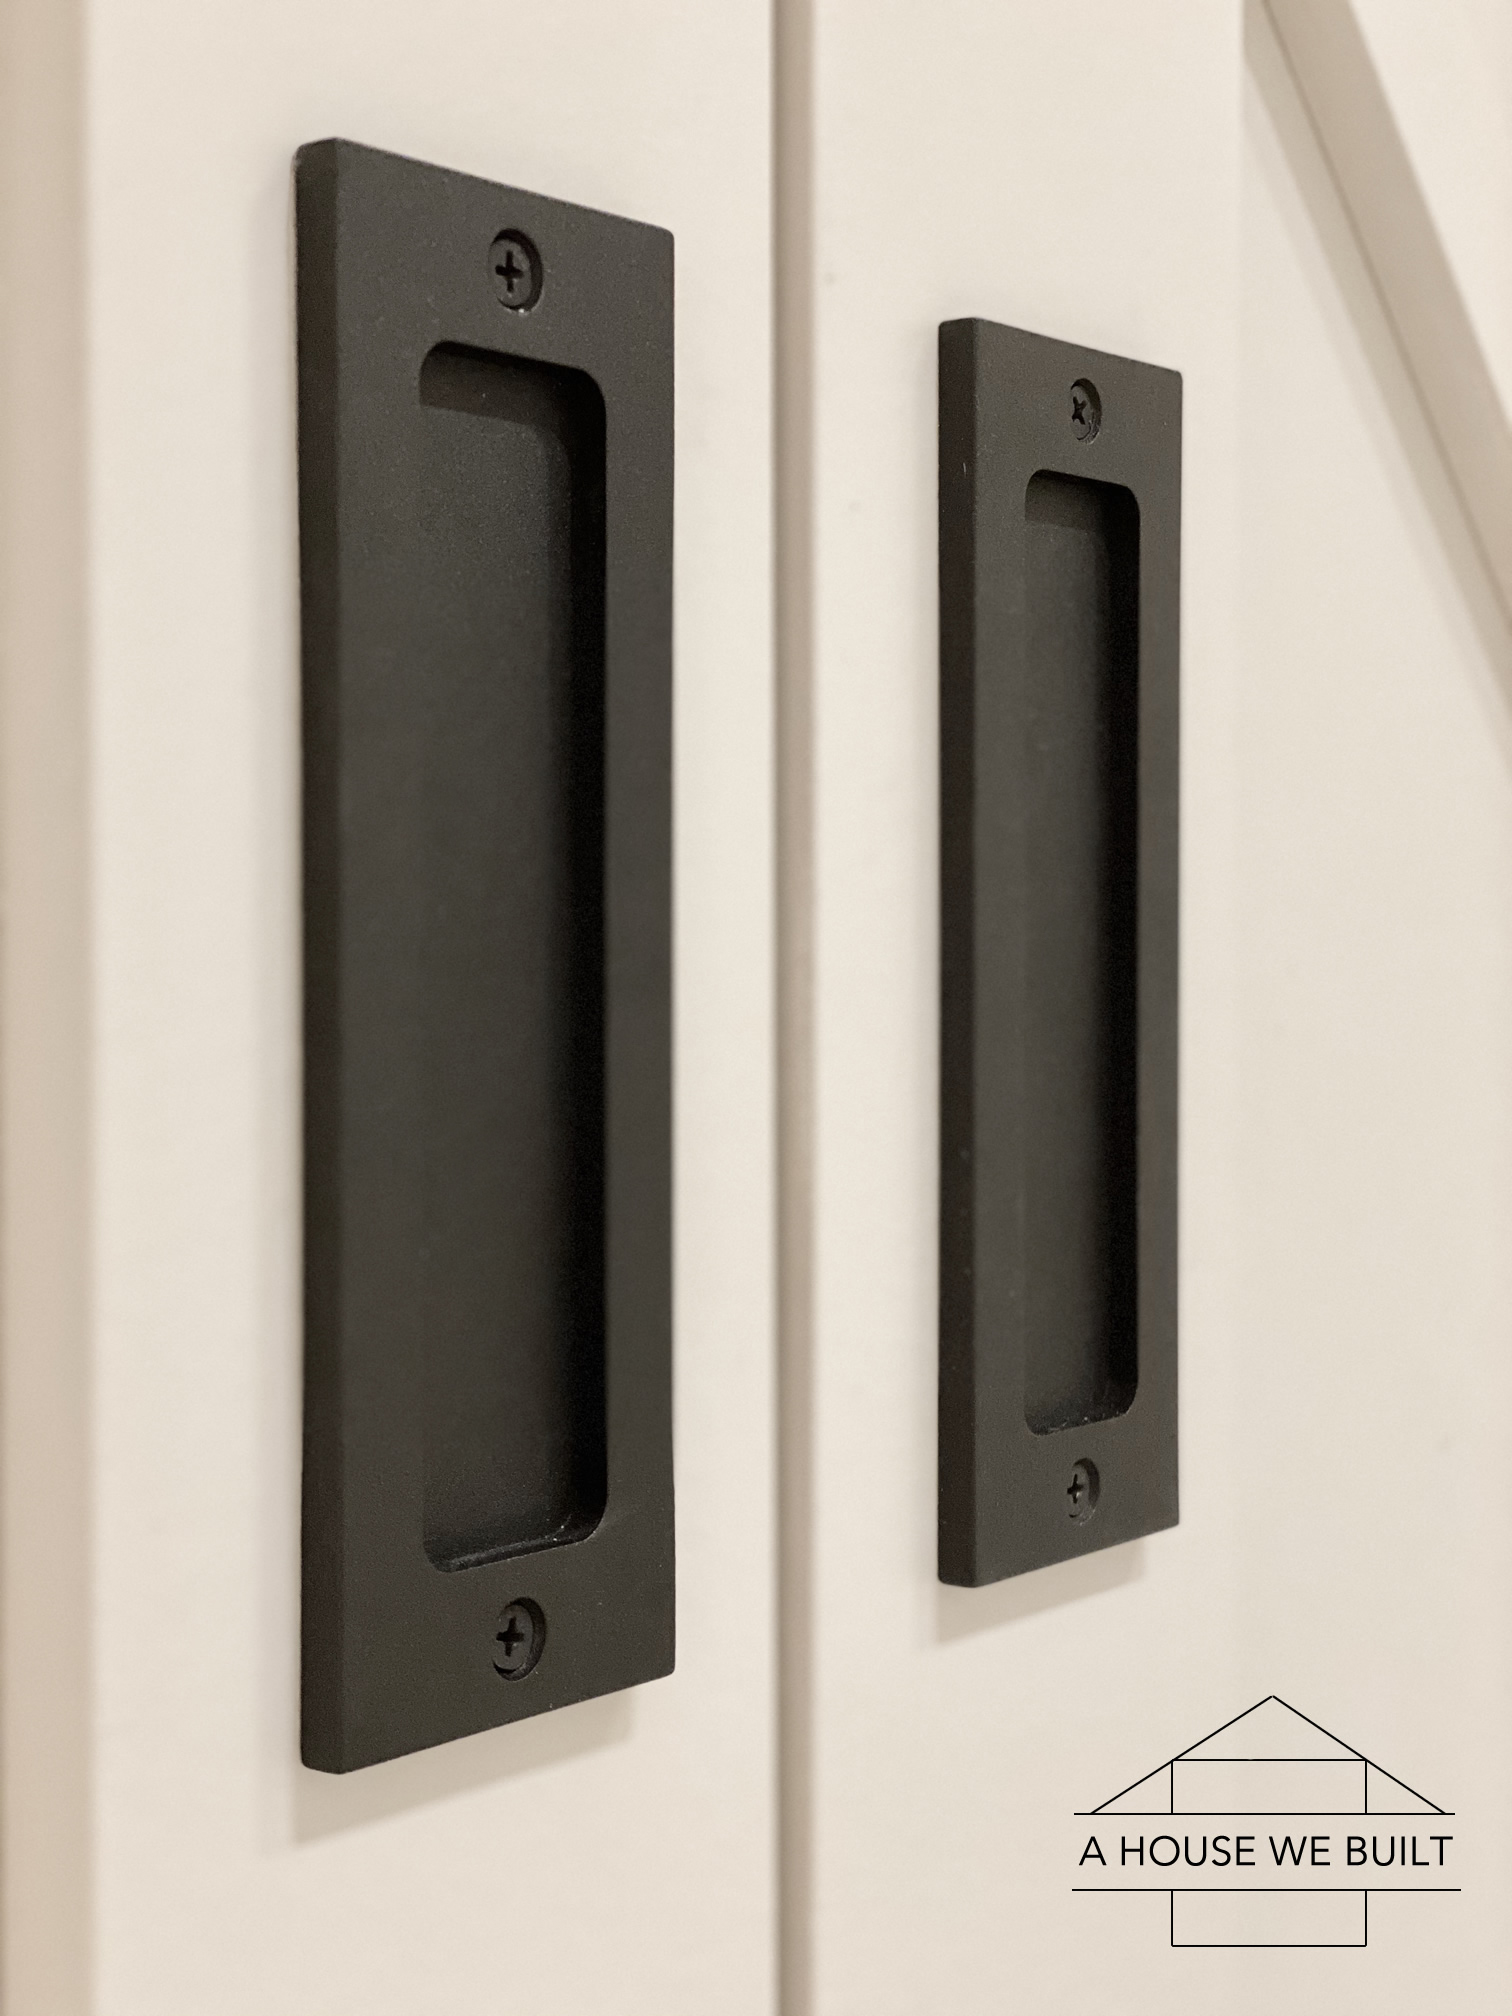
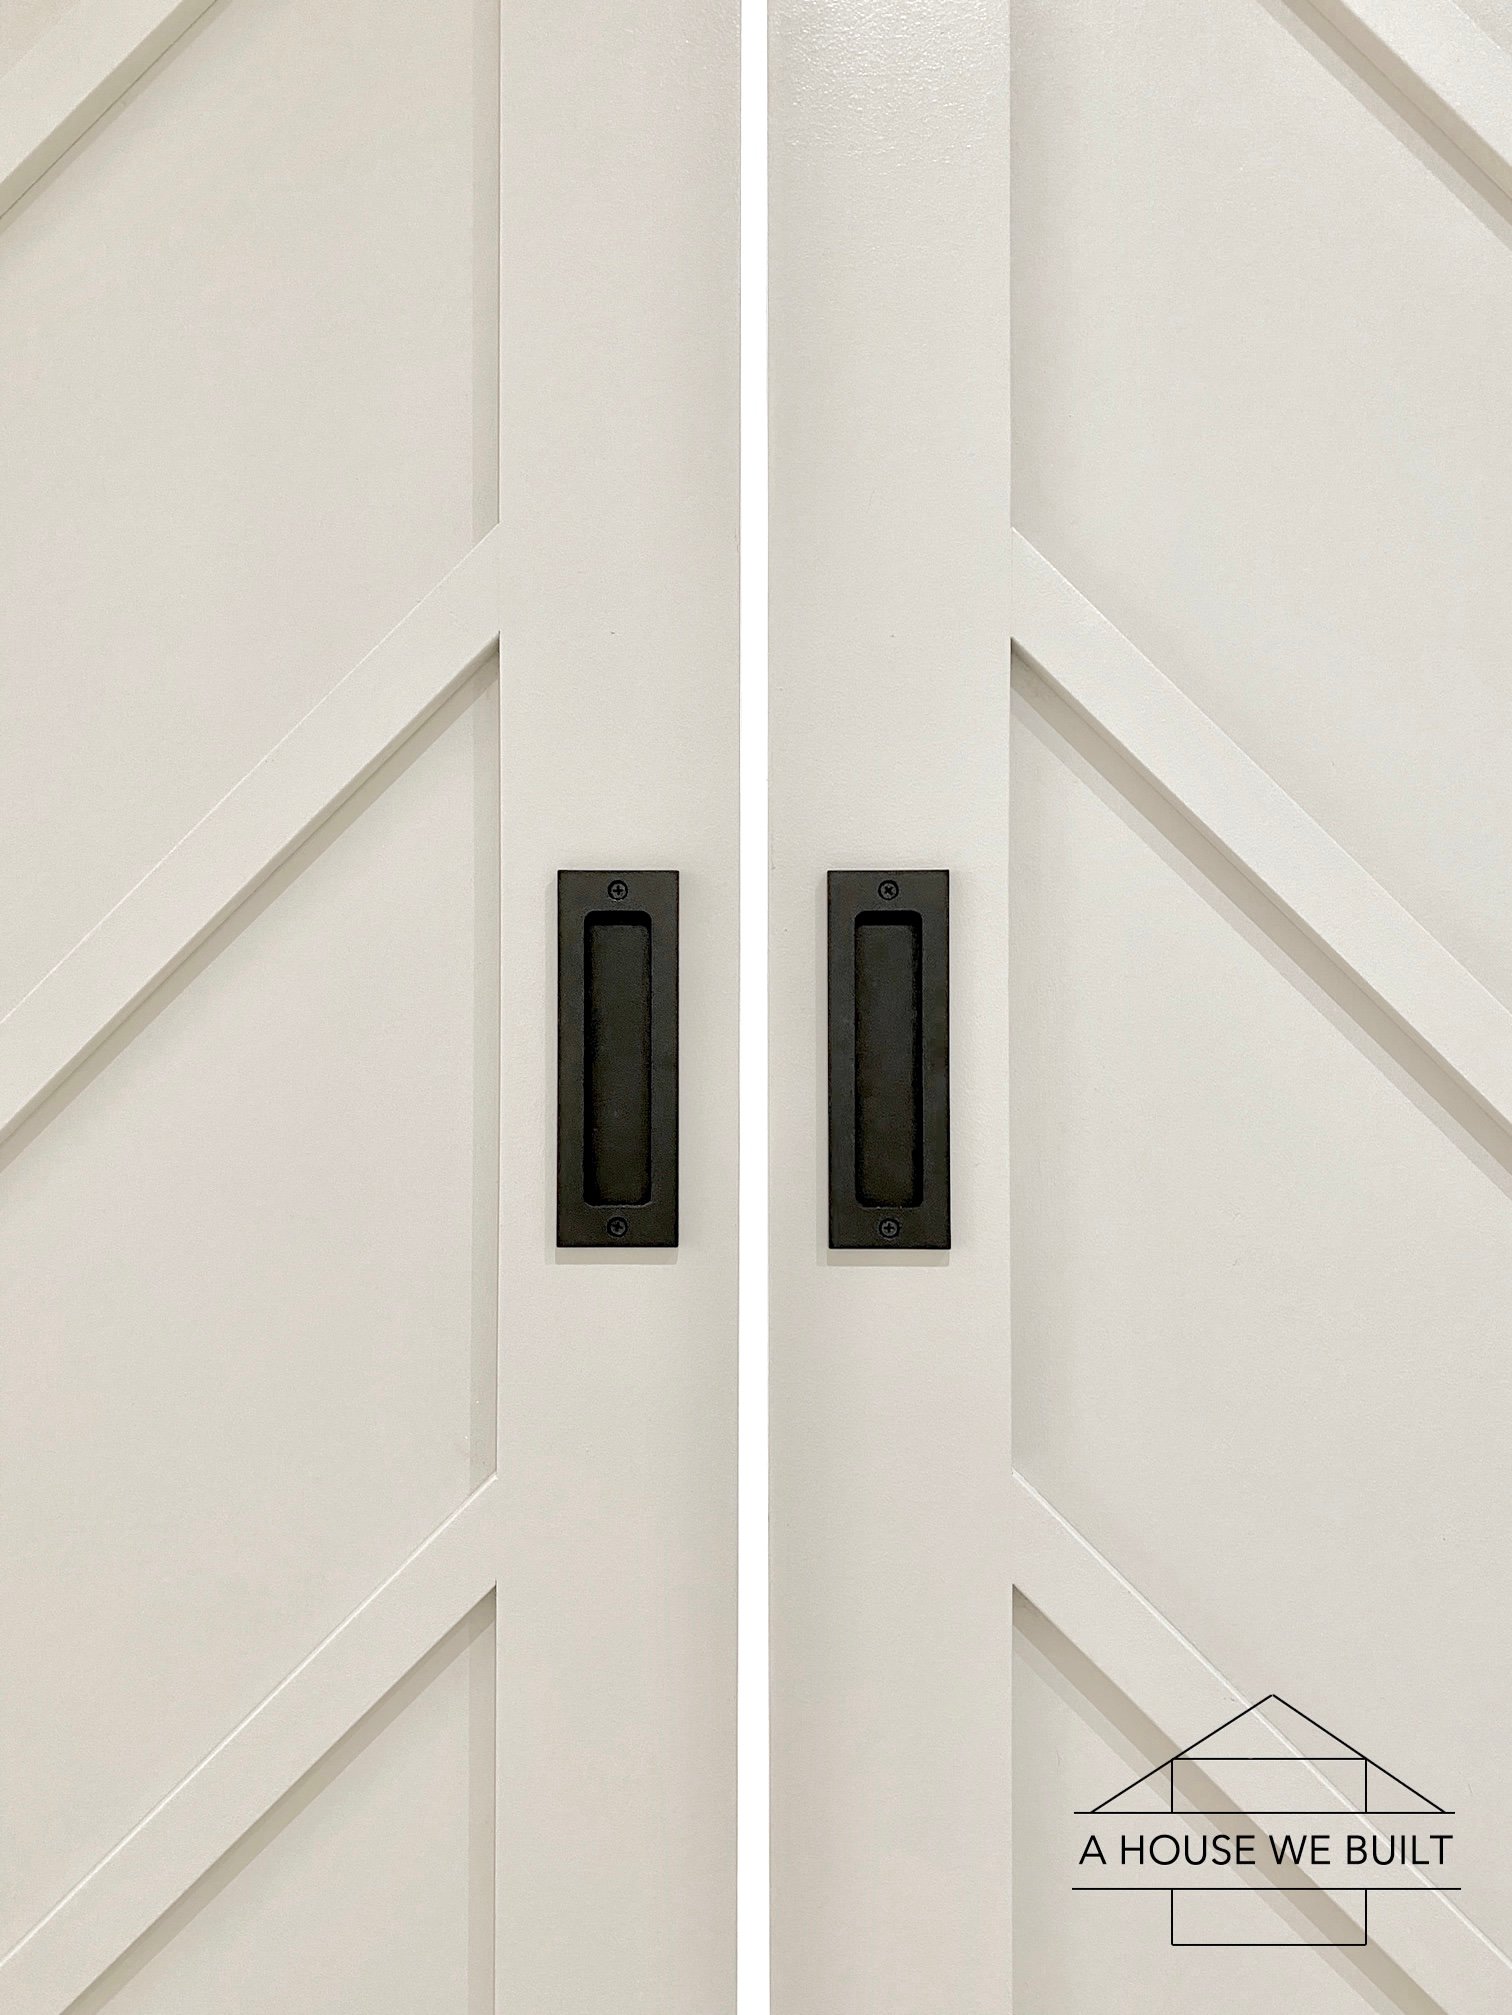
- Door pulls: Surface mounted: Amazon | With handle: Home Depot | Flush mount option (recessed into door): Overstock | Home Depot
BARN DOOR HARDWARE KITS:
- Single rail bypass: Amazon | Walmart *
- Double rail bypass: Amazon | Home Depot
- Single door: Amazon | Home Depot
- Double doors on single rail, no bypass: Amazon | Home Depot
* Our hardware is custom but we did a single rail bypass with four doors.
HARDWARE MOUNTING TIPS:
- You must have some kind of support/beam on/in your wall to mount your track on. We designed and built this part in our basement with the intention of having barn doors here so we did in a structural beam for our track to hang off. If you don’t have something like that, then you may want to consider some kind of wooden header bar to strengthen where the track hangs from because the weight of all the doors will hang off this so it can’t just be screwed into drywall.
- Follow the mounting directions on the hardware kit you get because each one will be slightly different. For our bypass track though essentially it was just bolted to the wall with offsets.
- Make sure your track is level!!!!!! This is seriously so, so, so, so, so important.
- Mount the track to your wall before you take your final door measurements.
BARN DOOR BUILDING INSTRUCTIONS:
Note 1: these instructions can apply to any barn door design that is a combination of a backer board and trim on top, so these instructions are adaptable to many different barn door styles other than our design.
Note 2: we pre-painted all individual pieces before assembly. Pre-painting is just my personal preference, but not necessary. If you don’t want to pre-paint, ignore all paint references and paint/stain at the end.
Note 3: if you’re building bypass barn doors, you must read my “Accounting for Overlap in Bypass Barn Doors” tip below these instructions before you build anything! I just put it at the end because it only applies to bypass doors and if you’re just building regular non-bypassing doors, then it’s not relevant.
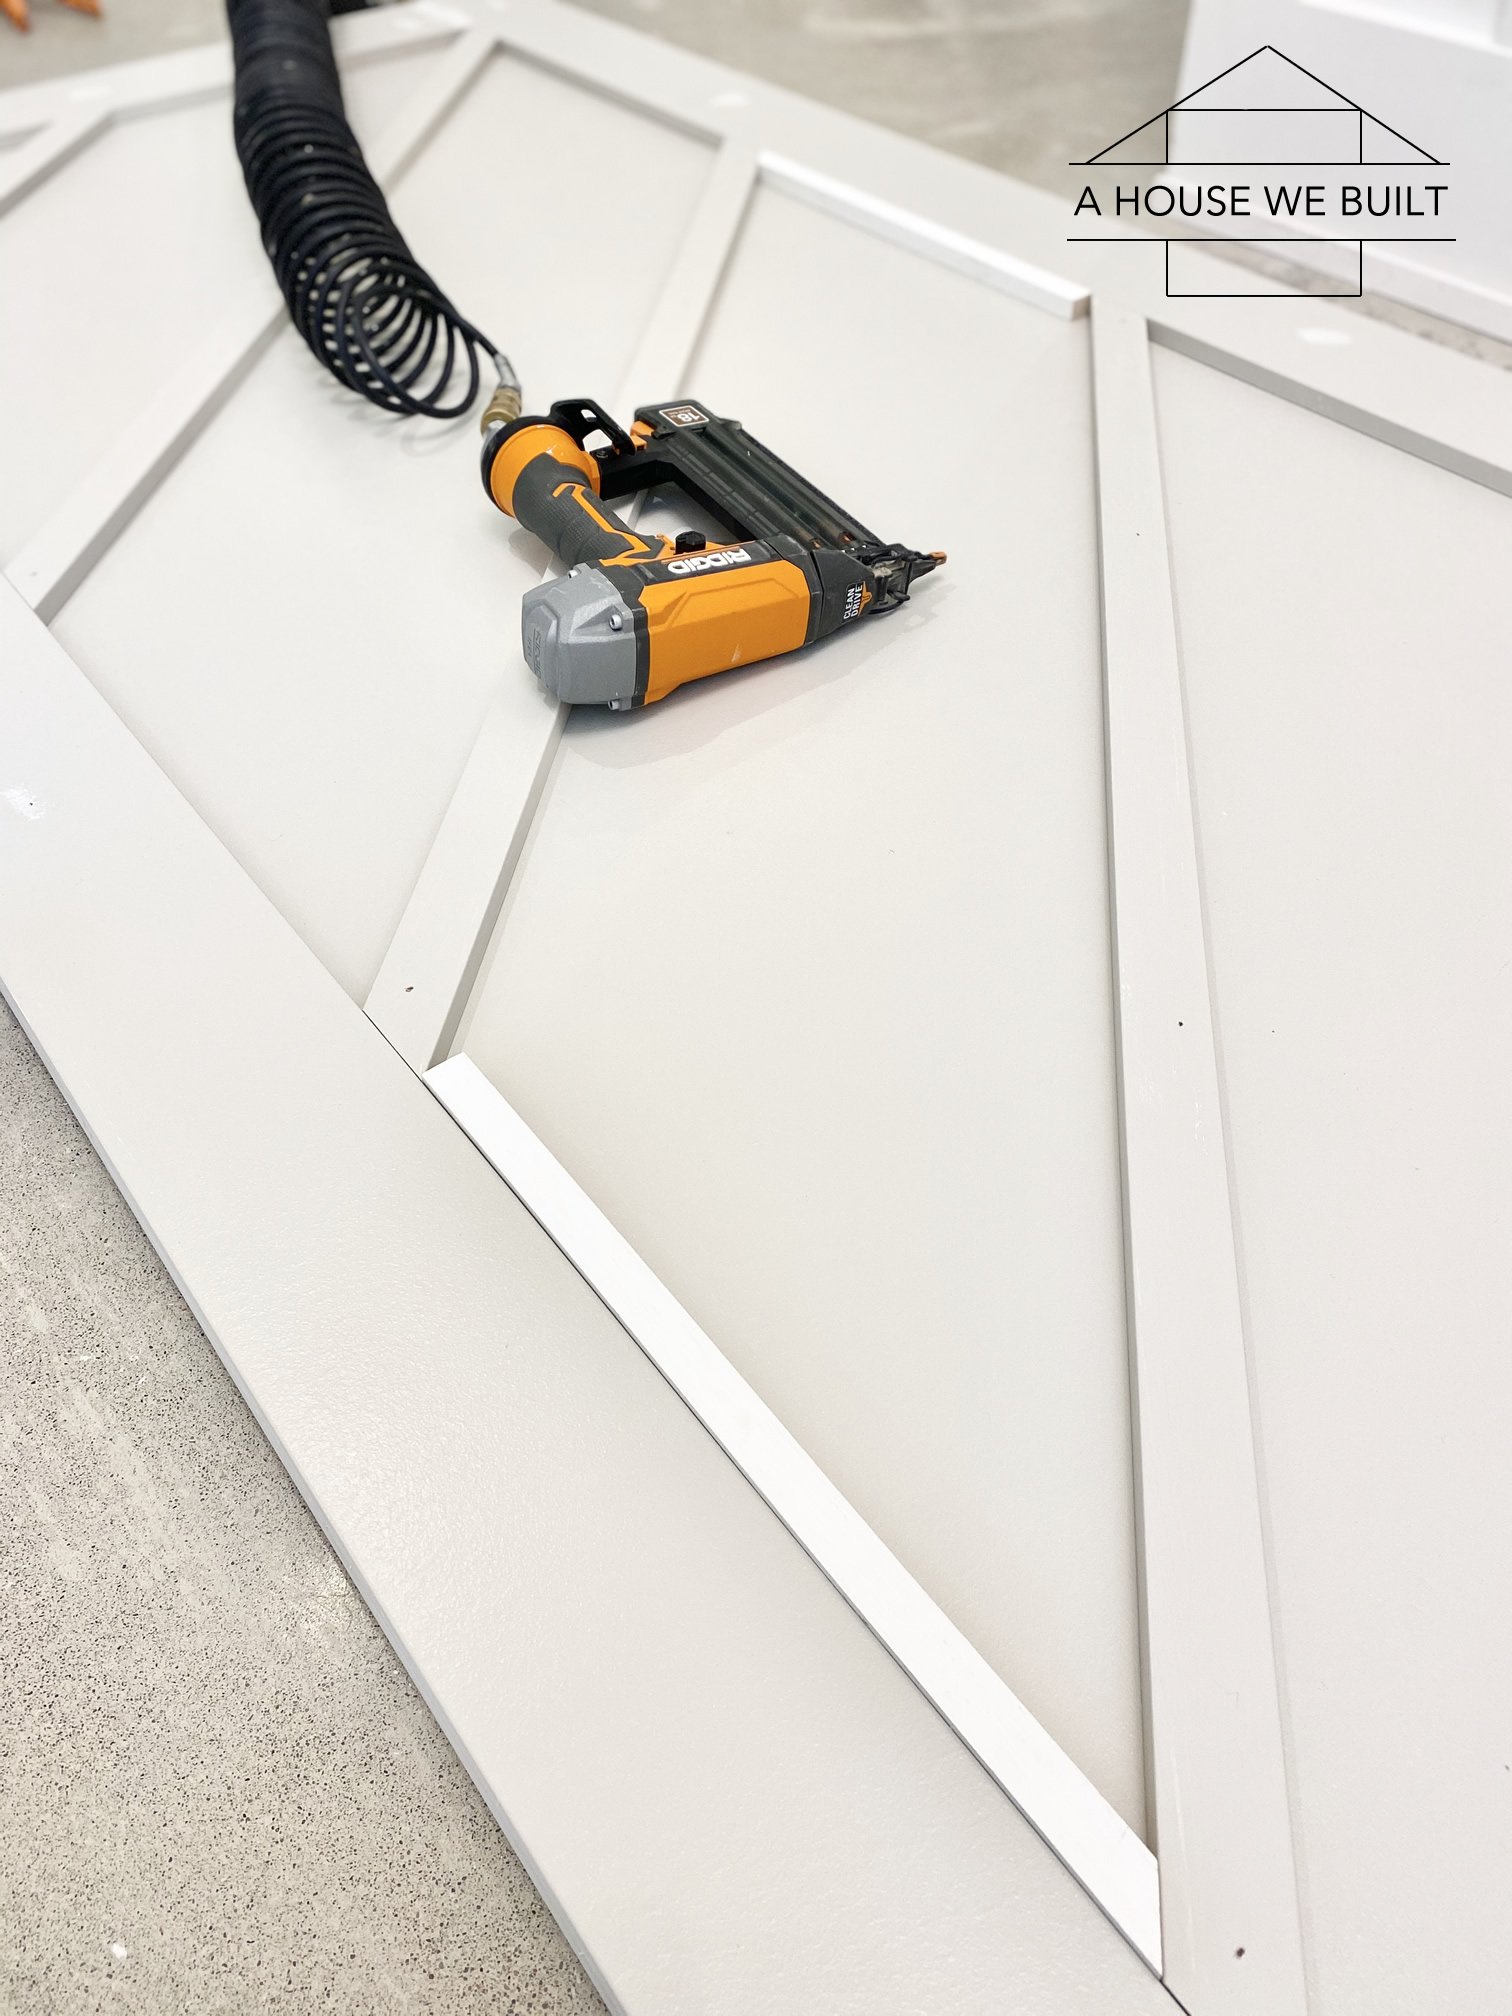
Note 4: You may notice that the timeline in my pics doesn’t fully line up with these instructions and that’s because on our first door (which I took progress pics of), we weren’t as confident so we painted each set of trim as we cut them instead of cutting everything up front, which is how we did the rest of the doors.
- Cut the plywood backer board down to the size you want your door. (ours are approx 3.5′ x 8′)
- Use wood filler on any imperfections. Once dry, sand and paint both sides. Once the first coat of paint has dried, sand the entire surface lightly, and once it’s smooth then paint the second coat.
- Cut all your perimeter trim to size. The vertical side pieces are the same height as your door panel. The short header/footer pieces are the width of the door minus the width of the side trim pieces.
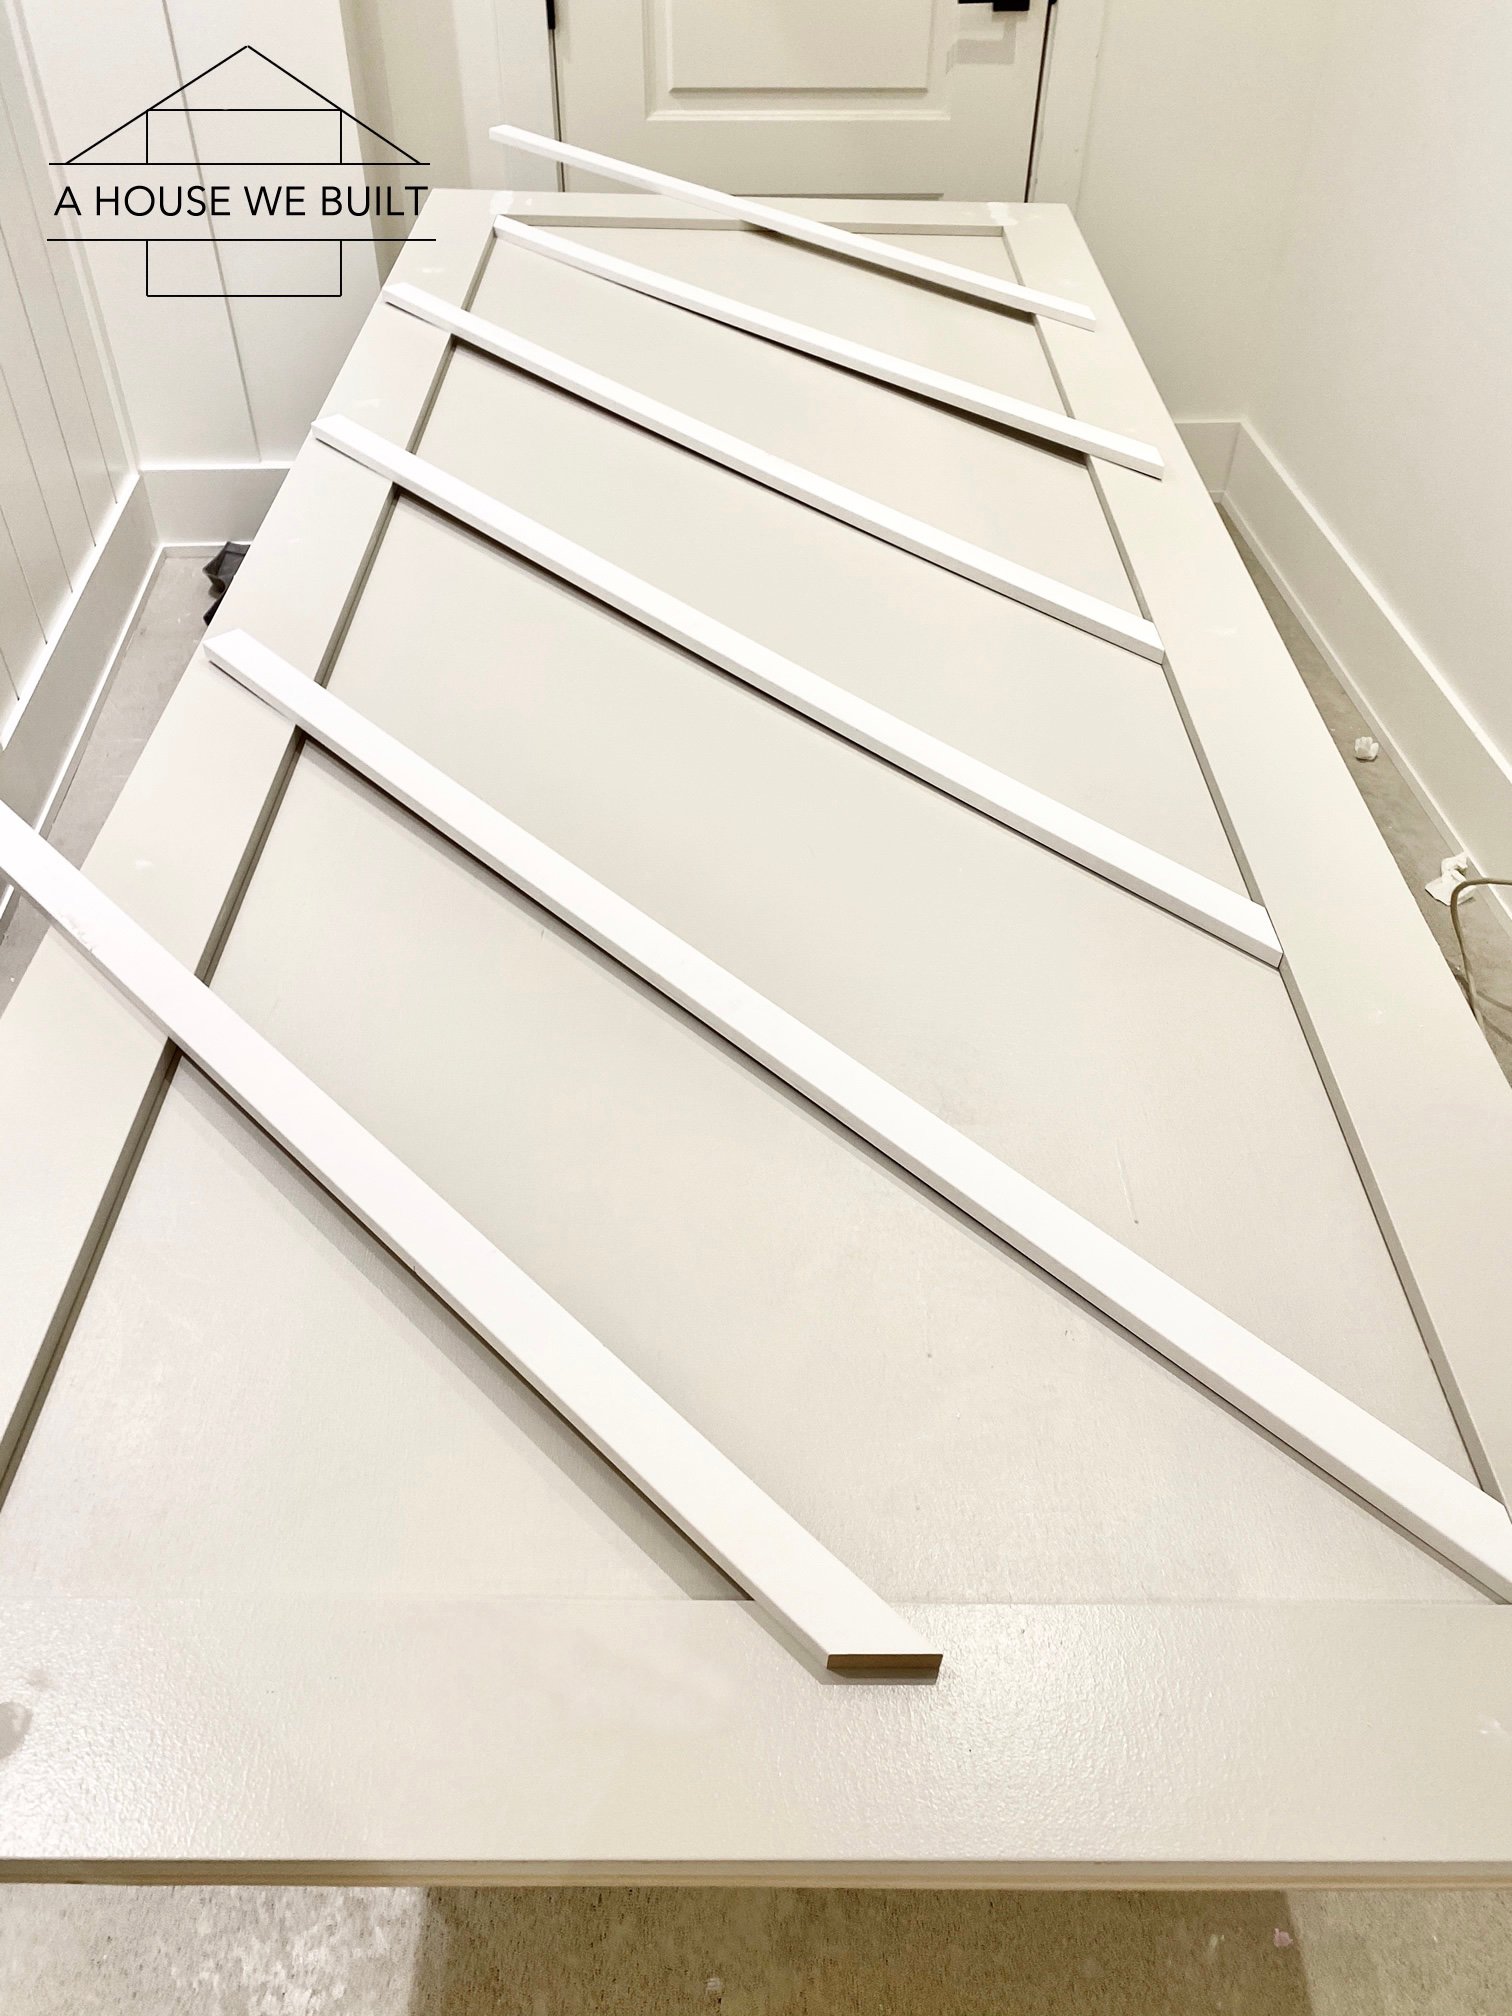
- Cut your battens to size. For the first door, while we were figuring out the measurements, we cut them all in half to 48″ and cut one side to 45*, then placed them on the door and used them to measure the length. We had two batten sizes in total (one long, one short), so once we determined those lengths, we just used those battens to mark the length on all the rest of them. The first one is the hardest, all the rest are easy. Note: the battens on Doors 1 & 3 have exact opposite angles as Doors 2 & 4. (We also created a spacer guide cut to the space between the battens.)
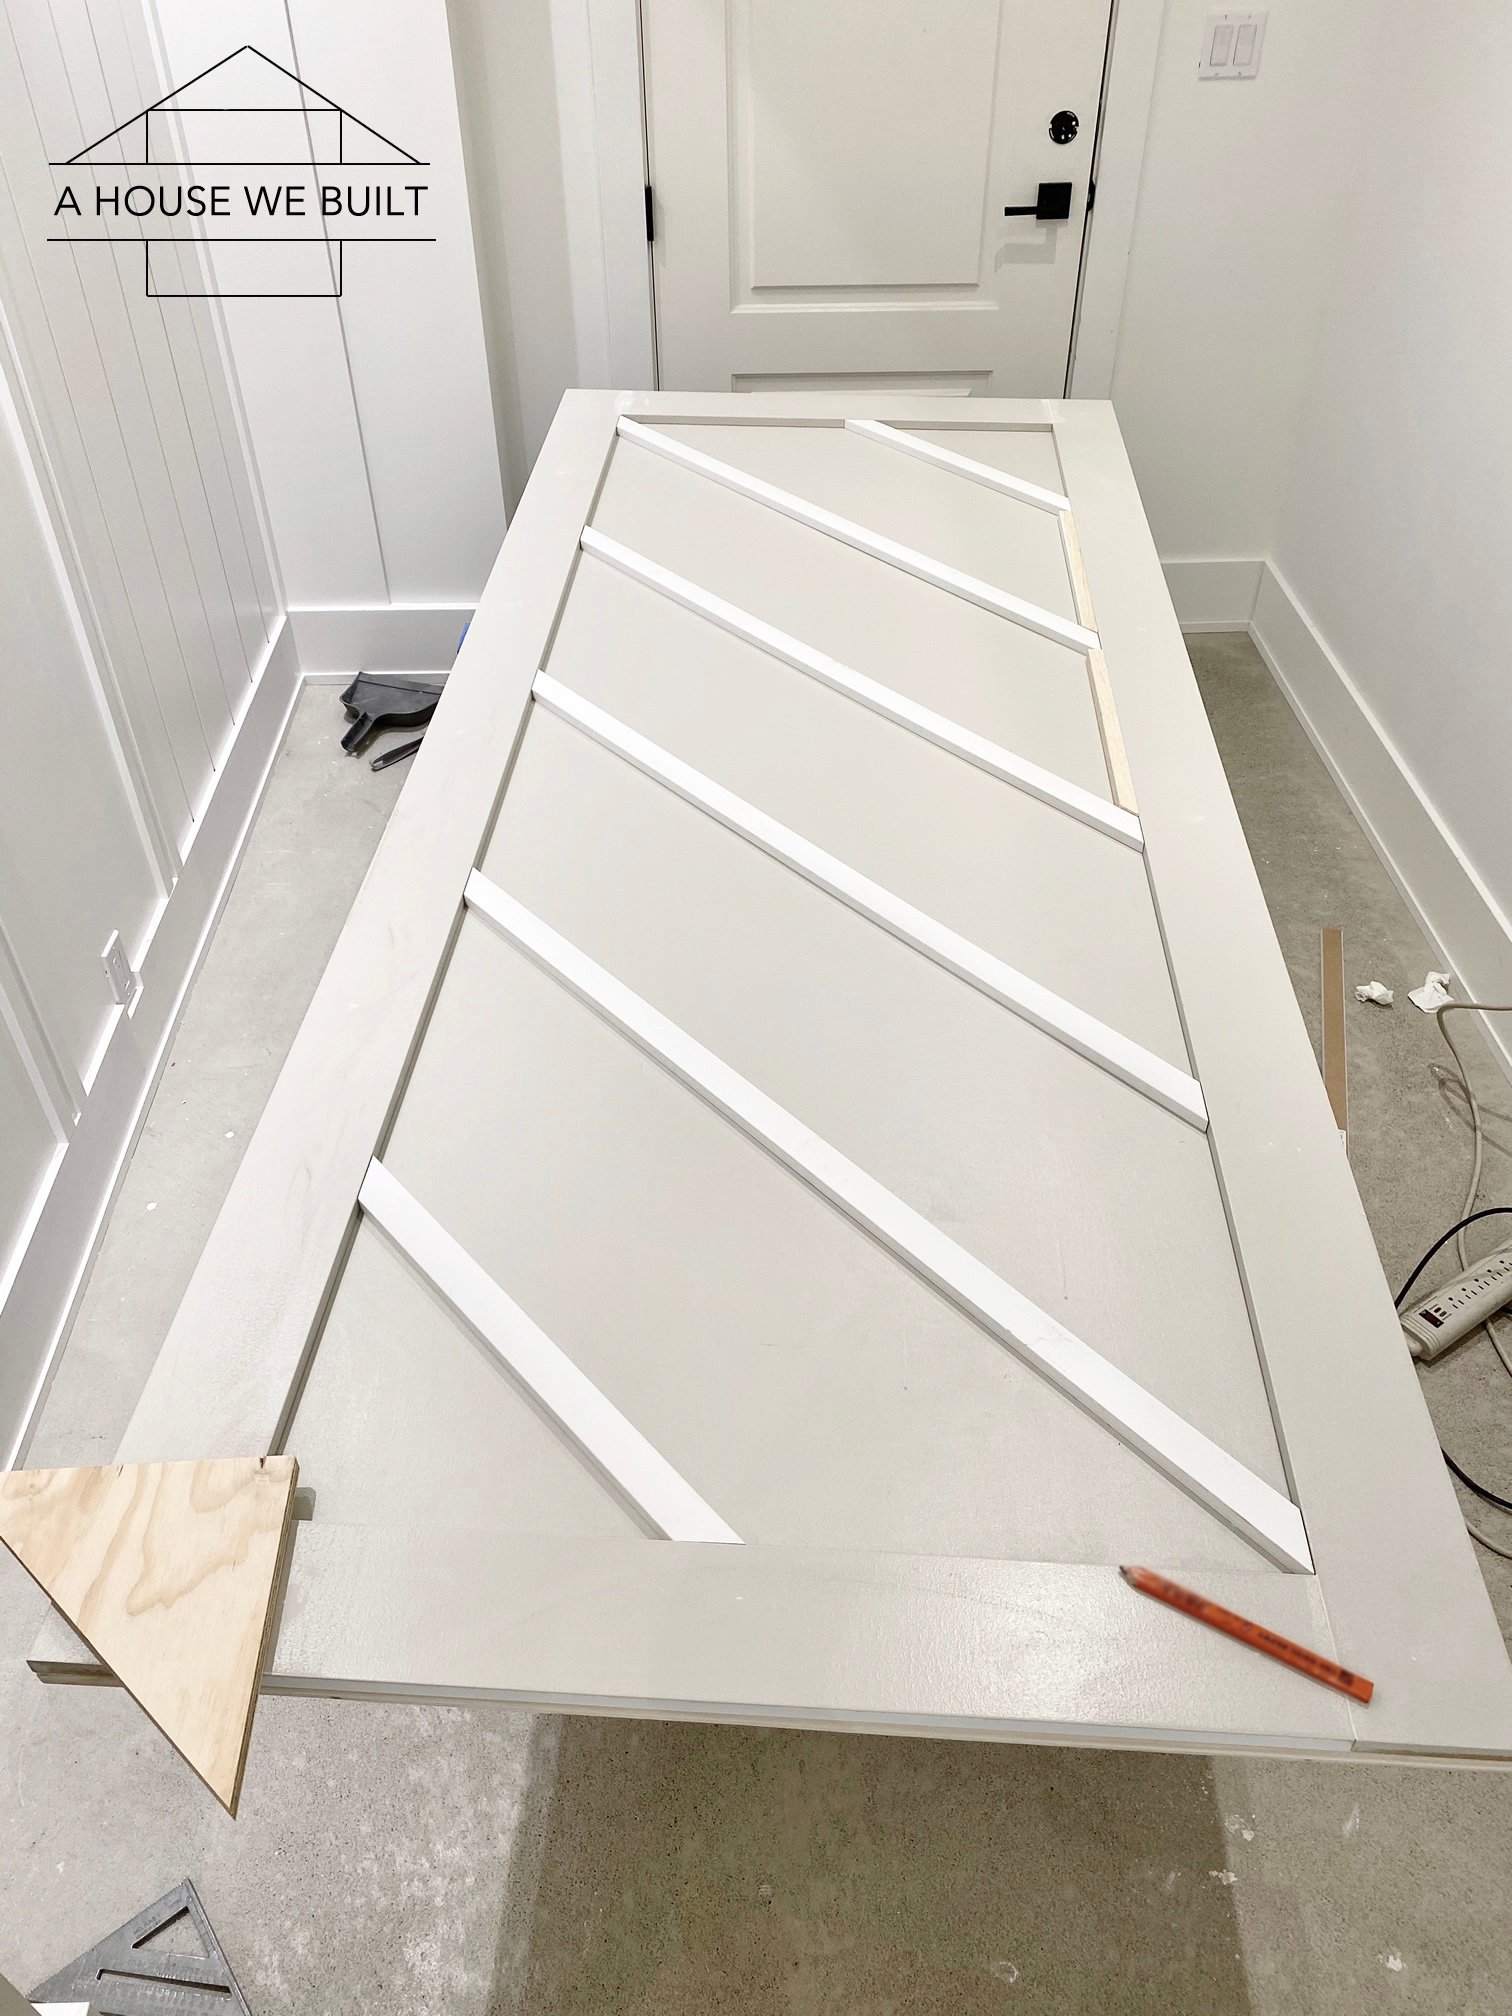
- Dry-fit all the trim & battens on the backer board just to make sure you measured and cut everything properly and that all the pieces fit perfect as intended before moving to the next step.
- Paint all your trim & battens. I use a brush & roller because it’s easier cleanup than a sprayer.
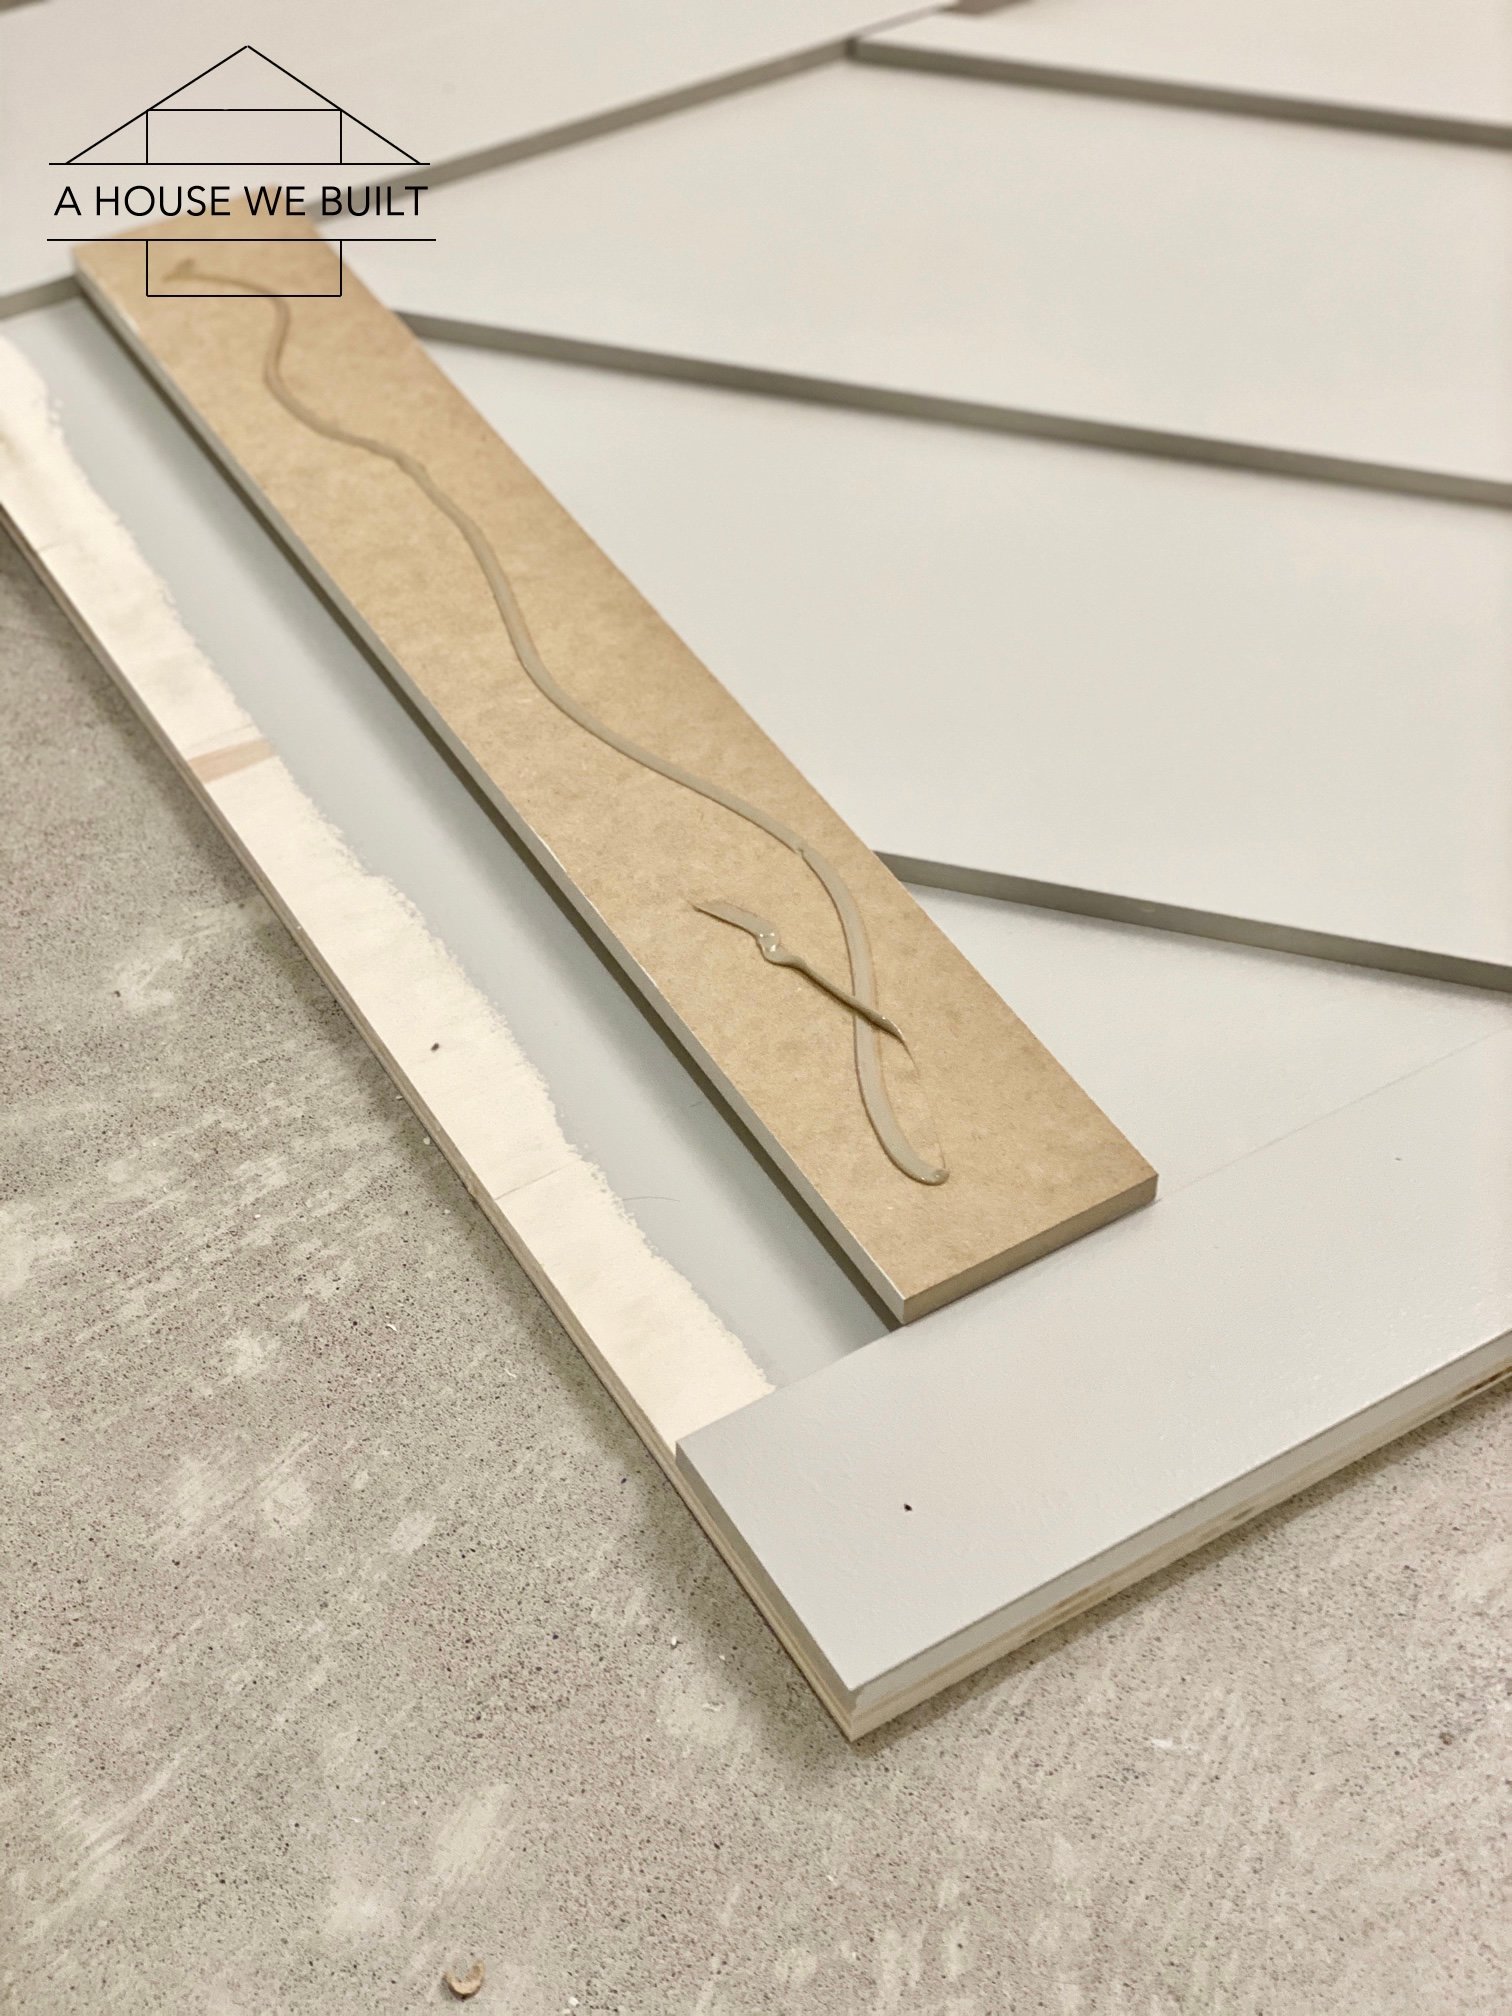
- Attach all the trim to your door with adhesive and nails. Start with your perimeter trim (first do the long side pieces, then the two shorter header/footer pieces). Next, attach the battens.
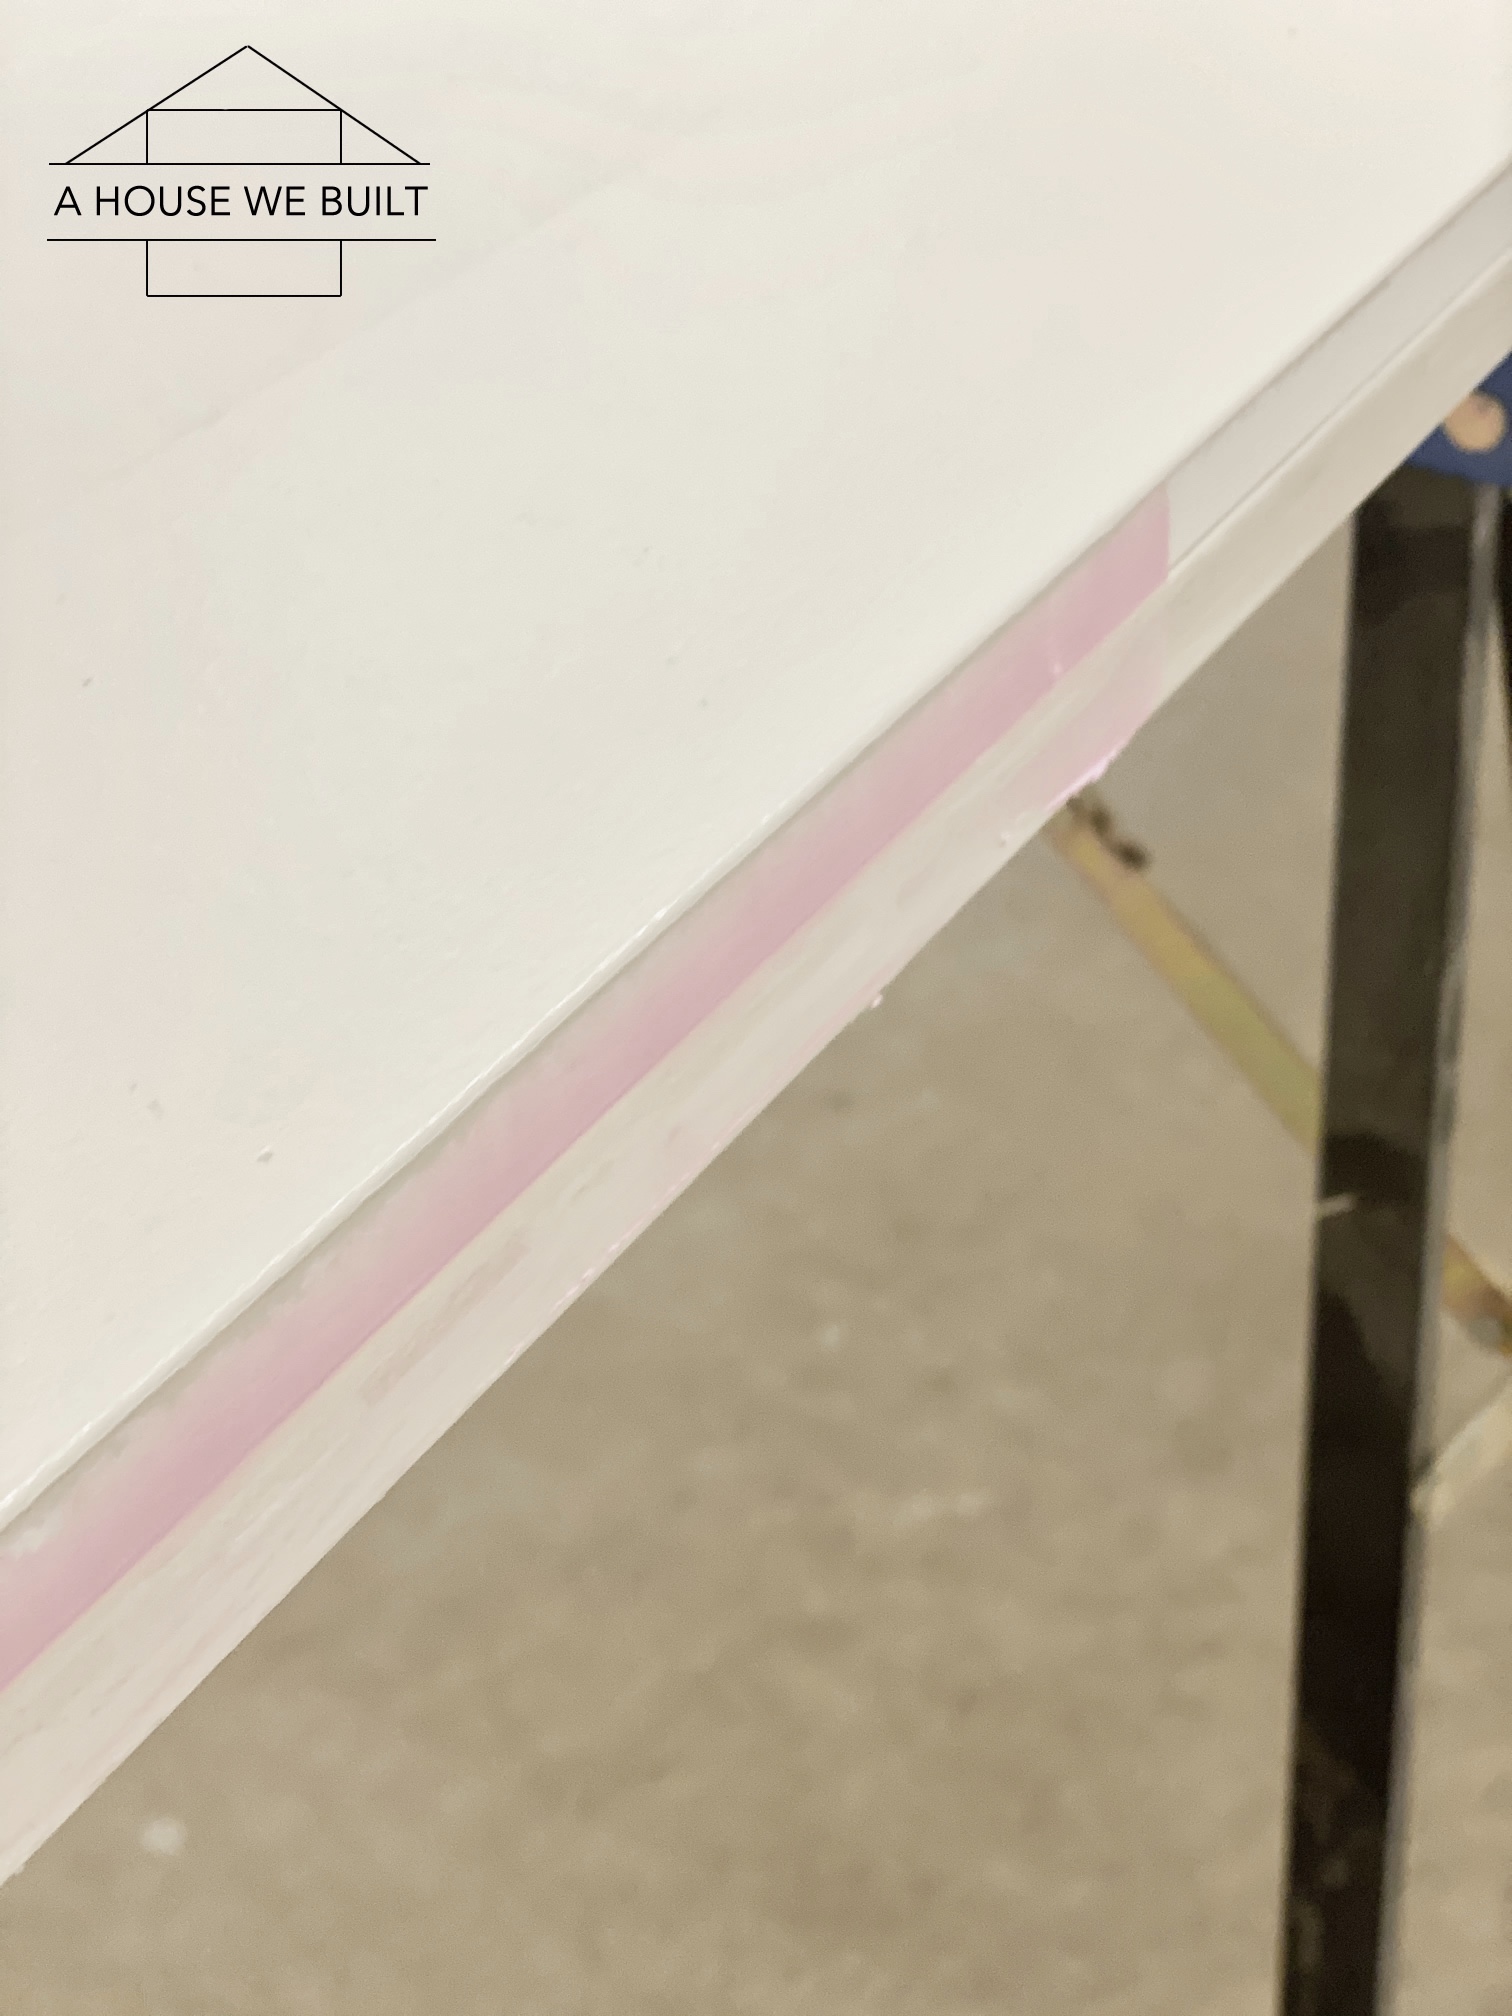
- Wood filler all the nail holes, seams between trim pieces, and the two long exterior sides of the doors (where the plywood and trim meet) to visually erase all seams between boards.
- Once dry, sand all the wood filler spots down (including the two exterior long sides of the doors), then touch up the paint where needed (I actually re-rollered the top of all the trim with a small roller).
- Attach the door pulls. (We did this after our doors were hung but if you know where you want your pulls at this point in the building process, then you can just attach them now.)
- Attach the hangers to your doors according your hardware’s guidelines. Essentially, you just drill holes in alignment with the holes on your hangers and bolt the hangers to the door.
- Hang the doors. If you have bypass doors, start with the “behind” doors.
- Install door stops and floor guides (should come with your hardware kit).
ACCOUNTING FOR OVERLAP IN BYPASS BARN DOORS:
If you’re building bypass barn doors (especially on a single rail), this is VERY IMPORTANT. This is why our “behind” doors are different widths than our “front” doors. See, everywhere says “do about an inch of overlap” between bypass doors but that does not work if you want the full design of your “behind” door to be visible from the front! This seems painfully obvious in hindsight, but I didn’t see anyone mention it so I didn’t consider it until after we’d built our first 4 doors. So I’m sharing both our mistake and our solution.
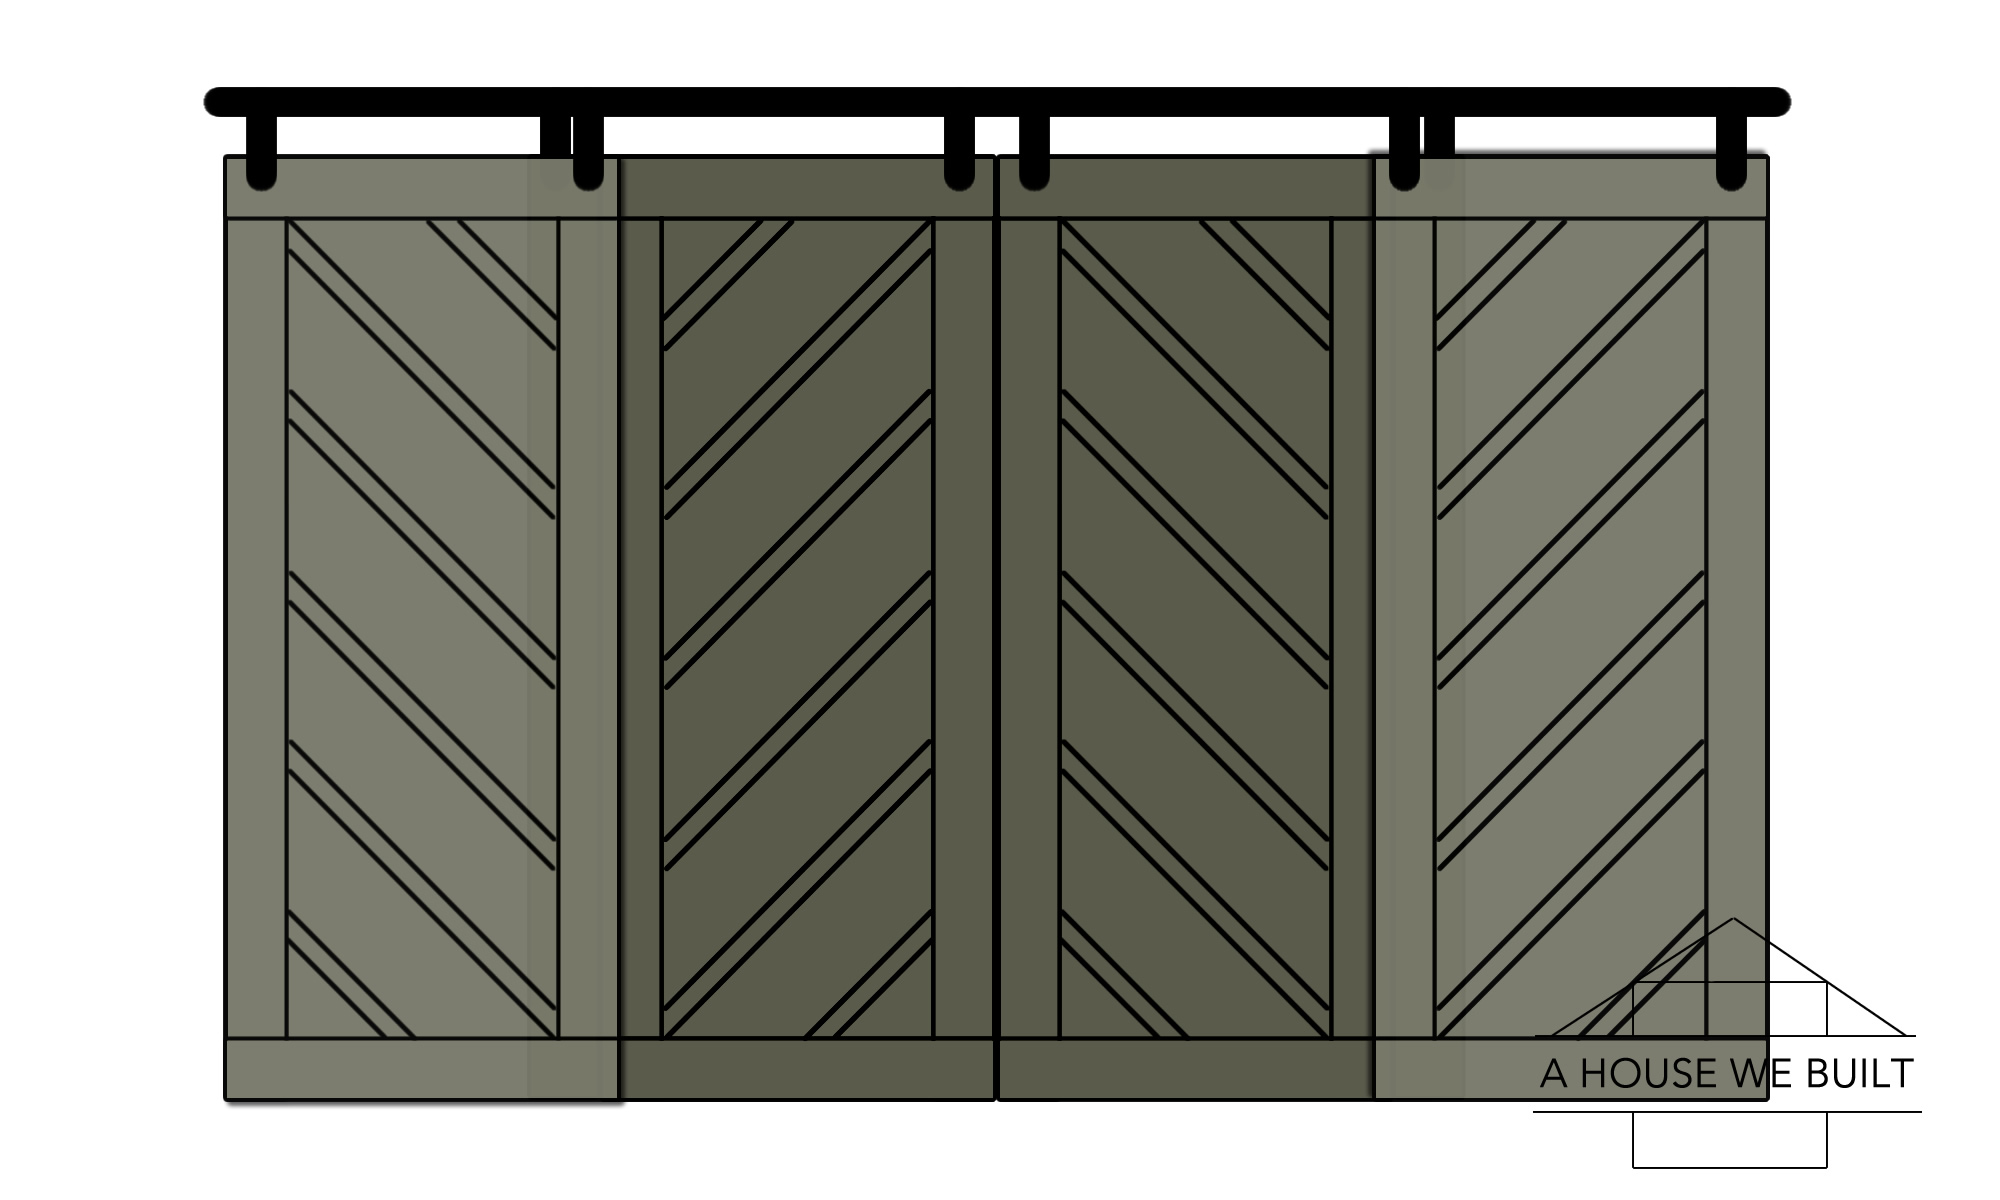
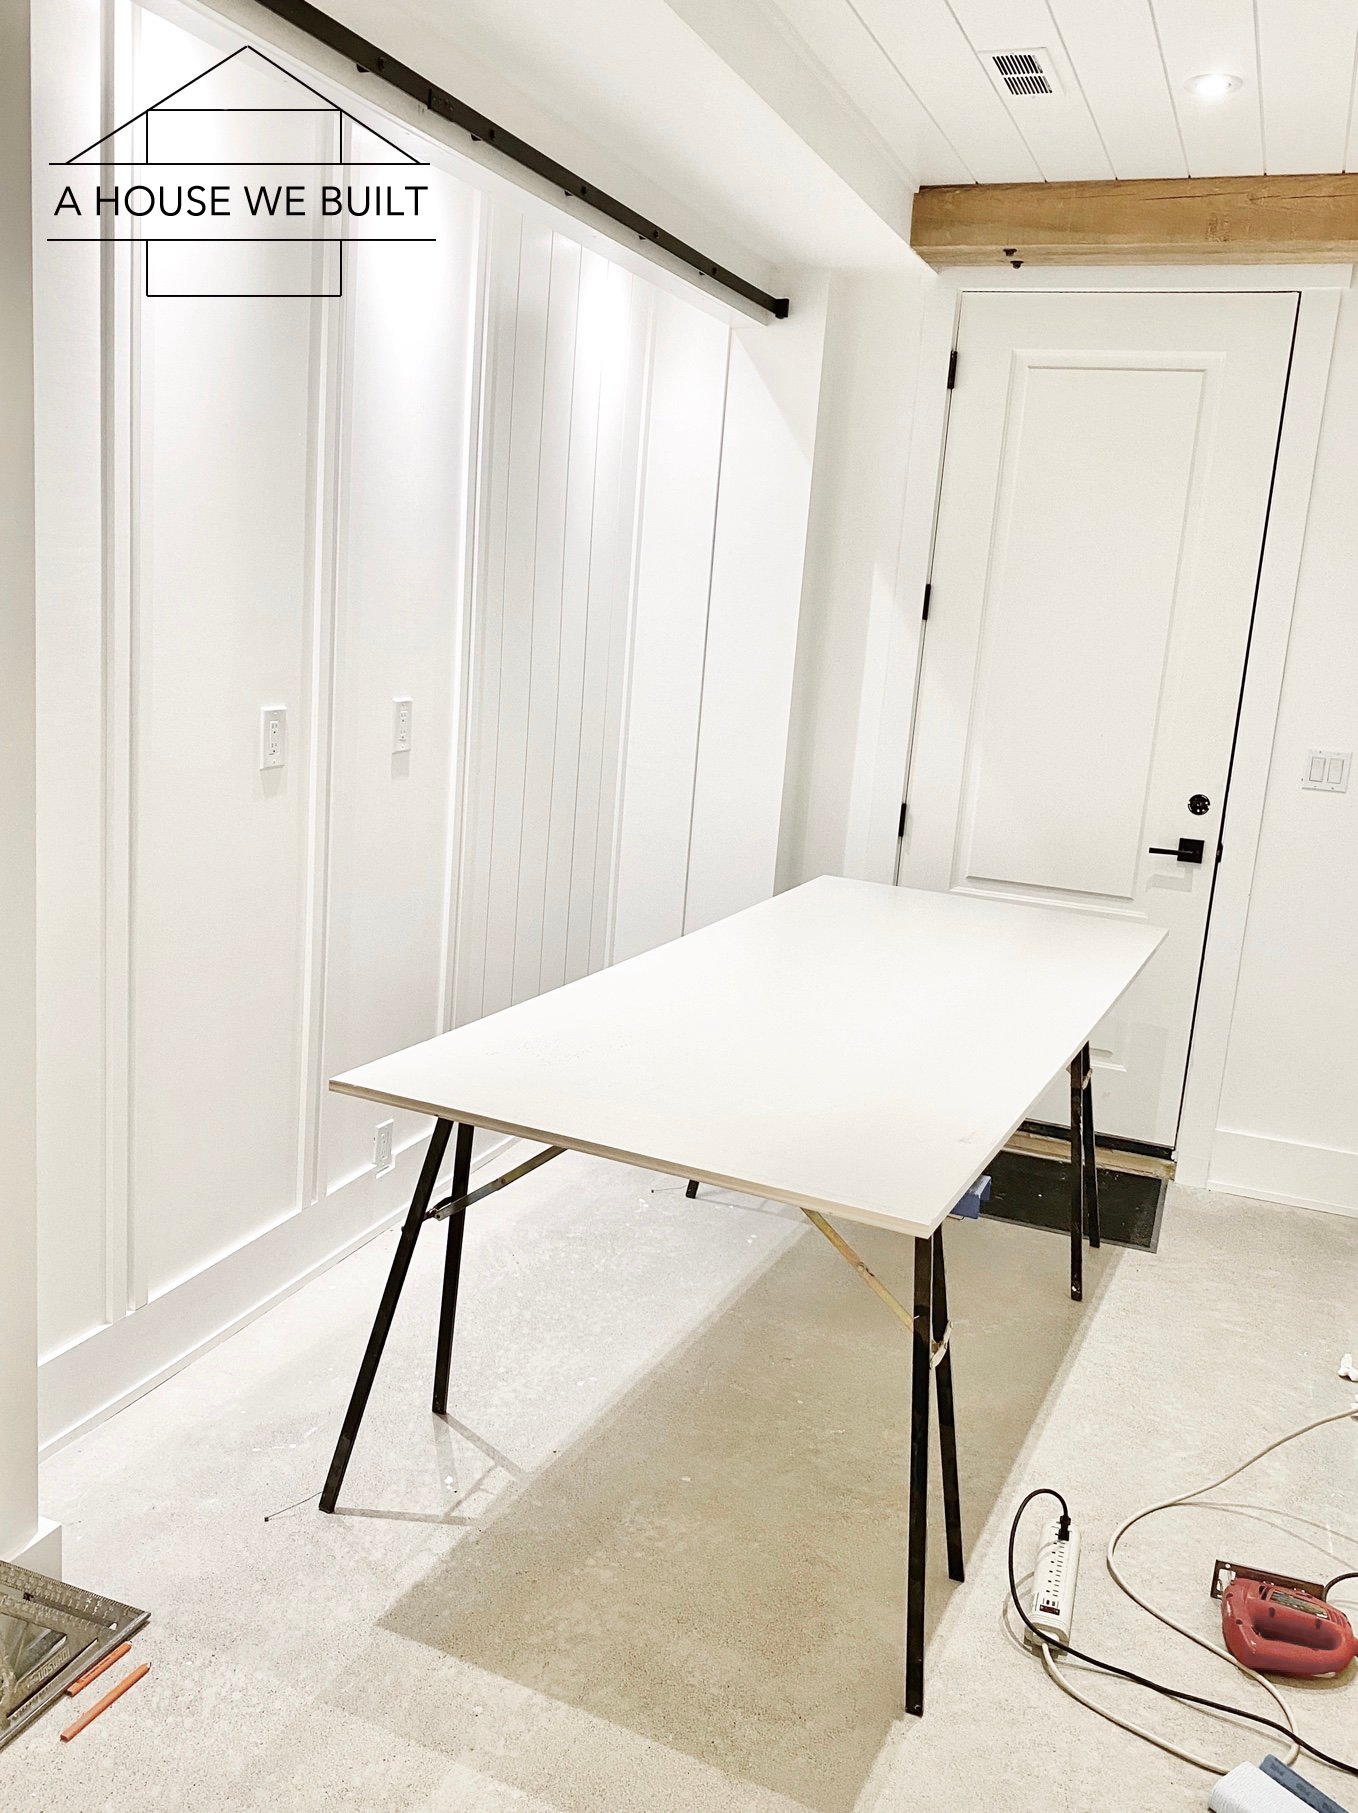
Let me explain: If you take the full width of your space and divide by the number of doors you’re going to do, then add one inch of overlap and build 4 doors that are exactly the same size on a single track bypass system, as you can see in the picture below, several inches of the design on the “Behind” doors (in our case: Doors 2 & 3) are visually lost behind the “Front” doors (in our case: Doors 1 & 4).
Furthermore, due to the overlap, the total width of the doors no longer covers the total width of the track (duh, right? *sigh*). But if you’re wondering why we didn’t just build wider doors, that’s because while wider doors would solve the problem of physically covering the space, the visual design would still be equally messed up from the overlaps partially hiding the “behind” doors. Let me show you what I mean:
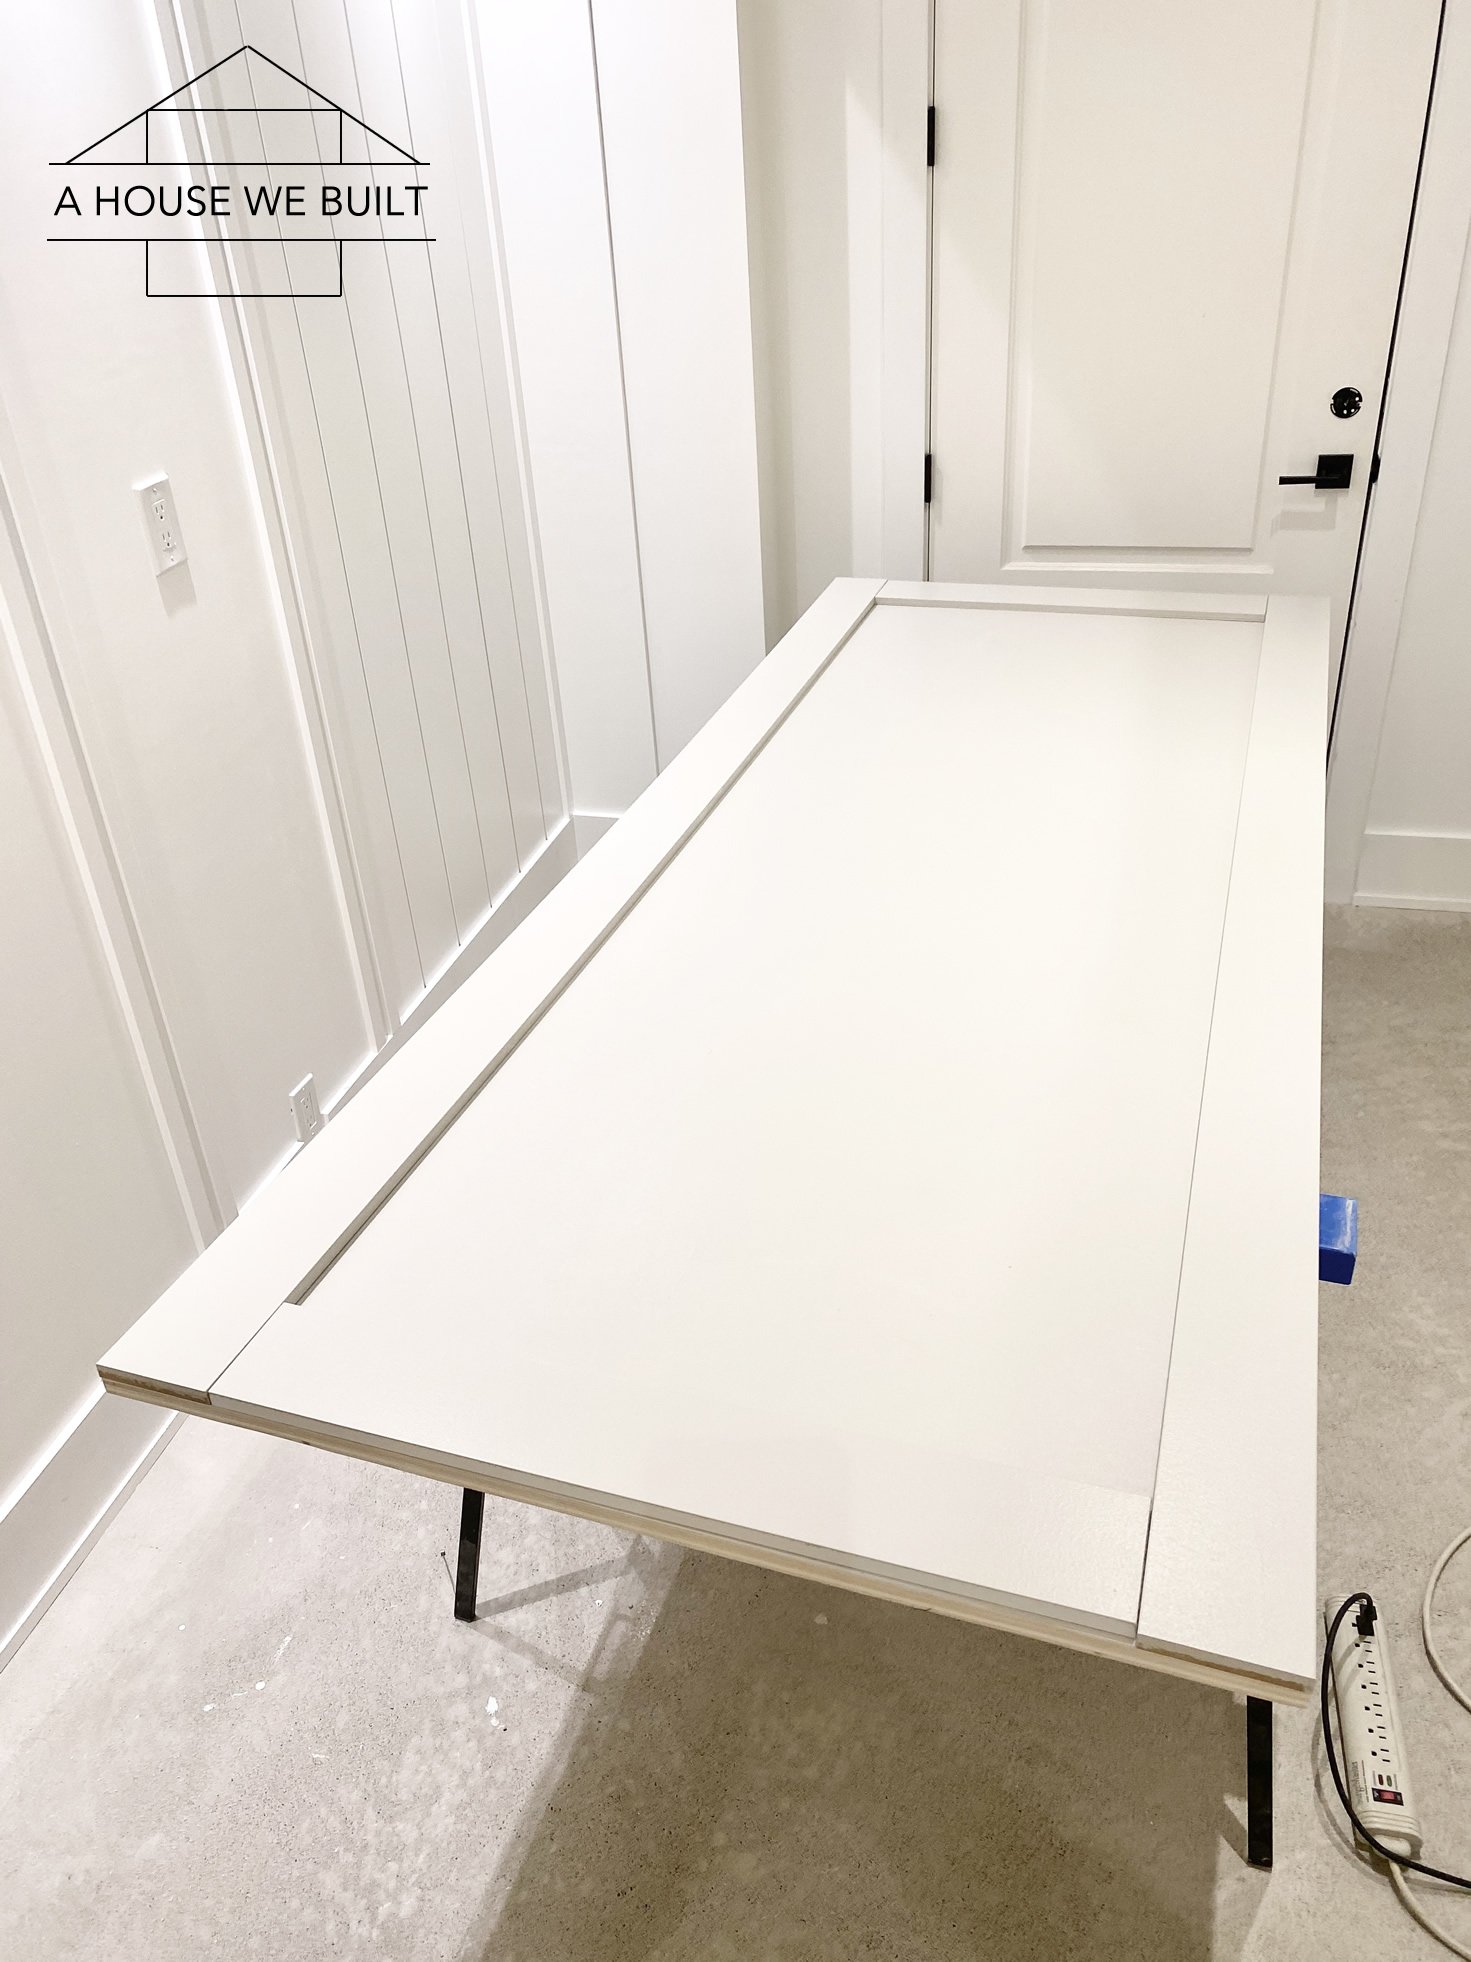
In real life, this is how that looks (cuz yep, we messed up the first time around):
Note 1: If you’re working with double rail bypass hardware, this isn’t really a problem.
Note 2: If your door design doesn’t have any perimeter trim (so, if it was all horizontal or vertical boards, or even a single-slab design), this wouldn’t really matter. Or maybe some people wouldn’t care, but for me, this situation was unacceptable because my design needed all 4 doors to be fully visible for the chevron pattern to flow properly from one door to the next. Not only were almost 6-inches of Doors 2 & 3 visually lost when all the doors were the same size, but the worst part was that the battens no longer lined up with each other because almost 6 inches of Doors 2 & 3 were hidden behind Doors 1 & 4.
My mistake was that in my excitement to build these barn doors, I didn’t properly consider how much visual space my design would lose from the overlap before building the doors. So, here was our solution:
We decided to rebuild the two middle “behind” doors and modify them to cheat the difference. Visually, they’d look perfectly aligned, but in reality both of them would be different sizes. This is how we did it.
We calculated that the amount of visual width we were losing with the bypass system was 5 1/2 inches per door – but we were only losing it on the side of the doors that was behind the “front” doors. Meaning that we needed to add 5 1/2 inches to the left side of the middle-left door, and we needed to add 5 1/2 inches to the right side of the middle-right door. Note: your additional width measurements will differ depending on your door and space size so our math probably won’t work for another space.
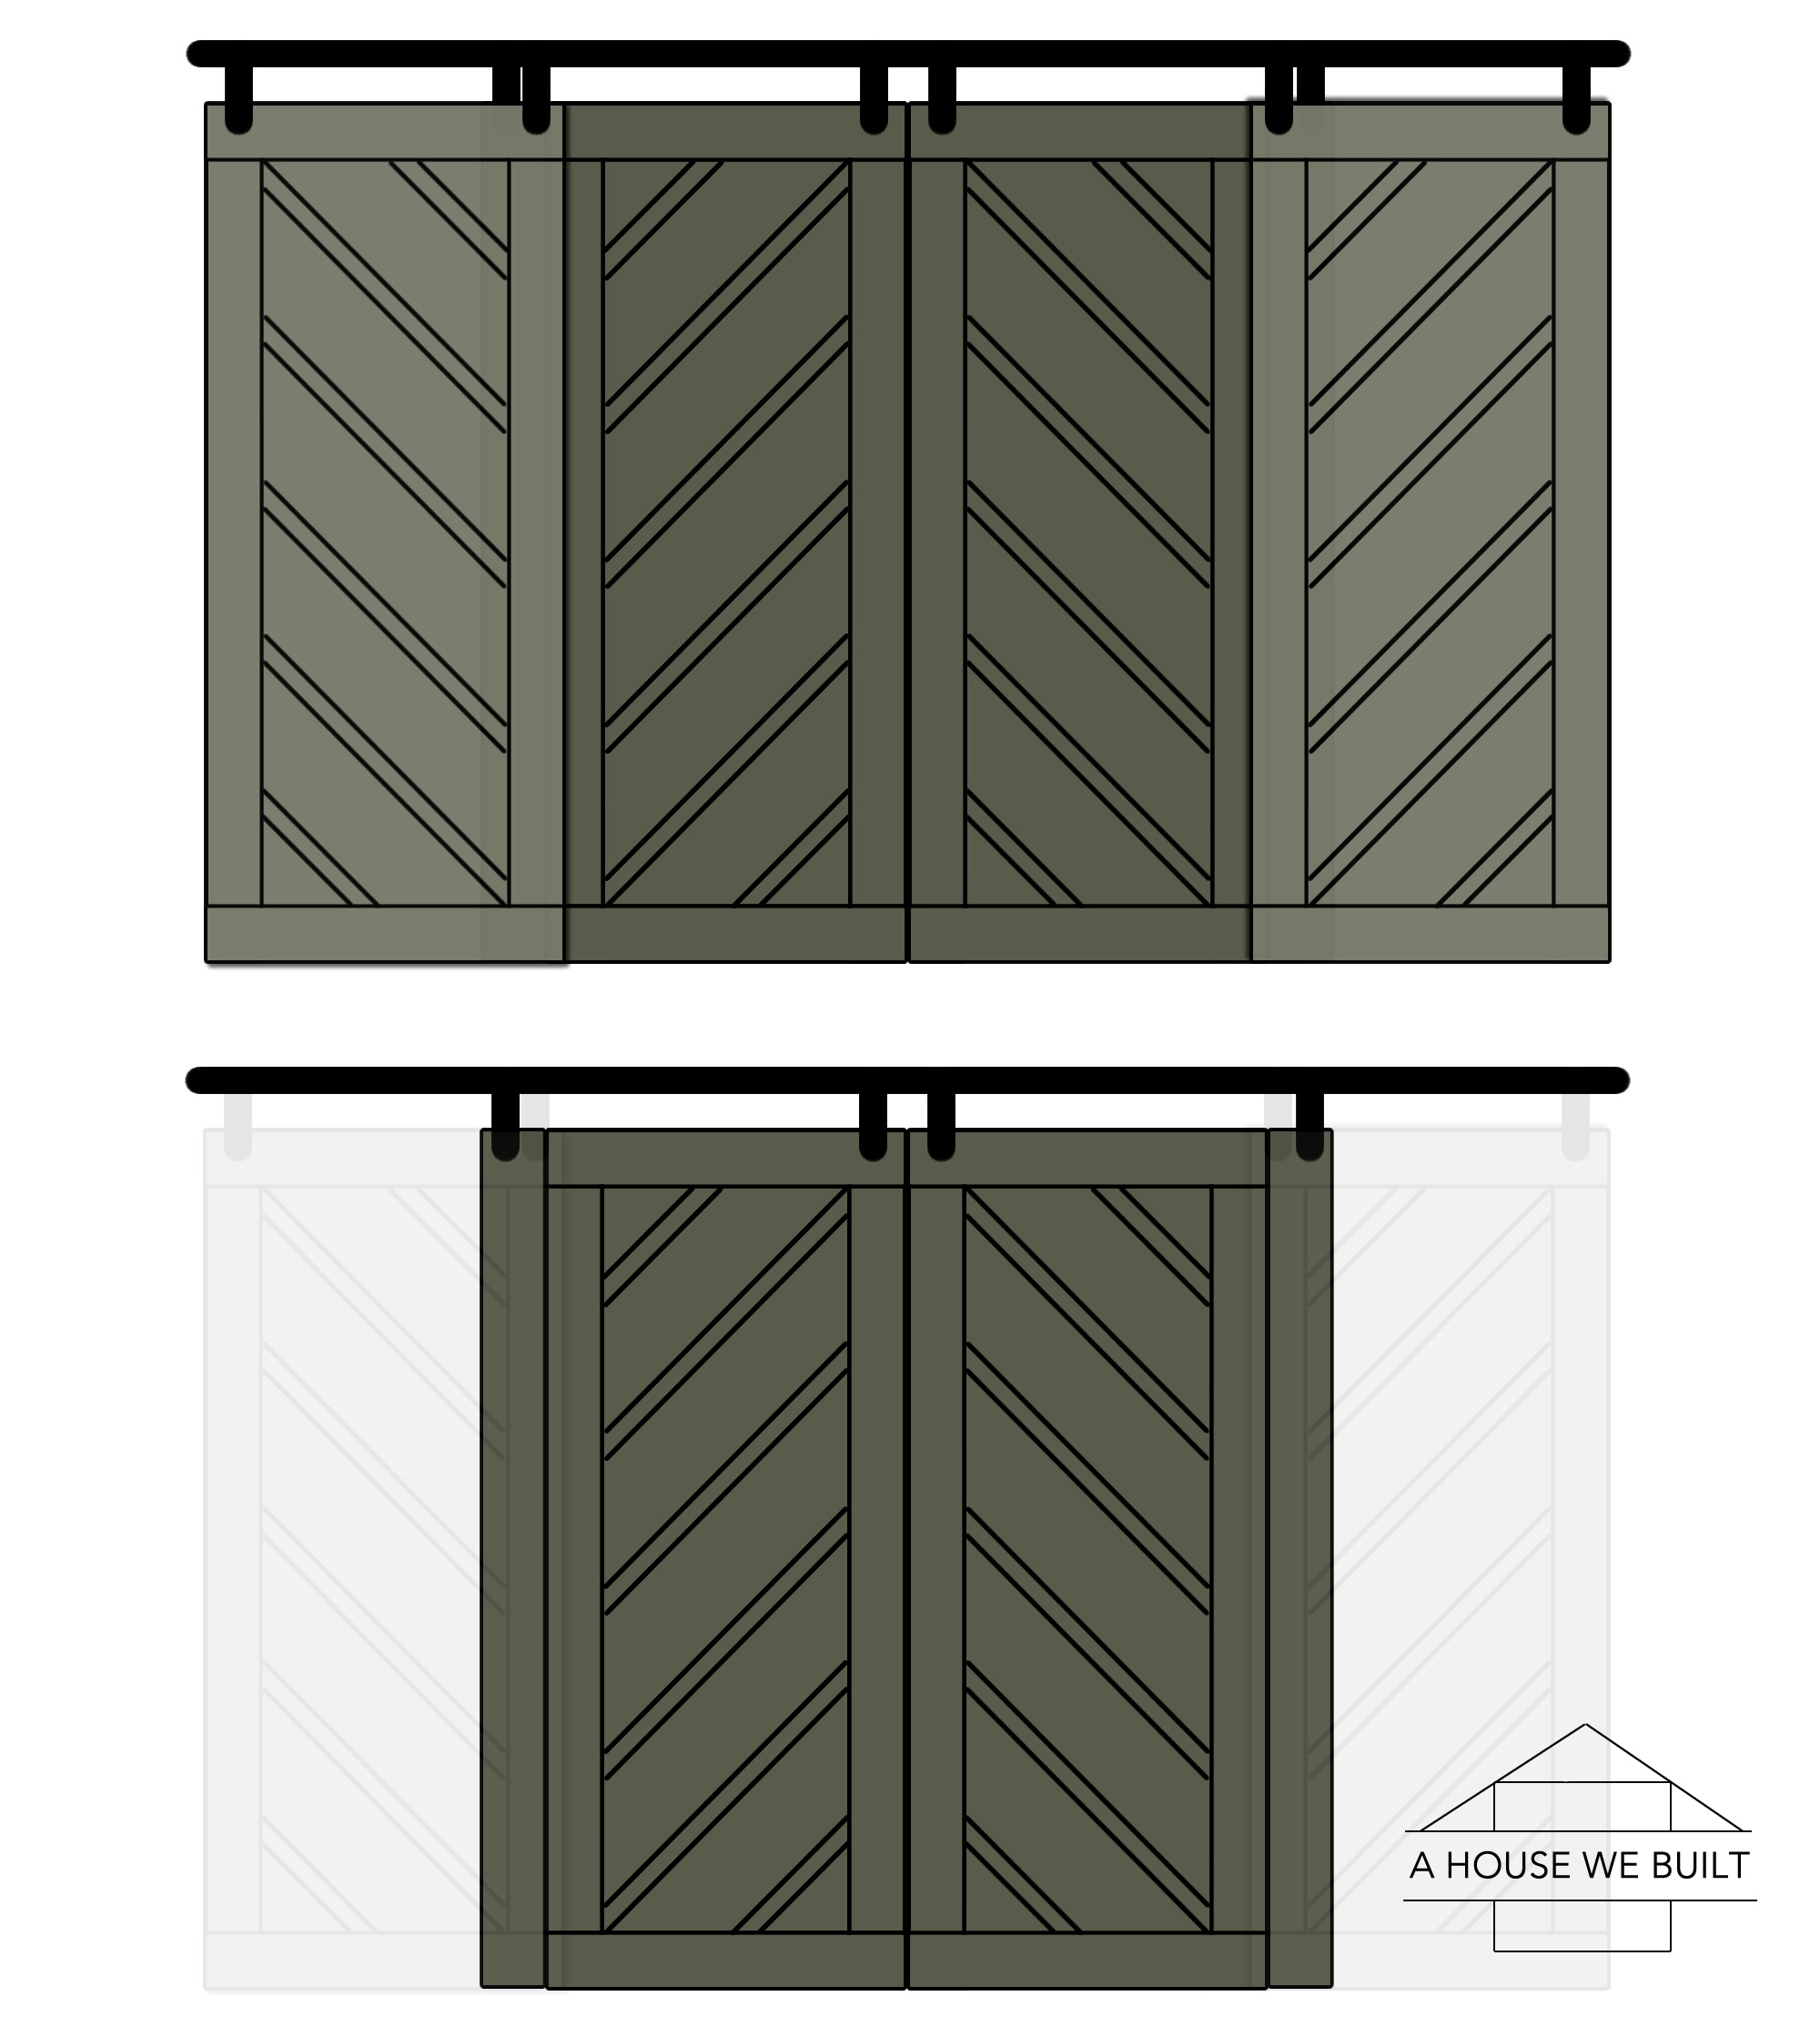
Rebuilding our “behind” doors (Doors 2 & 3) like this made the VISIBLE parts of the doors the same widths, but the hidden additional widths allowed them to slide behind Doors 1 & 4 without hiding any of the chevron design and keeping the battens in line. (Note: If we had simply remade Doors 2 & 3 wider instead of only adding width behind the overlap, the batten alignment would mess up.) So…
- Doors 1 & 4 were same size (but opposite designs)
- Door 2 needed extra width on the left side to account for the overlap behind Door 1
- Door 3 needed extra width on the right side to account for the overlap behind Door 4
With 4 barn doors, the angle of the battens has to switch each time like this: \\ // \\ //.
And if you do bypass barn doors in a different configuration (see Options A, B, C, D above), it’ll always be your “Behind” doors needing extra width anywhere a “Front” door overlaps them.
And here is our solution in real life:
Luckily, we had good uses for our two “extra” barn doors – we ended up hanging them together as a single-rail double door feature flanking the entry to our master closet using a long rail and a double set of door hangers (like these: Home Depot | Home Depot) so it all worked out in the end.
I really hope this all makes sense and is helpful for anyone thinking about building bypass doors! 😀
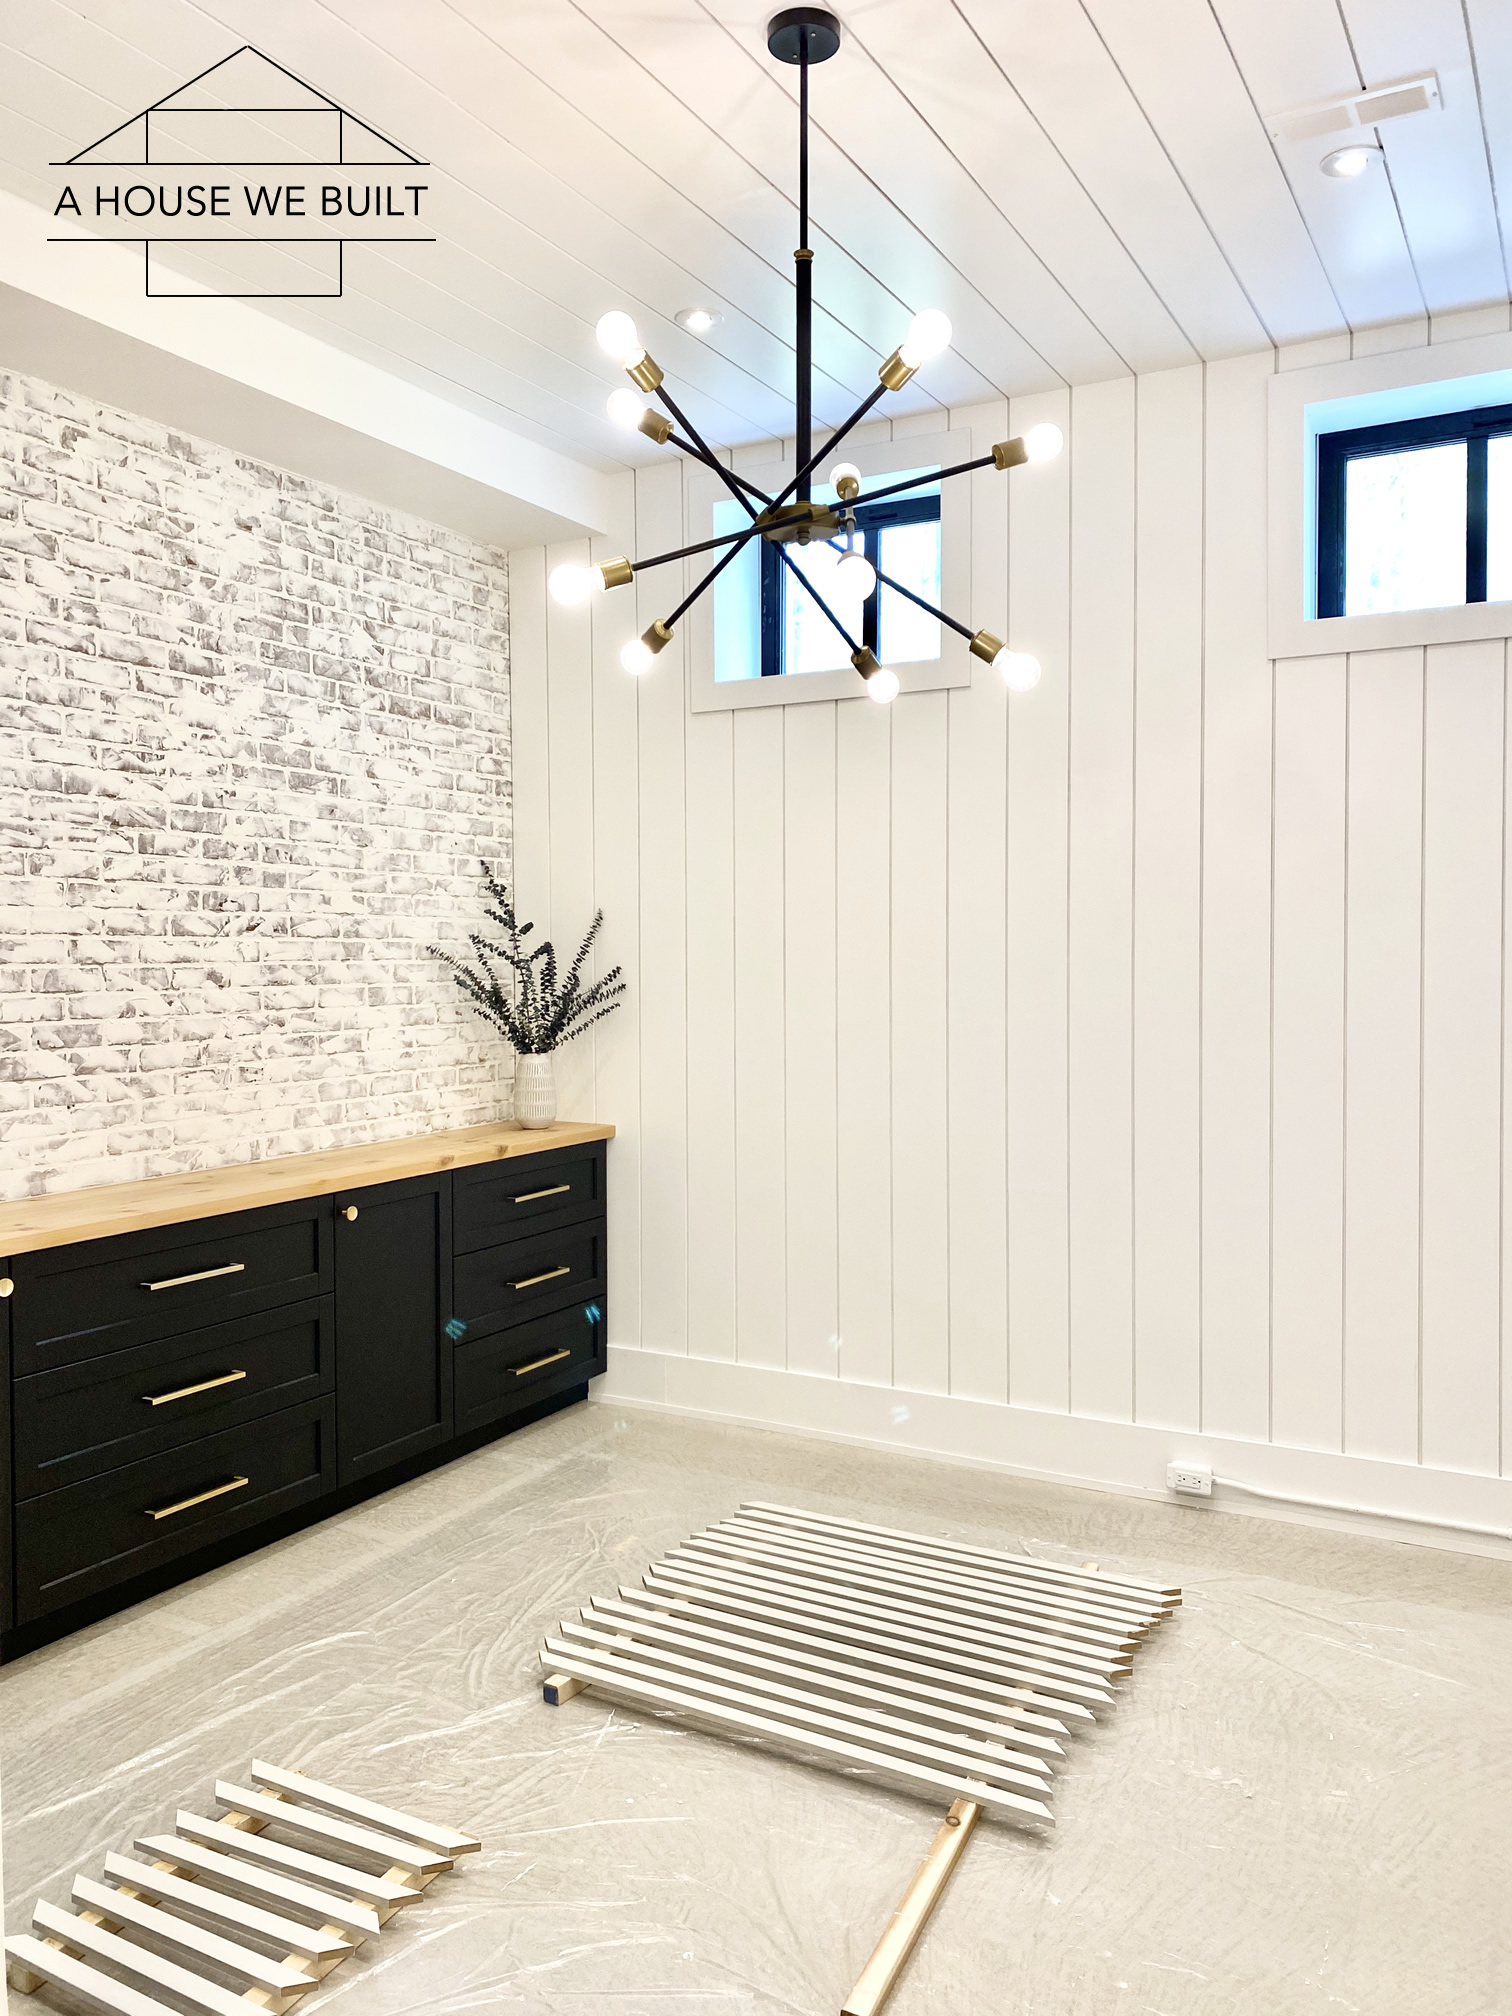
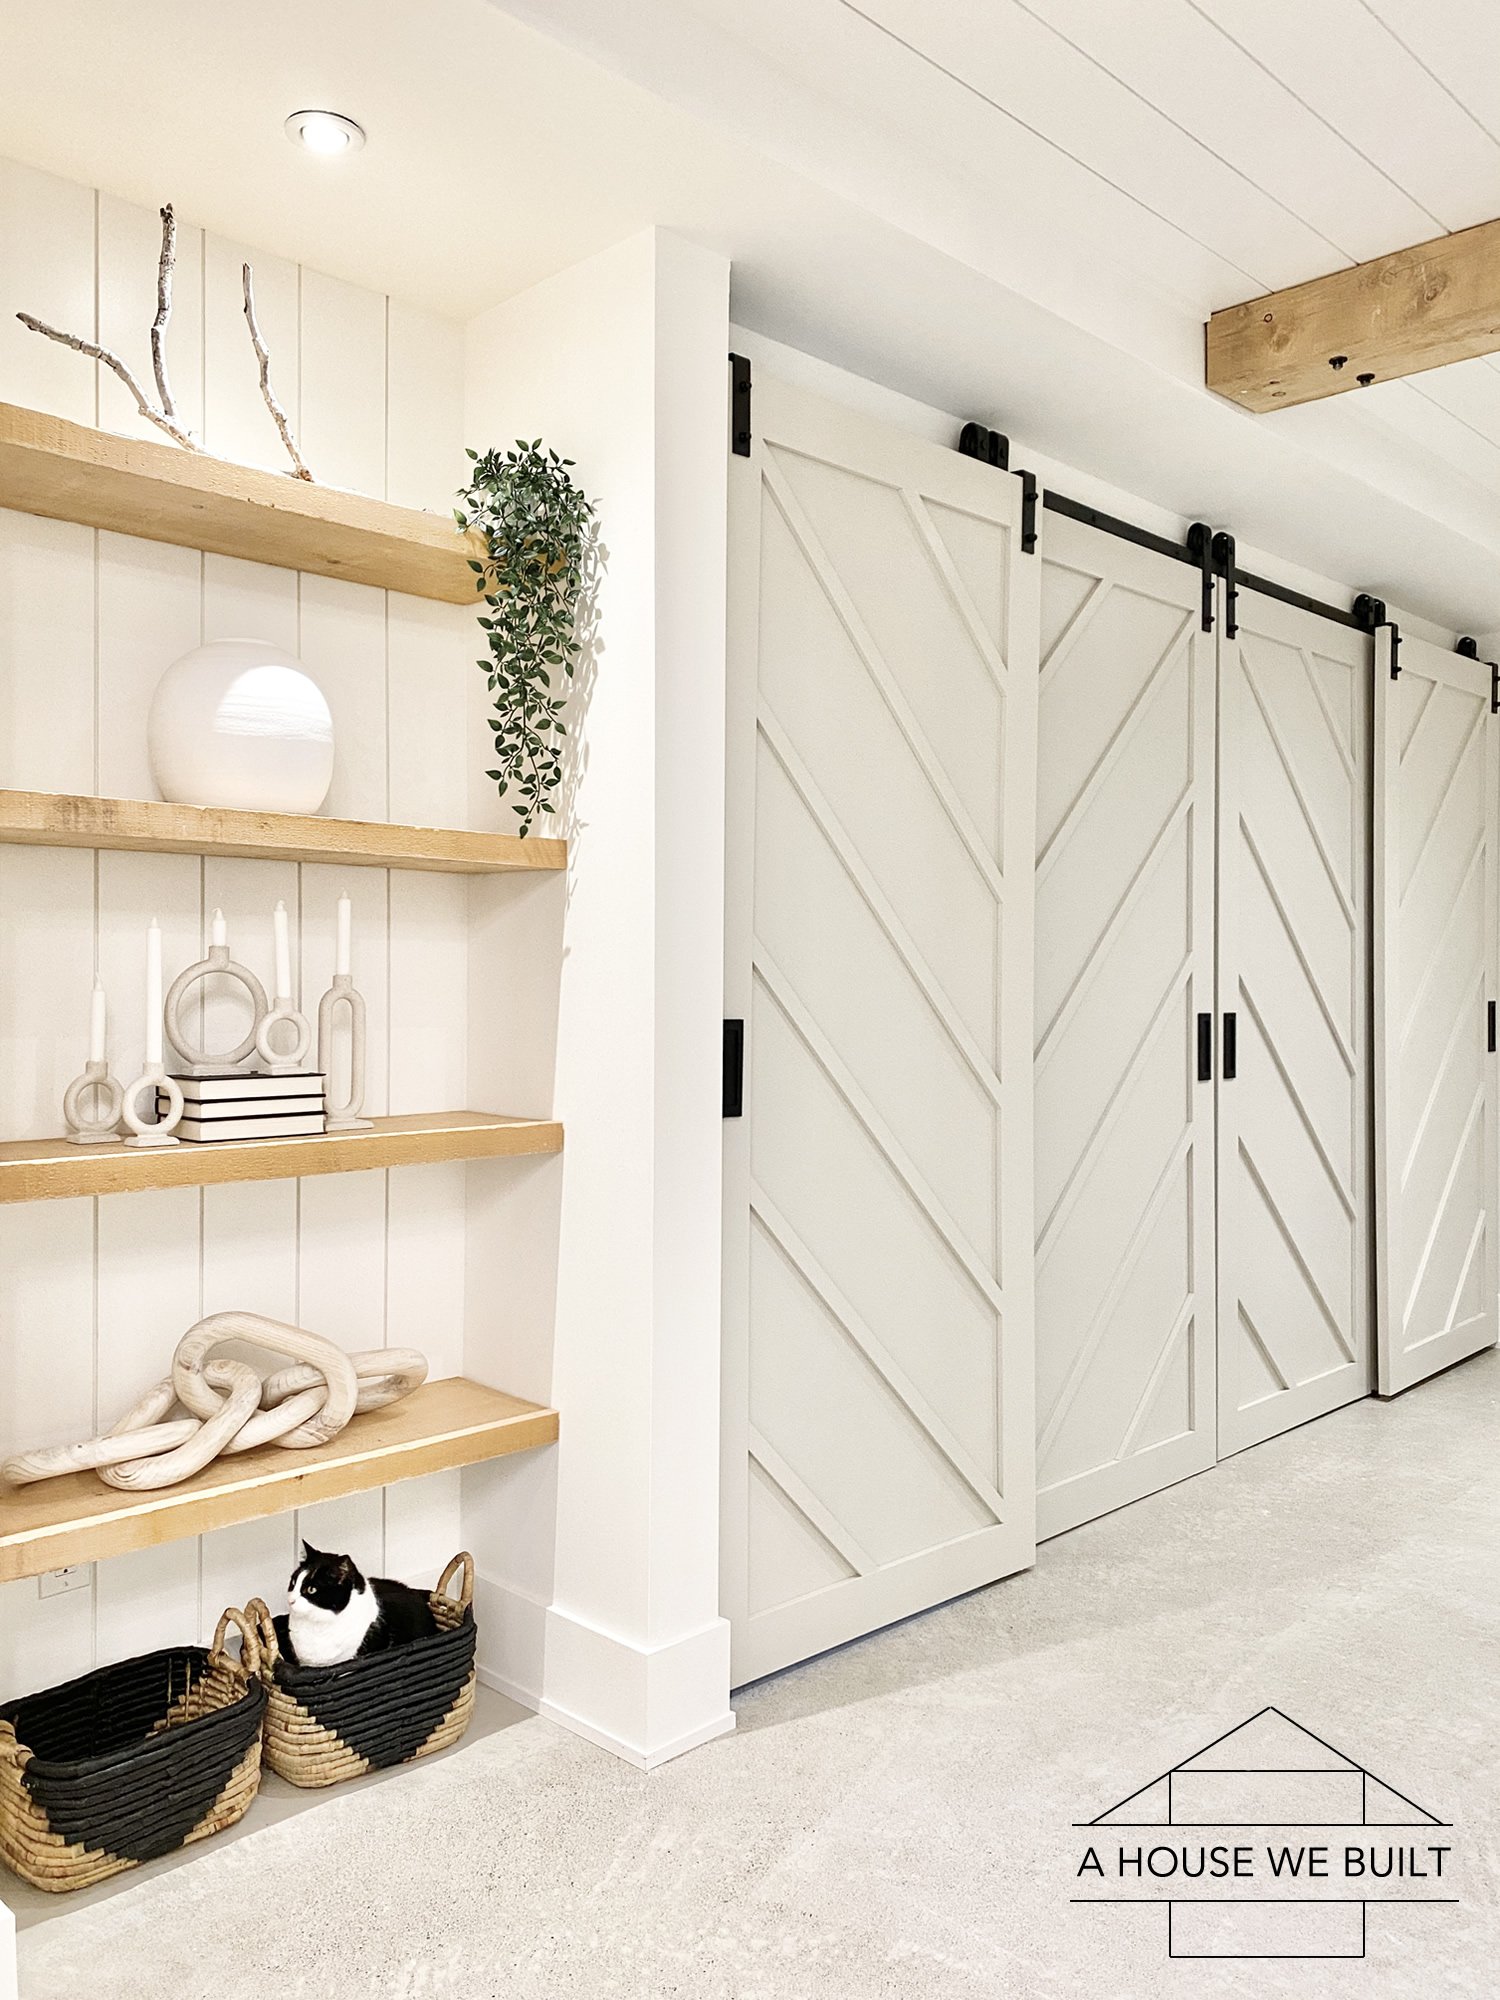
Finally, here is a finished picture of our barn door wall:
Sources: baskets | candle holders | wood links | similar vase
Tutorials: Tutorial: How to Install Shiplap | How to Install Open Shelving
For more of our tutorials, click here.
For sources from our basement, click here.
To see other rooms in our house, click here.
Nadia says
Beautiful…they are amazing! I hope next year my husband and I start our basement project and we will use ten tips you give us to use as reference.
You house is lovely.
admin says
Thank you! Best of luck with your basement 😀
Victor says
This looks great, and the detail description is great as well. If you did the “Option C” layout would you have had to add in extra space to the doors (assuming the bracket and doors would have been mounted inside a room vs outside a room)?
admin says
I’m a bit confused about your bracket location, but yes in Bypass Option C the extra width would be needed be on the right of Door 1 and the left of Door 4 (basically, wherever they go behind another door).
Cherrishe Brown says
Hello,
Where did you get your custom built hardware? Who custom made it for you. the version you linked on amazon only accommodates 2 doors.
admin says
Hi 🙂 We don’t list custom suppliers. I linked the most similar style of bypass hardware to what we have to give people a starting point, but have not been able to find non-custom hardware sets that exactly match what we have. However, sometimes 2 sets of 2-door hardware can be joined together to create a 4-door set if done properly. Ultimately though, this is a tutorial for how to build the barn doors themselves, not how to hang them – I don’t consider ourselves experts in barn door hardware so don’t feel comfortable giving guidance on it further to the information we have provided here.
Brittny says
Question.
When hanging the doors do the bottom of the doors not try to swing in? Is there something that keeps them from swinging back and forth? I saw one tutorial where the door was leaning in towards the bottom it was a small version of a barn door for a cabinet but thought the if that translates to the larger doors them it would look funny in my kitchen as a pantry door. In this version I would be worried that the front bypass doors would be leaning back at the bottom and scratch the back doors.
admin says
Yes, step 13 is “Install door stops and floor guides (should come with your hardware kit).” – These are very necessary for keeping the doors straight and all our doors have them. But this tutorial is about building the doors, so I didn’t focus on the hardware installation quite as much since I’m not a hardware expert and whatever kit you get should come with specific instructions.
Marc says
I have built barn doors before and I have a general knowledge of the hardware. With the long excursion of each door
(These doors can slide a distance longer than their width) how do you keep the doors on the floor guides? I would think any door moving a distance greater than the width of the door would pop off of the hardware that fits in the groove on the bottom of the doors.
admin says
We did not do floor guides with grooves – we just bolted the guides (little nob-like things) directly into the floor so they keep the doors in alignment but the doors are not connected to the guides with grooves. They are really visible unless you look behind the doors. We have had no issues with them sliding anywhere they’re not supposed to and the doors are not able to pop off the hardware – though a very strong person could physically lift the entire door off the rails if they chose to.
Jennifer Konkle says
Can you give me a ballpark as to how much you paid for your custom hardware? So far, we have gotten a bid for 8K and I about fell off my chair. Ours is for 4 doors and spans 12 feet for the whole closet. Thank you!
admin says
Oh my goodness! I’d have fallen off my chair too lol. Our hardware was in the low hundreds which I felt was reasonable 🙂
Marcia Mumm says
I have a 132″ wall storage unit. I would like to put by-pass barn doors on the unit. I am thinking that single rail by-pass hardware would be lighter than the double by- pass. I would be using four doors. Would the cabinet need to be secured to the back wall for this to be functional?
Any suggestions on how to achieve the best look?
admin says
I don’t do this professionally so I might not be the best person to ask. But I can say that these doors + hardware are massively heavy (they’re the weight of all that metal, all that plywood, and all that trim together) so anything they’re hanging off of needs to be very secure and also reinforced. We custom built a beam into our wall during framing to support these specific doors so ours are not hanging off a normal wall, they’re hanging off a structural beam that was designed and built to support their full weight (and more). Now, you don’t need to have a beam, there are other ways of supporting it but I would be personally wary of hanging a barn door on a free-standing unit. Obviously I haven’t seen your storage unit though so I could be imagining something different than what you actually have but my advice is to take the weight of the doors/hardware into account and make sure that it’s all structurally supported/sound. Best of luck!
Patty says
Thank you for your detailed explanation on your barn doors. I really like the single rail bypass barn door look better than the double rail. I want to put it in front of my sliding door in my bedroom instead if having curtains, however with your method of the barn doors you’ve installed, how would they all open when you put them all to one side? Do you have a picture you can send me?
admin says
Welcome! You can’t open all of these to one side. Even with a double rail that wouldn’t be possible – they’d still be 2-doors-wide. The single rail version like I do will never do a full overlap (we didn’t need them to) because of the way the hangers sit. The double rail would do a full overlap, but only of 2 doors. You’d need a… well, I guess a 4-rail system (?) to have all 4 doors overlap. Hope that helps.
Dieter Himmler says
Want to build an exterior by-pass barn door with an approx. opening size of 10′. Do you think 2- 5′ doors will work, or do you think5′ is too large. So what do you think of the max. door size?
admin says
I don’t have any experience with exterior barn doors so I don’t know if there are special requirements for them. All the guidance I can offer in terms of door size is explained in the post above. Ultimately, it comes down to door design because that will determine if you need to account for the overlap as we did with ours.
Jason Boudrie says
Hi- how did you calculate the amount of additional width needed in your “behind” door? Im working on 2 bypass doors with a total door opening width of 68″. Just trying to figure out the math. Thanks for any help.
admin says
It’s hard to explain and there are a lot of variables: the type of hardware, what part of the door you attach the hardware too, what type of trim you use (if any)… 1. Whatever hardware hangers you use will be a certain distance from each other based on where on the doors you choose to attach the hangers. 2. Where they are placed on the doors will show you how much overlap you have once the doors are closed. At this point, you just have to determine how much of your behind-door will show from the front and how much extra you need to add to go behind the front-door, taking into account whatever perimeter trim you have around each door, making sure that that is able to be seen from the front. Unfortunately there’s not a simple equation to determine this amount because there are too many variables involved.
christina says
Beautiful! How is the extension attached to the doors?
admin says
It’s not. It’s fully a part of the door, not an “add on” piece. We had to remake those two doors to account for the extra widths which is why I was sharing our experience to hopefully save someone else that trouble 😉
David says
Building the same thing for my wife, and (I think) my only question is, if the trim pieces on the sides are full length, do you see any reason not to use a piece of 1×10 or 1×11.25 MDF for the whole lengthened side vs a piece of 1×6 and a piece of 1×5? Essentially, this would just eliminate the seam and make the whole trim piece on that side much wider?
admin says
There’s no reason not to as long as you can find a piece that is the exact right size you need for the extra sides. But there is no point at which the seam is every visible due to how the doors overlap so it also doesn’t really matter. I found it easier to use two pieces because that way I knew for sure that the front pieces that were visible would match perfectly on all 4 edges of the door.
Kim says
Just want to say thanks! I used your instruction for 1 door. Great design!
admin says
You’re very welcome!
James says
What did you use to install the handles on the doors?
admin says
Two small screws.
Melinda says
I have a bypass barn door, where do I place the guide? Don’t want to ruin floor.
admin says
We drilled ours straight into the concrete. You place them where your door should slide.
Pam Rolens says
Great design! I’m getting ready to do barn doors in my hallway closet. I need an 8′ rail. They almost all come in 2- 4′ pieces. They connect in the middle. Will the door hardware/wheels roll over the connections? I haven’t been able to tell by any pictures.
admin says
I suppose it depends on the particulars of the connections you get but we have 2 places in our home with connected rails and the wheels slide over them with no issues. Our connection pieces are only on the front and back of the rail so they dont affect the top part where the wheel slides on.
Tara says
Love it ! Can you share what colour you used
admin says
Thank you! That info is in the post ^ 🙂
John Bator says
Hi There,
Love the doors, we are going to make our own doors and I just want some clarification. You purchased the double rail bypass kit, it only comes with 4 rollers, 2 for the first door and two for the bypass door (2nd door). Did you purchase a separate bypass kit/rollers for doors 3 and 4? Do all 4 doors move independently?
Thanks
admin says
Thank you. Actually our post mentions that our hardware is custom so we did not purchase a standard kit. The kits I have linked to are for reference and options. What we got is explained in the materials list section. The left 2 doors slide infront/behind each other, as do the right 2. They move independently of each other. Best of luck with your doors!
Brenda says
What does the back of the doors look like, from the other room? Did you repeat the Chevron pattern on the backside? Or does it just look plain? I would want the same look from both sides….
Thank you!
admin says
Ours are plain but you can make them double sided if you want 🙂
Jamie says
Thanks so much for the overlap explanation. Spent hours watching YouTube and about to start my doors tomorrow when luckily I read your post the night before! Honestly better than 100% of the videos I watched. Thank you!
admin says
Glad it was helpful! 🙂
Meg says
I am looking for design ideas. I have a wall that is shiplap but it is horizontal on the wall. I am wanting a modern barn door to cover my pantry on this same wall. What do you think would look good for this design?
admin says
I feel like something with raw wood would look good against the shiplap!
Grace says
Hi, I Iove your design and thank you for your instructions. I’m going to try this weekend to do it. I just have one question. You said: “We had two batten sizes in total (one long, one short)”. Do you remember those two sizes?
admin says
Not offhand, sorry! Best of luck with your doors 🙂
Jane says
Hi
Thanks for all your amazing detail. I need an 8 foot opening, so I assume my doors in front need to 4 feet?
Thanks!