• Skip to primary navigation
  • Skip to main content
  • Skip to primary sidebar
  • Skip to footer

A House We Built

Custom House Designed by Husband & Wife Team | Modern Farmhouse Inspired

  • Shop Our Home
  • Sources by Room
    • All Sources & FAQs
    • Kitchen Sources
    • Pantry Sources
    • Living Room Sources
    • Dining Room Sources
    • Home Office Sources
    • Laundry Room Sources
    • Entryway Sources
    • Mudroom Sources
    • Gallery Wall Sources
    • Reading Room Sources
    • Theater Room Sources
    • Game Room Sources
    • Guest Bedroom Sources
    • Primary Bedroom Sources
    • Primary Closet Sources
    • Primary Bathroom Sources
    • Powder Bathroom Sources
    • Buffalo Check Bathroom Sources
    • Basement Bathroom Sources
    • Basement Sources
    • Stairs, Landings & Hallways
    • Paint Colors and Stain Recap
    • Cleaning Sources & Routines
  • Tutorials
    • How to Make a Staircase Gallery Wall
    • How to Make Textured Canvas Art
    • How to Install Shiplap
    • How to Build a Slat Wall
    • How to Paint an Ikea Dresser
    • How to Build Bypass Barn Doors
    • How to Build a Farmhouse Table and Benches
    • How to Build a Rustic Sideboard
    • How to Build a Slat Sideboard
    • How to Make a Sofa Pit
    • How to DIY a Faux Brick Wall
    • How to Build a Window Seat
    • How to Build a Paneled Accent Wall
    • How to DIY a Functional Play Kitchen
    • How to Stencil a Wall
    • How to Build a Round Table
    • How to Build a Console Table
    • How to Make Paper Stars
    • How to Make Paper Mache Bowls
    • How to Make Clay Links
    • How to Texture Bowls & Vases
    • How to Install Open Shelves
    • How to Make Wood Block Art
    • How to Make a Wood Bead Garland
    • How to Build Cabinet Doors
    • How to Build a Wood Countertop
    • How to DIY a Nightstand Charging Drawer
    • How to Make a Wheat Wreath
    • How to Hang Gallery Wall Frames
    • How to Stain Stairs and Paint Risers
    • How to Make Industrial Stair Railings
    • How to Build a Window Seat Cushion
    • How to Make Salt Dough Ornaments
    • How to DIY a Modern Mantel Christmas Tree
    • How to DIY a Wooden Christmas Village
    • How to Build a Wood Christmas Tree Collar Box
    • How to Make Paper Christmas Trees
  • Cats
    • Cat Room Tour & Litterboxes
    • Cat-Related Sources & Cleaning Tips
    • How to Cat-Proof Christmas Trees & Decor
    • How to Stop Cats from Scratching Furniture
    • How to Stop Cats from Playing with Decor
    • How to Train Cats and Kittens
    • How to Cope with Cat Allergies
    • How to Introduce New Kittens to Older Cats
  • Christmas
    • Christmas Decor Favorites 2023
    • How to Build a Wood Christmas Tree Collar Box
    • Neutral Christmas Present Wrapping
    • How to Make Paper Christmas Stars
    • How to Make Paper Christmas Trees
    • How to Make Salt Dough Ornaments
    • DIY Holiday Art Ideas
    • How to Cat-Proof Christmas Trees & Decor
    • How to Make Modern Tabletop Trees
    • How to Make a Wooden Christmas Village
    • Holiday Cheese & Snack Boards
    • Christmas Decor 2021
    • Christmas Decor 2020
    • Christmas Decor 2019
    • Gingerbread House & Cookies Recipe
    • Puff Tastry Christmas Tree Recipe
    • Christmas Decor 2018
  • Cleaning
    • Cleaning Sources & Routines
    • Minimalism: How To Get Started
    • Cat-Related Cleaning Tips
  • Recipes
    • Apple Turnovers Recipe
    • Baked Pumpkin Donuts Recipe
    • Banana Chocolate Chip Bread Recipe
    • Blueberry Lemon Cake Recipe
    • Cheese & Cracker Snack Boards
    • Chocolate Chip Cookie Recipe
    • Christmas Crack Recipe
    • Chocolate Crinkle Cookies Recipe
    • Cinnamon Rolls Recipe
    • Cinnamon Star Pastry Recipe
    • Coconut Curry Squash Soup Recipe
    • Creamy No-Cheese Pasta Sauce Recipe
    • Crumble Recipe
    • Easy Veggie Pasta Recipe
    • Fresh Rolls Recipe
    • Garlic Flatbread Recipe
    • Gingerbread Biscotti Recipe
    • Gingerbread House & Cookies Recipe
    • Healthy Hearty Salad Recipe
    • Homemade Bread Recipe
    • Lasagna Recipe
    • Molasses Cookies Recipe
    • Oatmeal Raisin Cookies Recipe
    • Pad Thai Recipe
    • Pesto Pasta Recipe
    • Potato Curry + Naan Bread
    • Puff Pastry Christmas Tree Recipe
    • Pumpkin Donut Bites Recipe
    • Pumpkin Loaf Recipe
    • Pumpkin Oat Muffins Recipe
    • Roasted Red Pepper Pasta Recipe
    • Rocky Road Bars Recipe
    • Vegan Bolognese Pasta Sauce
    • Vegetable Soup Recipe
  • About
    • About Us
    • Website Roadmap
    • Shop Our Home
    • Minimalism: How To Get Started
    • Privacy Policy
  • Blog

How to Install Floating Open Shelves (Solid Wood)

August 24, 2020 by admin 5 Comments

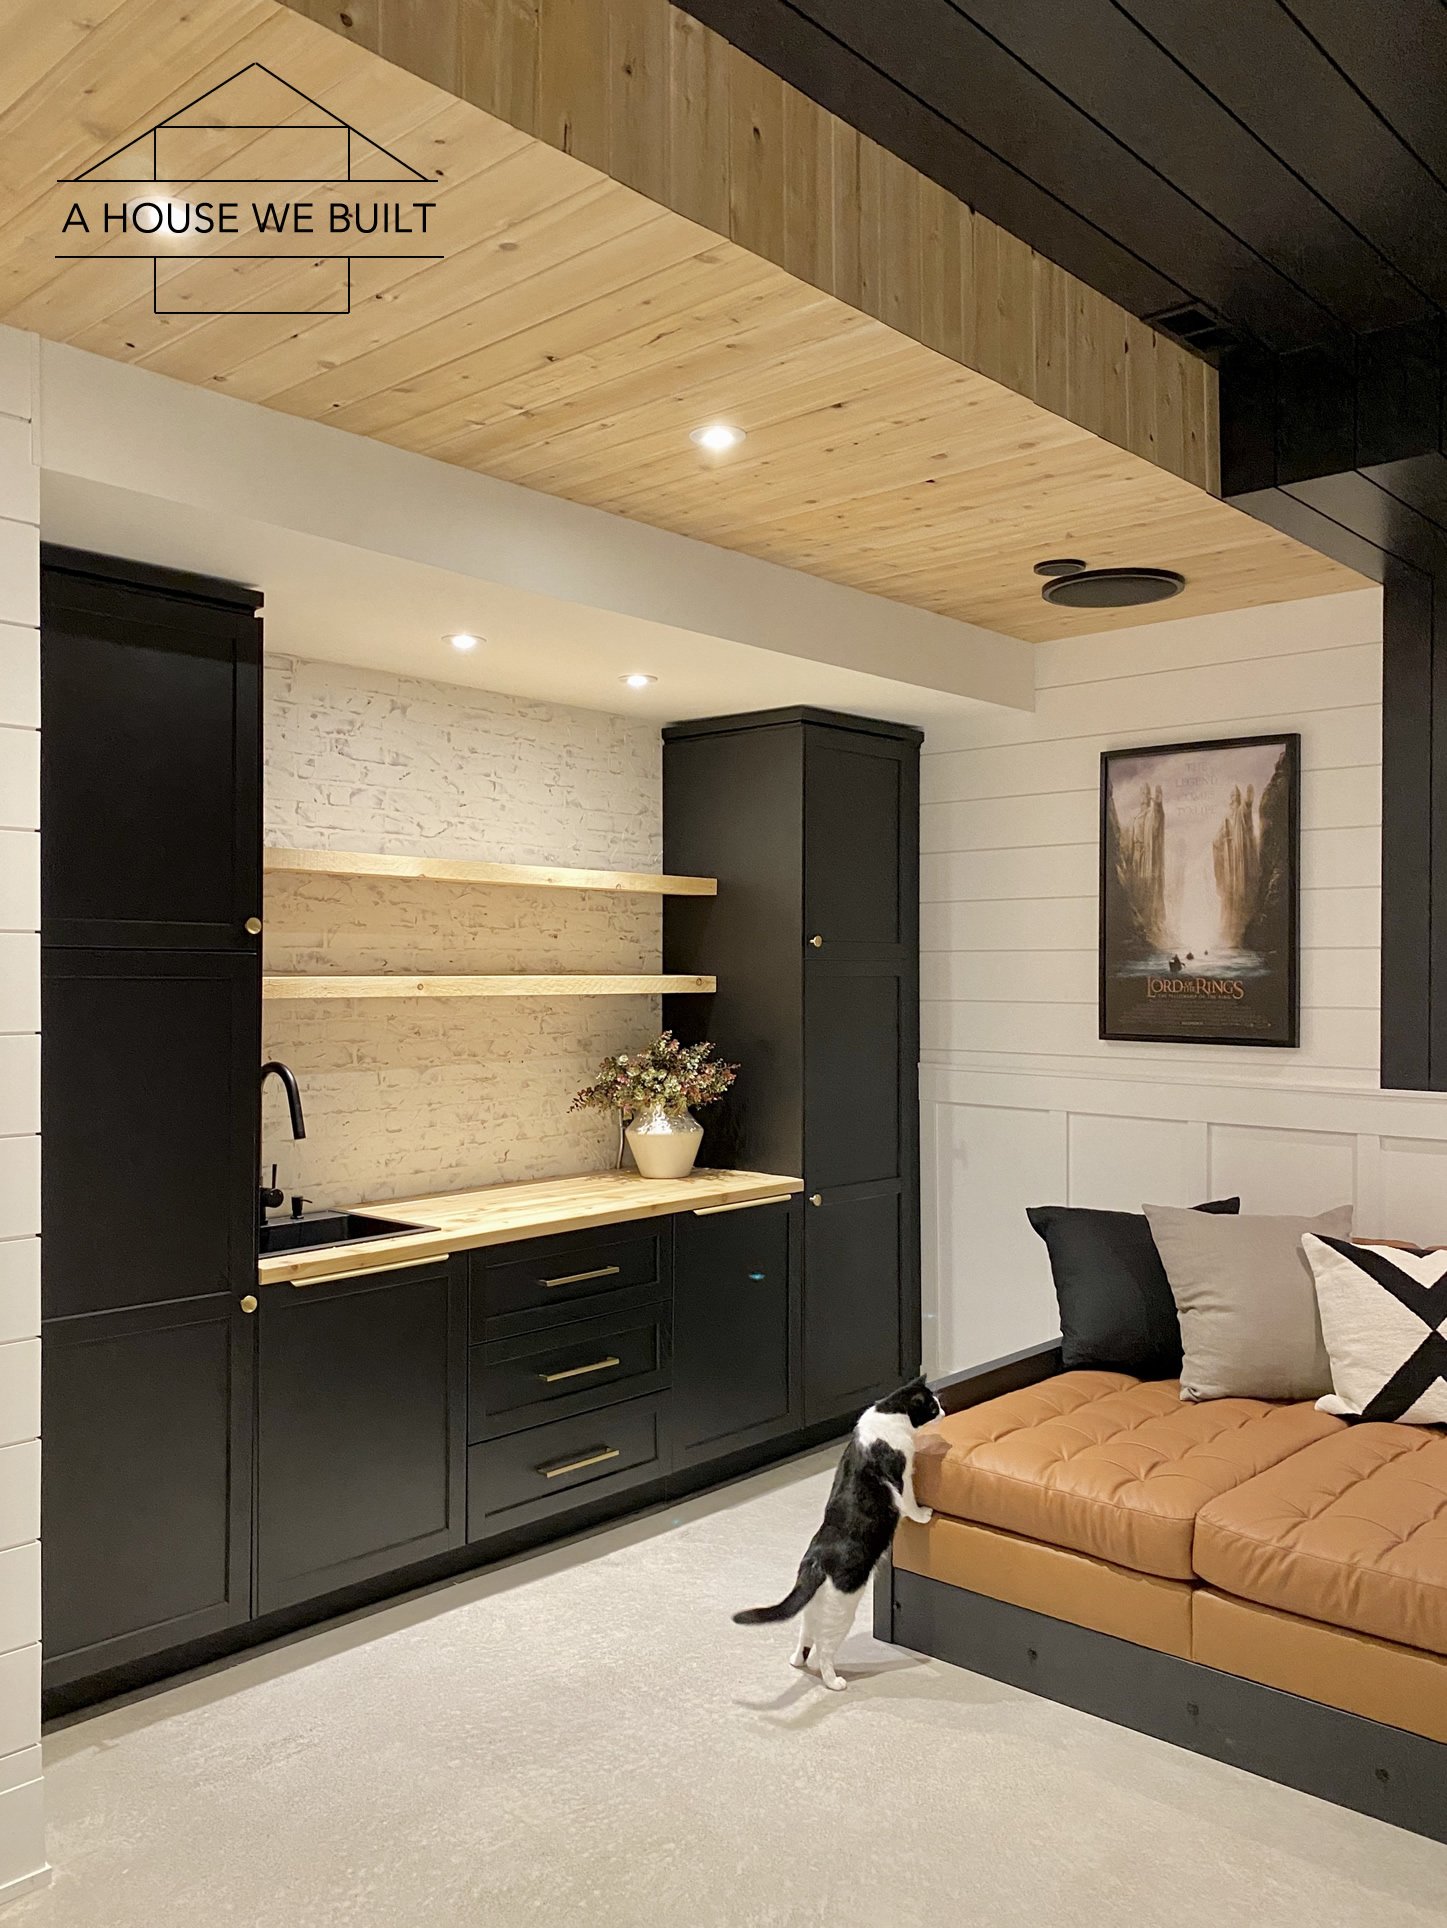
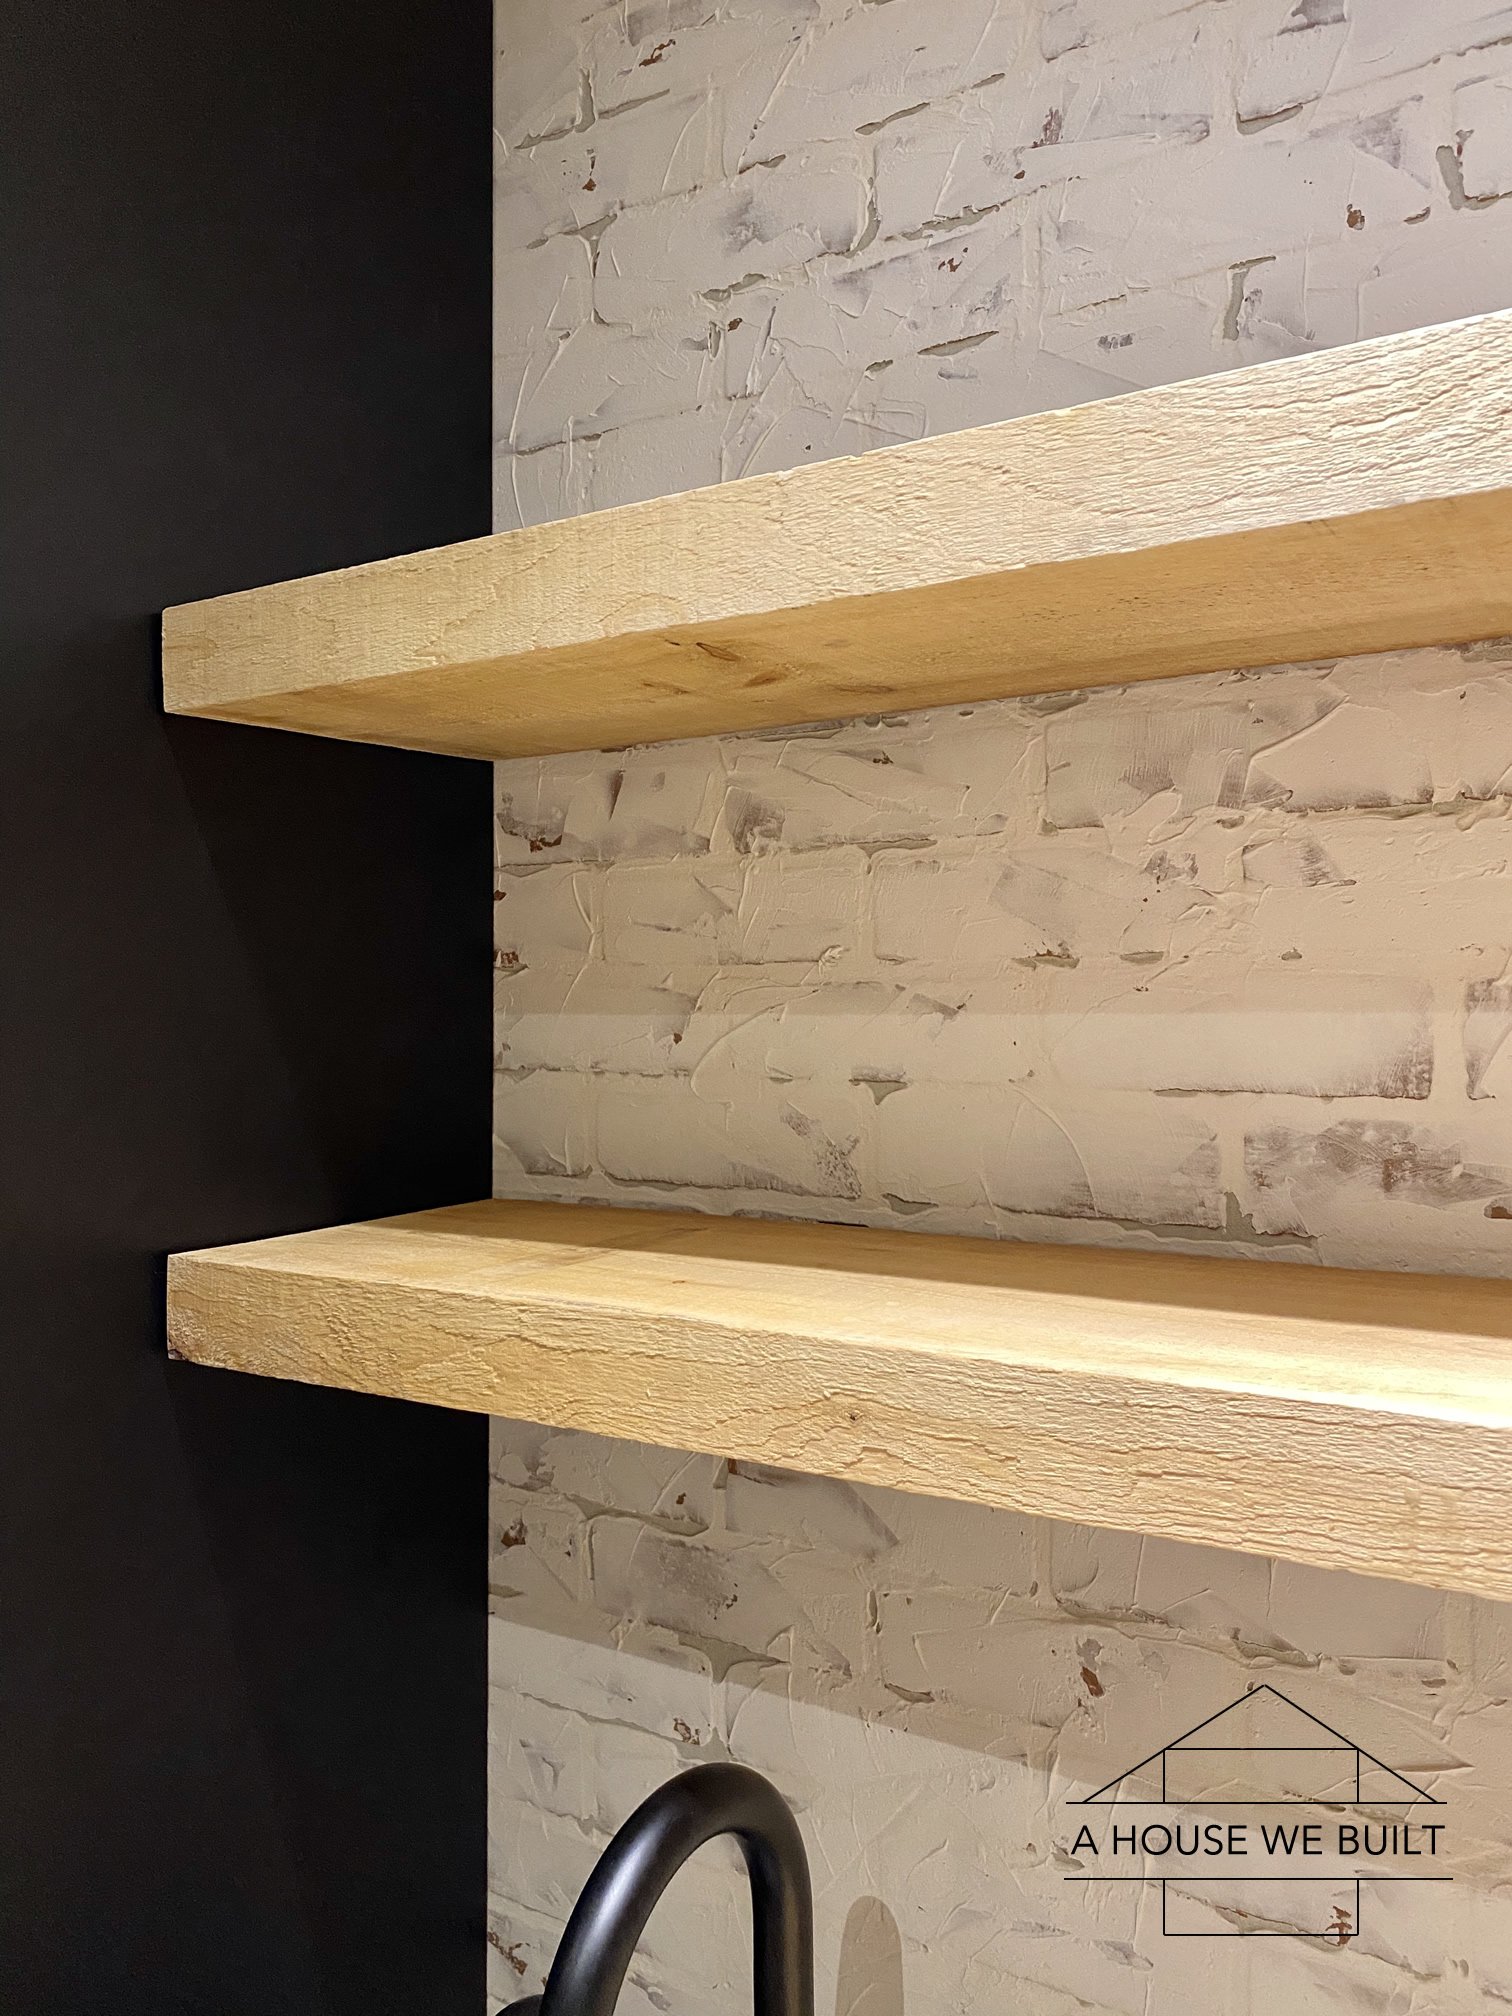
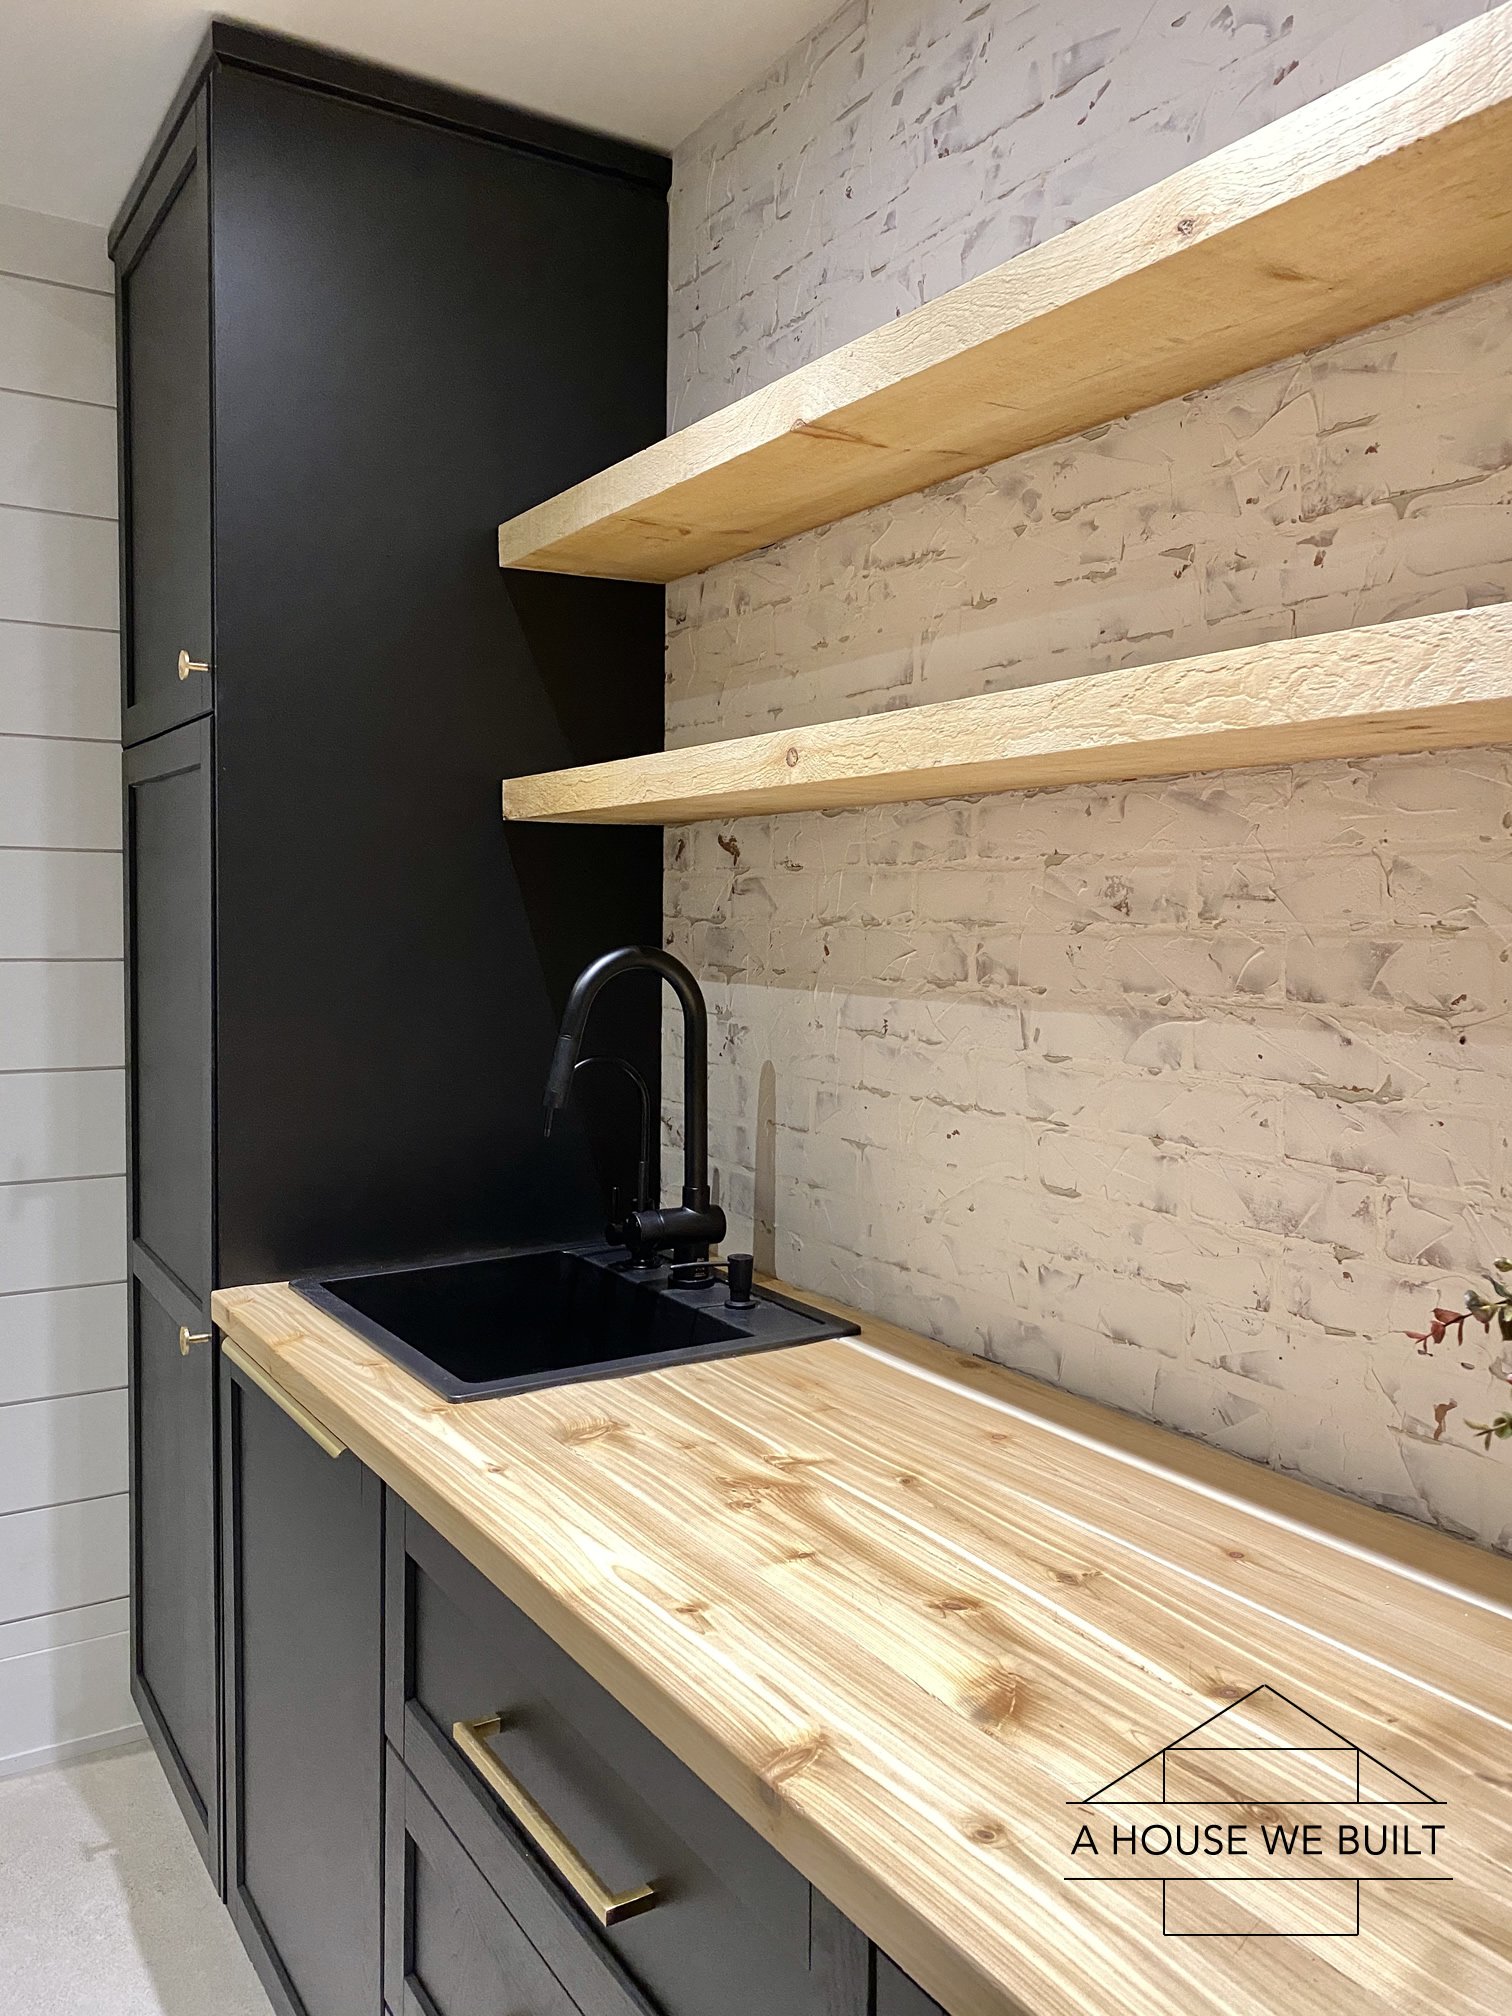
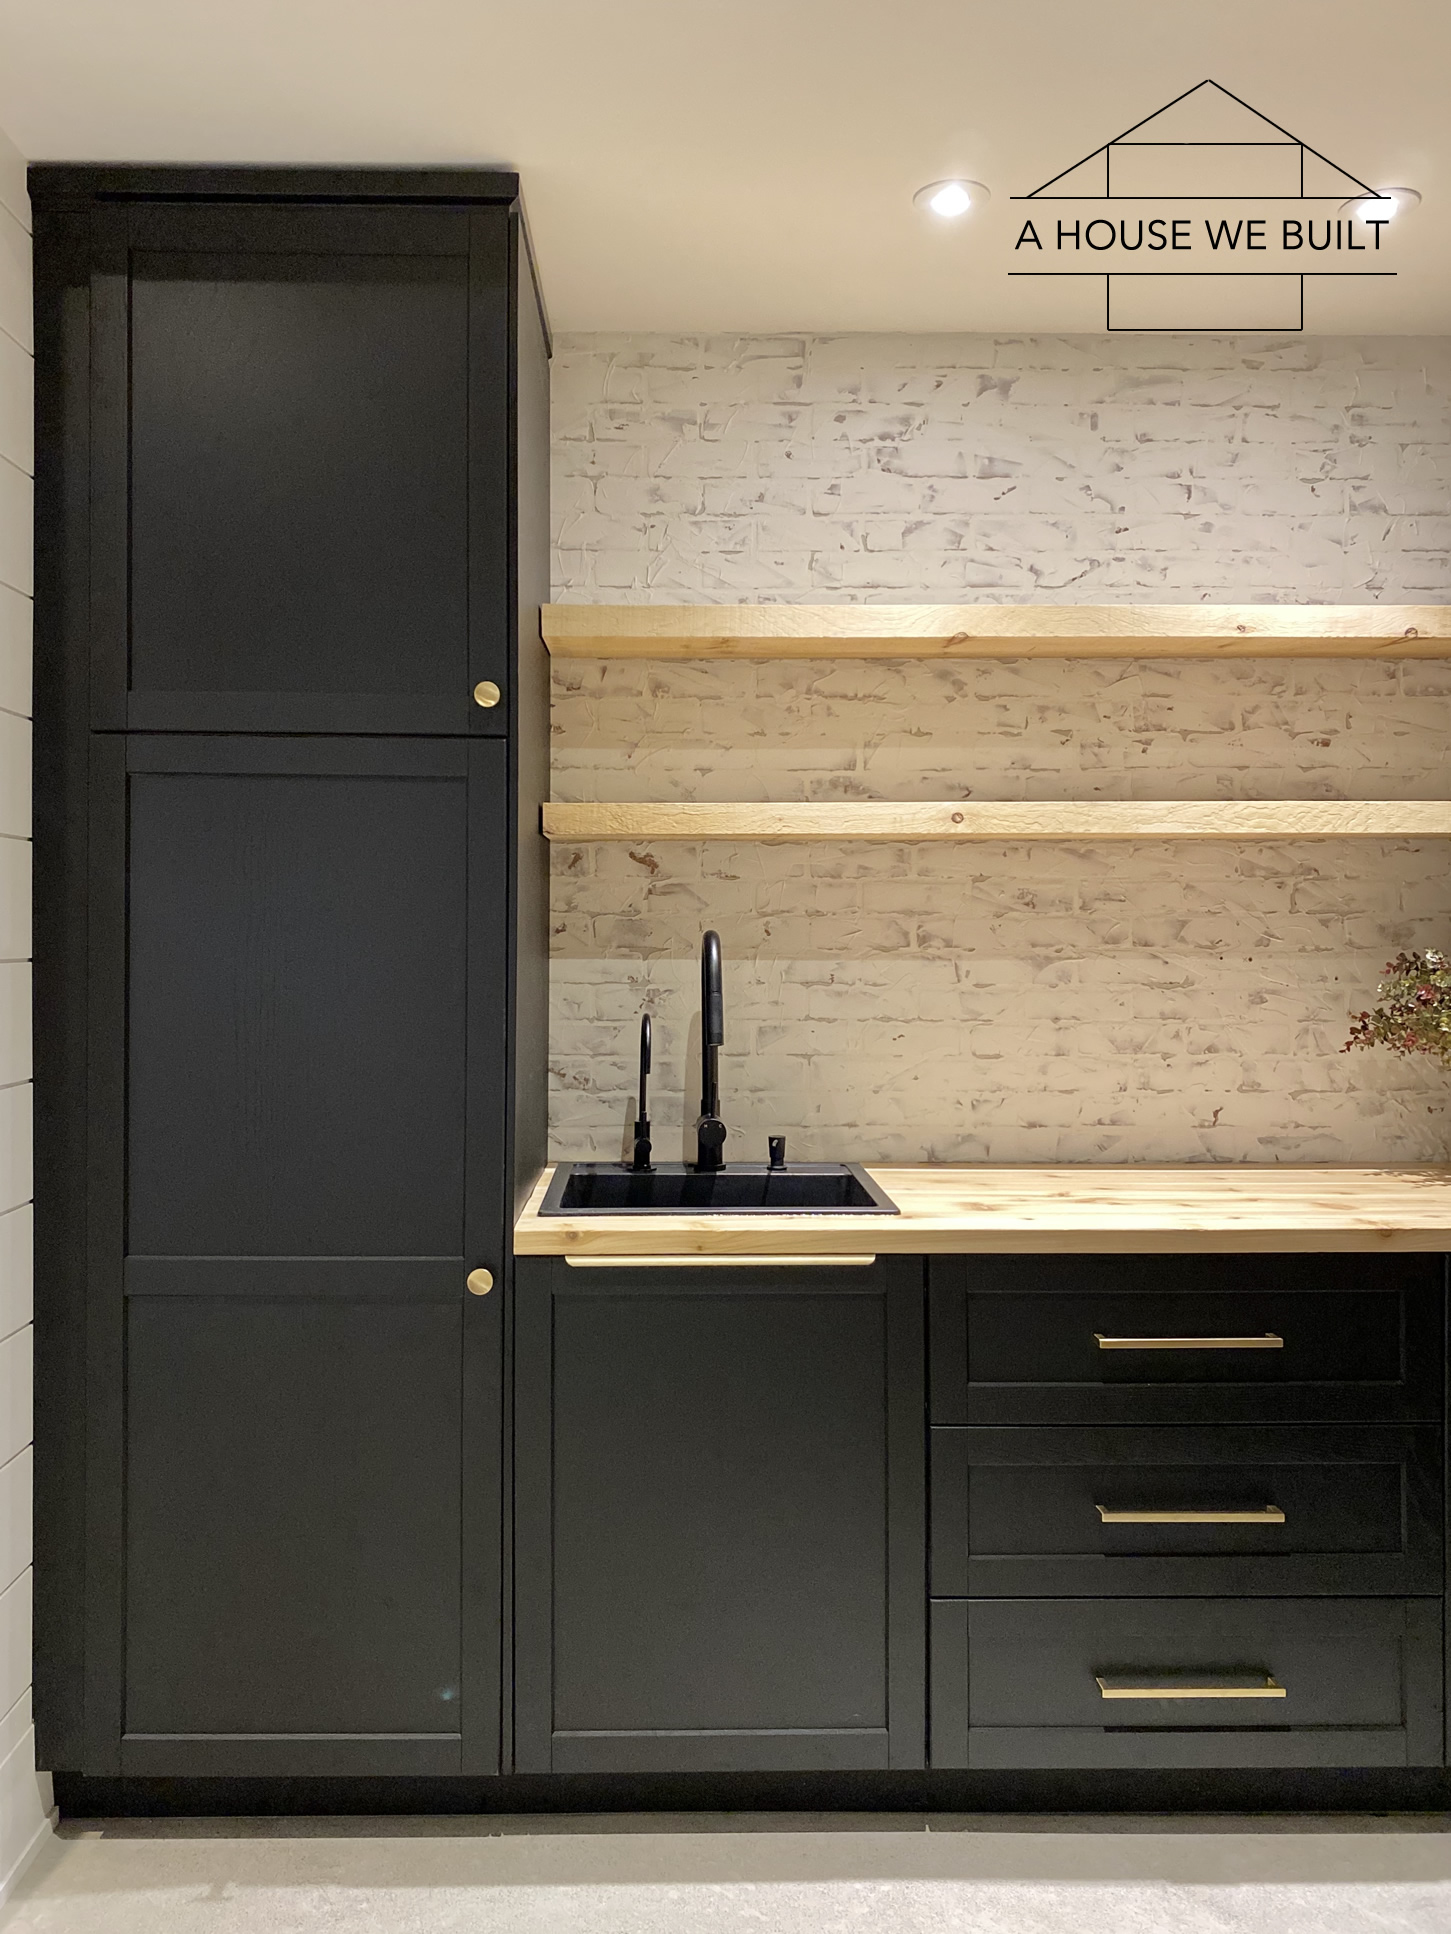
We installed floating open shelves over the snack bar in our Home Theater Room in our Basement so we thought we’d share how we did it here! There are many great ways to do floating shelves and each of them have their own advantages. The method we used not only seemed the easiest to us but also using genuinely solid wood planks achieved the thick, chunky, rustic look we were going for very authentically.

We also did these shelves in our Game Room and the little nook in our Basement Hallway.

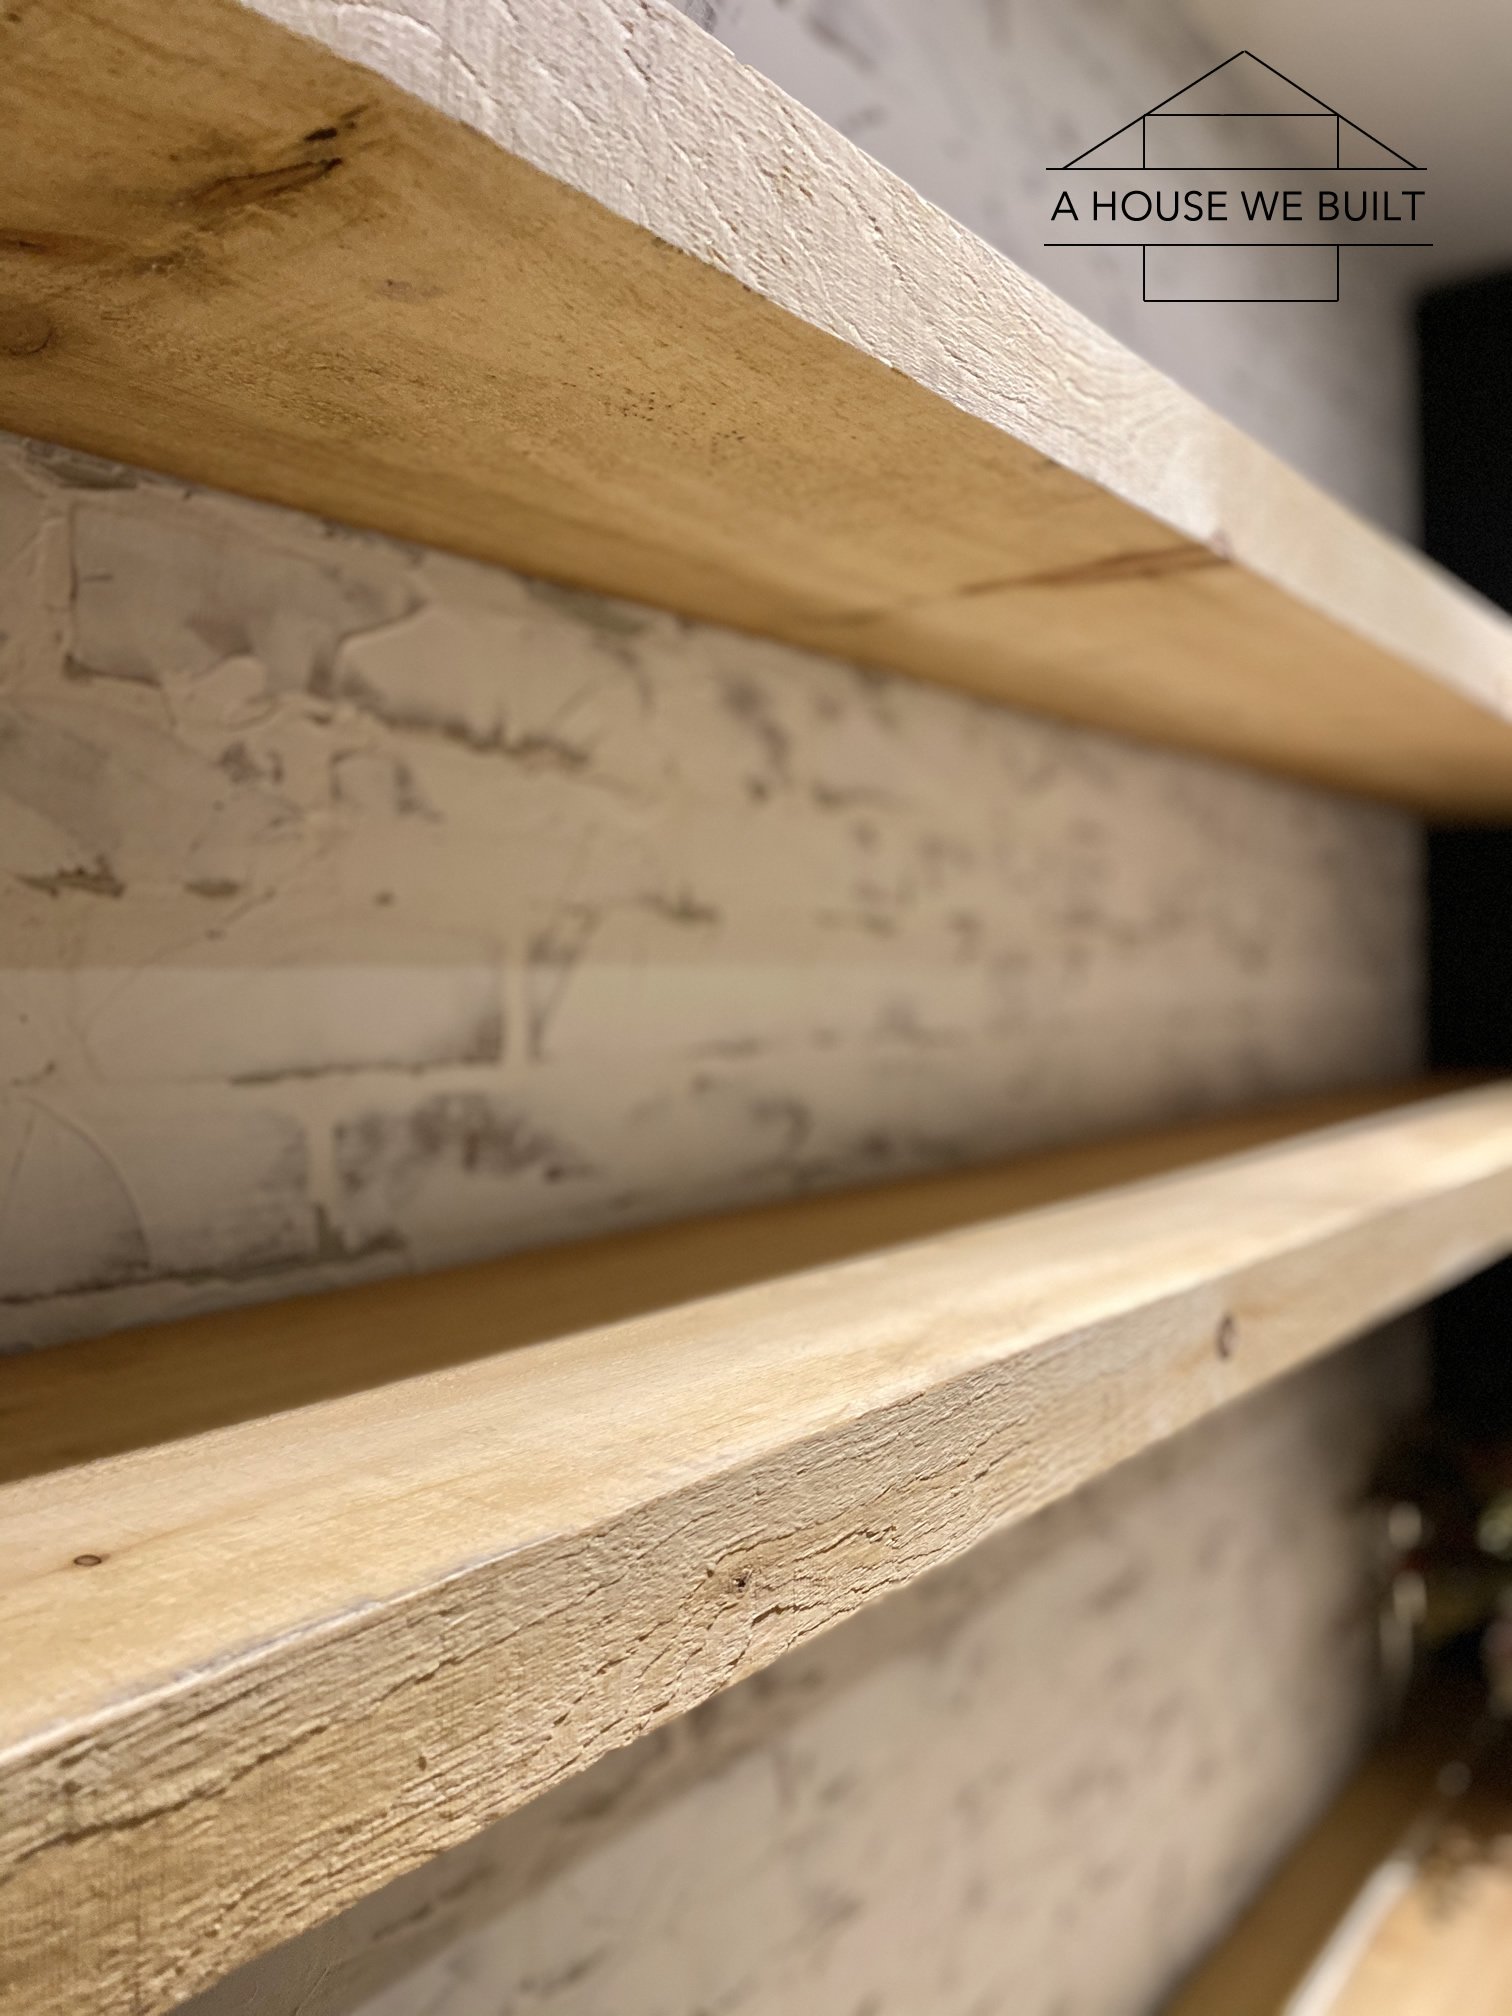
We use real solid wood boards as our shelves, so they’re not specifically “shelving”, they’re just planks of the right size and shape that we then turn into shelves.

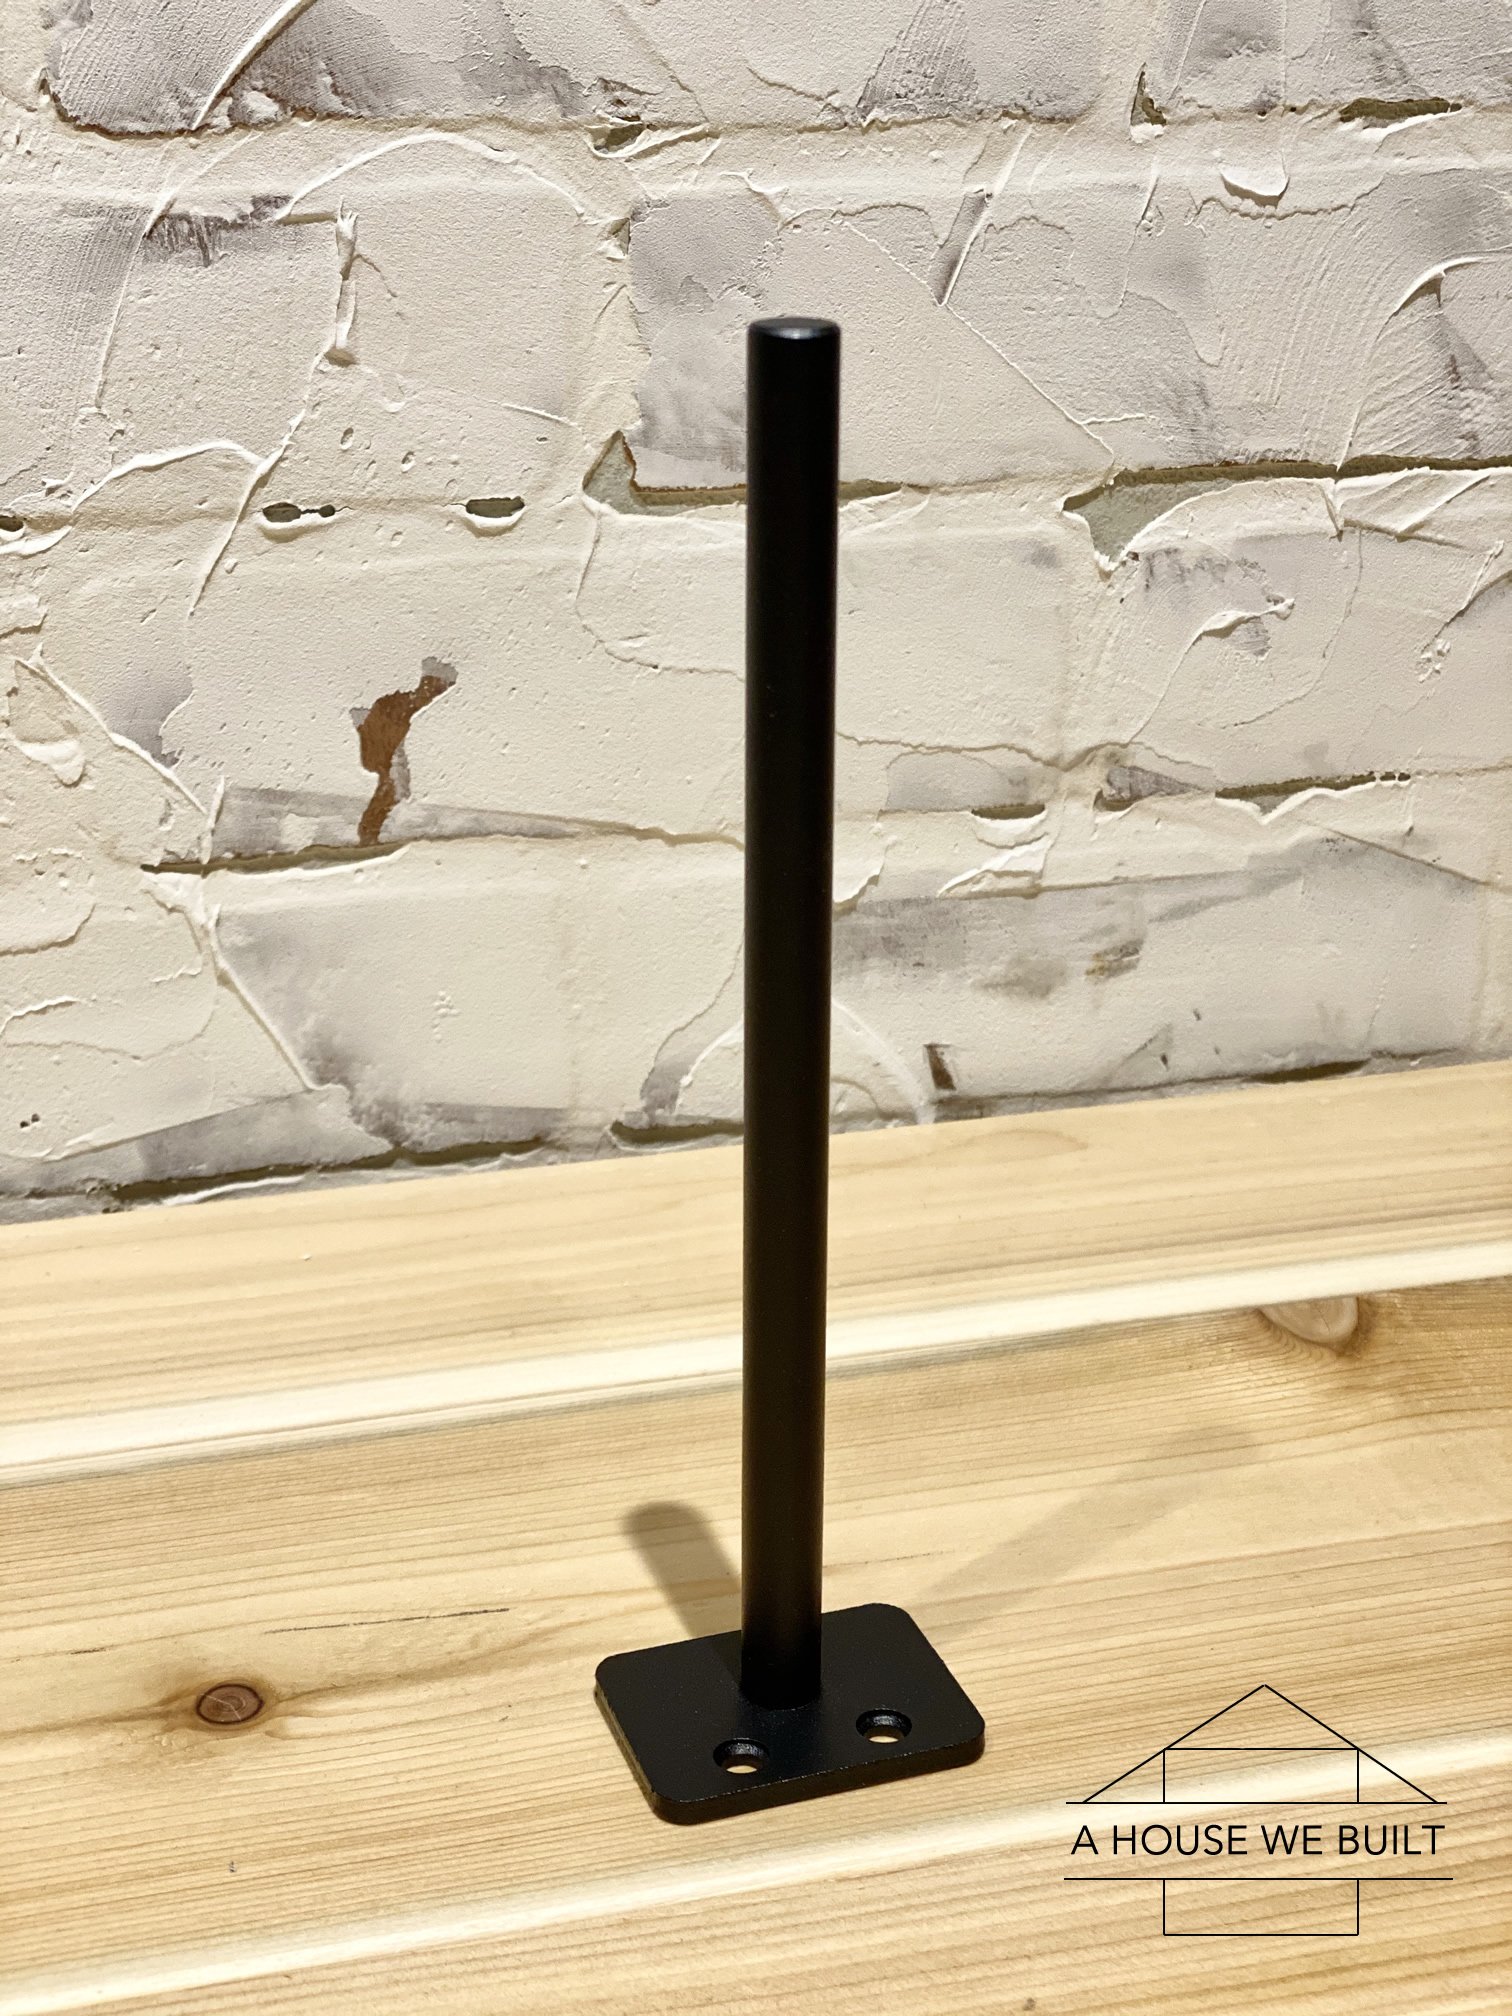
The process for installing floating shelves is simple. You just screw the rod brackets (Amazon) to studs, drill holes for them in the wood, and slide the board onto the rods. But I’ll go into more detail below:

MATERIALS & TOOLS LIST:

  • Floating shelf brackets: Amazon
  • Wood boards: ours are 2″ solid planks (you can use any type of wood)
  • Extra long spade drill bit (+ drill): Home Depot (to drill for brackets)
  • Miter saw: Home Depot | Amazon (to cut boards to size)
  • Matte top coat: Home Depot | Amazon
  • Sandpaper: Home Depot | Amazon

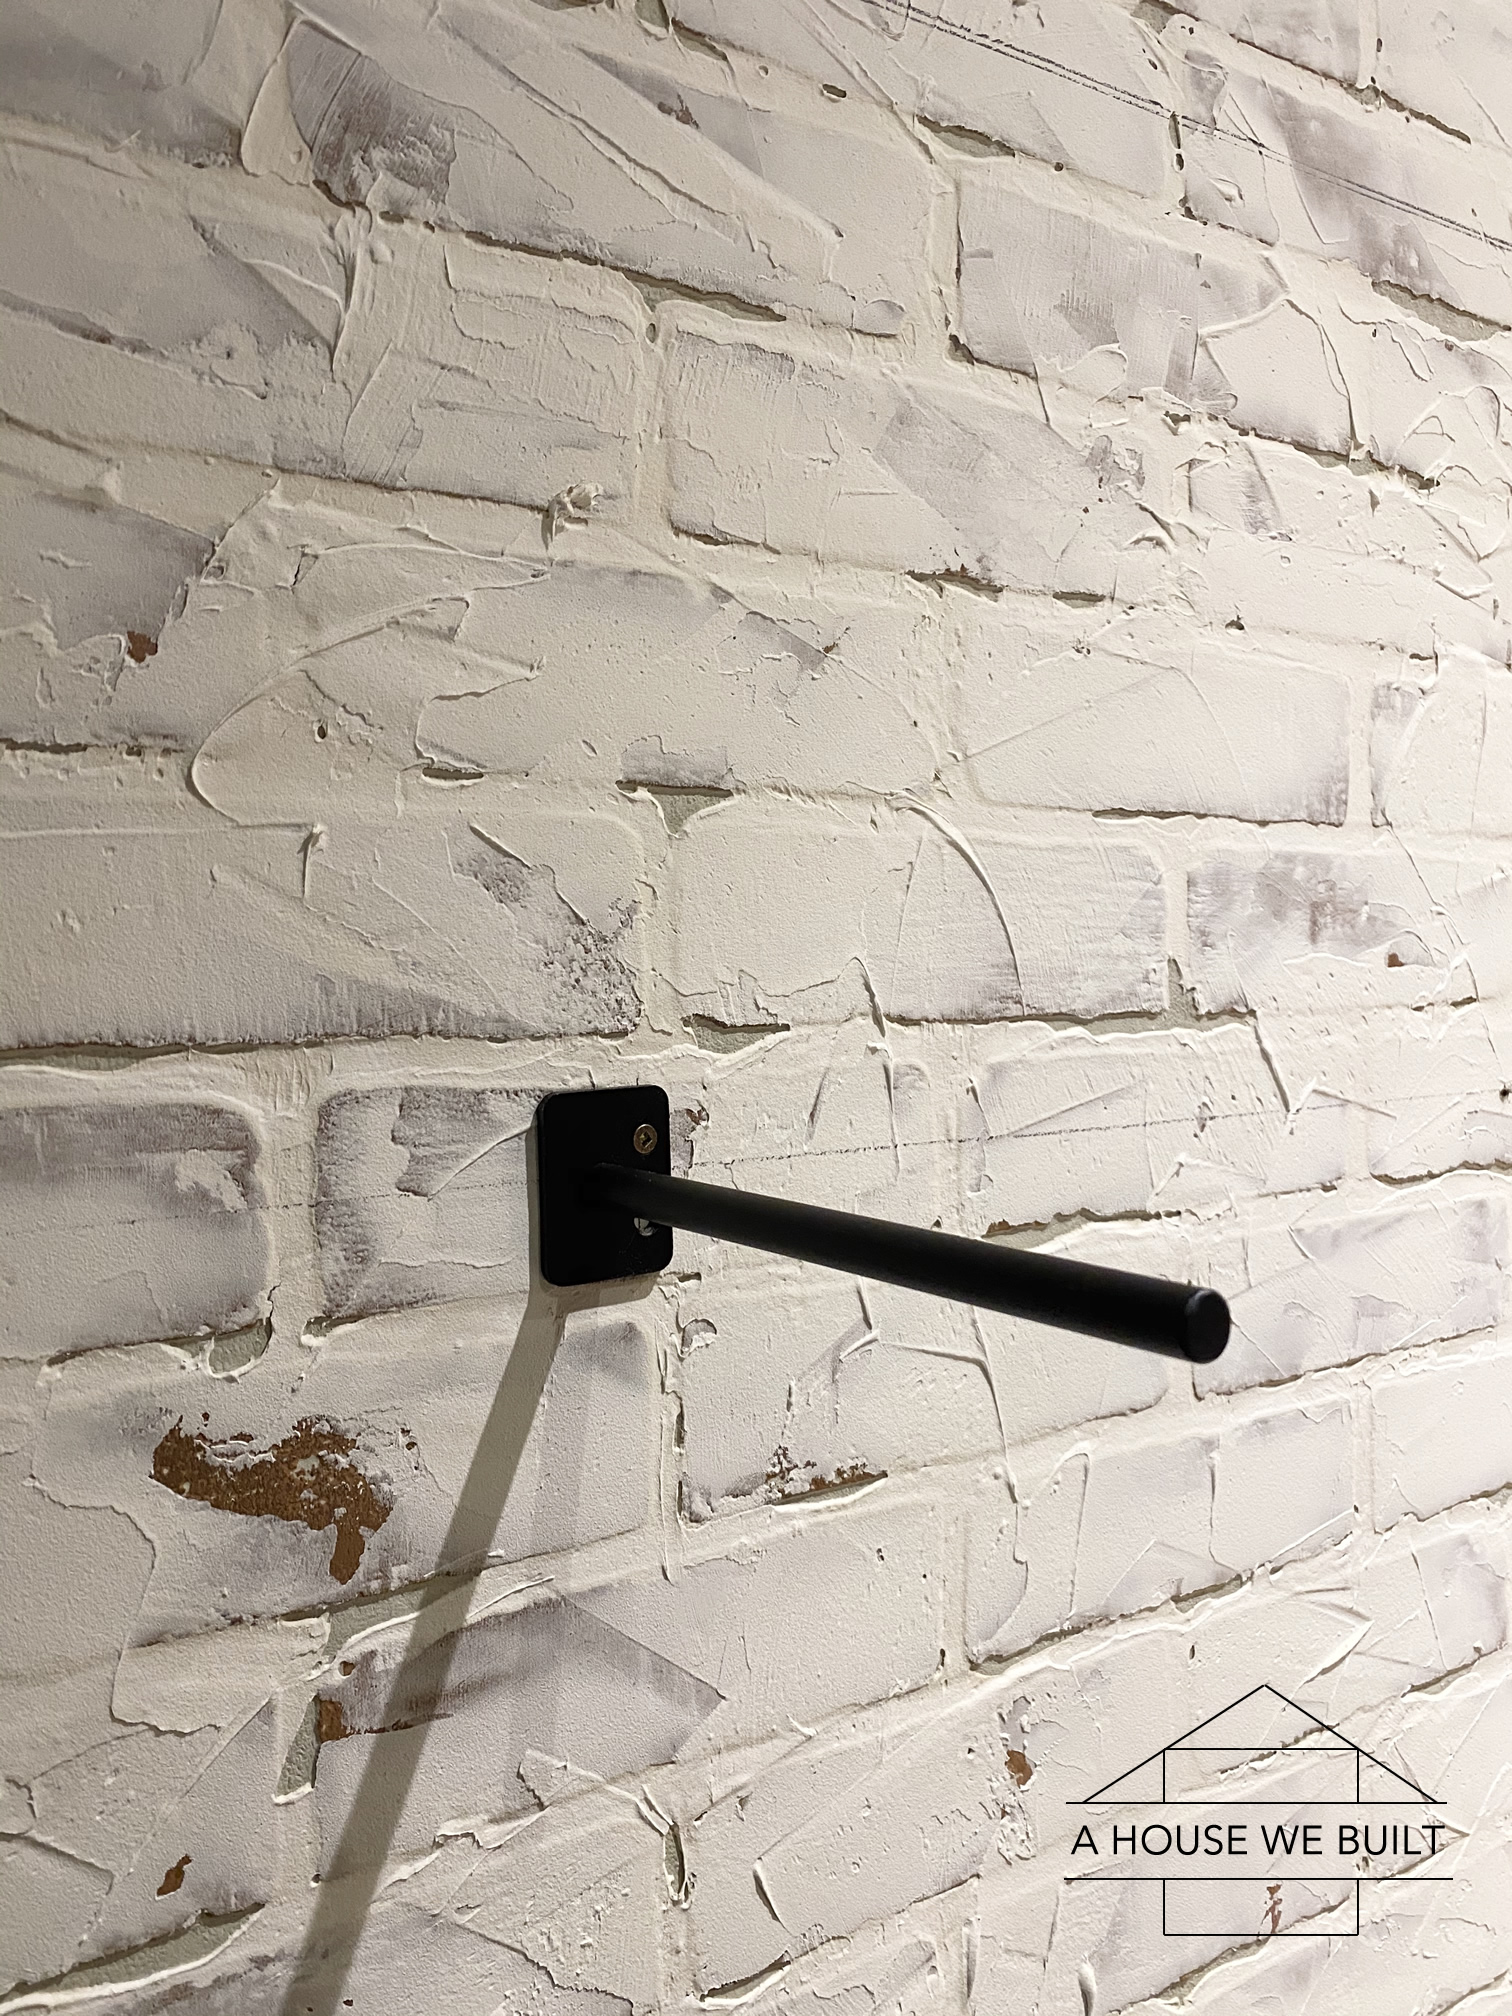
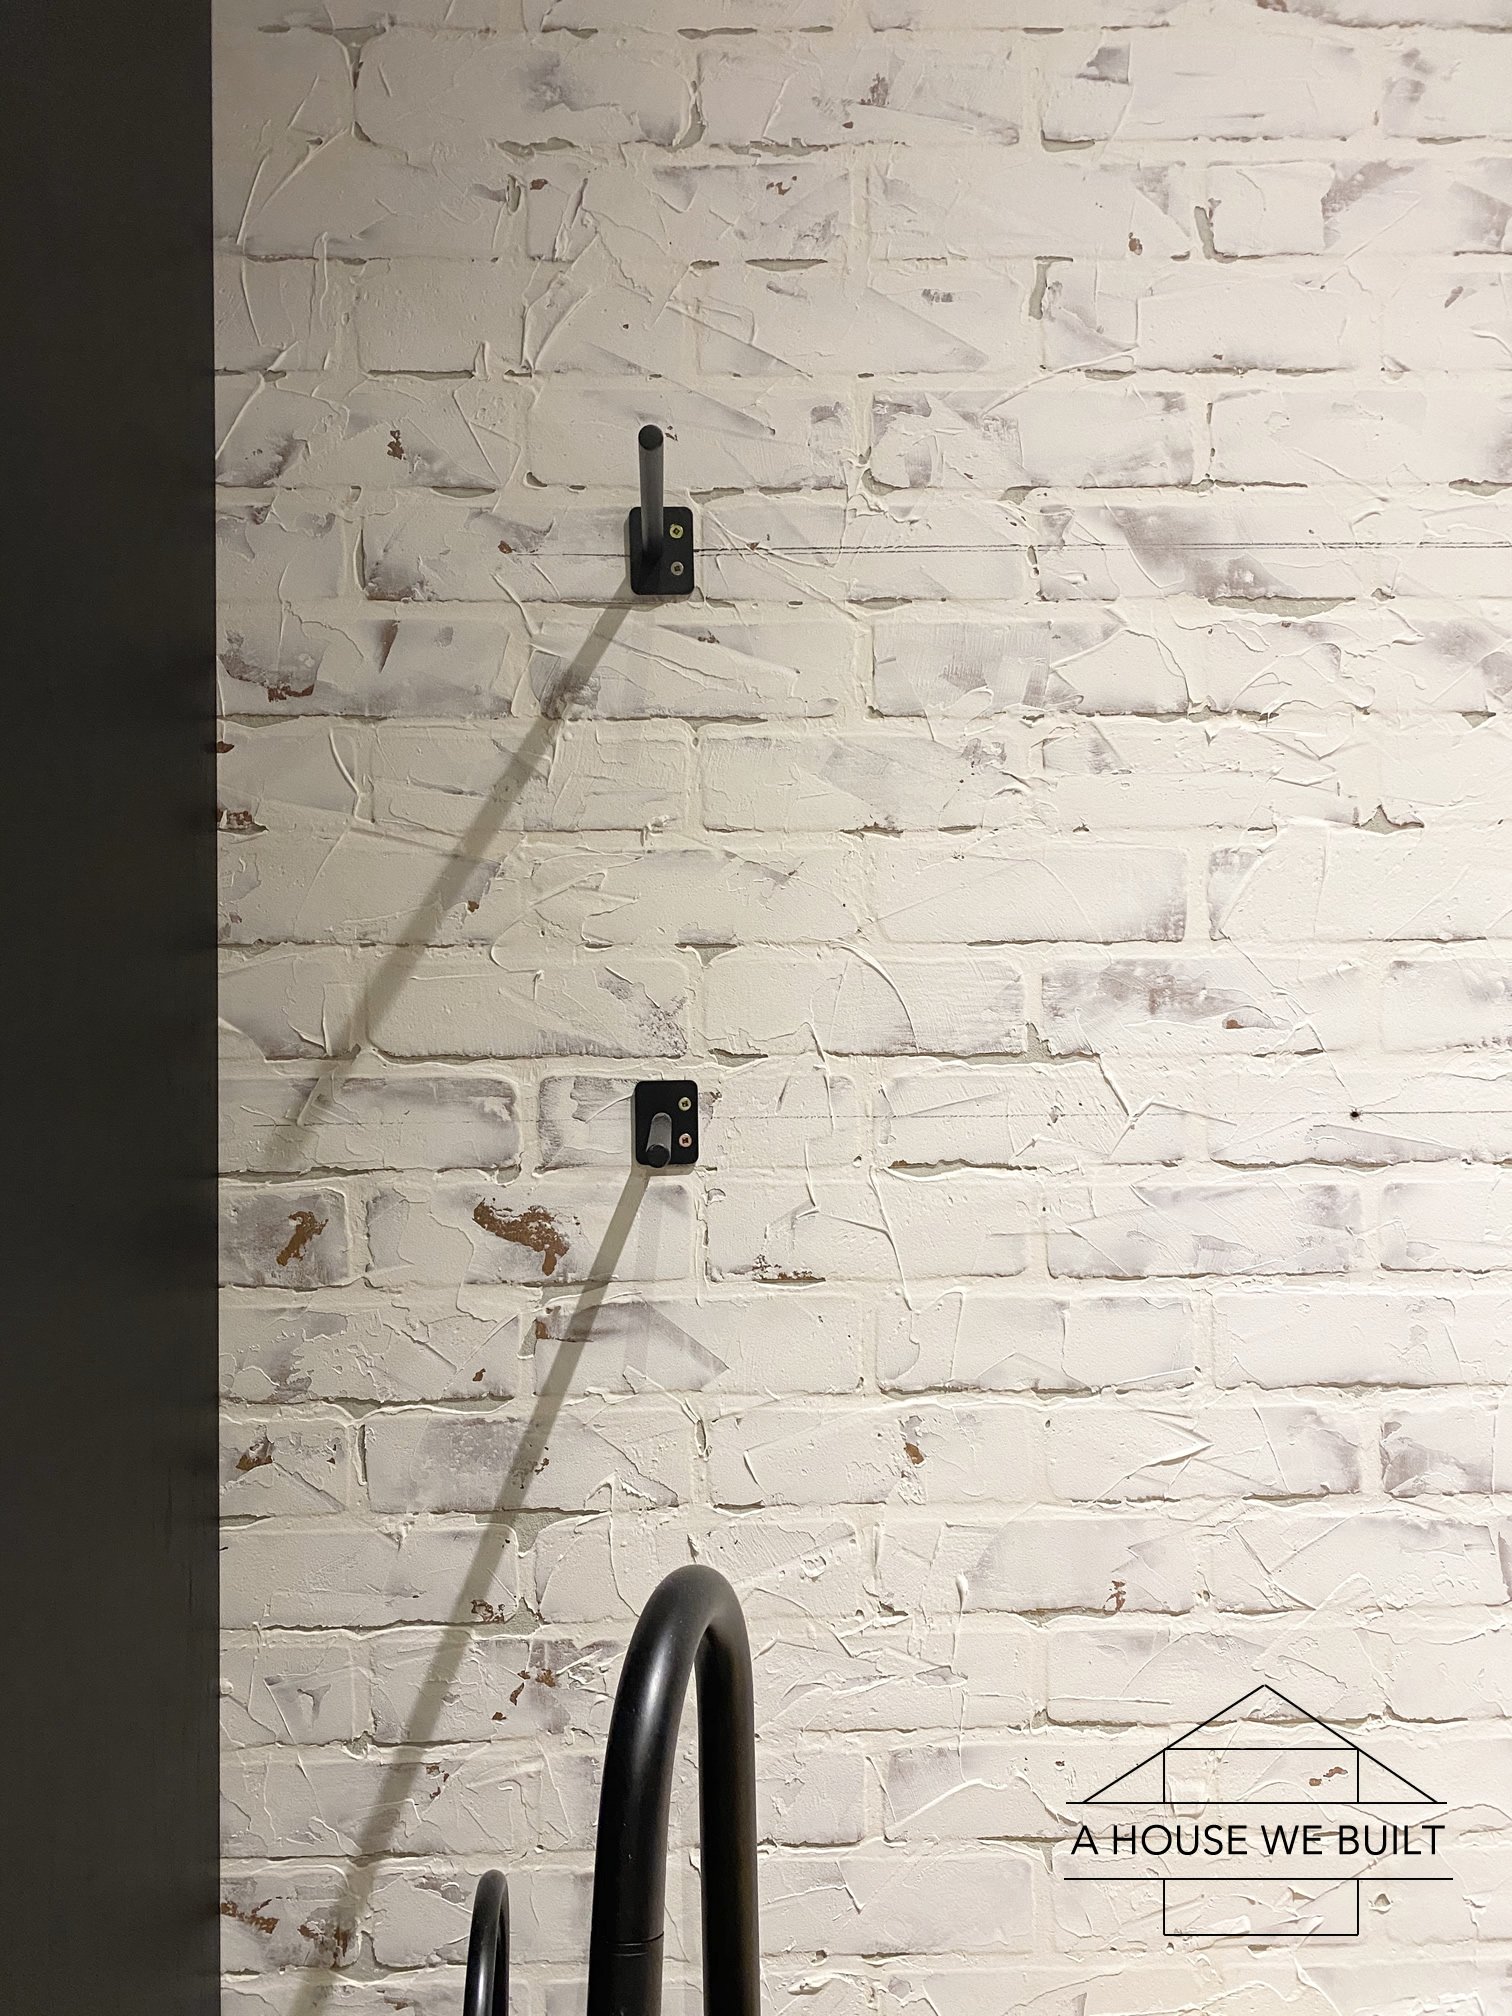
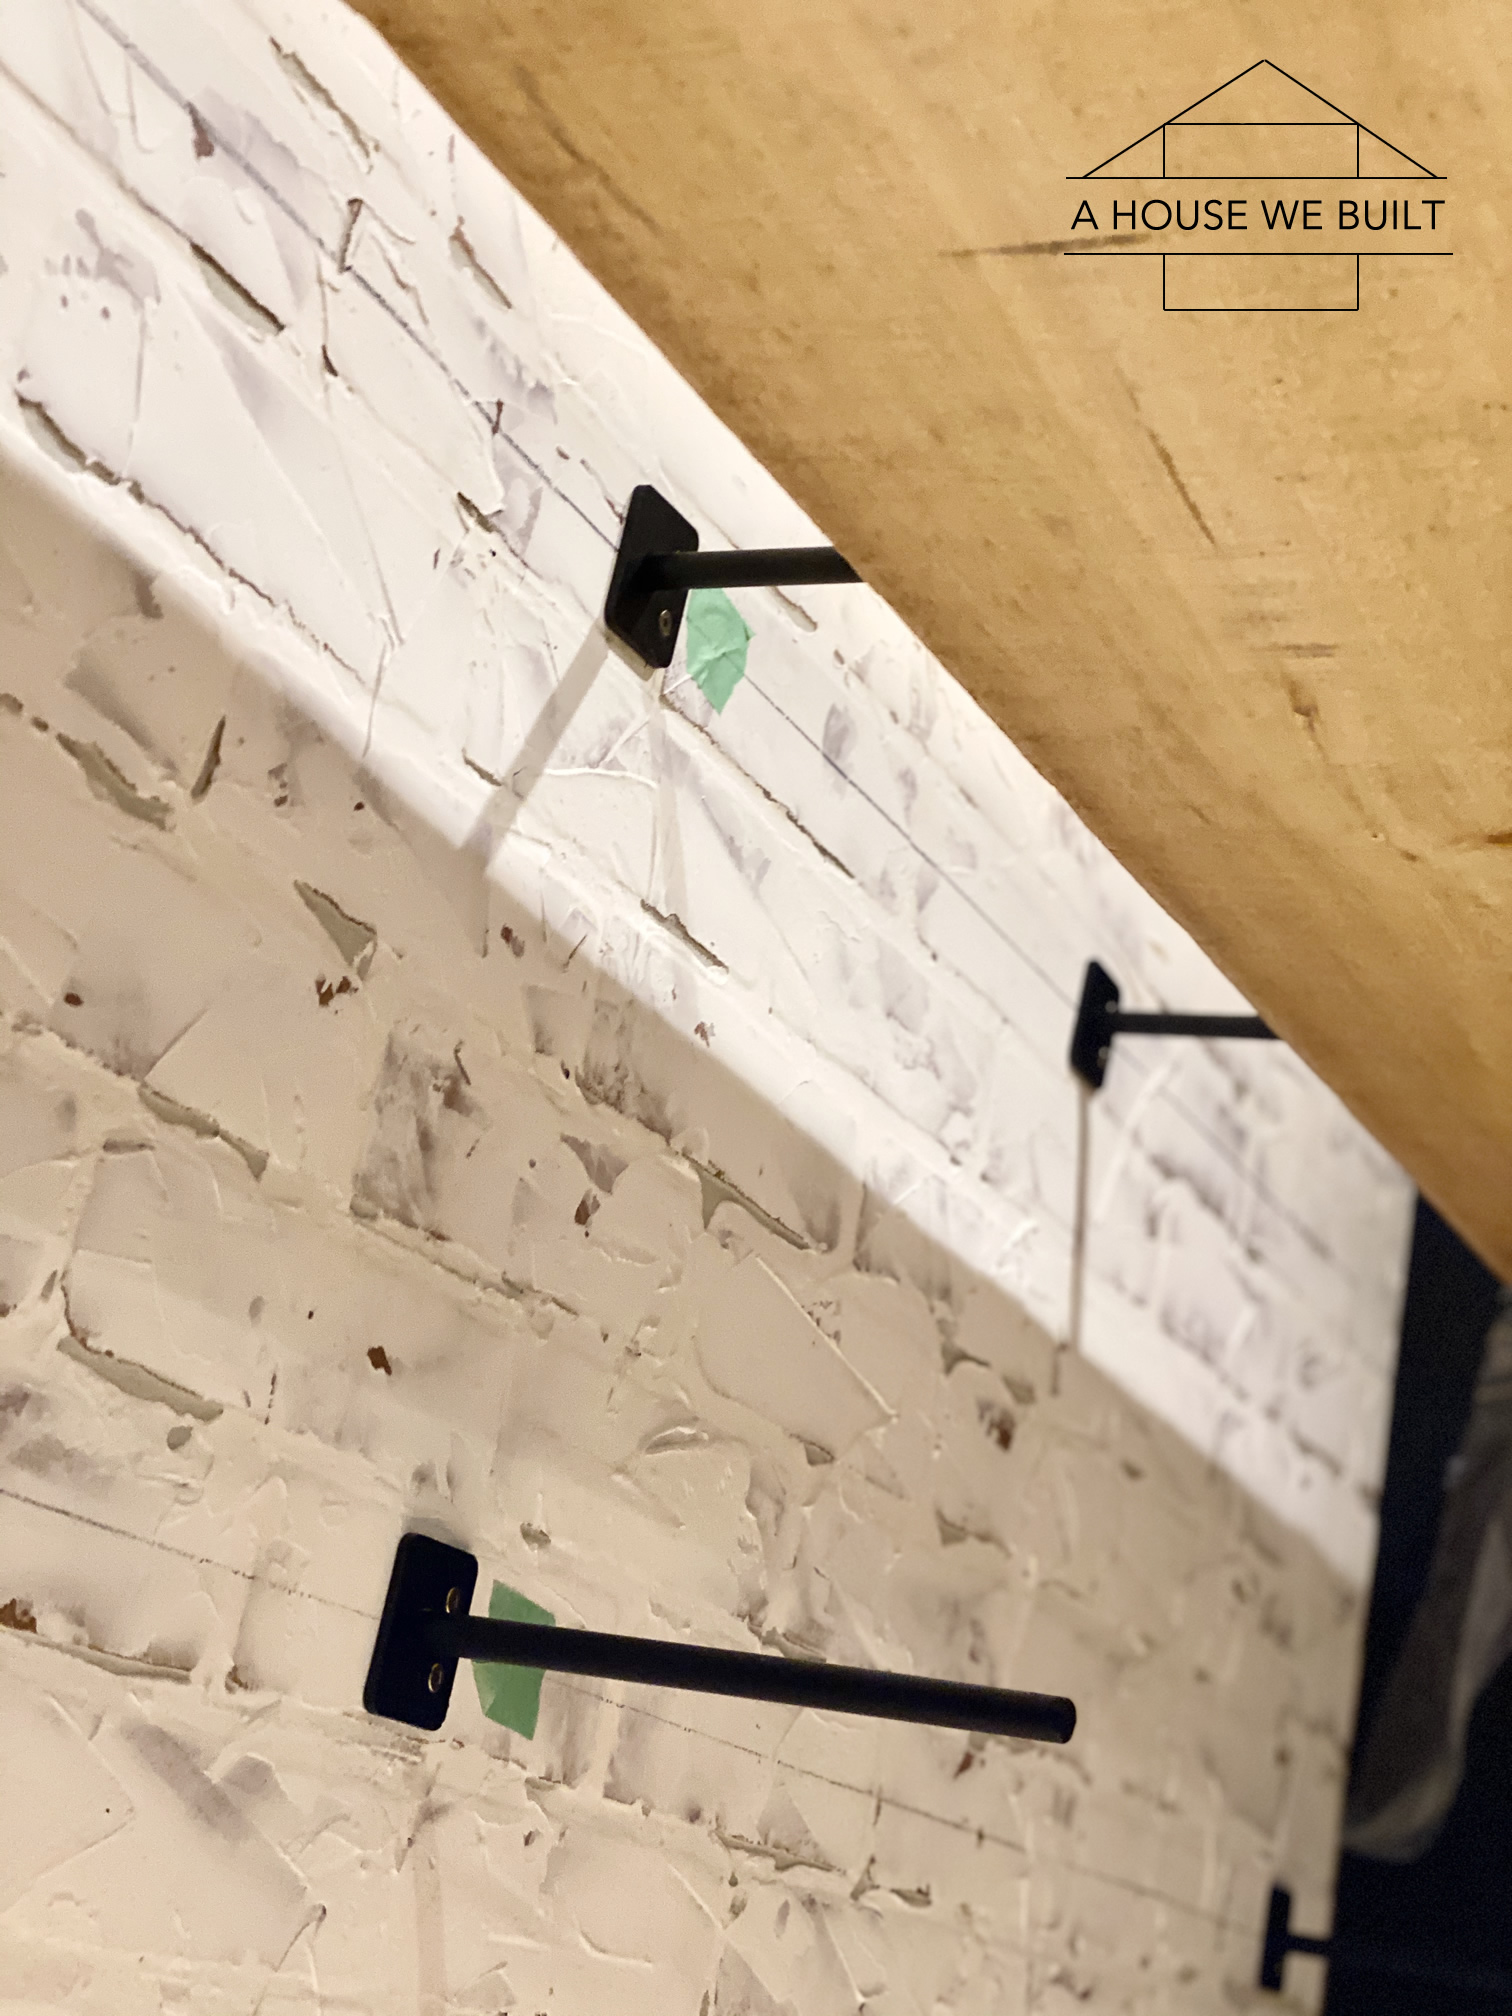
1. INSTALL SHELF BRACKETS:

The style of floating shelf bracket we used is this: Amazon. We chose this style because we wanted the brackets to be completely hidden once the shelving was in place to give the “floating” look. When your brackets arrive, we recommend checking them all for straightness. A tiny bit off is ok, but they should be generally all welded straight. We used 3 brackets per shelf and each of our shelves was ~ 6 feet long.

To install them:

  1. Decide where your shelf should go and draw a level line across the space.
  2. Mark the studs and pre-drill holes for your brackets.
  3. Screw them into the studs.

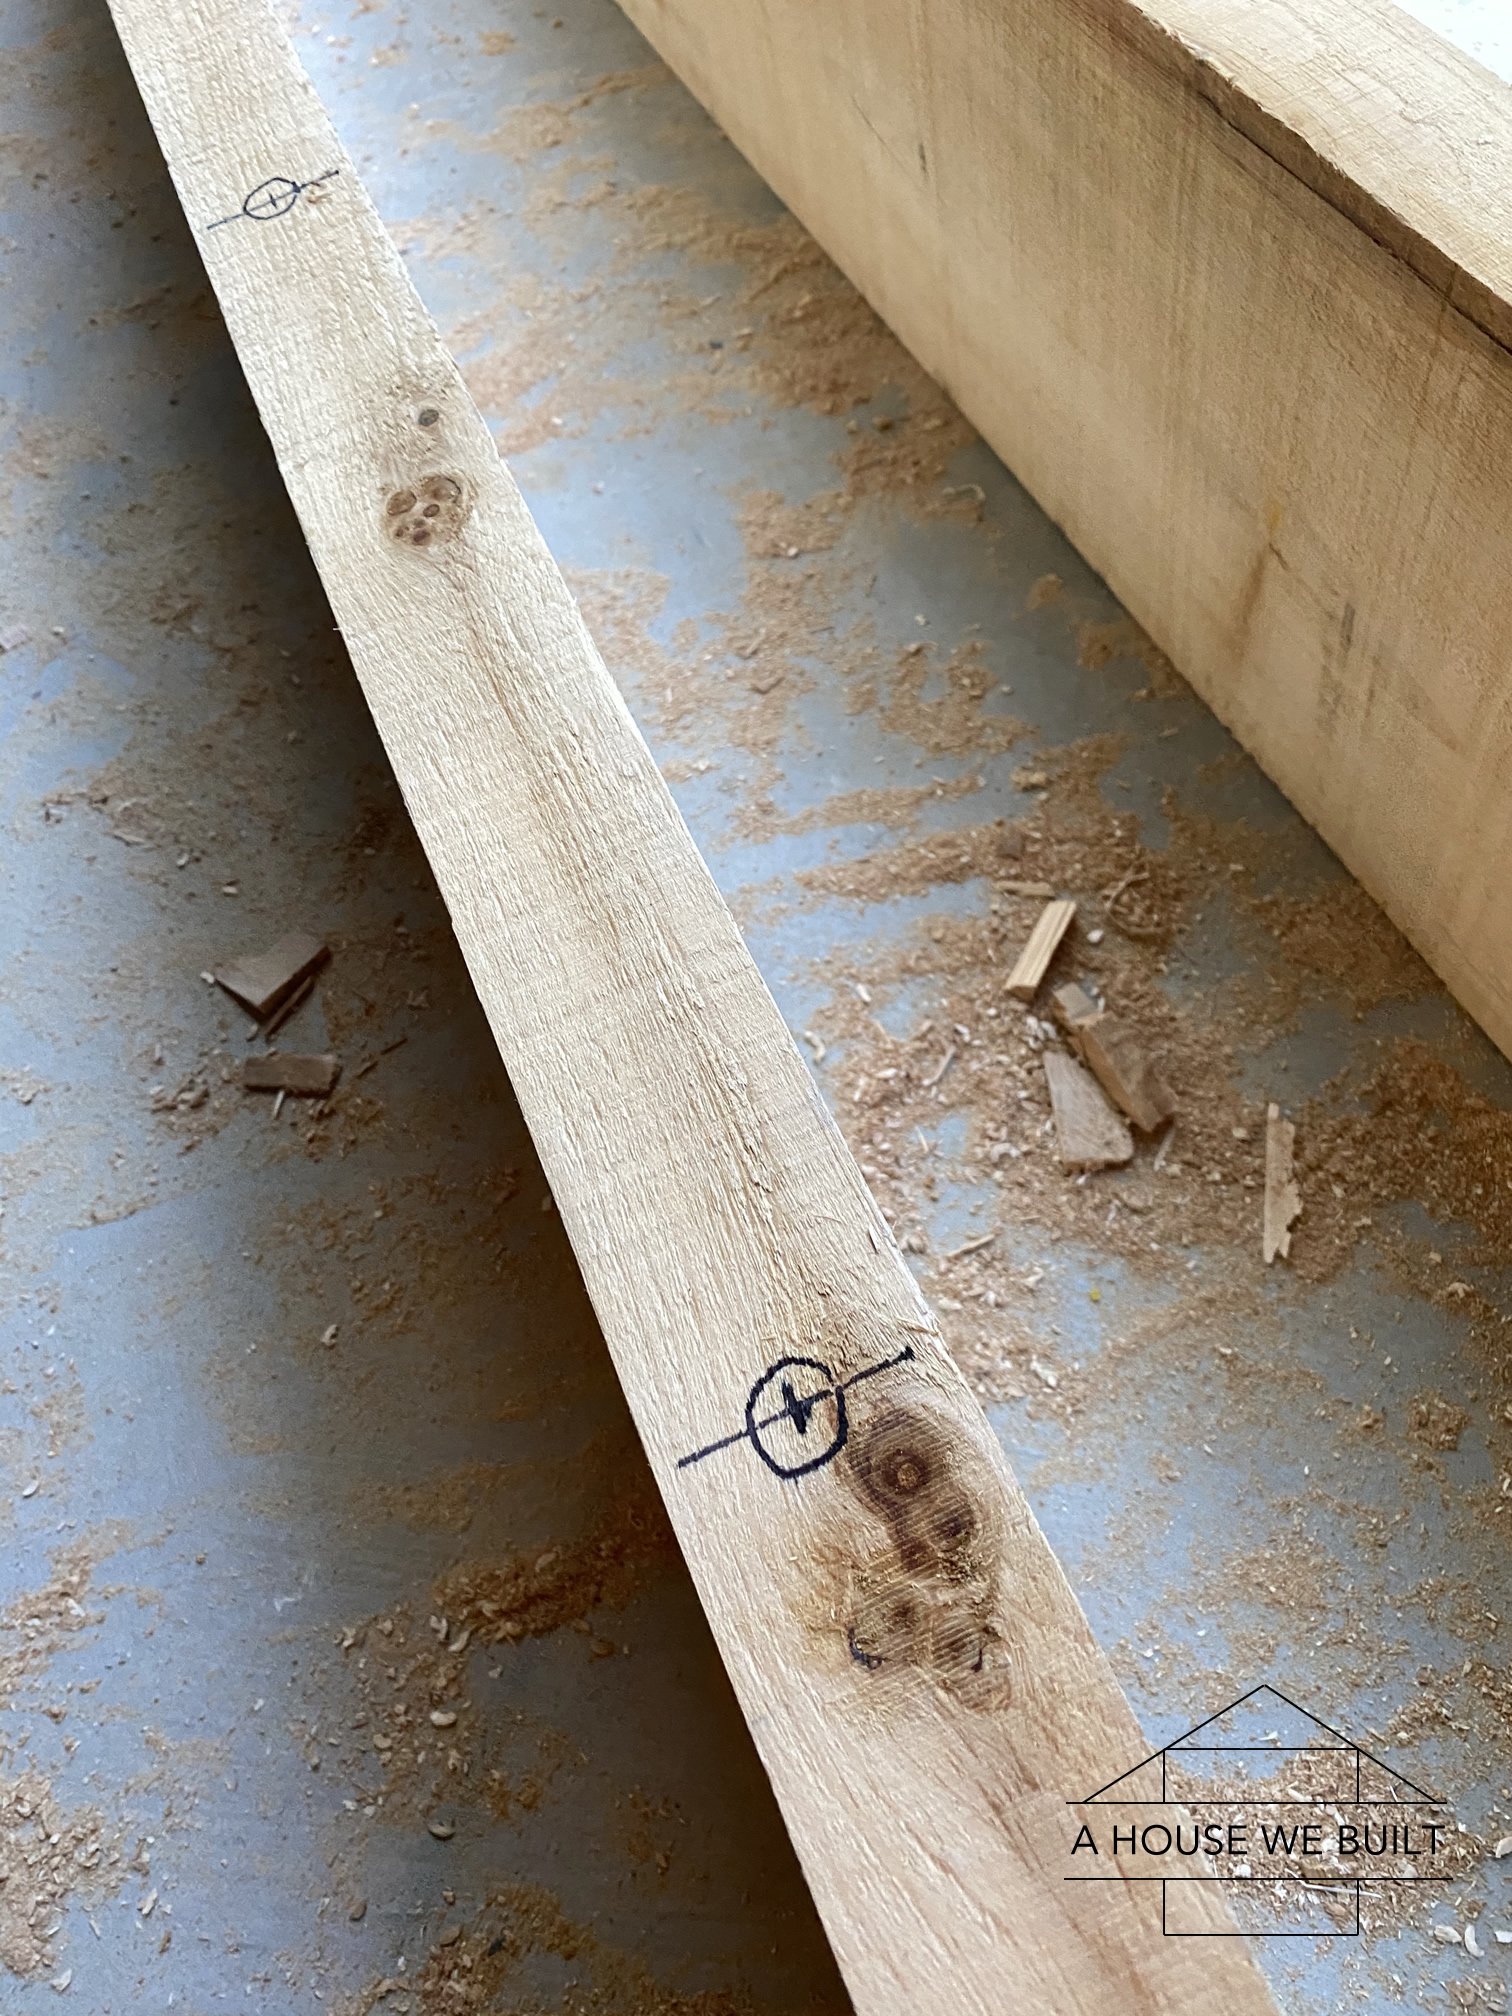
2. PREPARE WOOD BOARDS:

Our shelves are solid wood planks: 2″ thick x 10″ wide (true measurements) x 6′ long.

First, cut them to the length you need. A little tip if your shelving is going between two walls or two cabinets (as ours were) is to leave about 1/16″ of space on either side when calculating your board/shelf length. This ensures that the board doesn’t scrape against anything as you slide it into place.

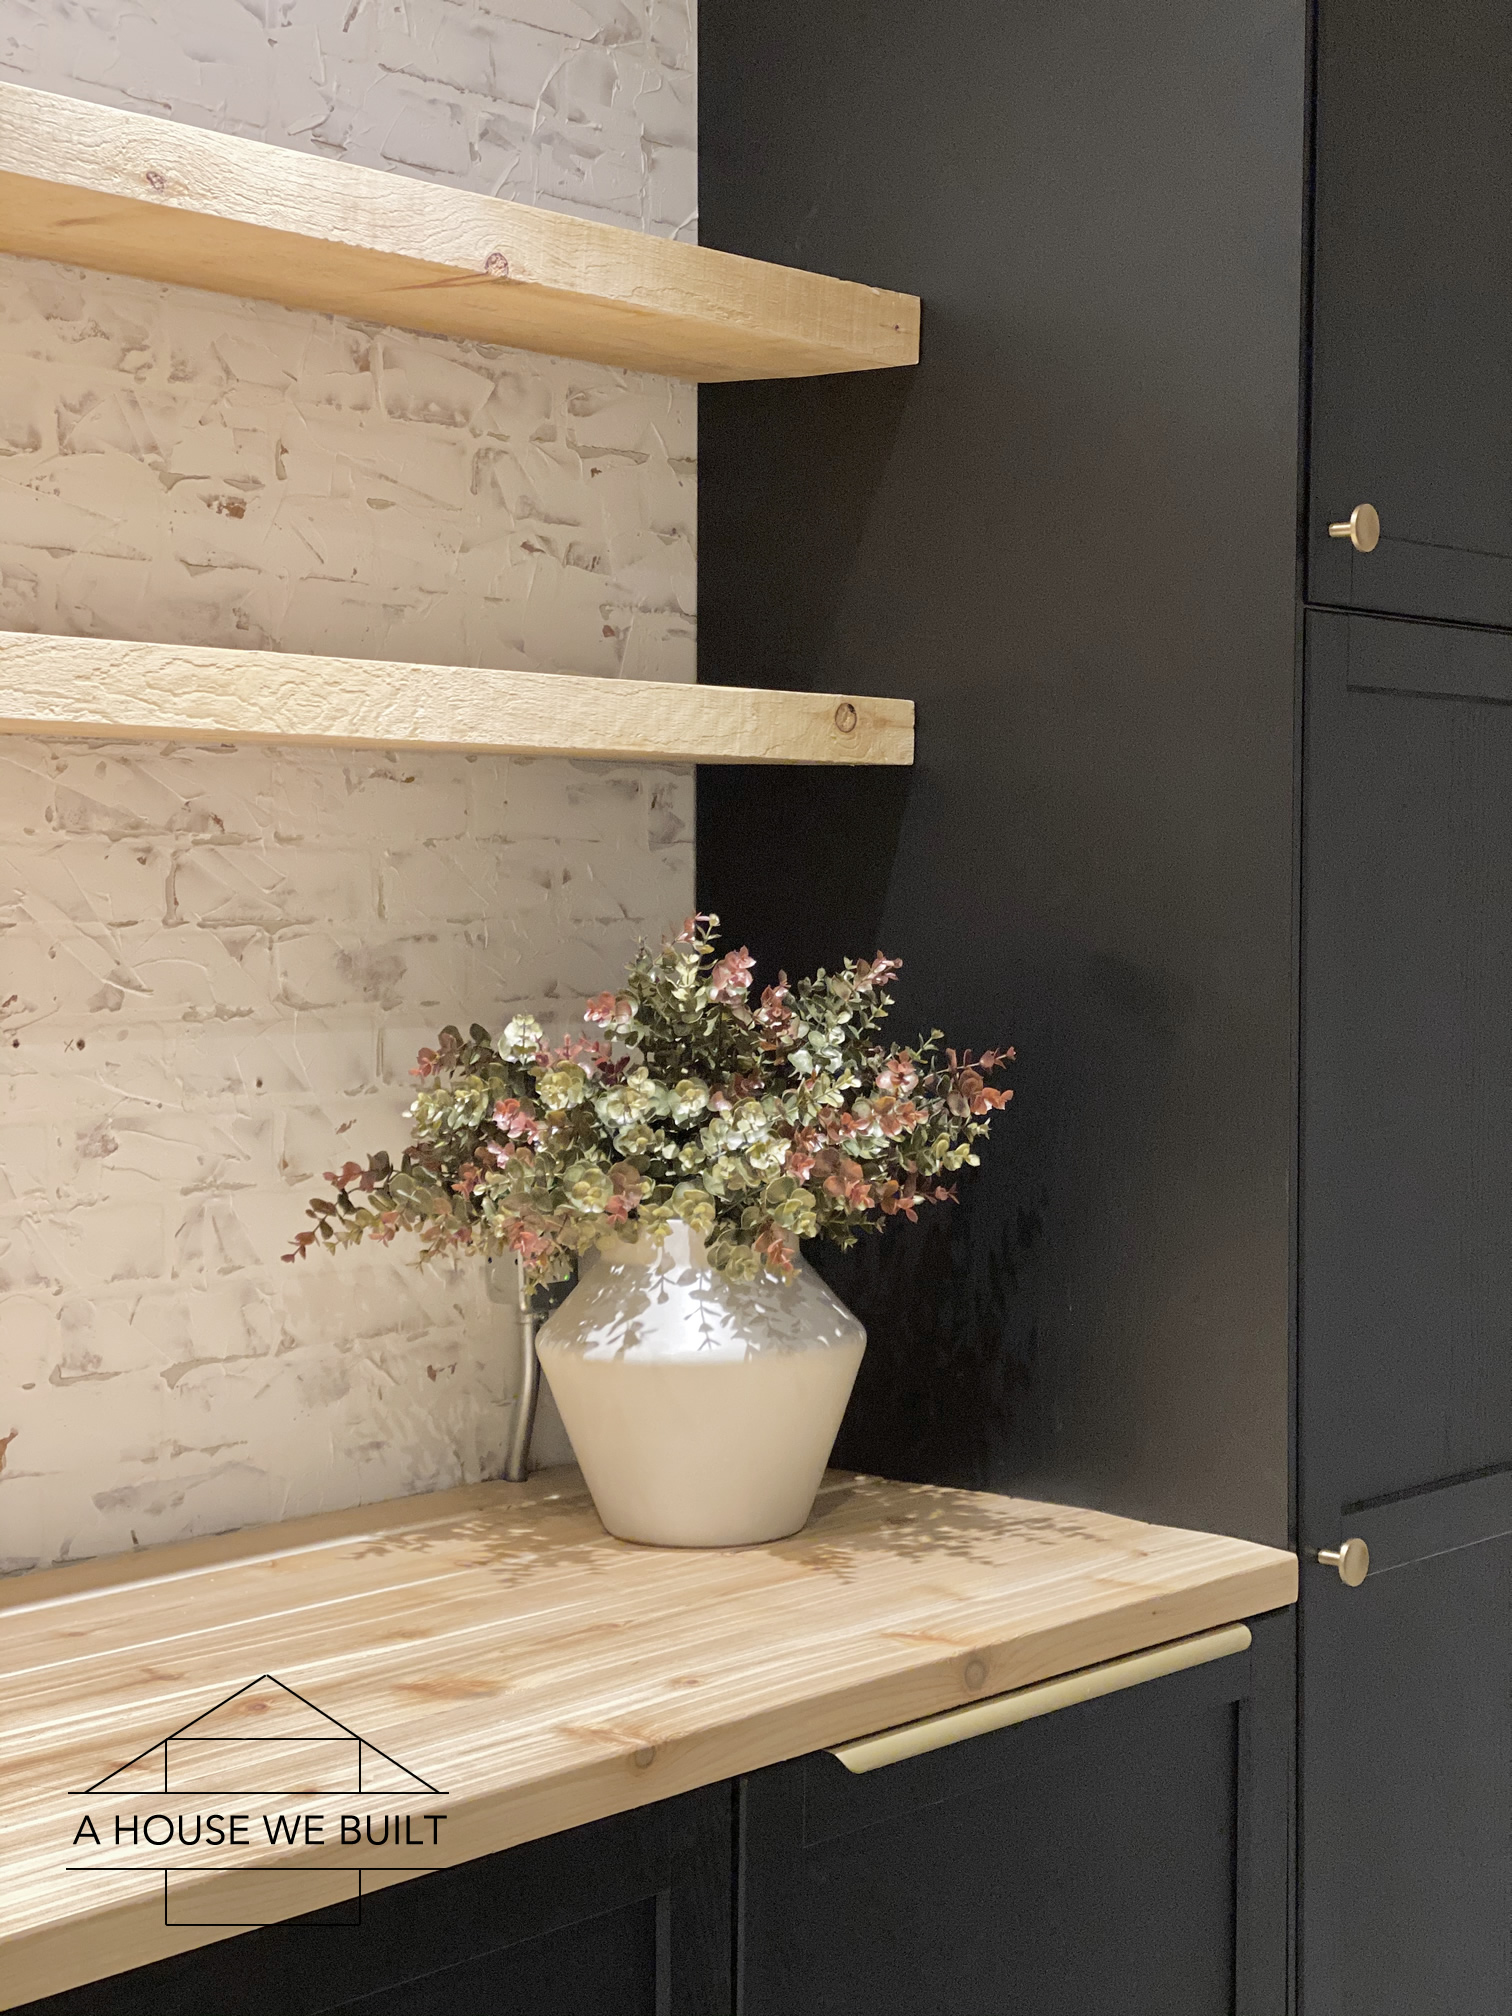
Next, finish them. We chose rough planks since we were going for a bit of a rustic look. The shelves needed to be easy to clean, but we also wanted to retain their warm natural color tone so we didn’t want to just sand them down to smoothness (which would have lightened them and lost their color). So we finished them in a way that kept their rustic/rough look while making them smooth enough to wipe down.

This is how we finished them:

  1. Apply a clear matte top coat (source: Home Depot | Amazon) to your rough board with a paint brush and allow it to fully dry. Very important that you do NOT sand before applying the top coat!
  2. Once the top coat is dry, lightly sand (by hand, do NOT use an orbital sander) with 150 grit until the immediate roughness is gone. You have to run your hand over it to determine the smoothness.
  3. Repeat applying another layer of top coat, wait for it to dry, then lightly sand it. This was all our boards needed, but depending on how rough yours is, you may need to repeat this several times.
  4. Do this same process to the other side (all sides of the board should be finished in the same way).

The goal with this process is that you’re filling the board’s roughness with the top coat layers and you’re lightly sanding the top coat, not the actually board (or at least, not much of it) to retain its color.

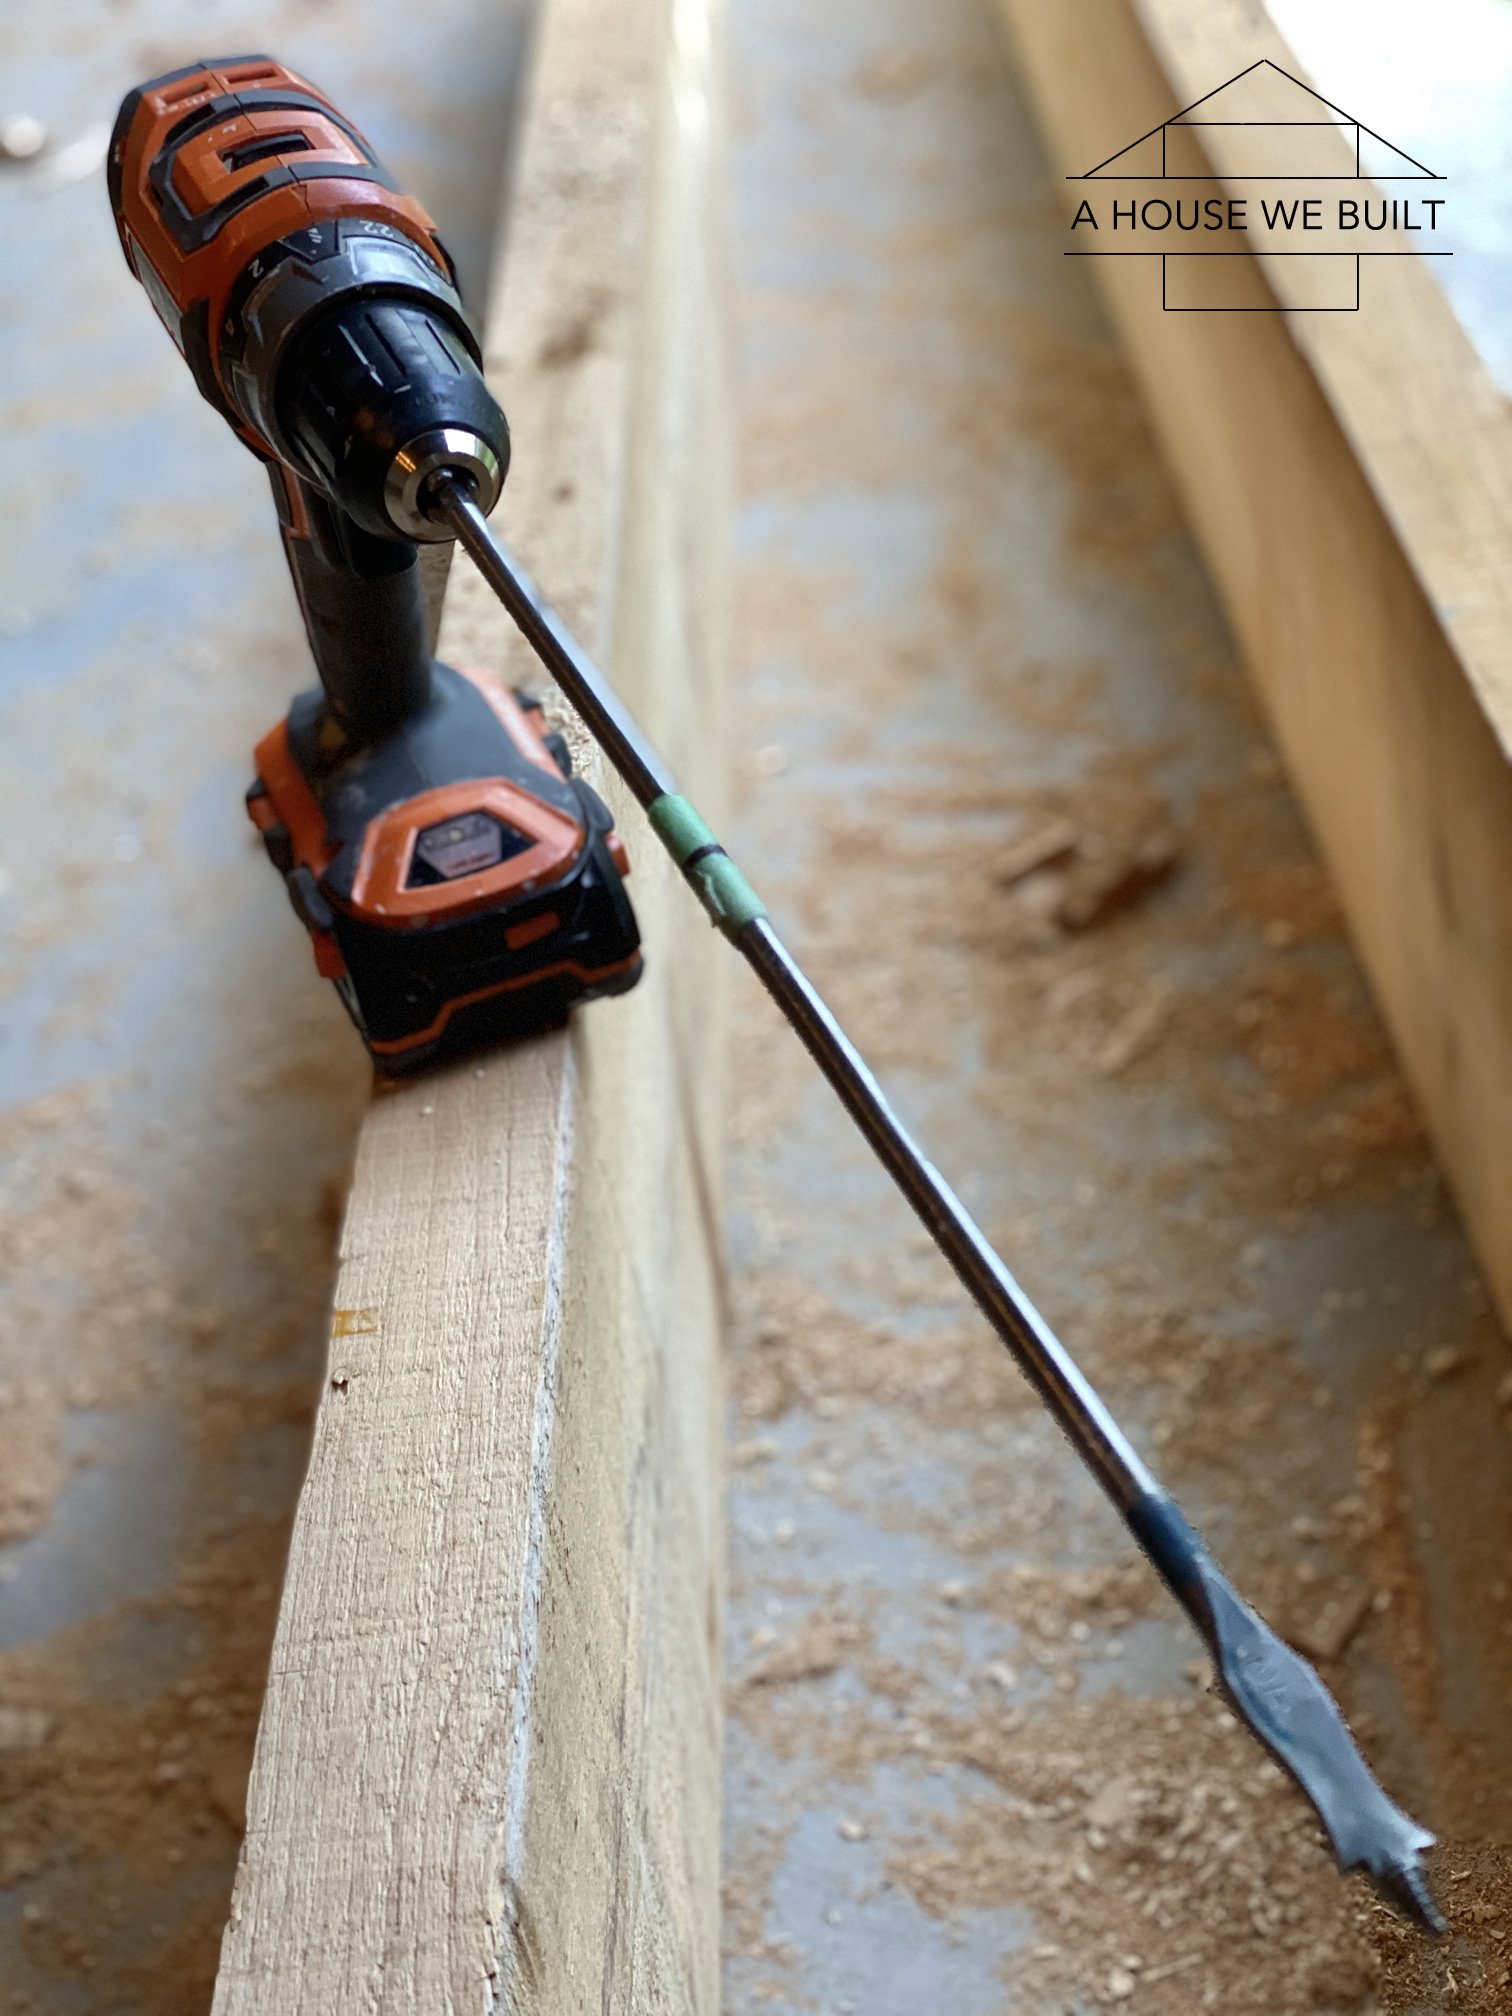
Lastly, drill holes for your brackets. You will need an extra long drill bit (ours: Home Depot) for this. Make sure your drill bit is either the same size as or only slightly bigger than the rod/bracket. Our rods were 1/2″ and we had a 1/2″ drill bit so we just enlarged the hole a bit by moving the drill about a little since the brackets were mostly straight, but not perfectly straight. A 5/8″ drill bit would have been great too, but no bigger than that. We calculated the exact placement of the holes based on the brackets’ locations on our wall (don’t forget to account for the 1/16″ gap between the board + wall if you did one), then we just eyeballed the straightness of the drill bit.
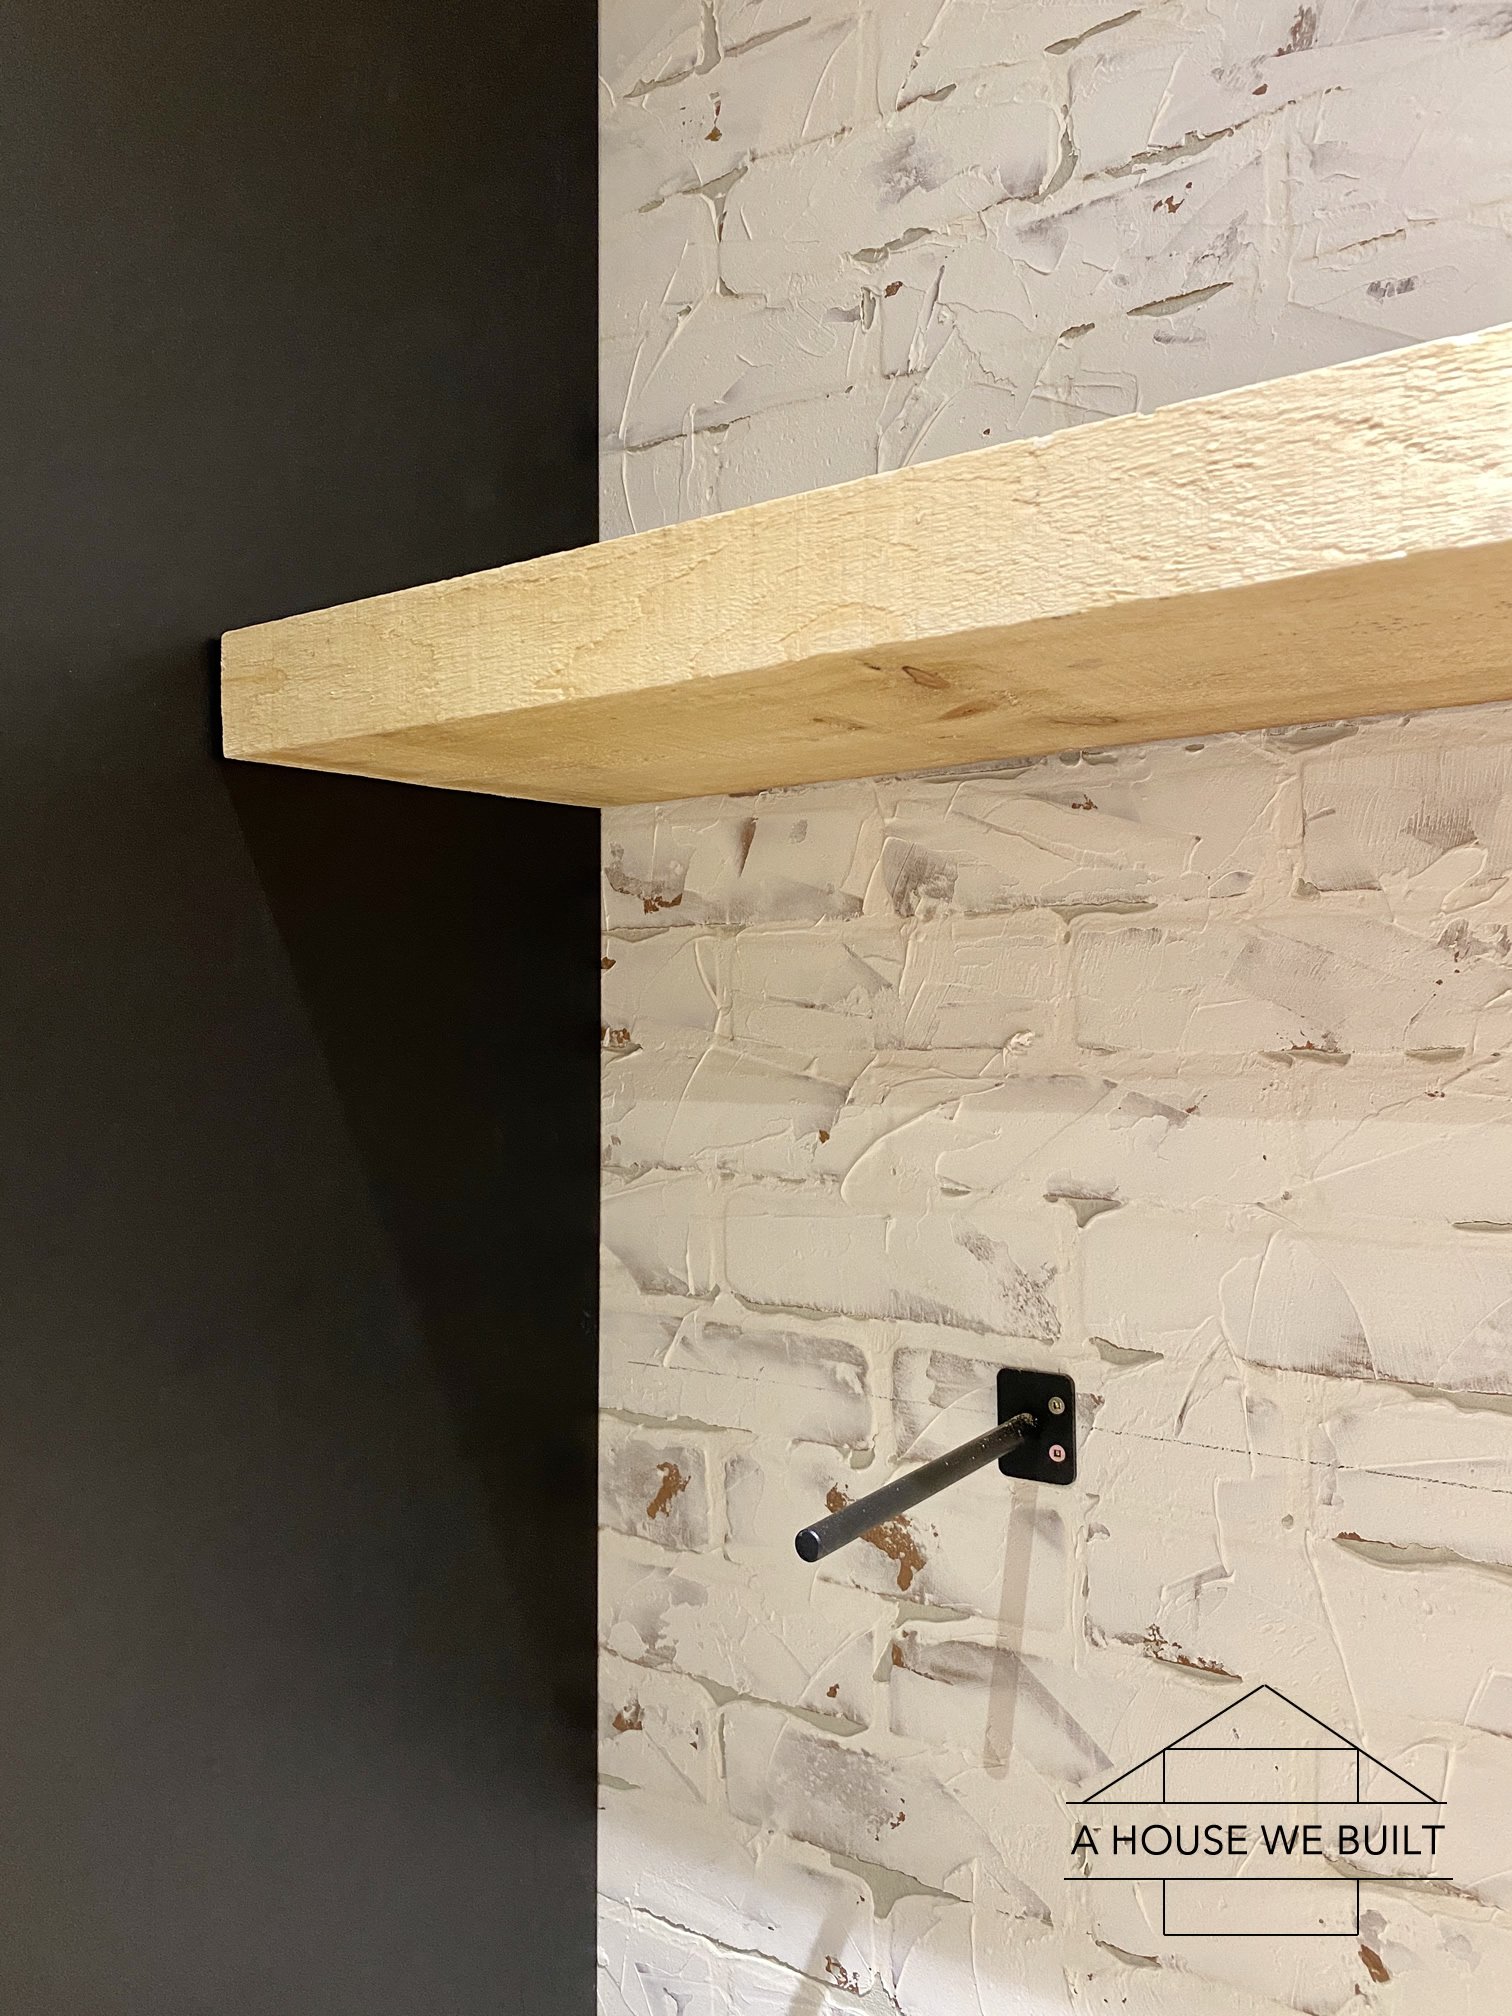
3. INSTALL SHELVES:

Once your brackets are in place and your boards are finished, simply lift the board up to your brackets and slide them onto the rods. If you’ve calculated the placement and drilled the holes correctly, they should just slide into place. A couple notes:

  • It’s helpful to have a rubber mallet on hand if you need to give it an extra push.
  • We used painters tape to cover the two sides of the shelf before we lifted them into place. This just ensured that if it made contact with the cabinets, it wouldn’t cause any damage.
  • The brackets likely have a tiny bit of play back and forth so you can kinda pull them into position if needed – it’s just a tiny fraction of an inch of play but it was enough for us.
  • You can fill the holes with a little bit of construction adhesive before installing the shelving if you feel it’s necessary or if you feel the fit is too loose. We didn’t need to do this (and we liked having the option of easily removing the shelving if needed) but the adhesive is an option to consider.
  • We used 8″ brackets with 10″ boards so our bracket rods span most of the depth of each shelf. If you have a smaller bracket-to-shelf depth ratio, then I definitely recommend using an adhesive so that they don’t slide off if you place something heavier on them.

Other sources:

  • Sofa pit: How to Make a Sofa Pit Tutorial
  • Black linen pillows: We made ours | Similar: Pottery Barn | CB2 | West Elm
  • Gray linen pillows: We made ours | Similar: Pottery Barn | West Elm
  • Black & white X-block pillows: CB2 | Similar: West Elm
  • Poster frames (same size): Overstock (4-pack) | Overstock (single) | West Elm
  • Lord of the Rings movie poster: Amazon
  • Faucet: Wayfair | Home Depot
  • Drinking water faucet: Amazon | Overstock
  • Soap pump: Wayfair | Home Depot
  • Gold cabinet knobs: CB2
  • Gold drawer pulls: Amazon | Similar: Home Depot | Schoolhouse
  • Vase (similar): Crate & Barrel | Pottery Barn | McGee & Co
  • Eucalyptus greenery: Michaels
  • Wood countertop: How to Build a Wood Countertop Tutorial
  • Shiplap: Tutorial & Info
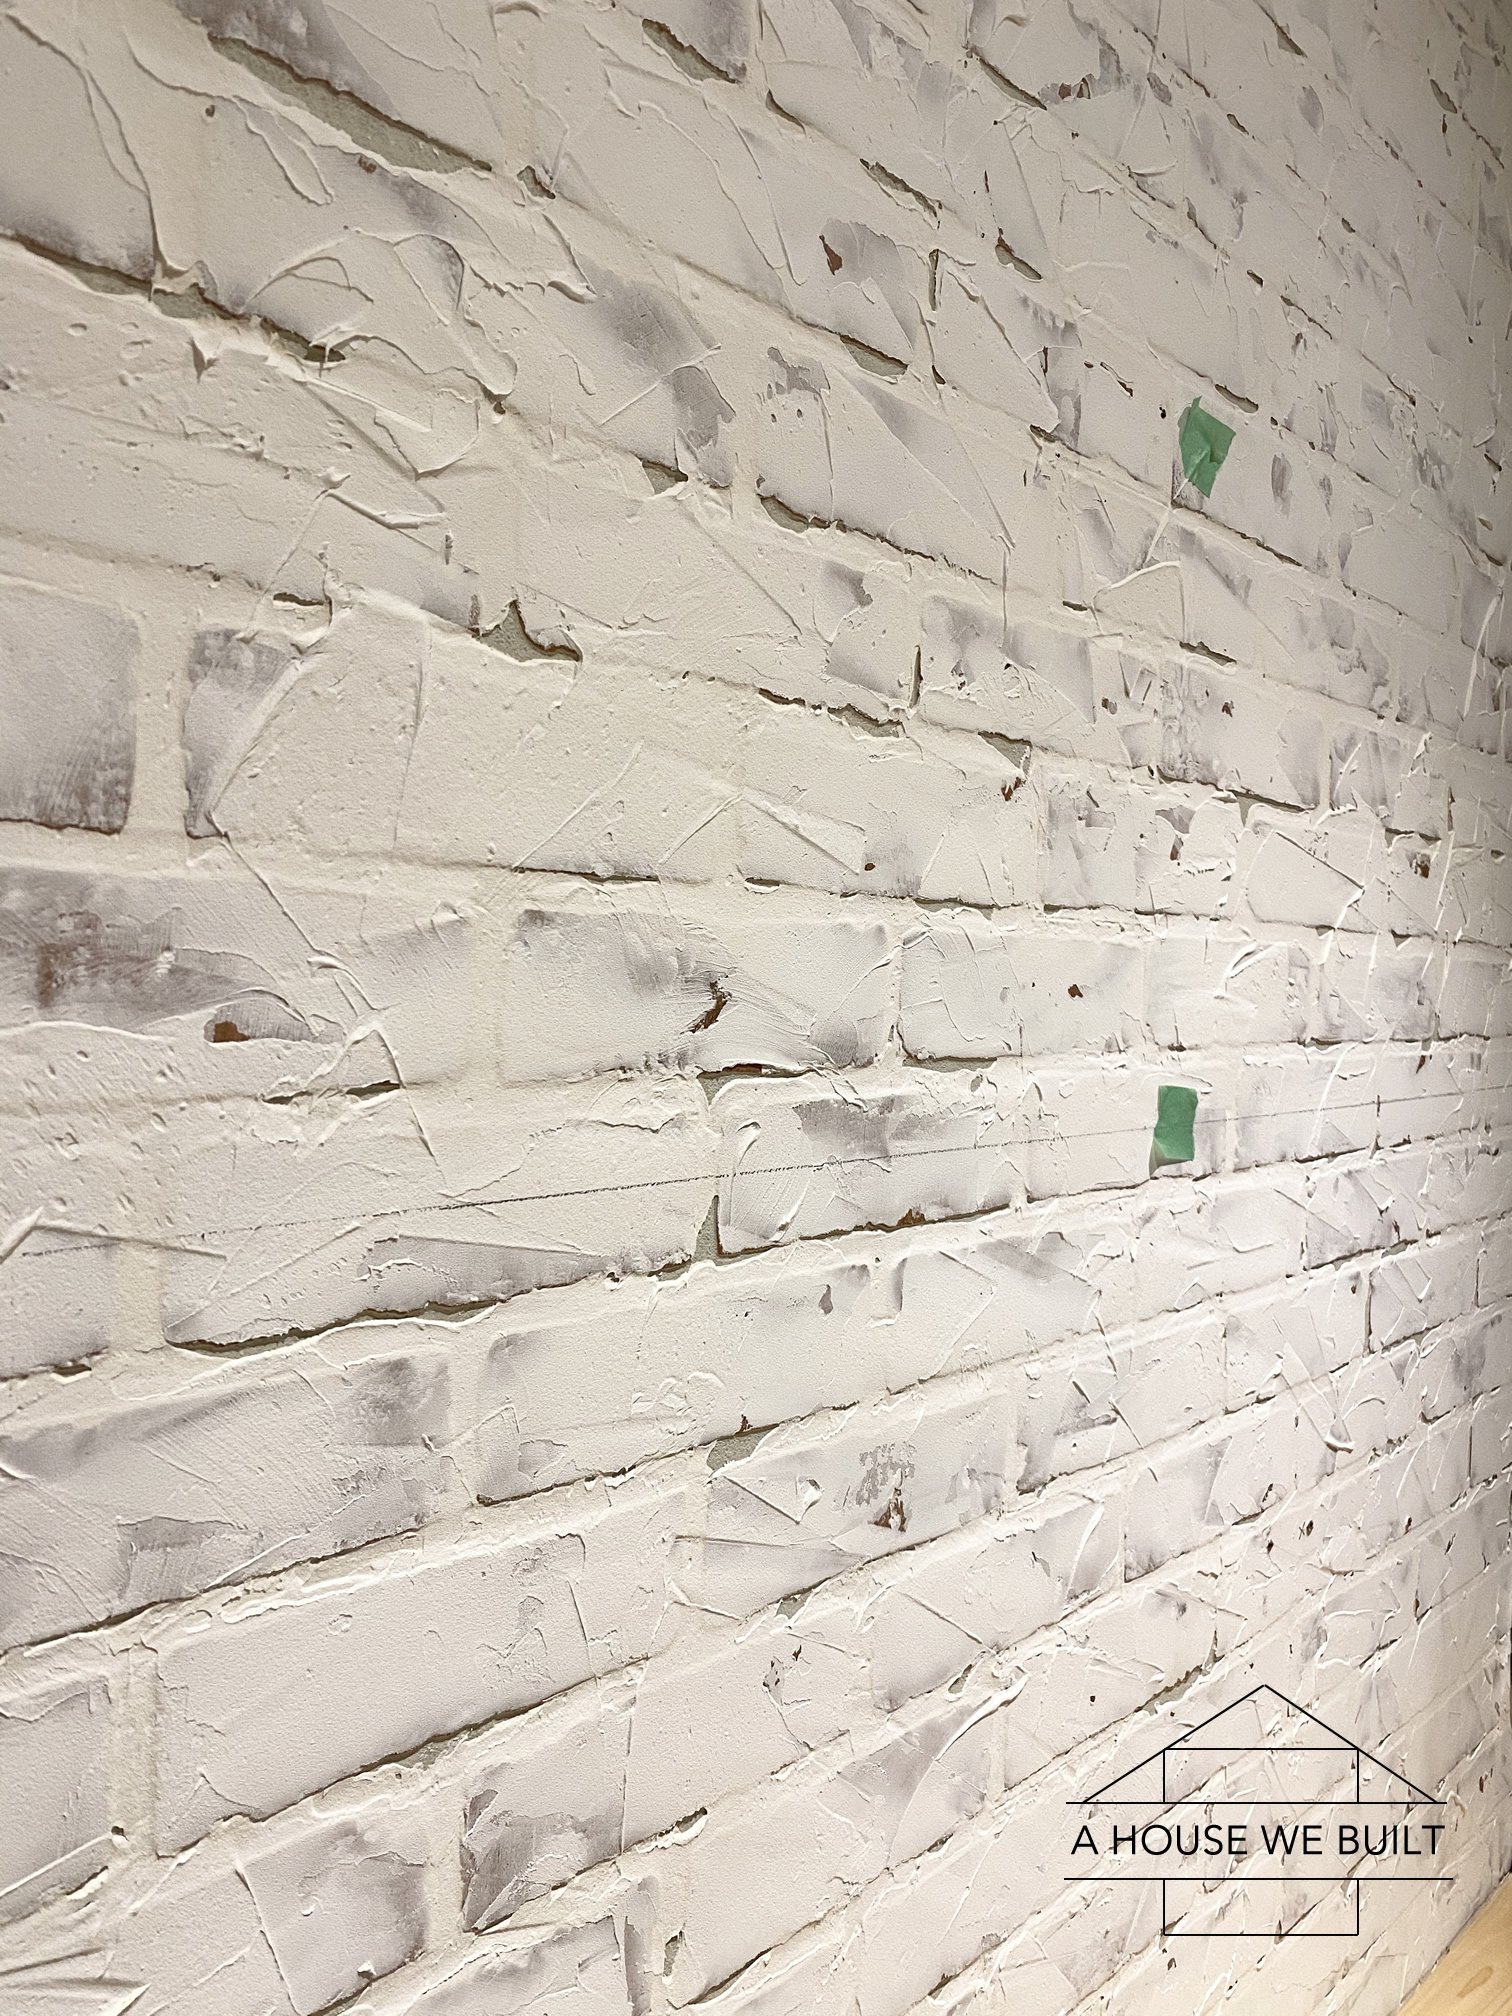
  • Brick wall: How to DIY a Faux Brick Wall Tutorial
  • Brick panels: Home Depot
    • Paint colors & more details on the Theater Room Sources Page

     
    For more sources from our Theater Room, click here.
    For more sources from our Basement, click here.
    For more of our DIY tutorials, click here.
    To explore the other rooms in our house, click here.

Filed Under: Tutorials

Reader Interactions

Comments

  1. Mariah says

    August 29, 2020 at 1:40 pm

    Is the wood rough sawn pine or what type of wood? Love it.

    Log in to Reply
    • admin says

      August 29, 2020 at 2:43 pm

      Yes it’s rough sawn 🙂

      Log in to Reply
      • Mariah says

        August 29, 2020 at 3:48 pm

        Thank you ☺️ I’m in love with the whole house! It’s so beautiful

        Log in to Reply
  2. Anne Loyd says

    October 29, 2020 at 10:20 pm

    Where do you buy your wood? I haven’t looked in store yet but I couldn’t seem to find it online. Thank you!

    Log in to Reply
    • admin says

      October 29, 2020 at 10:38 pm

      In stores or local wood shops. To my knowledge, this is not the kind of thing you can order online.

      Log in to Reply

Leave a Reply to Anne Loyd Cancel reply

You must be logged in to post a comment.

Primary Sidebar

SHOP OUR HOME

Click any image below for sources from our pics!

WEBSITE ROADMAP

  • Shop Our Home
  • Sources by Room
    • All Sources & FAQs
    • Kitchen Sources
    • Pantry Sources
    • Living Room Sources
    • Dining Room Sources
    • Home Office Sources
    • Laundry Room Sources
    • Entryway Sources
    • Mudroom Sources
    • Gallery Wall Sources
    • Reading Room Sources
    • Theater Room Sources
    • Game Room Sources
    • Guest Bedroom Sources
    • Primary Bedroom Sources
    • Primary Closet Sources
    • Primary Bathroom Sources
    • Powder Bathroom Sources
    • Buffalo Check Bathroom Sources
    • Basement Bathroom Sources
    • Basement Sources
    • Stairs, Landings & Hallways
    • Paint Colors and Stain Recap
    • Cleaning Sources & Routines
  • Tutorials
    • How to Make a Staircase Gallery Wall
    • How to Make Textured Canvas Art
    • How to Install Shiplap
    • How to Build a Slat Wall
    • How to Paint an Ikea Dresser
    • How to Build Bypass Barn Doors
    • How to Build a Farmhouse Table and Benches
    • How to Build a Rustic Sideboard
    • How to Build a Slat Sideboard
    • How to Make a Sofa Pit
    • How to DIY a Faux Brick Wall
    • How to Build a Window Seat
    • How to Build a Paneled Accent Wall
    • How to DIY a Functional Play Kitchen
    • How to Stencil a Wall
    • How to Build a Round Table
    • How to Build a Console Table
    • How to Make Paper Stars
    • How to Make Paper Mache Bowls
    • How to Make Clay Links
    • How to Texture Bowls & Vases
    • How to Install Open Shelves
    • How to Make Wood Block Art
    • How to Make a Wood Bead Garland
    • How to Build Cabinet Doors
    • How to Build a Wood Countertop
    • How to DIY a Nightstand Charging Drawer
    • How to Make a Wheat Wreath
    • How to Hang Gallery Wall Frames
    • How to Stain Stairs and Paint Risers
    • How to Make Industrial Stair Railings
    • How to Build a Window Seat Cushion
    • How to Make Salt Dough Ornaments
    • How to DIY a Modern Mantel Christmas Tree
    • How to DIY a Wooden Christmas Village
    • How to Build a Wood Christmas Tree Collar Box
    • How to Make Paper Christmas Trees
  • Cats
    • Cat Room Tour & Litterboxes
    • Cat-Related Sources & Cleaning Tips
    • How to Cat-Proof Christmas Trees & Decor
    • How to Stop Cats from Scratching Furniture
    • How to Stop Cats from Playing with Decor
    • How to Train Cats and Kittens
    • How to Cope with Cat Allergies
    • How to Introduce New Kittens to Older Cats
  • Christmas
    • Christmas Decor Favorites 2023
    • How to Build a Wood Christmas Tree Collar Box
    • Neutral Christmas Present Wrapping
    • How to Make Paper Christmas Stars
    • How to Make Paper Christmas Trees
    • How to Make Salt Dough Ornaments
    • DIY Holiday Art Ideas
    • How to Cat-Proof Christmas Trees & Decor
    • How to Make Modern Tabletop Trees
    • How to Make a Wooden Christmas Village
    • Holiday Cheese & Snack Boards
    • Christmas Decor 2021
    • Christmas Decor 2020
    • Christmas Decor 2019
    • Gingerbread House & Cookies Recipe
    • Puff Tastry Christmas Tree Recipe
    • Christmas Decor 2018
  • Cleaning
    • Cleaning Sources & Routines
    • Minimalism: How To Get Started
    • Cat-Related Cleaning Tips
  • Recipes
    • Apple Turnovers Recipe
    • Baked Pumpkin Donuts Recipe
    • Banana Chocolate Chip Bread Recipe
    • Blueberry Lemon Cake Recipe
    • Cheese & Cracker Snack Boards
    • Chocolate Chip Cookie Recipe
    • Christmas Crack Recipe
    • Chocolate Crinkle Cookies Recipe
    • Cinnamon Rolls Recipe
    • Cinnamon Star Pastry Recipe
    • Coconut Curry Squash Soup Recipe
    • Creamy No-Cheese Pasta Sauce Recipe
    • Crumble Recipe
    • Easy Veggie Pasta Recipe
    • Fresh Rolls Recipe
    • Garlic Flatbread Recipe
    • Gingerbread Biscotti Recipe
    • Gingerbread House & Cookies Recipe
    • Healthy Hearty Salad Recipe
    • Homemade Bread Recipe
    • Lasagna Recipe
    • Molasses Cookies Recipe
    • Oatmeal Raisin Cookies Recipe
    • Pad Thai Recipe
    • Pesto Pasta Recipe
    • Potato Curry + Naan Bread
    • Puff Pastry Christmas Tree Recipe
    • Pumpkin Donut Bites Recipe
    • Pumpkin Loaf Recipe
    • Pumpkin Oat Muffins Recipe
    • Roasted Red Pepper Pasta Recipe
    • Rocky Road Bars Recipe
    • Vegan Bolognese Pasta Sauce
    • Vegetable Soup Recipe
  • About
    • About Us
    • Website Roadmap
    • Shop Our Home
    • Minimalism: How To Get Started
    • Privacy Policy
  • Blog

WHERE WE SHOP

Amazon

Wayfair

West Elm

Crate & Barrel

CB2

Pottery Barn

McGee & Go

Overstock

Rejuvenation

Joss and Main

All Modern

Target

Home Depot

World Market

Etsy

H&M Home

Lulu and Georgia

Serena & Lily 

Schoolhouse

Anthropologie

RECENT POSTS

  • Christmas 2023
  • Christmas Decor Favorites 2023
  • How to Make a Staircase Gallery Wall
  • Functional Play Kitchen DIY
  • Christmas Decor 2022
  • Cinnamon Rolls Recipe

Meta

  • Log in
  • Entries feed
  • Comments feed
  • WordPress.org

Footer

RECENT POSTS

  • Christmas 2023
  • Christmas Decor Favorites 2023
  • How to Make a Staircase Gallery Wall
  • Functional Play Kitchen DIY
  • Christmas Decor 2022
  • Cinnamon Rolls Recipe
  • Christmas Decor 2021
  • Cinnamon Star Pastry Recipe

SHOP OUR HOME

FOLLOW US

ON INSTAGRAM

For daily updates on our house projects and rescue kitties, follow us on Instagram @ahousewebuilt

ON SHOP.LTK

To shop our home pics daily, follow ahousewebuilt in the free SHOP.LTK app (formerly LIKEtoKNOW.it) now available from the App Store to get product sources from our pics. With this app, you can instantly shop your screenshot of any of our Instagram pics! We always link exactly what we have when available and often offer similar options as well!

Copyright © 2025 · Metro Pro on Genesis Framework · WordPress · Log in