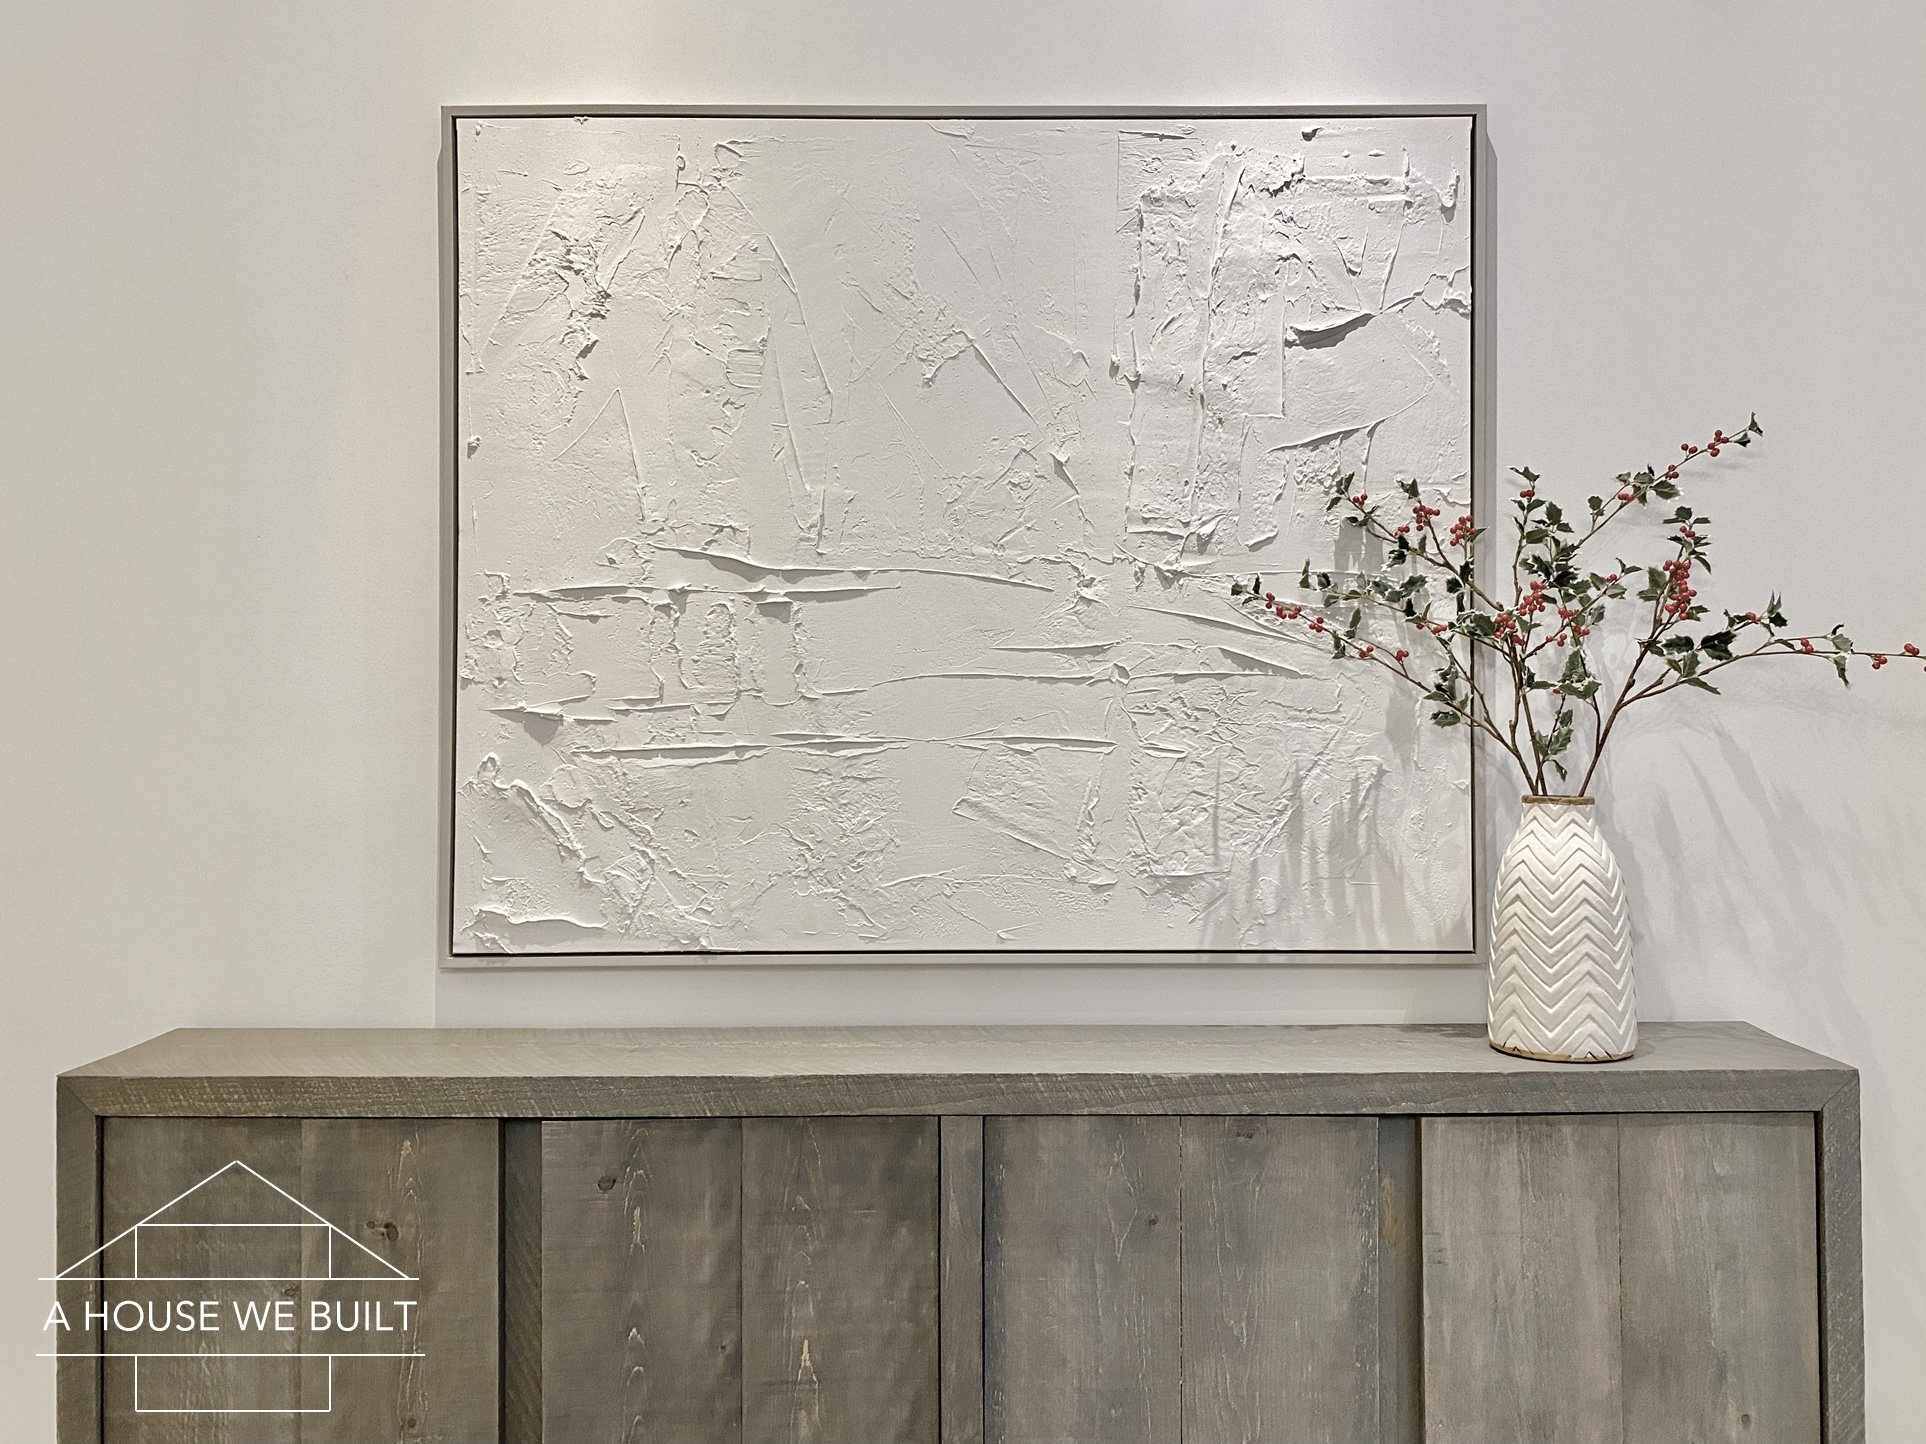
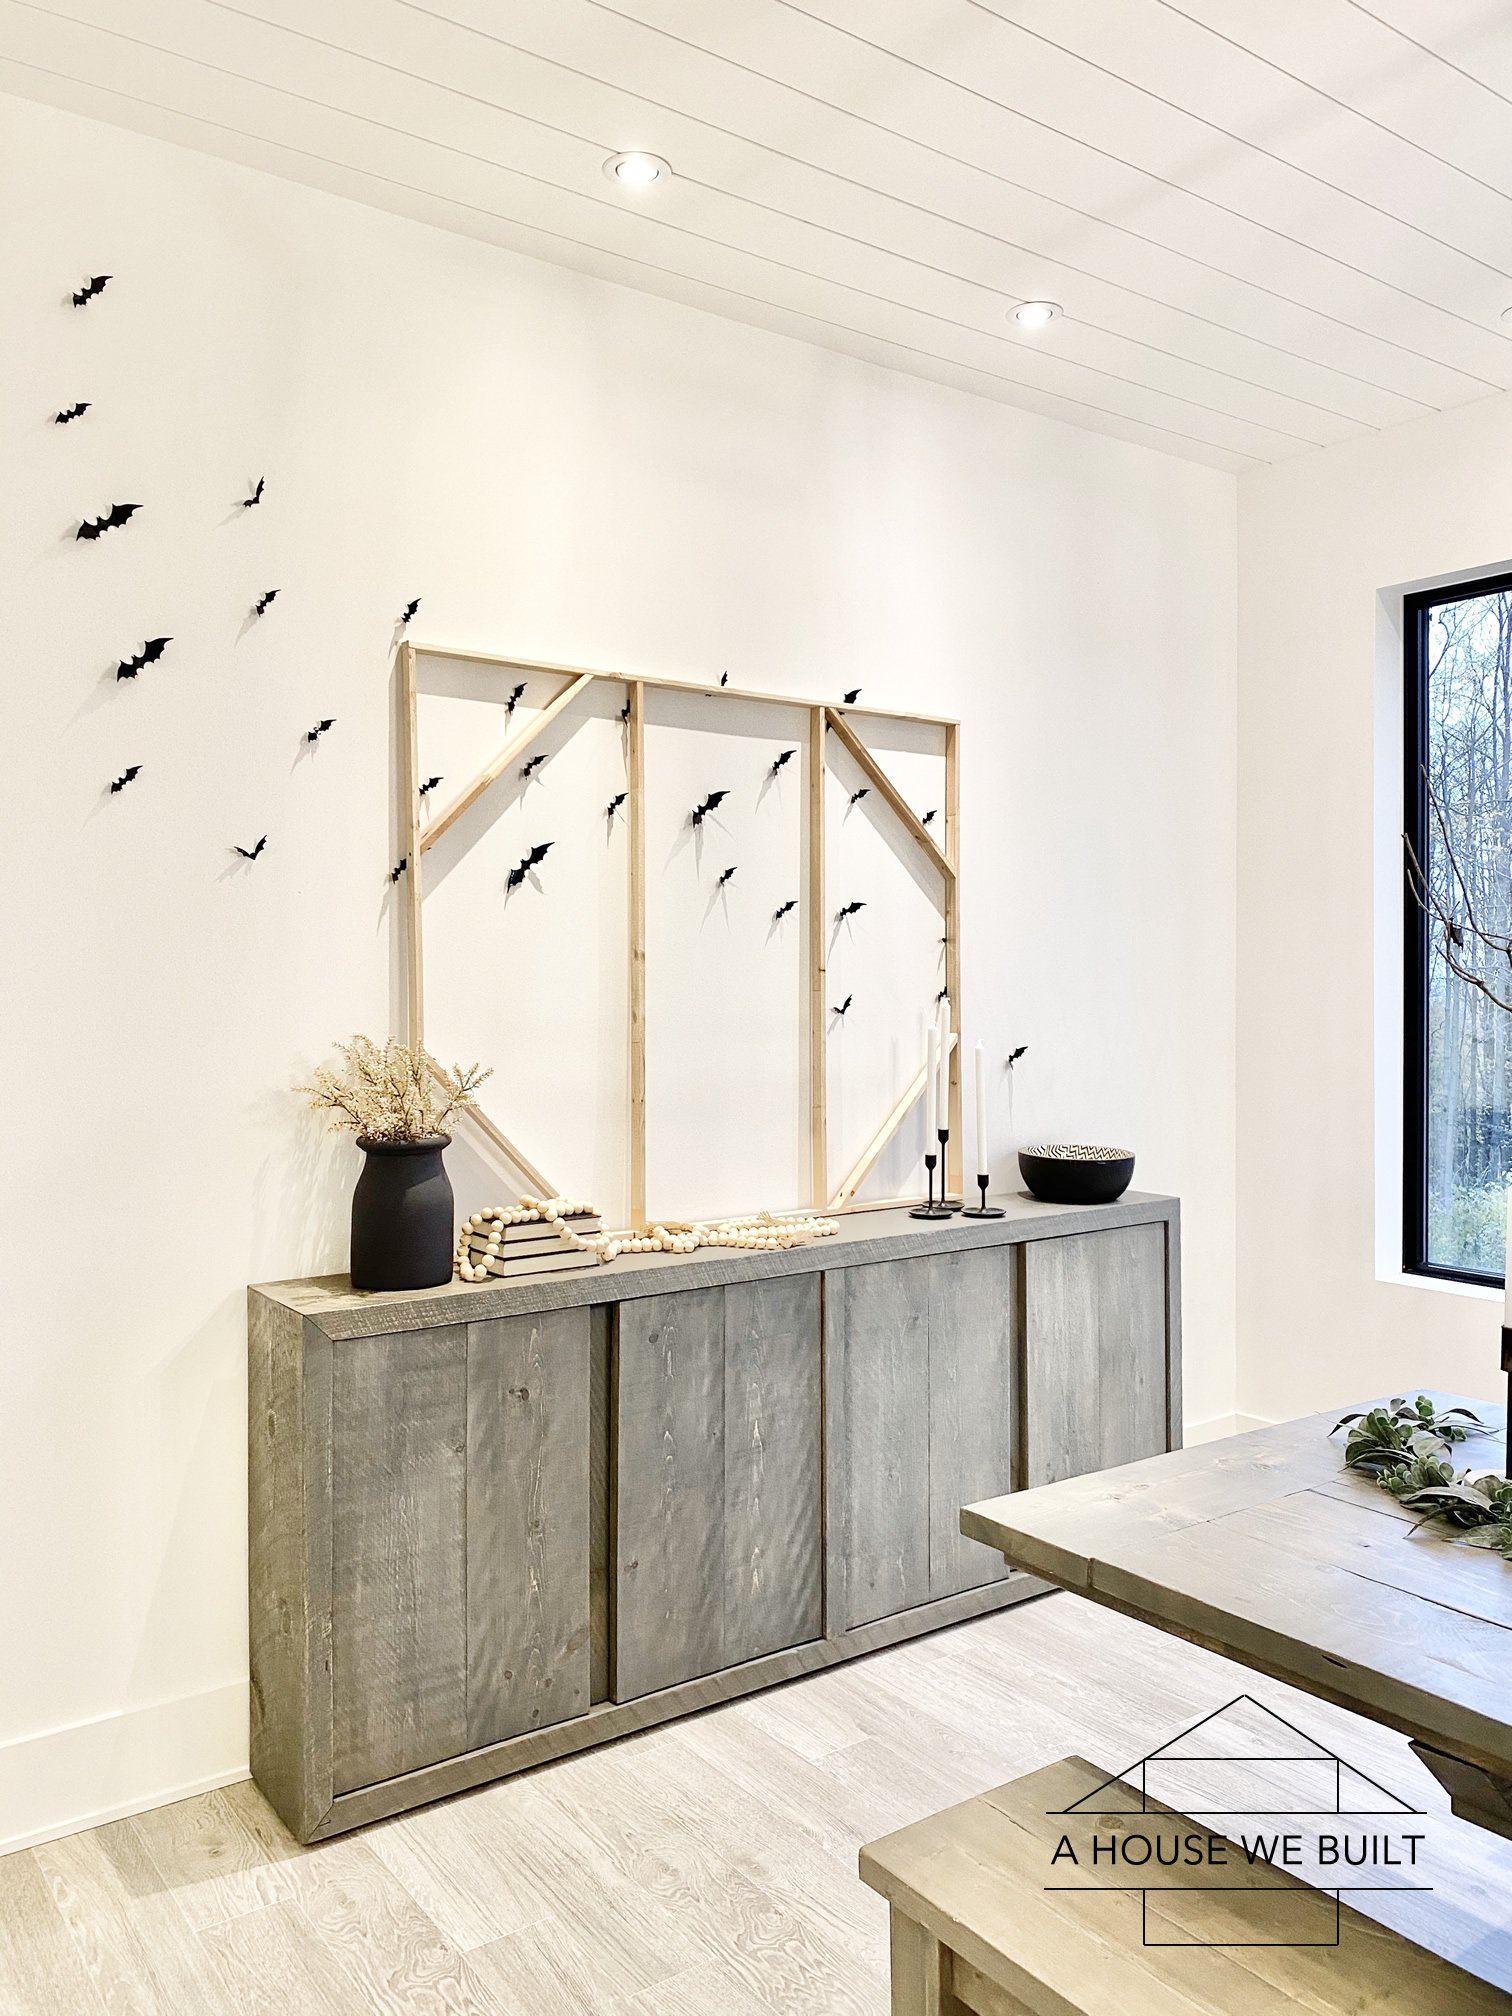
We made a huge textured canvas art piece for our dining room and I’m going to show you how we did it!
I made everything completely from scratch meaning I built my own canvas frame, I did my own art, and I made the floating frame but you can also skip part of these by buying a canvas frame or skipping the floating frame, so I’ve separated the tutorial into 3 steps so you can skip down to any step you want.
But if you’re not into DIY or just not feeling super artistic, here are similar art pieces you can buy ready-made: McGee & Co (rectangular) | McGee & Co (square) | Crate & Barrel | Anthropologie | Pottery Barn.

Ok so I literally made everything out of scrap wood and unused materials that were lying around my house but in case you don’t have these things on hand, I’ve tried to find sources for as much as I could.
STEP 1: HOW TO MAKE A CANVAS FRAME
Note: if you don’t want to make your own canvas from scratch, you can totally just buy one. I actually couldn’t find one that was the size I wanted (5′ x 4′), but depending on what size art you want to make, it may be easier to just buy one. Here are a few that are very similar to the ones I made:
If you want to make your frame though, you’ll need these materials:
- 1×2 wood: Home Depot (My canvas was 5’x4′ so I needed 3 for the frame + 1 for supports)
- Cotton canvas fabric: I got mine from a small fabric supply store a long time ago but I think this is the same or similar: Amazon | Amazon.
Tools:
- Miter saw: Home Depot
- Heavy duty staple gun: Home Depot
- Locking pliers: Home Depot
- Screwdriver & screws if your canvas is large
- Nailer & nails if your canvas is smaller
Instructions for making the frame:
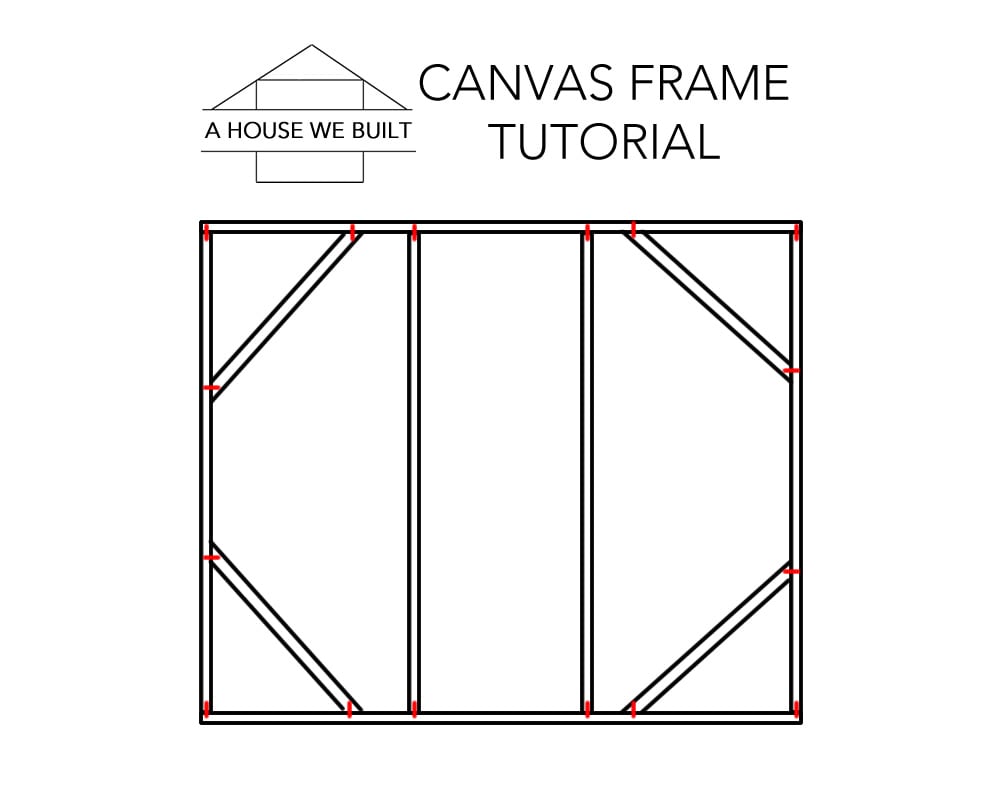
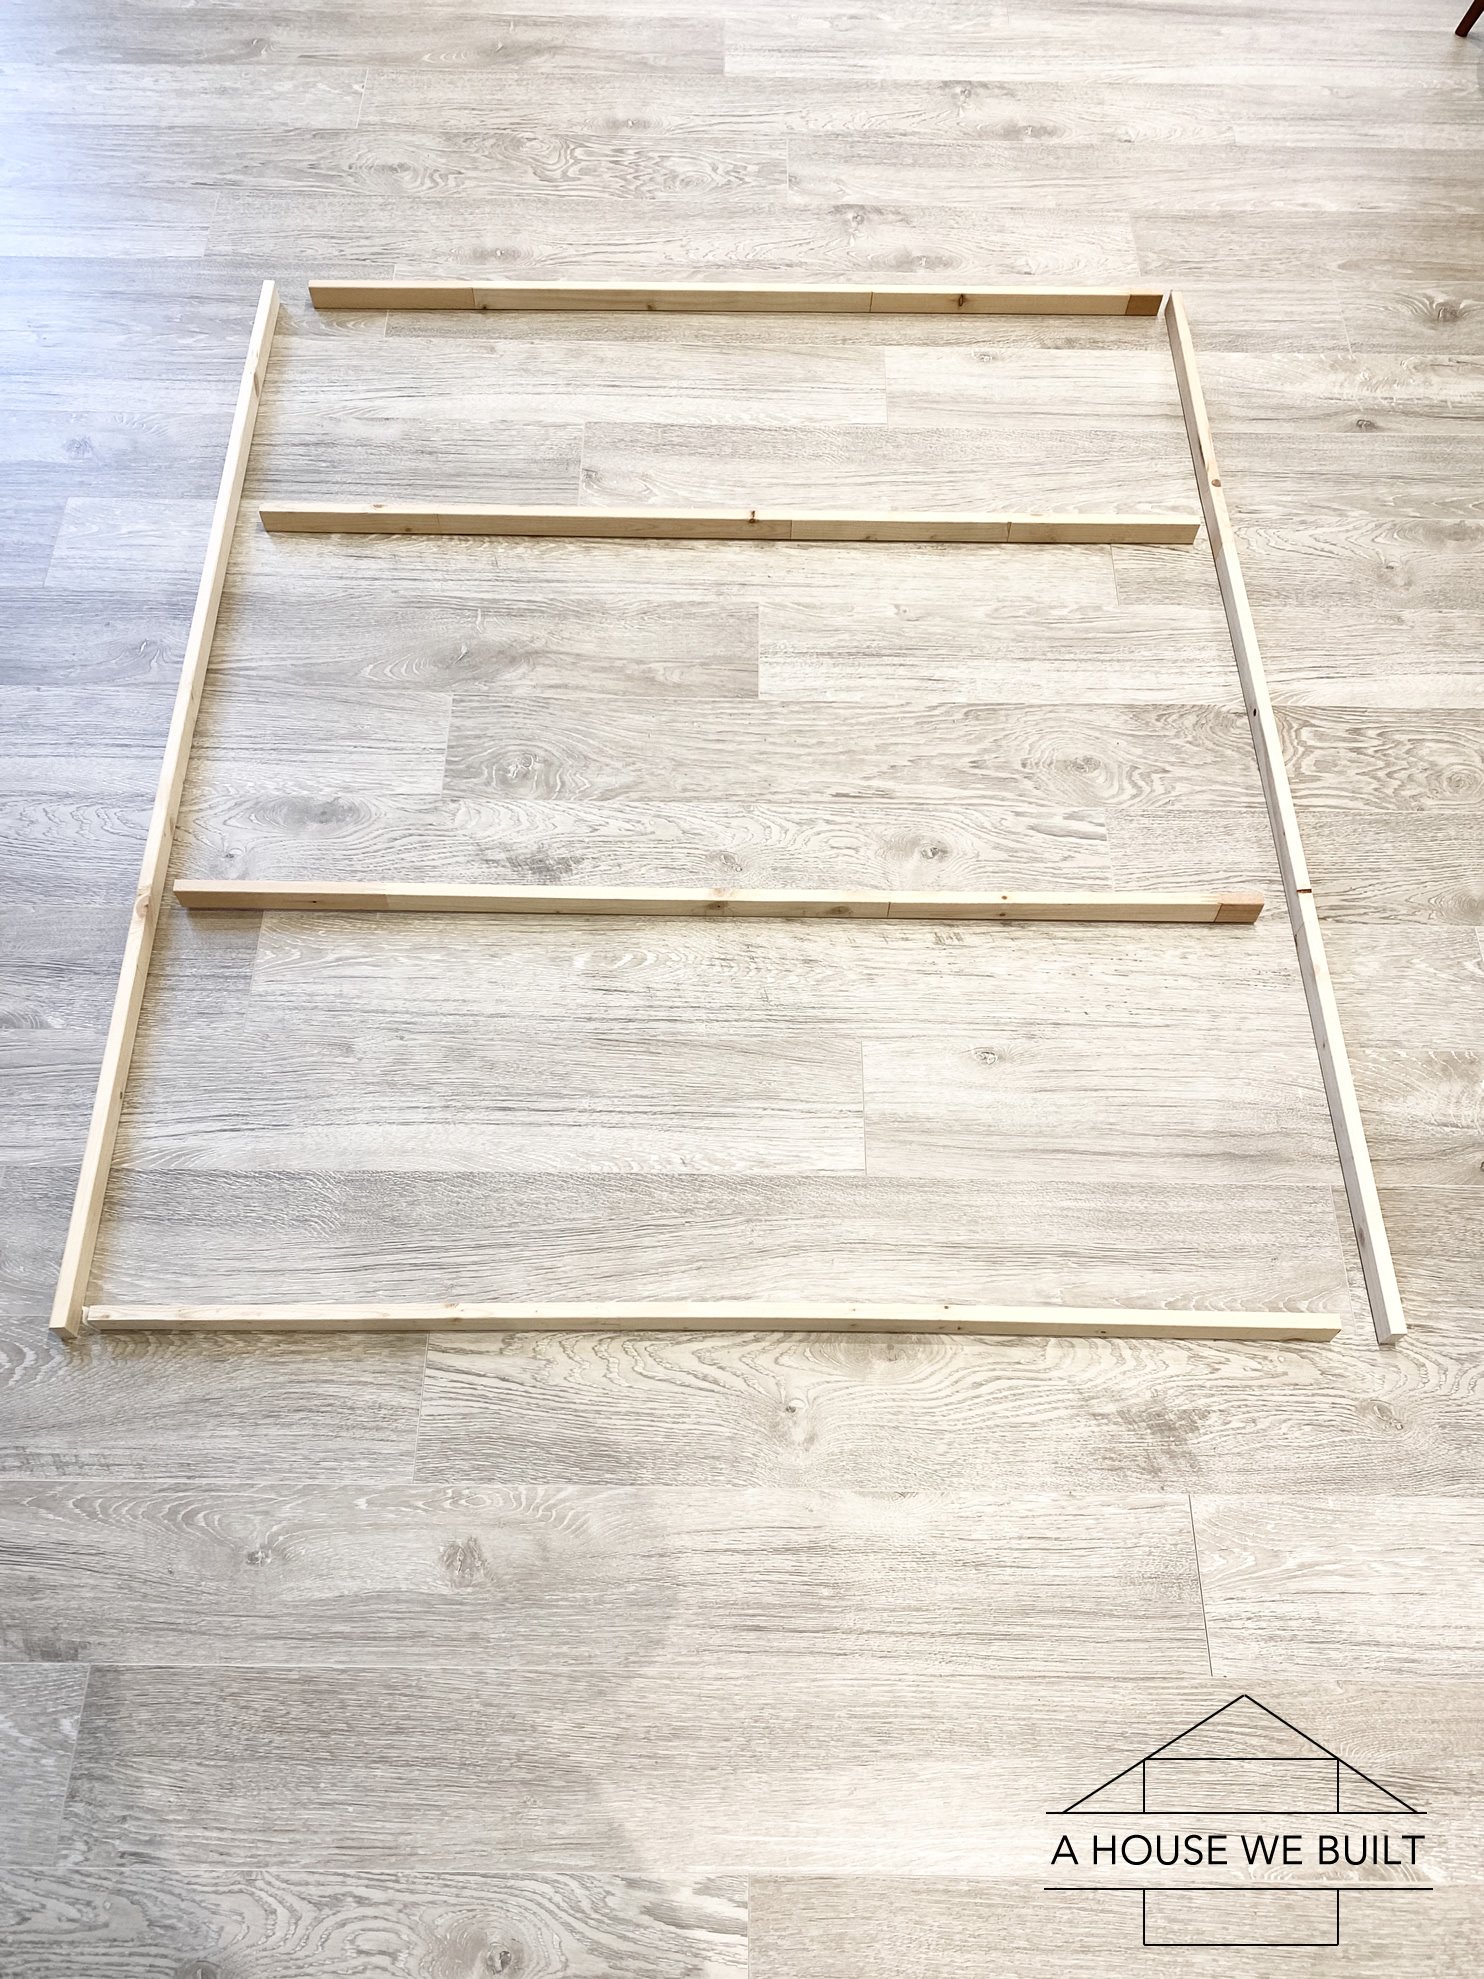
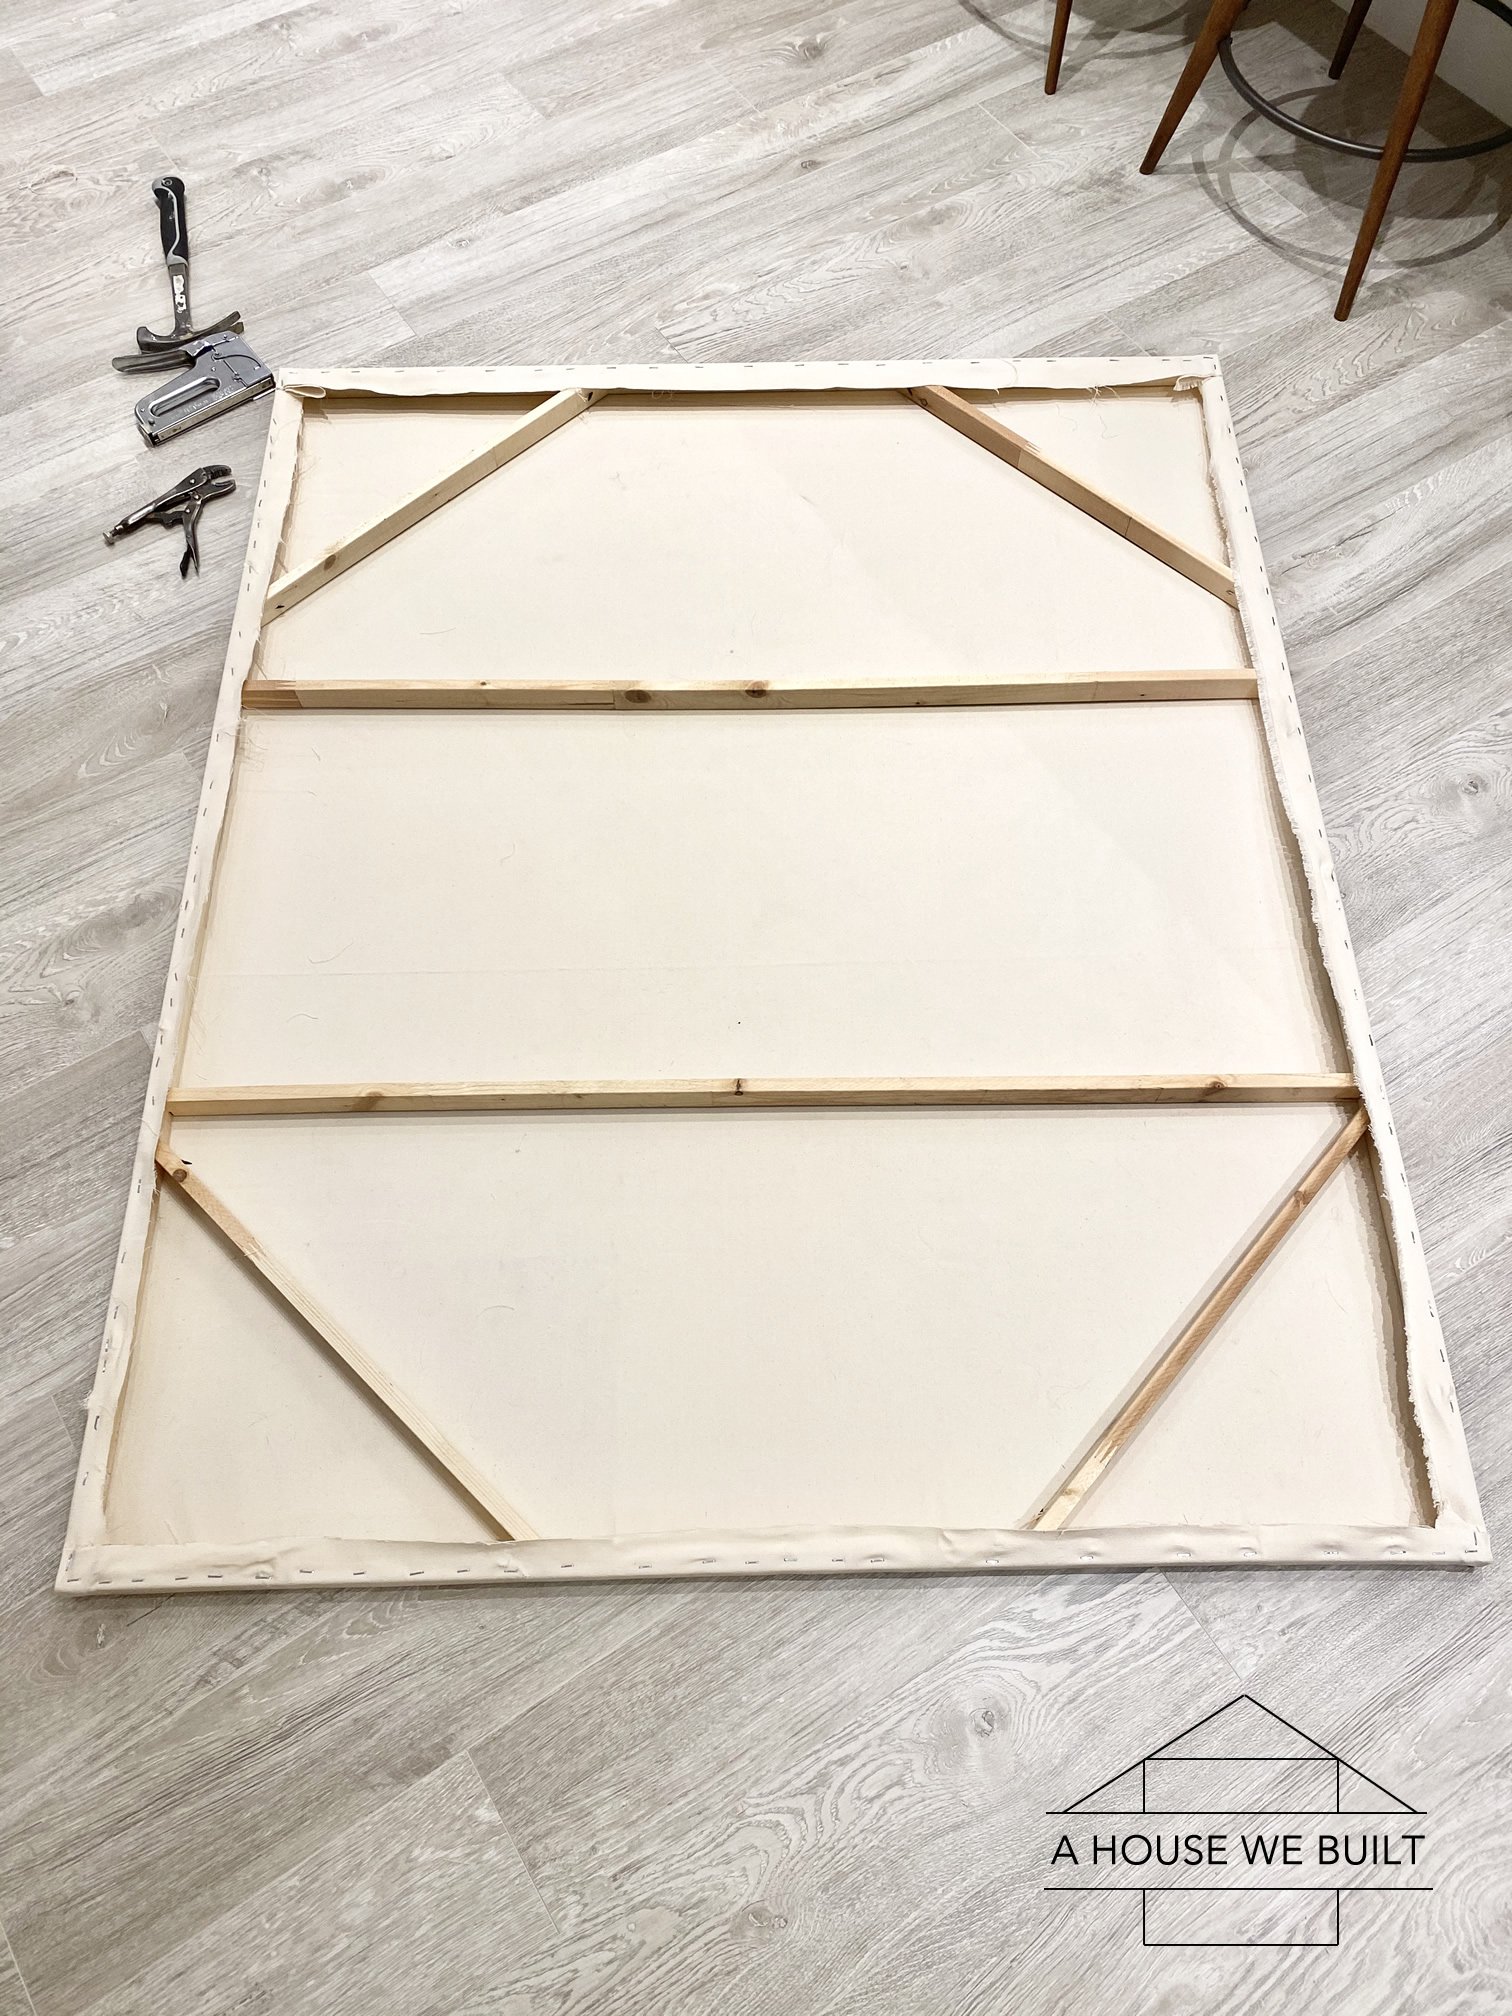
- Determine how large you want your canvas to be. I wanted mine to be about 5ft x 4ft so I cut two 1x2s down to 60″ each and another one in half (two 48″ pieces) and used that for the exterior frame. If you have a small frame, then you can get away with just little diagonal support pieces in the corners, but if your frame is as large as mine or larger, then you’ll also need additional support pieces so I also cut an additional 1×2 in half to create two more support pieces. Then I used the cut-offs from the two 1x2s that I got the 60″ pieces from to create diagonal support pieces. The exact sizes don’t really matter as long as they functionally support the frame. So in total I needed:
– 2 x 60″ lengths
– 4 x 48″ lengths
– 4 x diagonal support pieces with 45* corners so that it could brace against the exterior frame - Using pilot holes & screws, assemble your frame starting with the 4 exterior frame pieces, then interior vertical supports, and finally the diagonal supports.
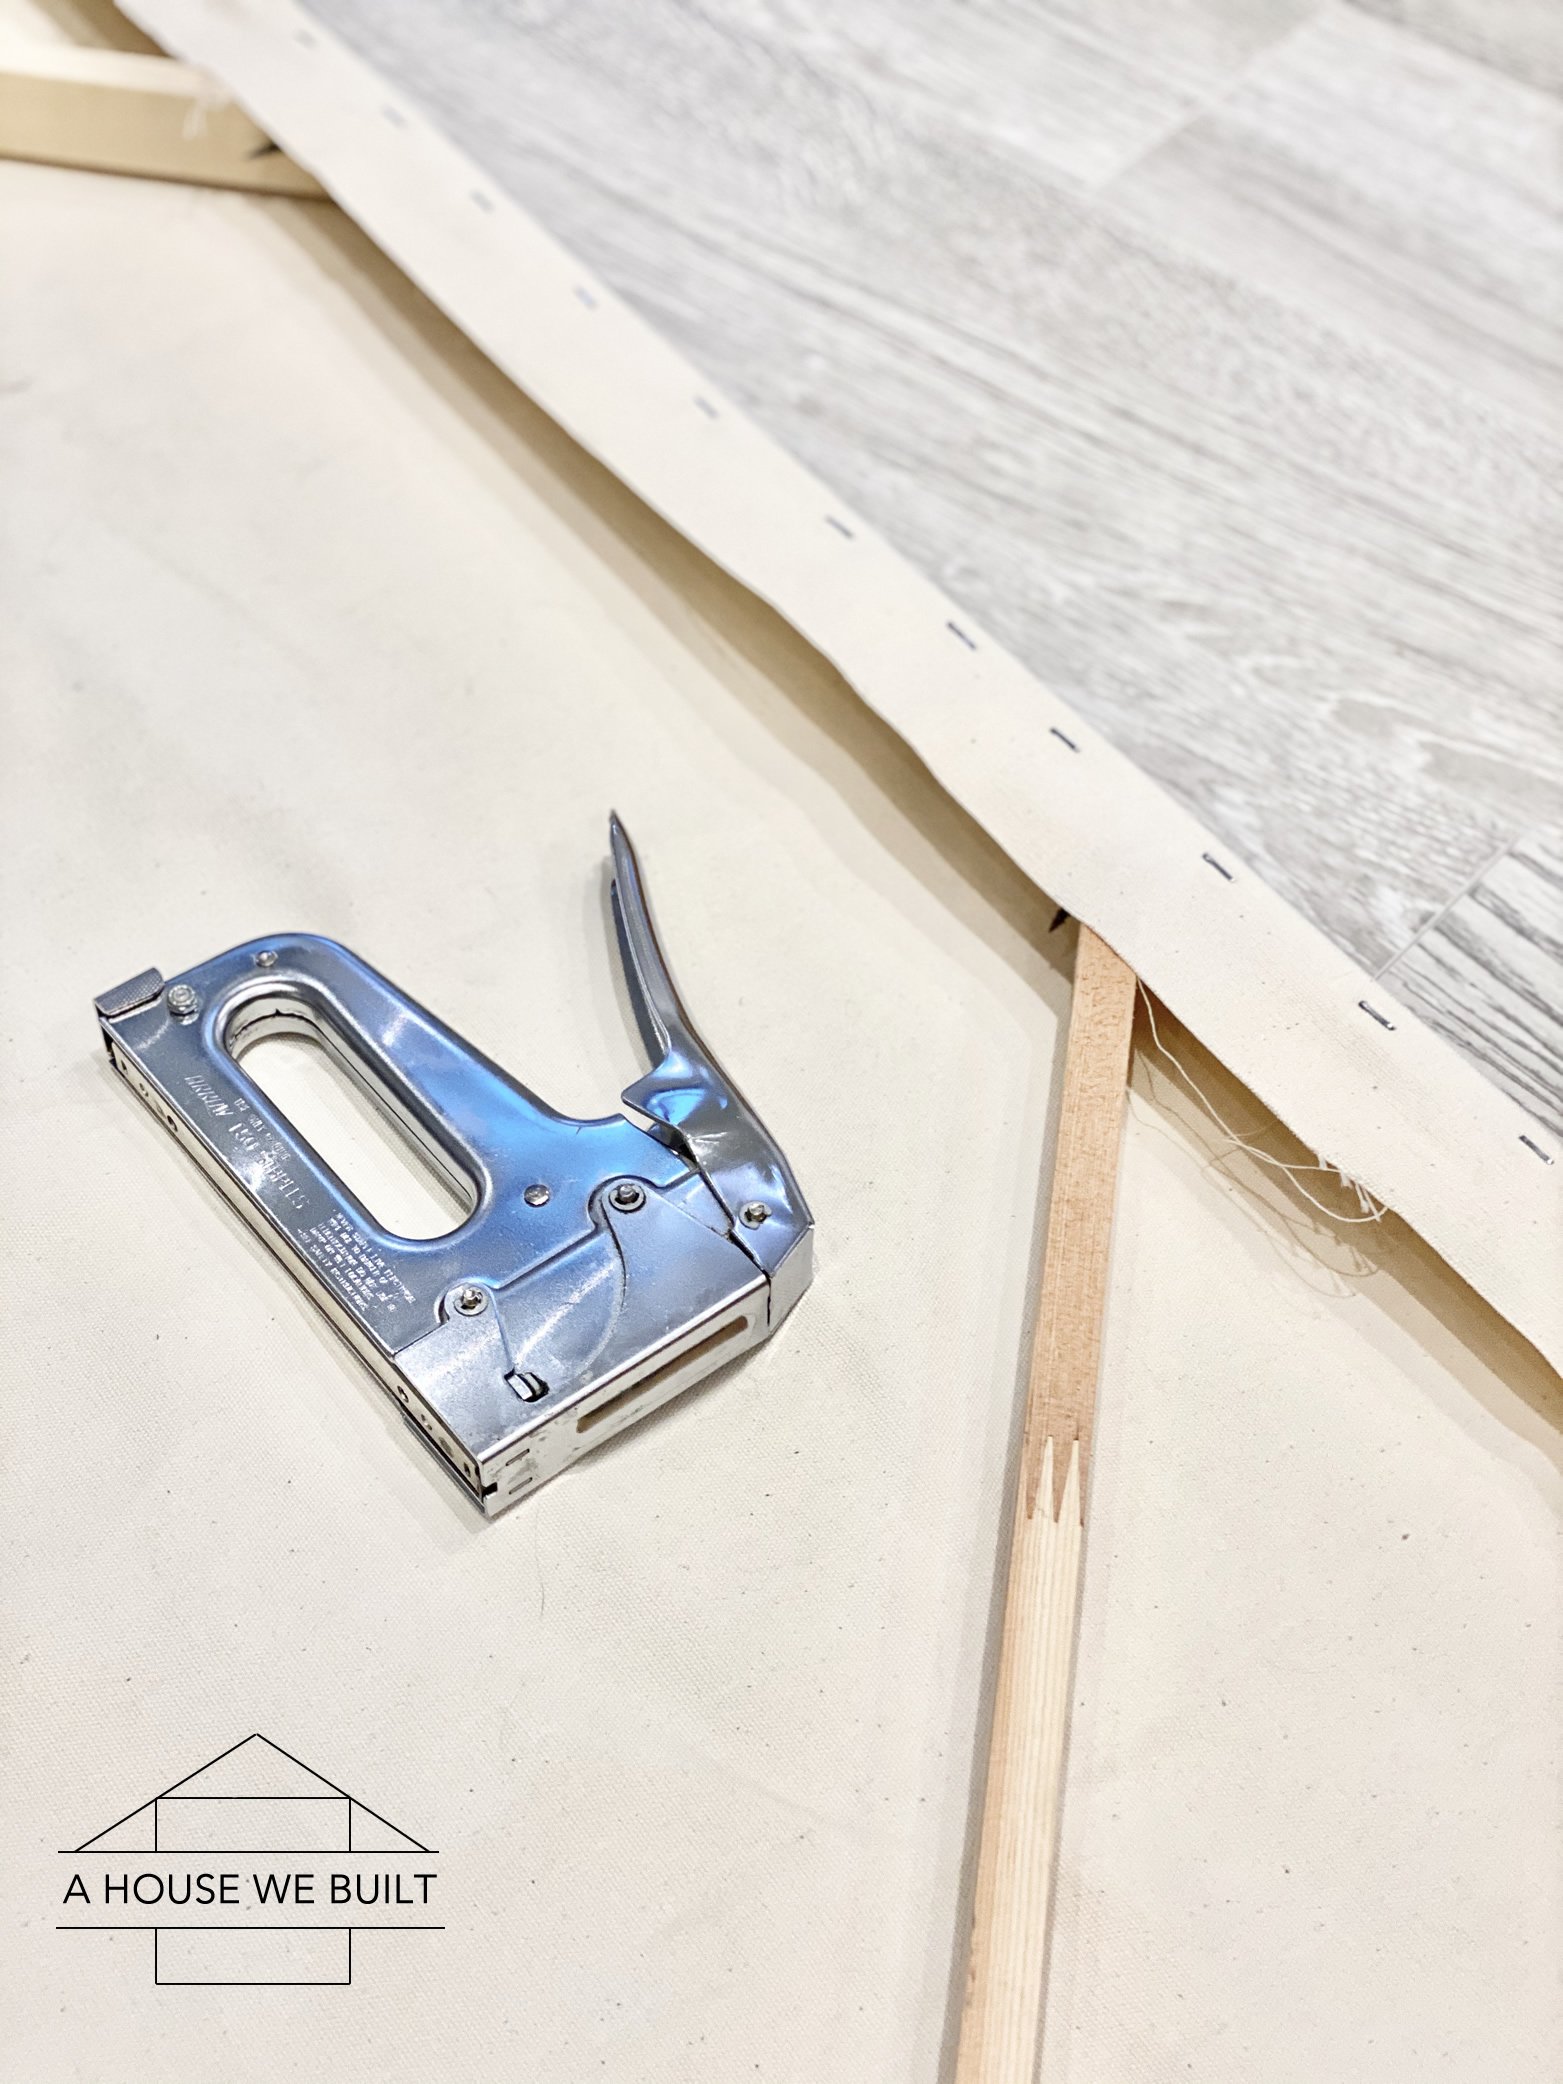
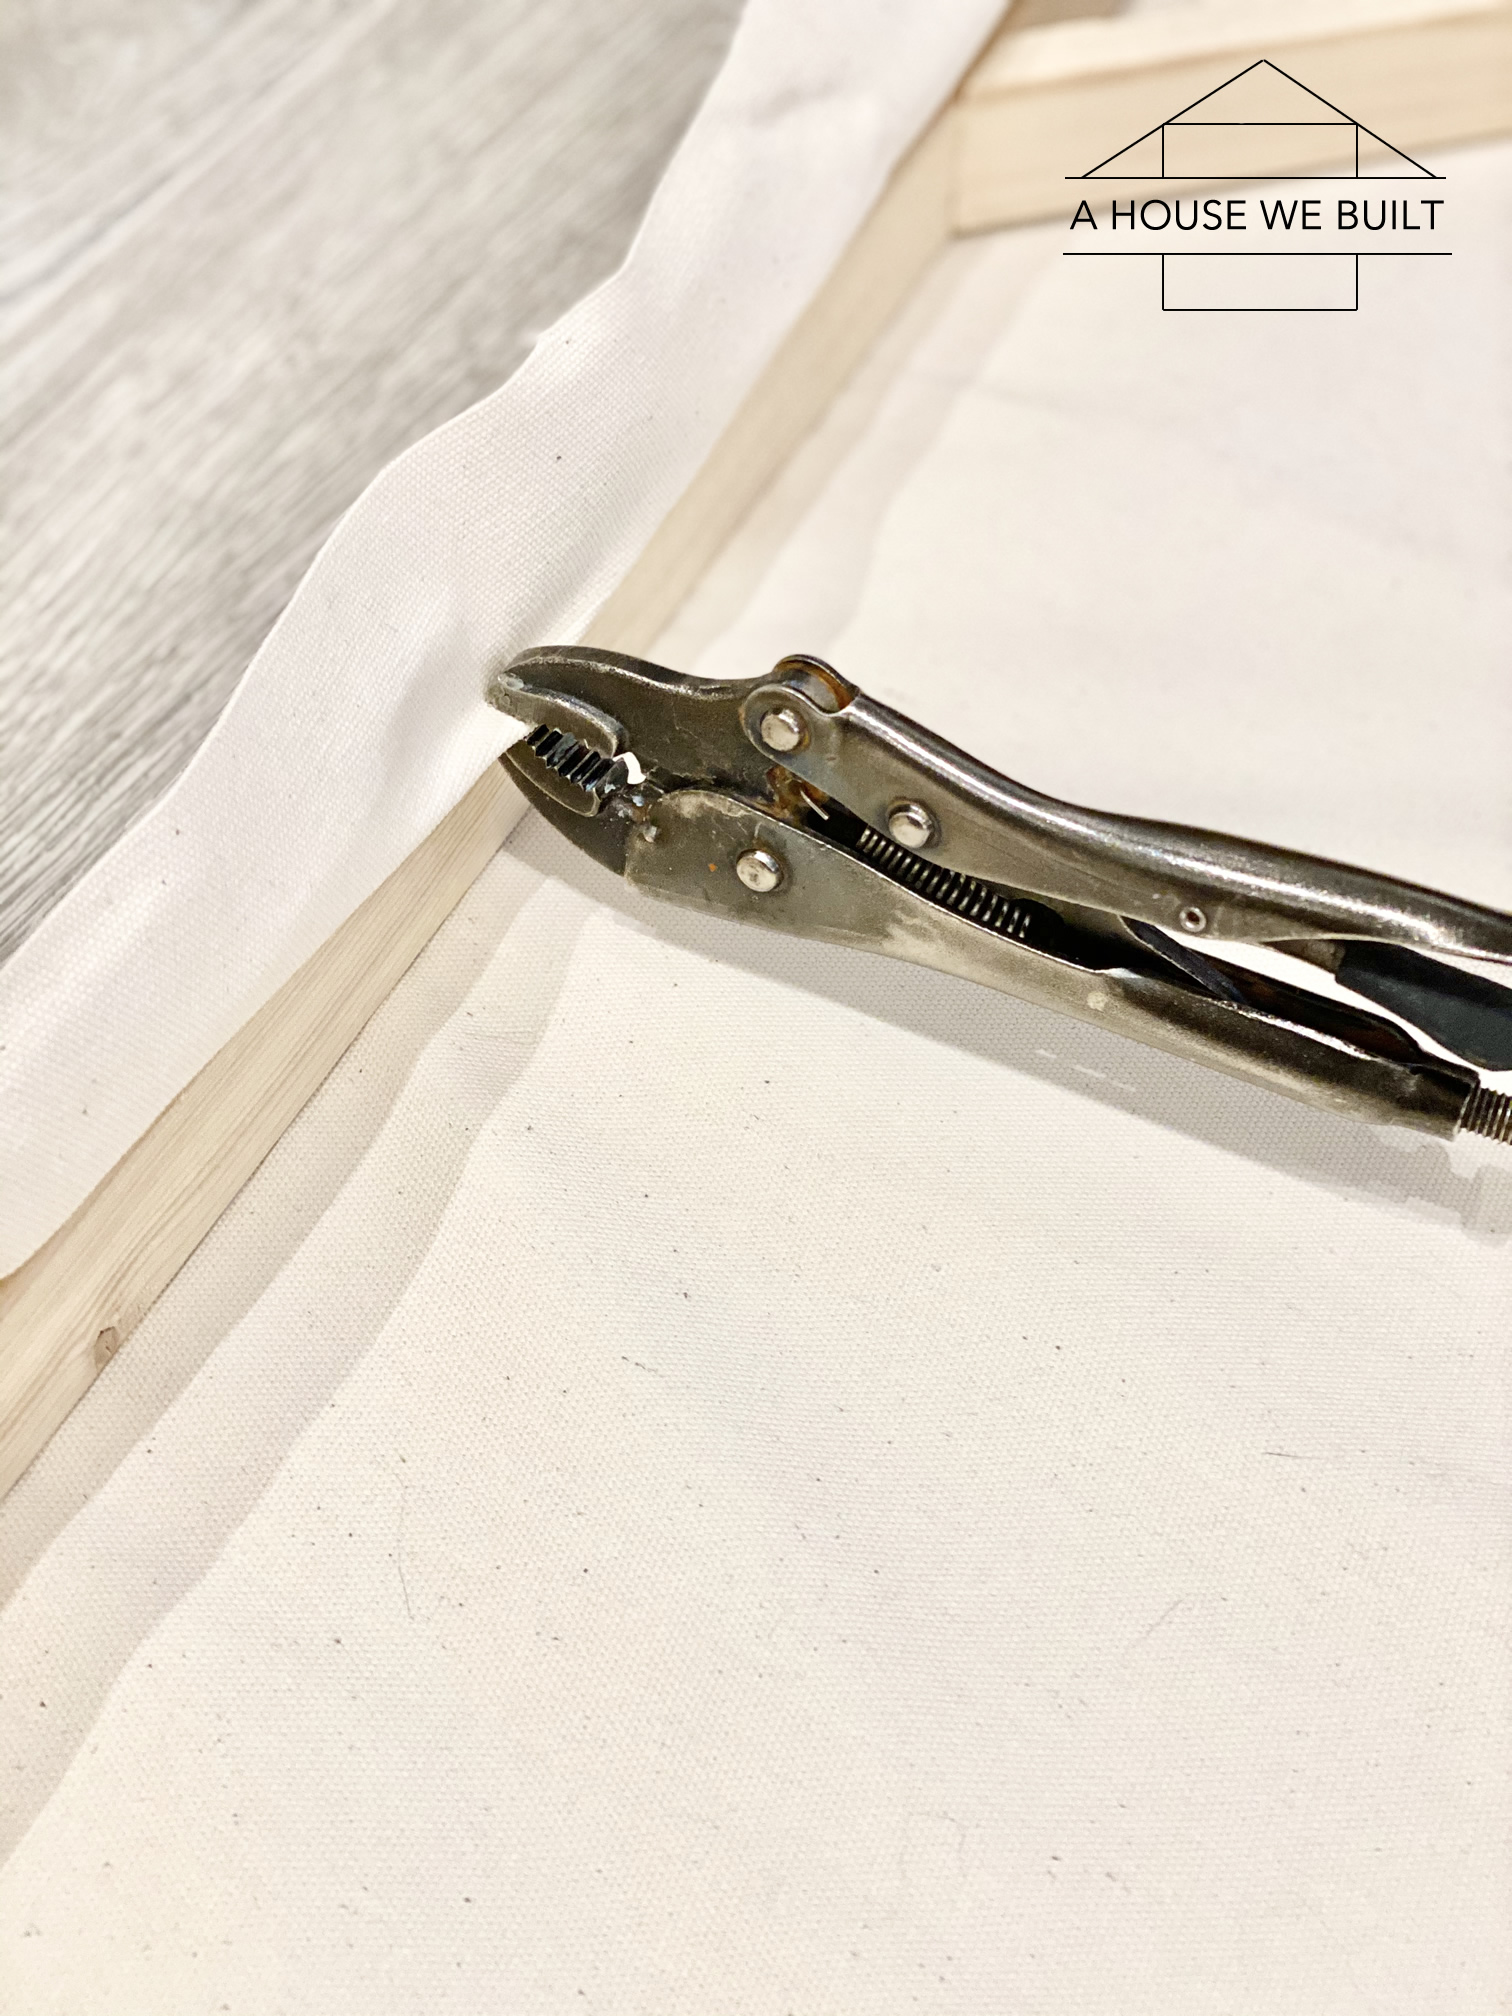
Instructions for attaching the canvas fabric:
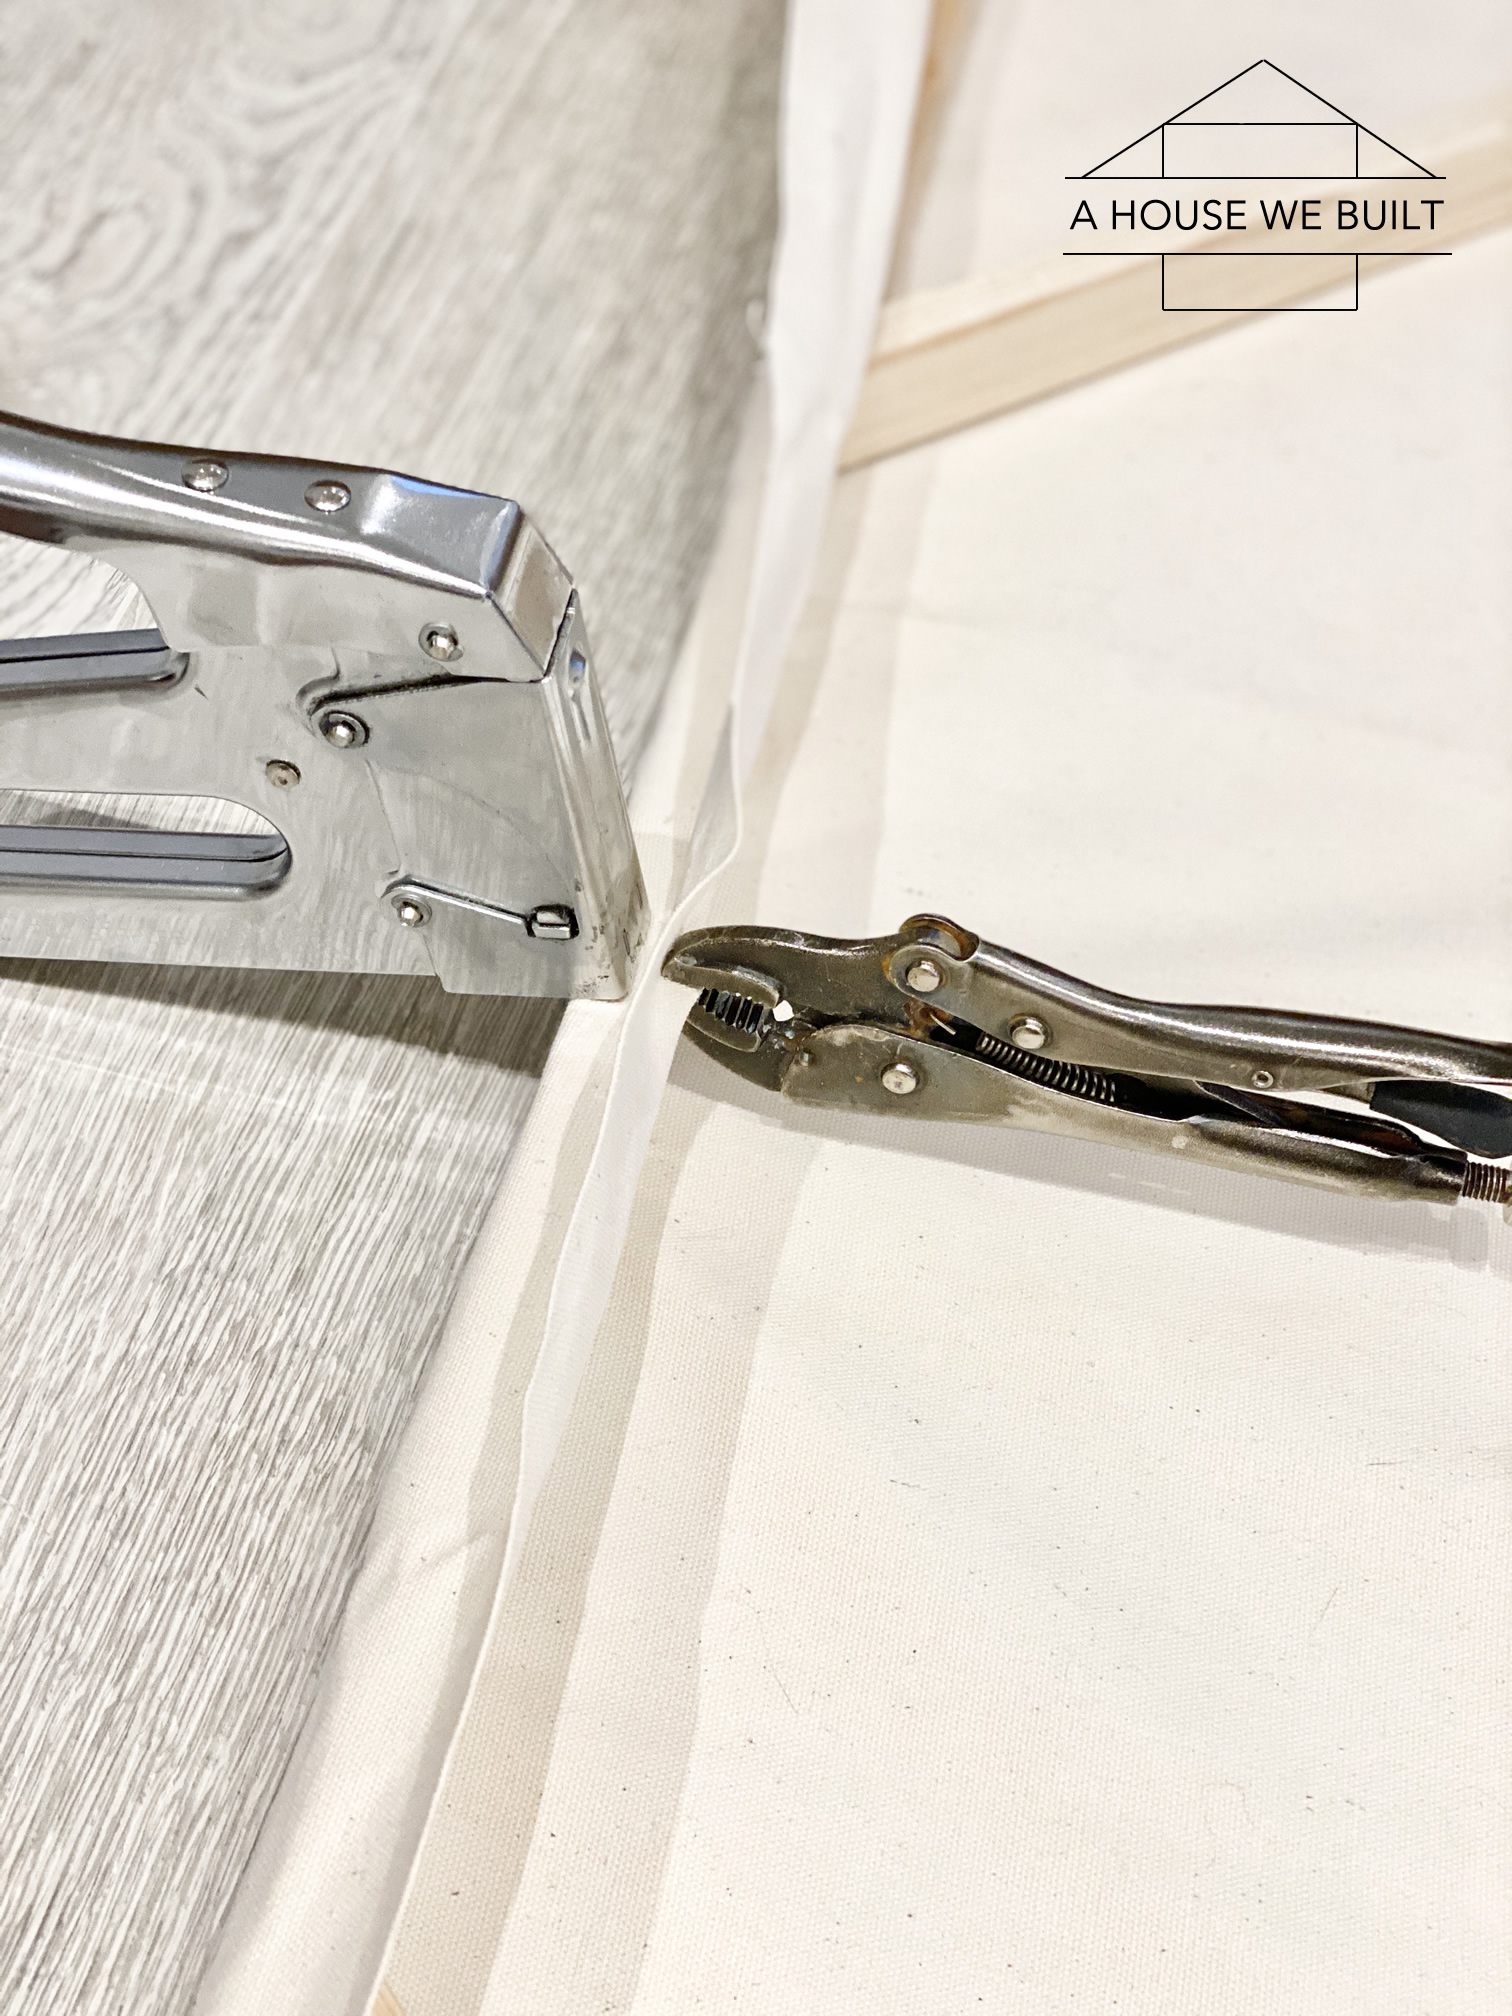
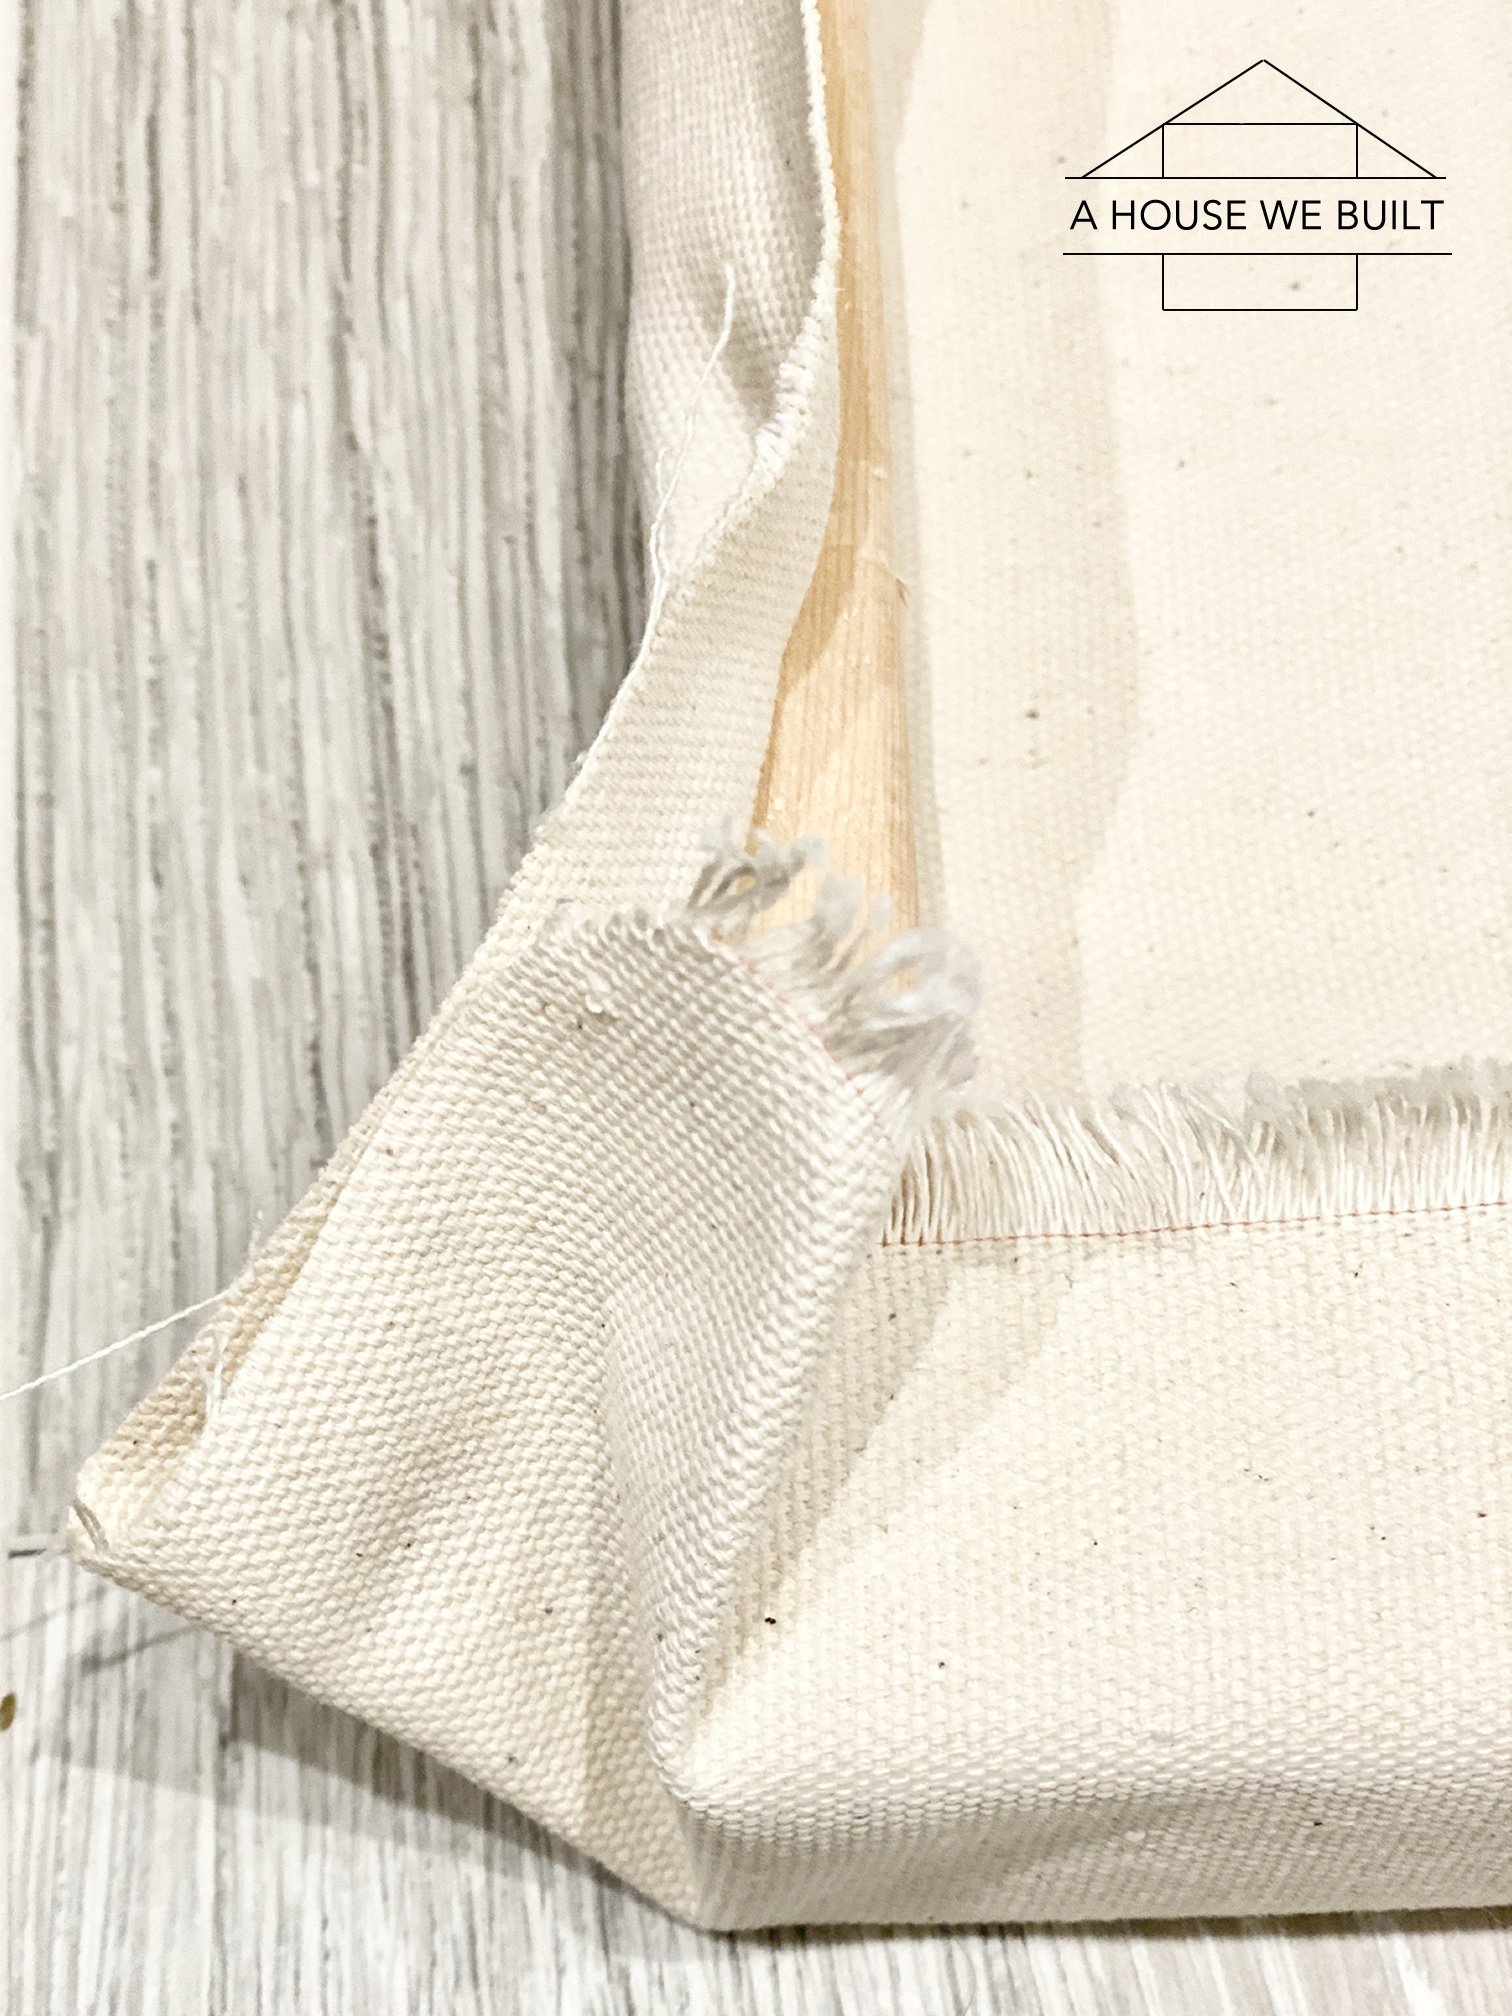
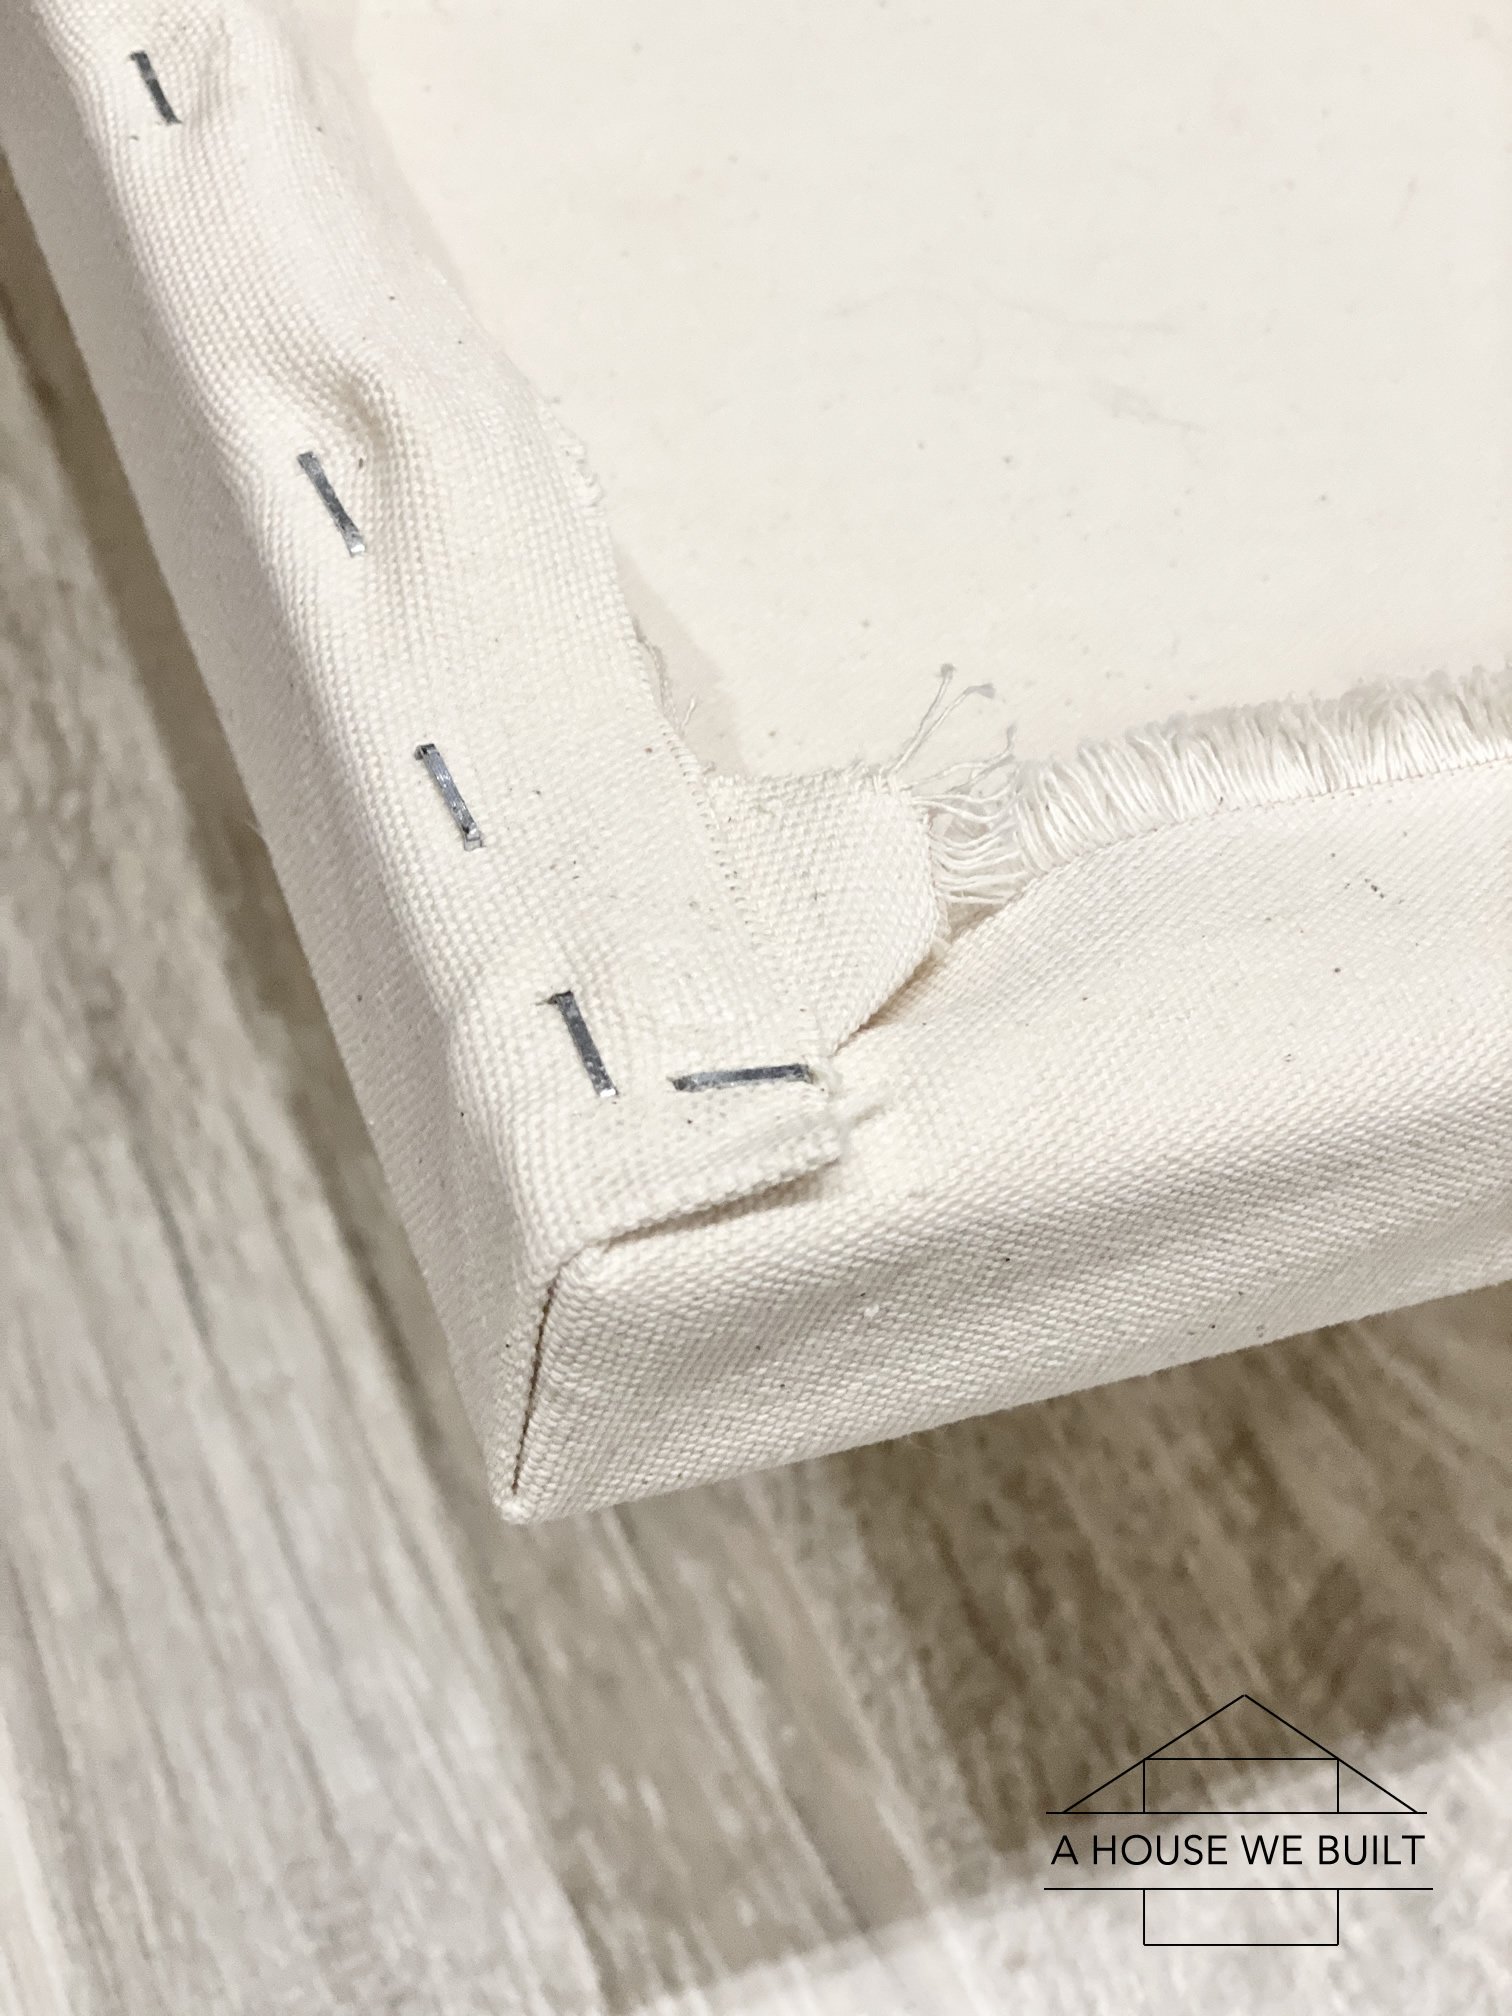
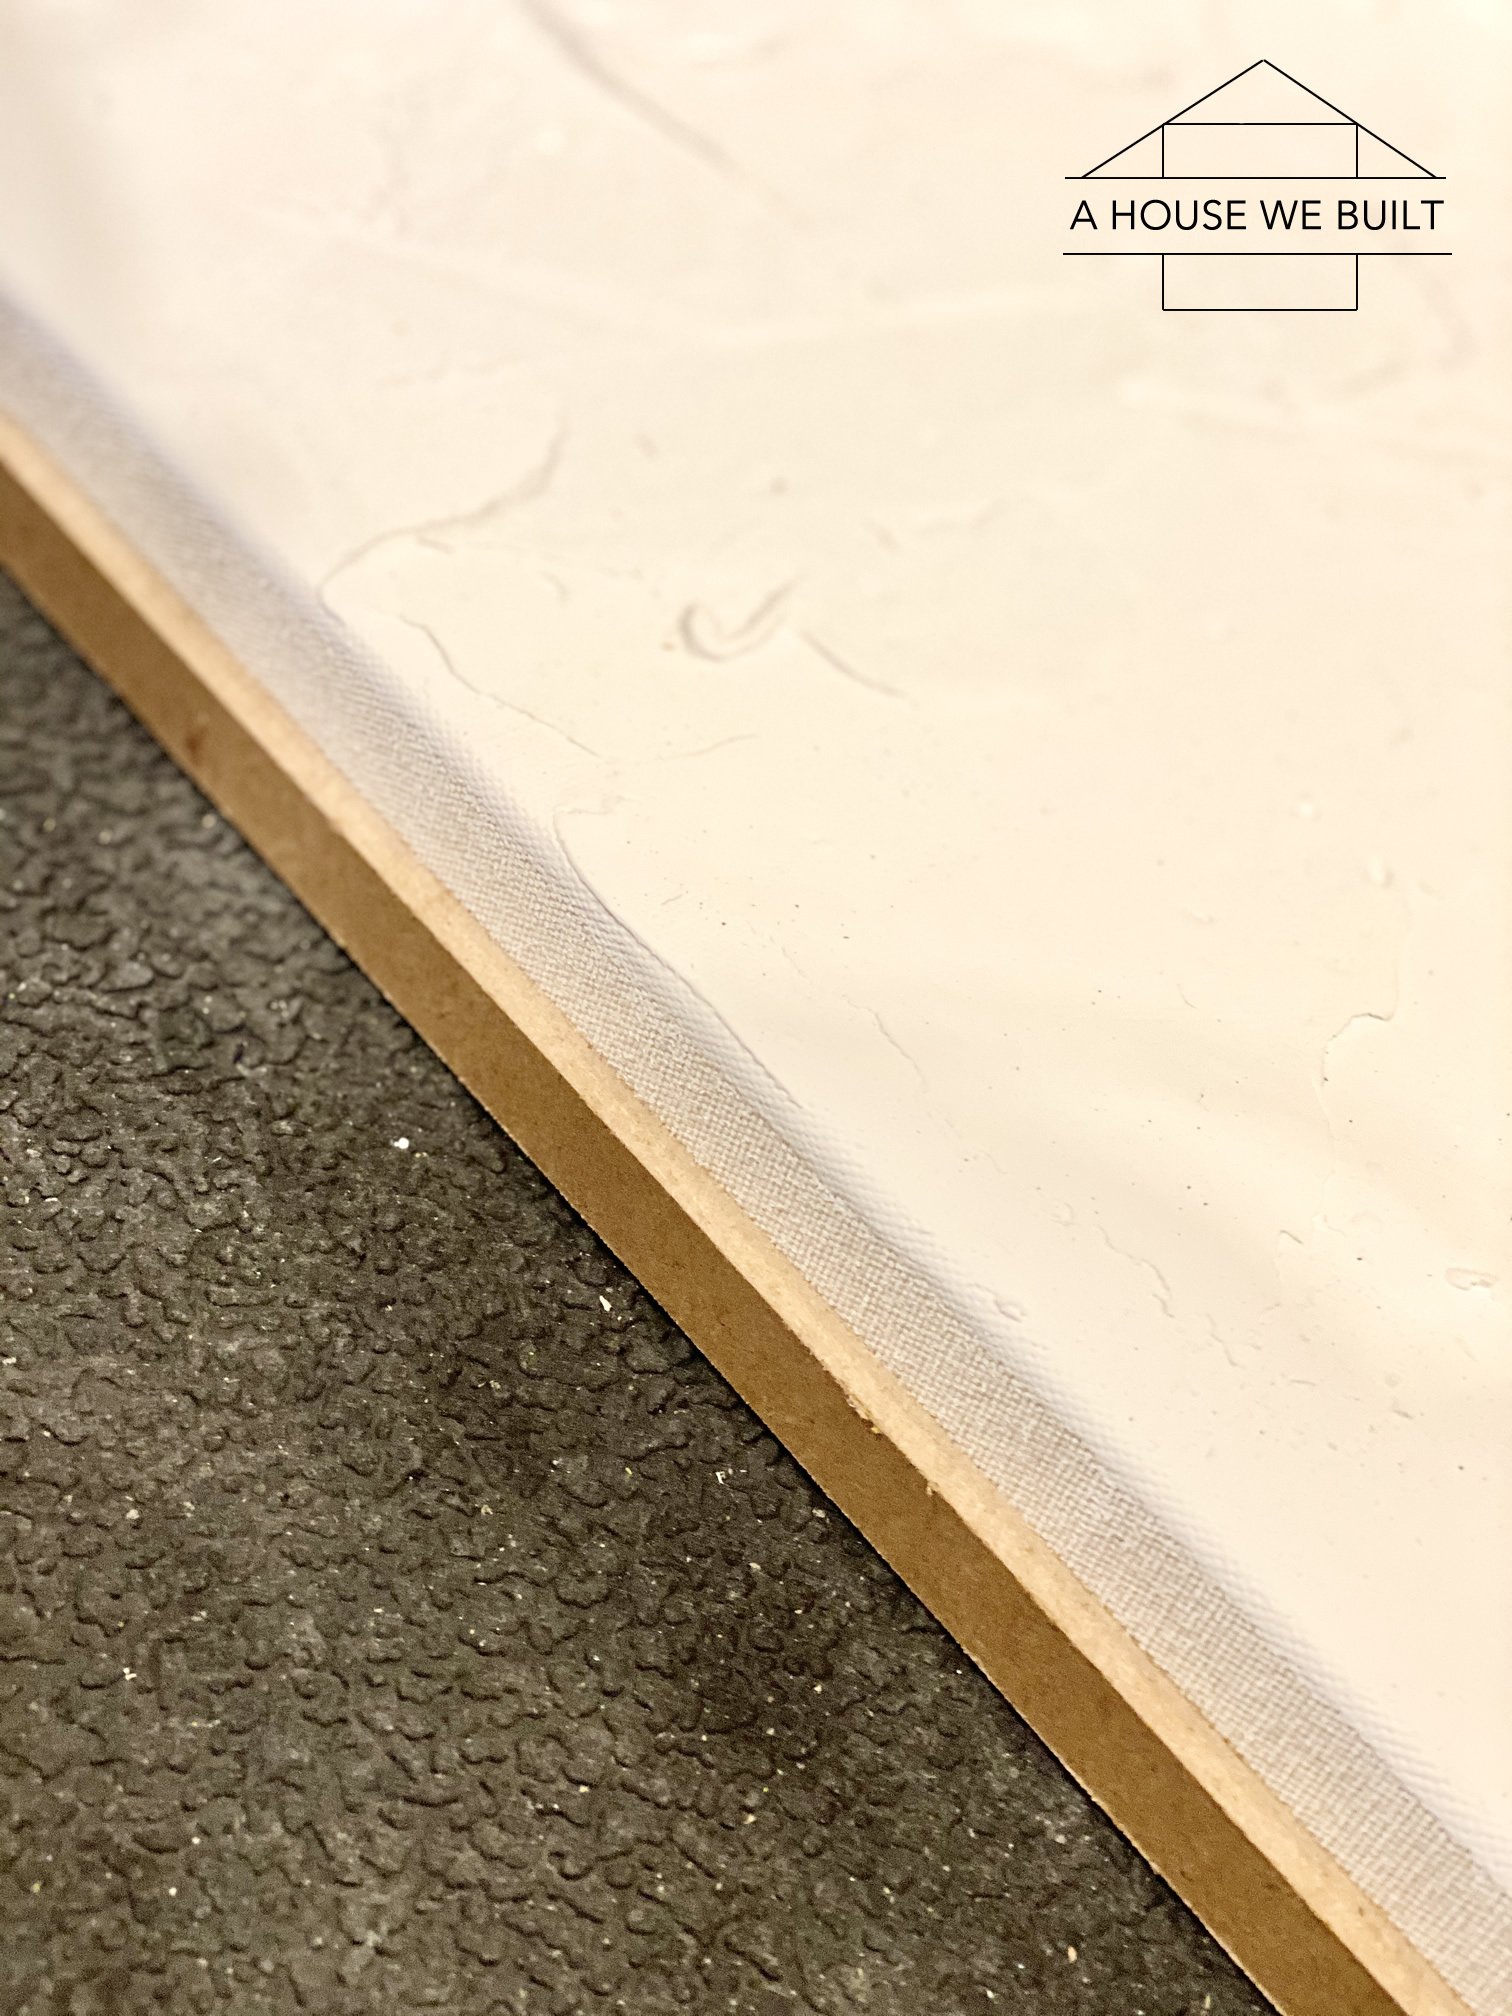
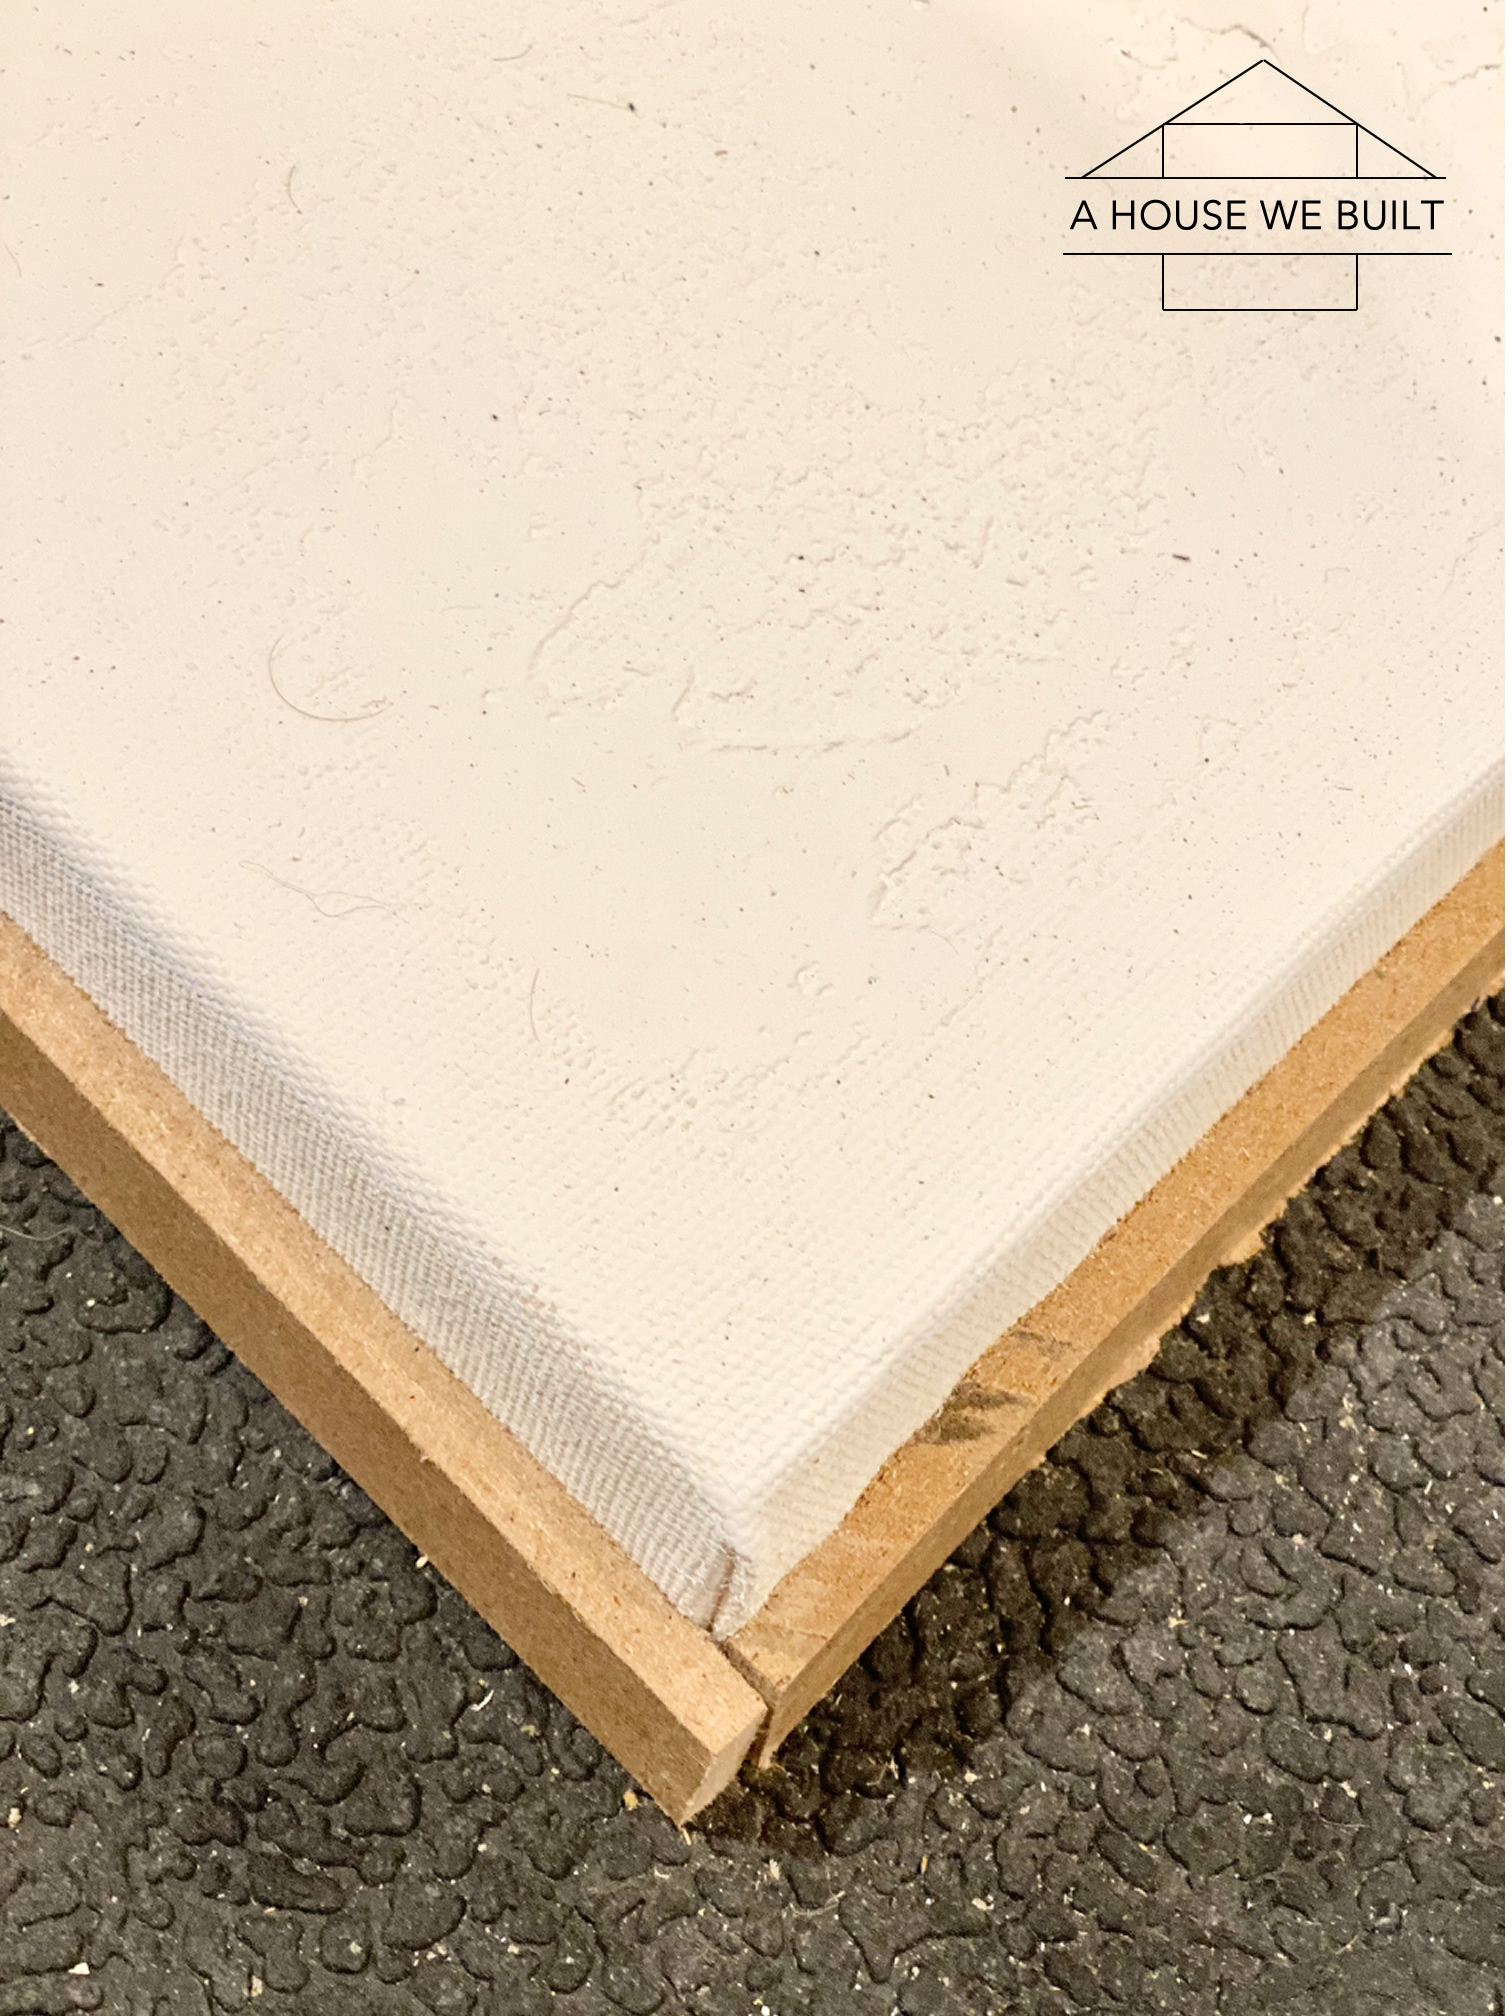
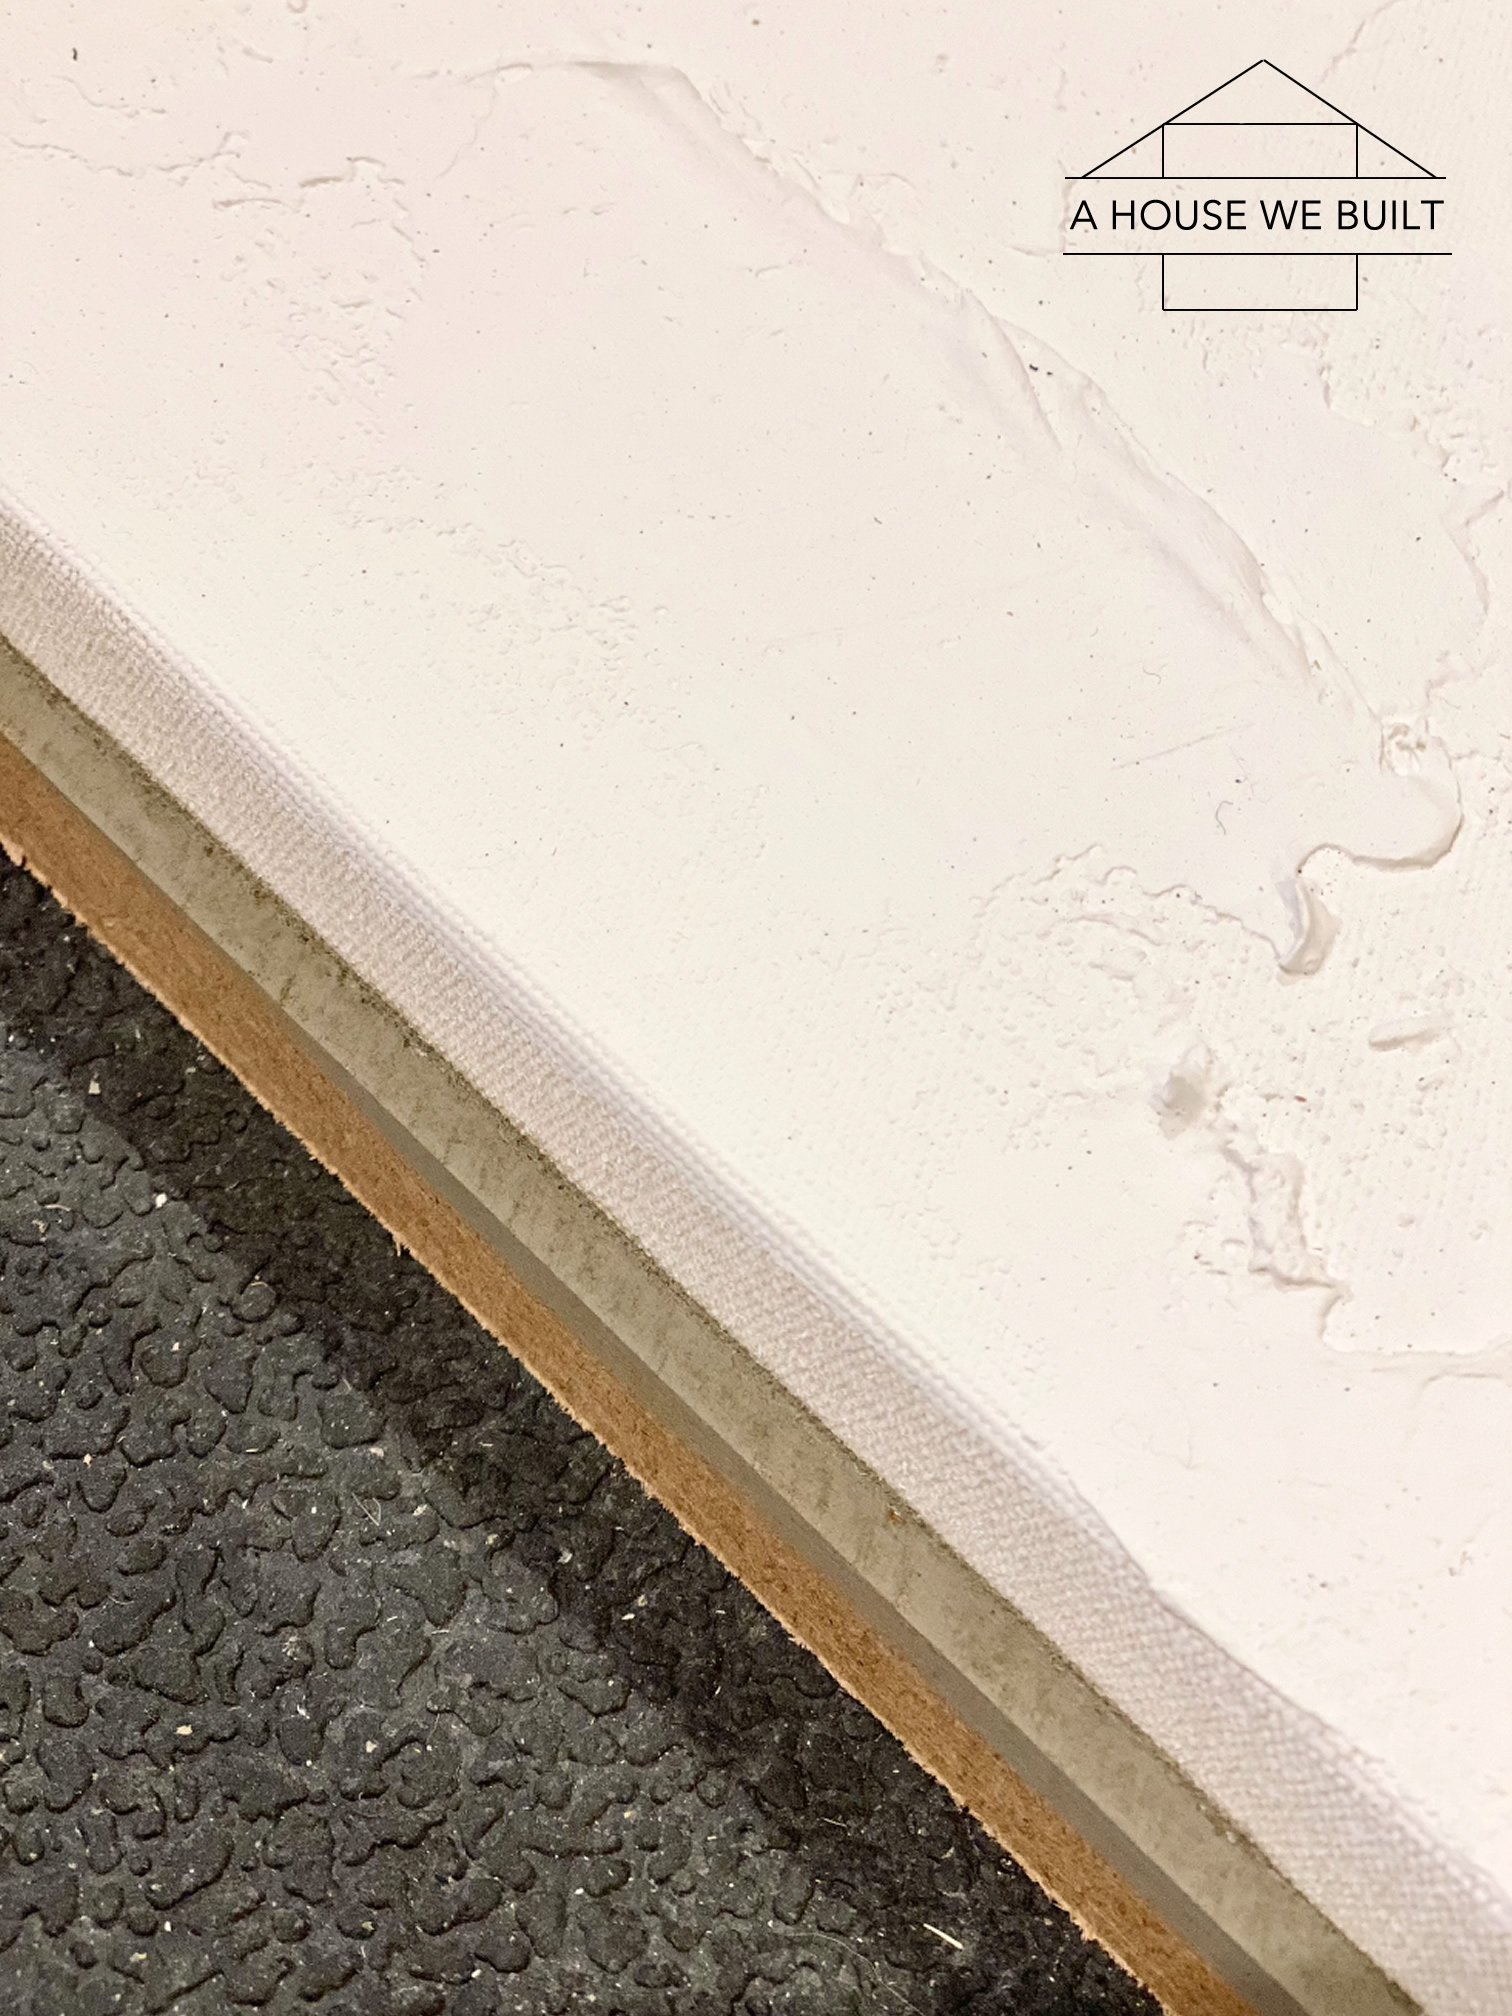
- The basic idea here is that you’re going to wrap the canvas over the front of the frame and staple it to the back. But you have to pull the canvas tight or you’ll end up with ripples and nobody wants that. So here’s how we did ours: First, we smoothed the canvas out to get rid of any fold lines, then placed the frame over it and secure one side all the way, stapling it to the wood every 1-2 inches, but be sure to stop about 2″ before the corners because you’ll do the corners at the end.
- Then continue on to secure the other sides with more staples. We always would start in the center and work our way to the corners. We used locking plyers to help pull the canvas tight – but be careful because you can rip the canvas if you pull too tight.
- Finally do the corners. I’ve shown a picture to kinda show how I folded it. There’s no right or wrong way to do it – just make it look neat and well tucked and give it a couple extra staples.
STEP 2: HOW TO MAKE DRYWALL MUD / JOINT COMPOUND ART
Materials:
- Joint compound/drywall mud: Home Depot (I always use this dust control one)
- Paint (I used BM Simply White in matte)
Tools:
- Trowels/taping knives. I used these two sizes: Home Depot / Amazon | Home Depot / Amazon
- Paint brush
Instructions for mud art:
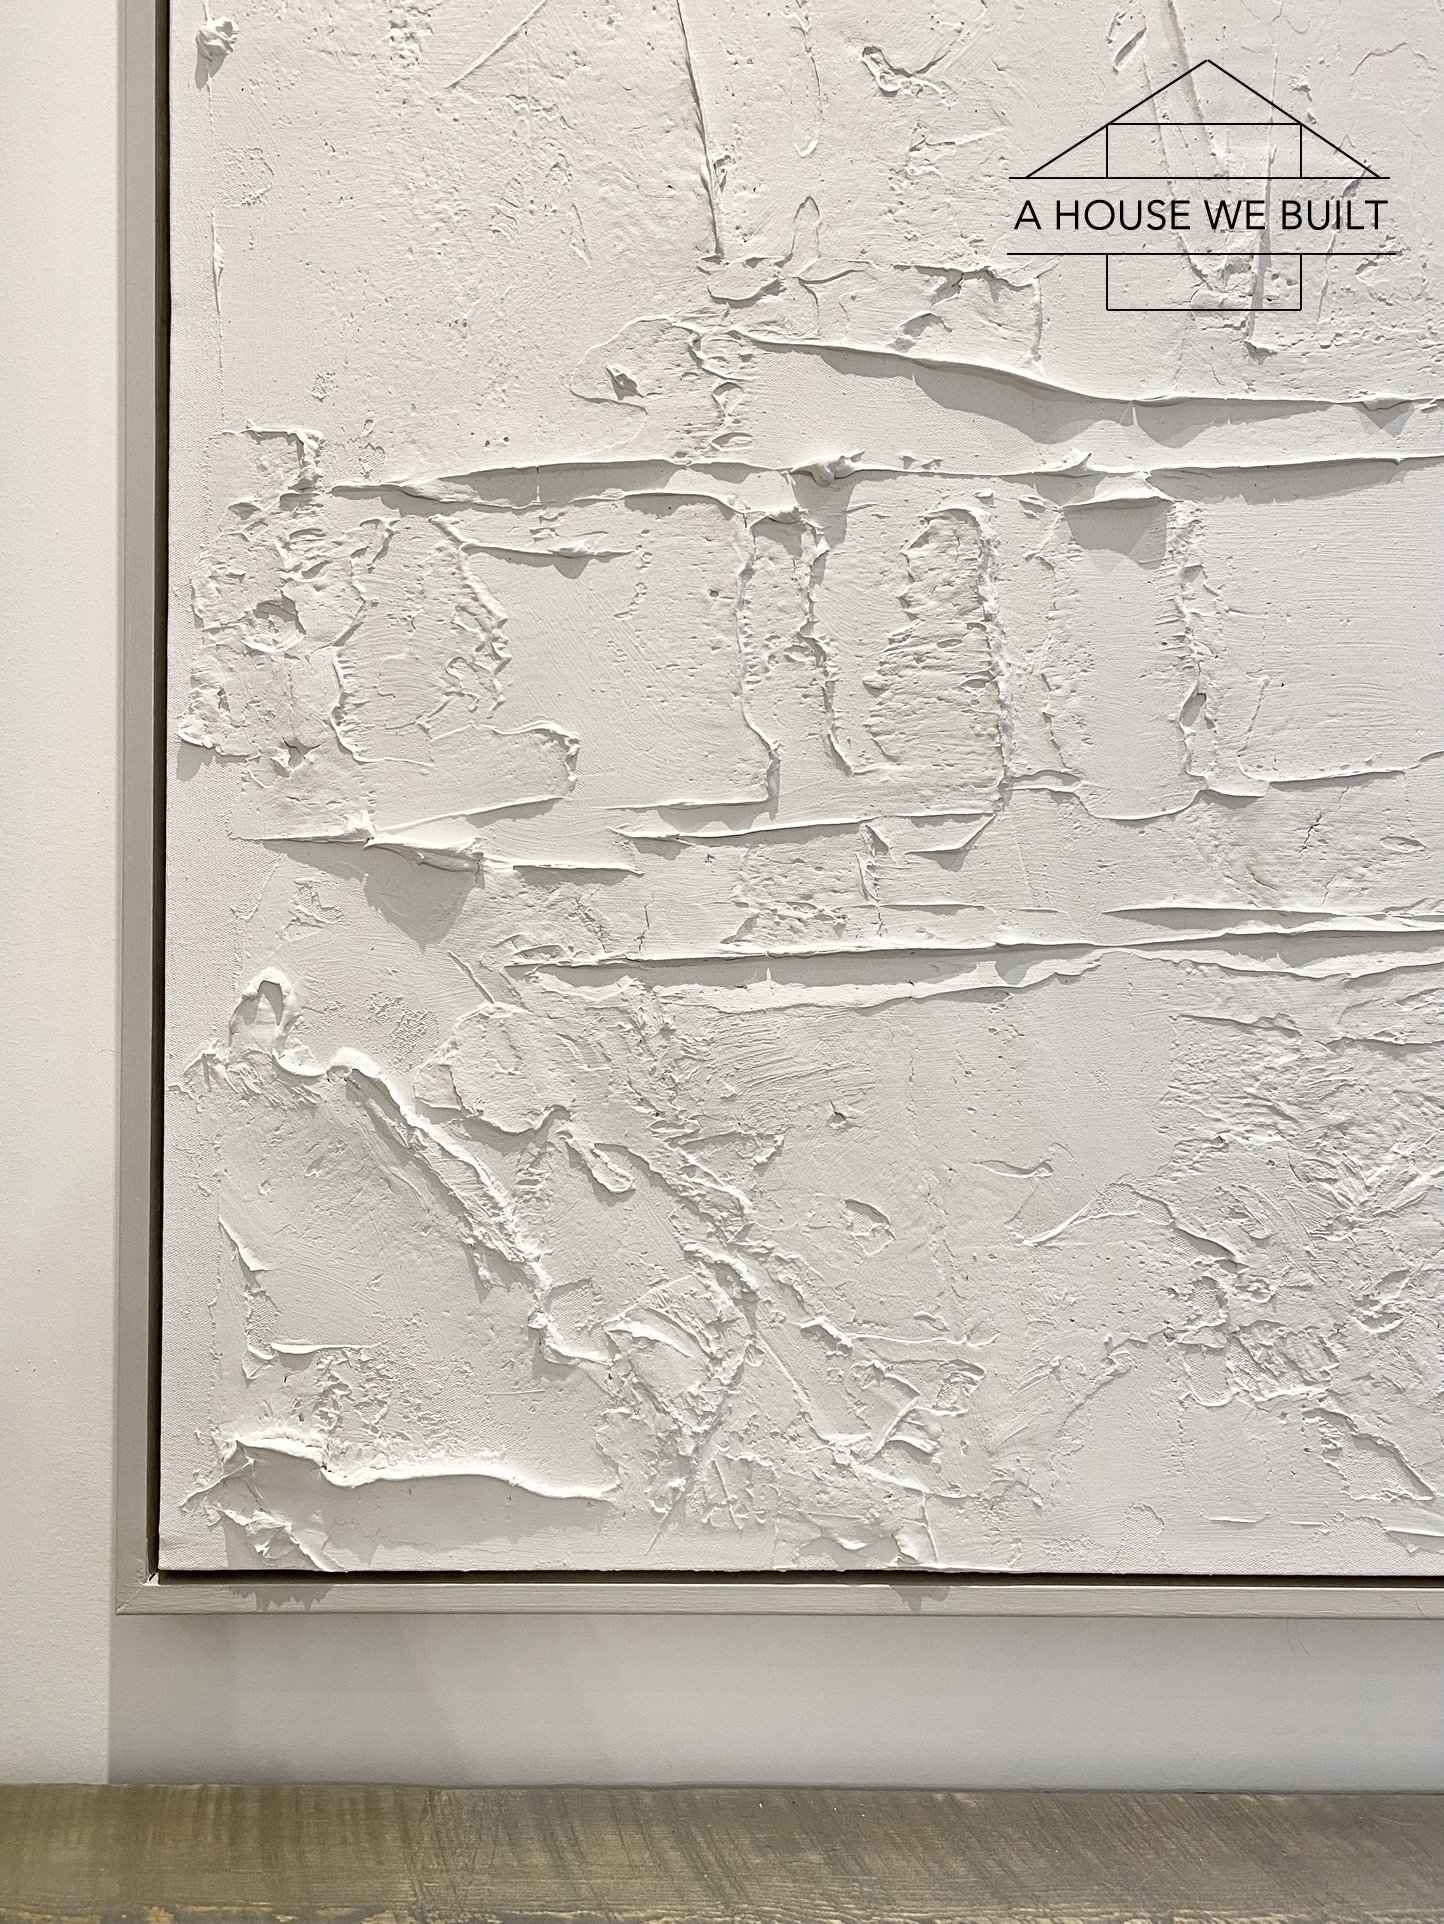
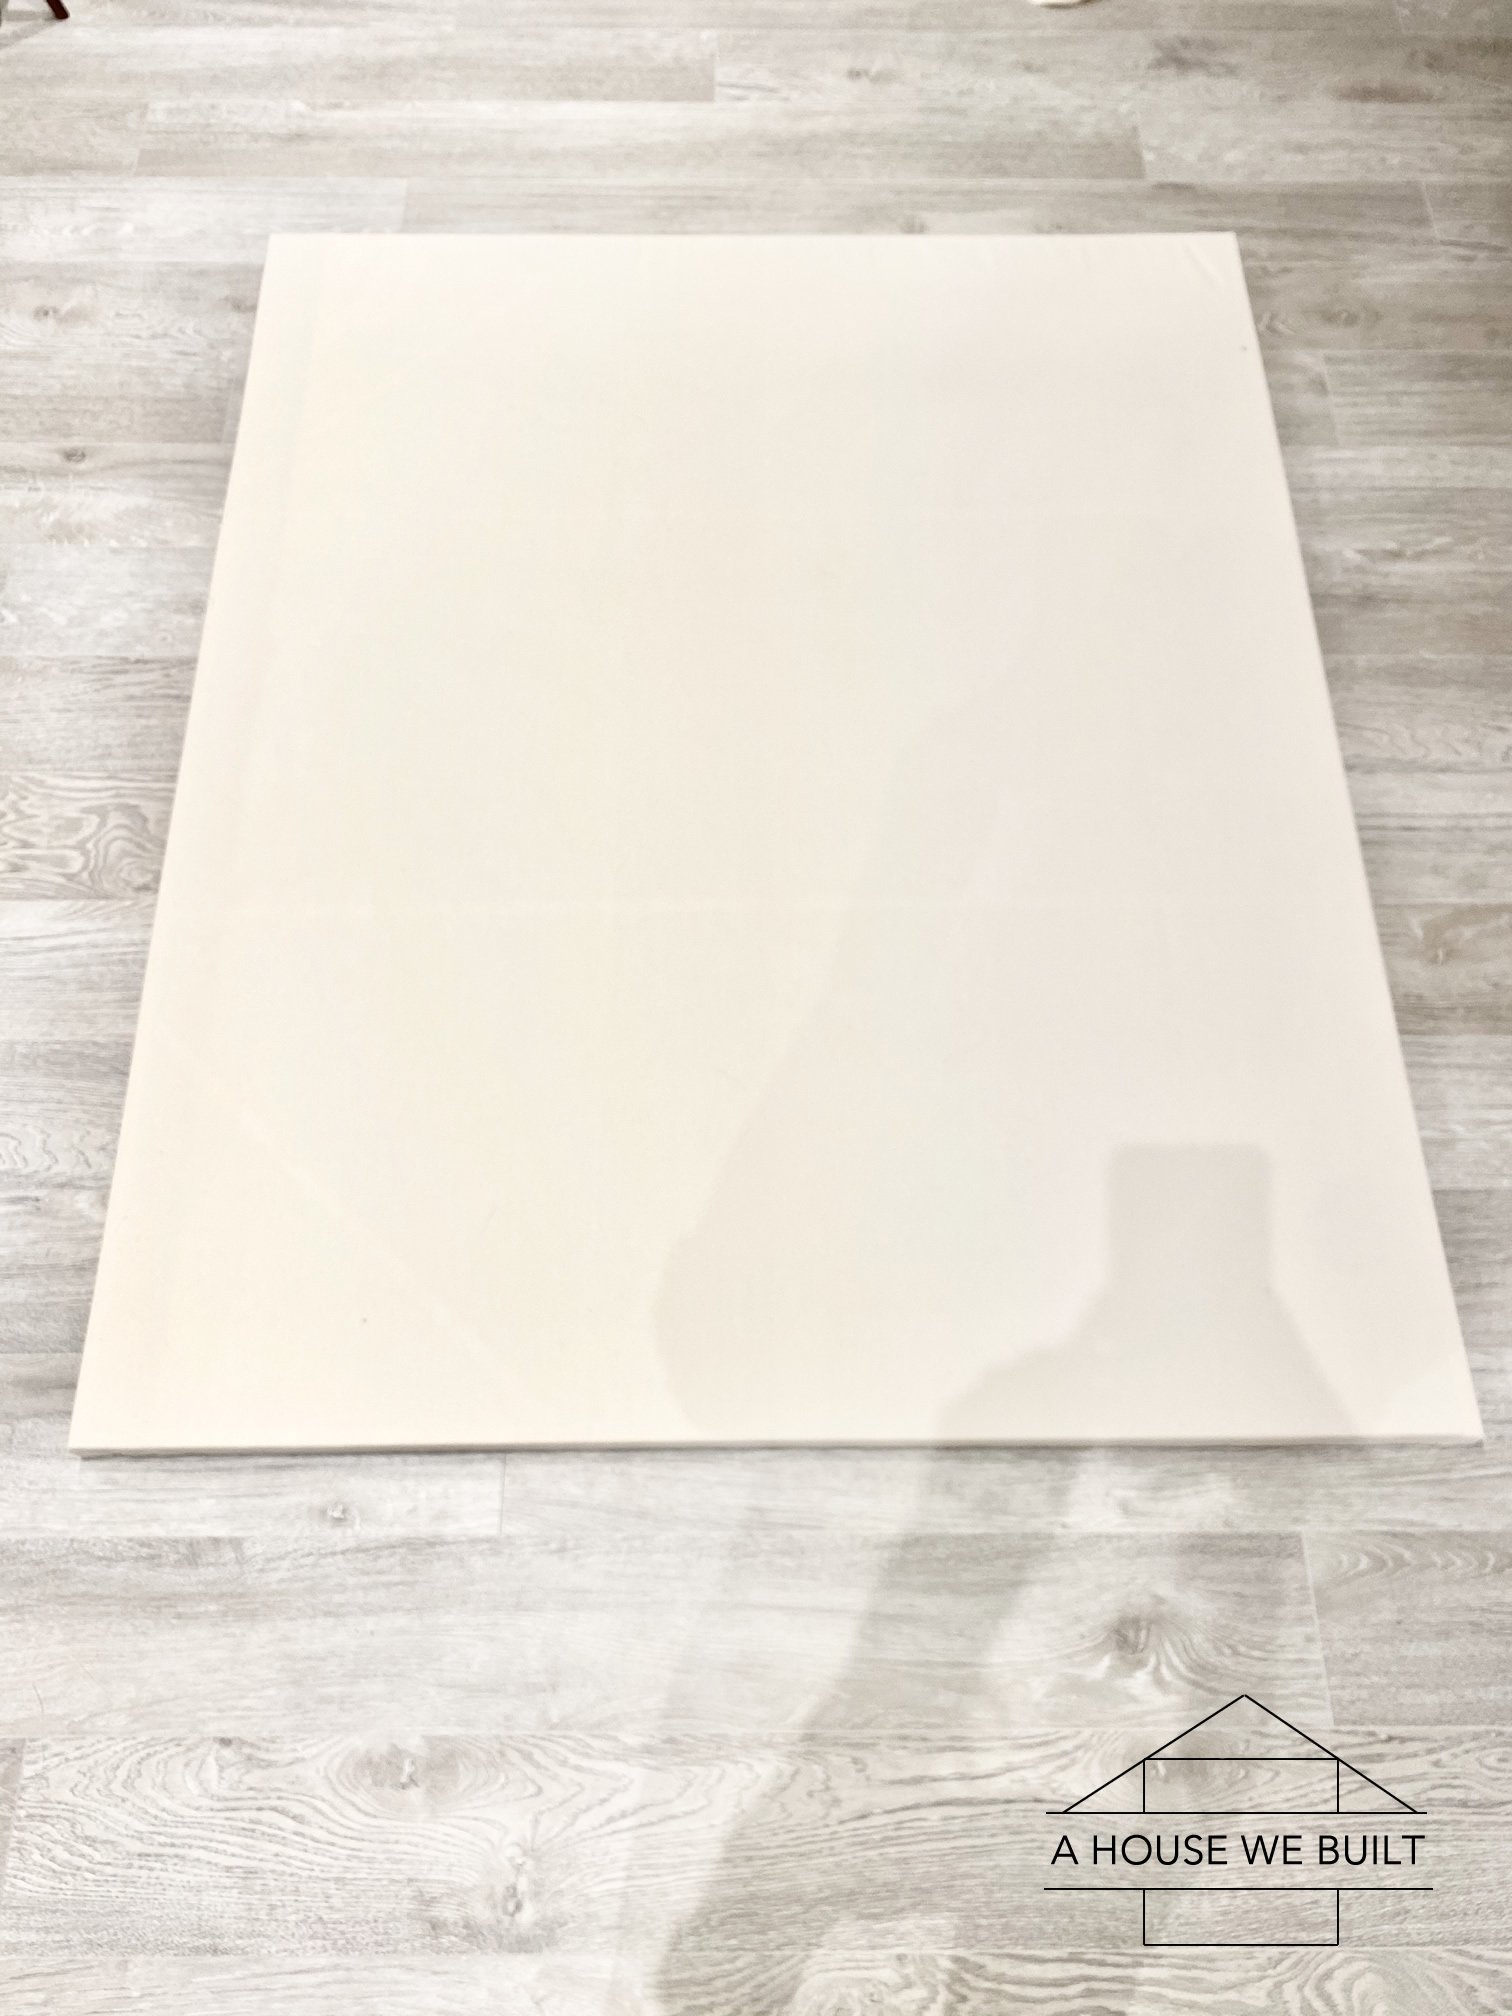
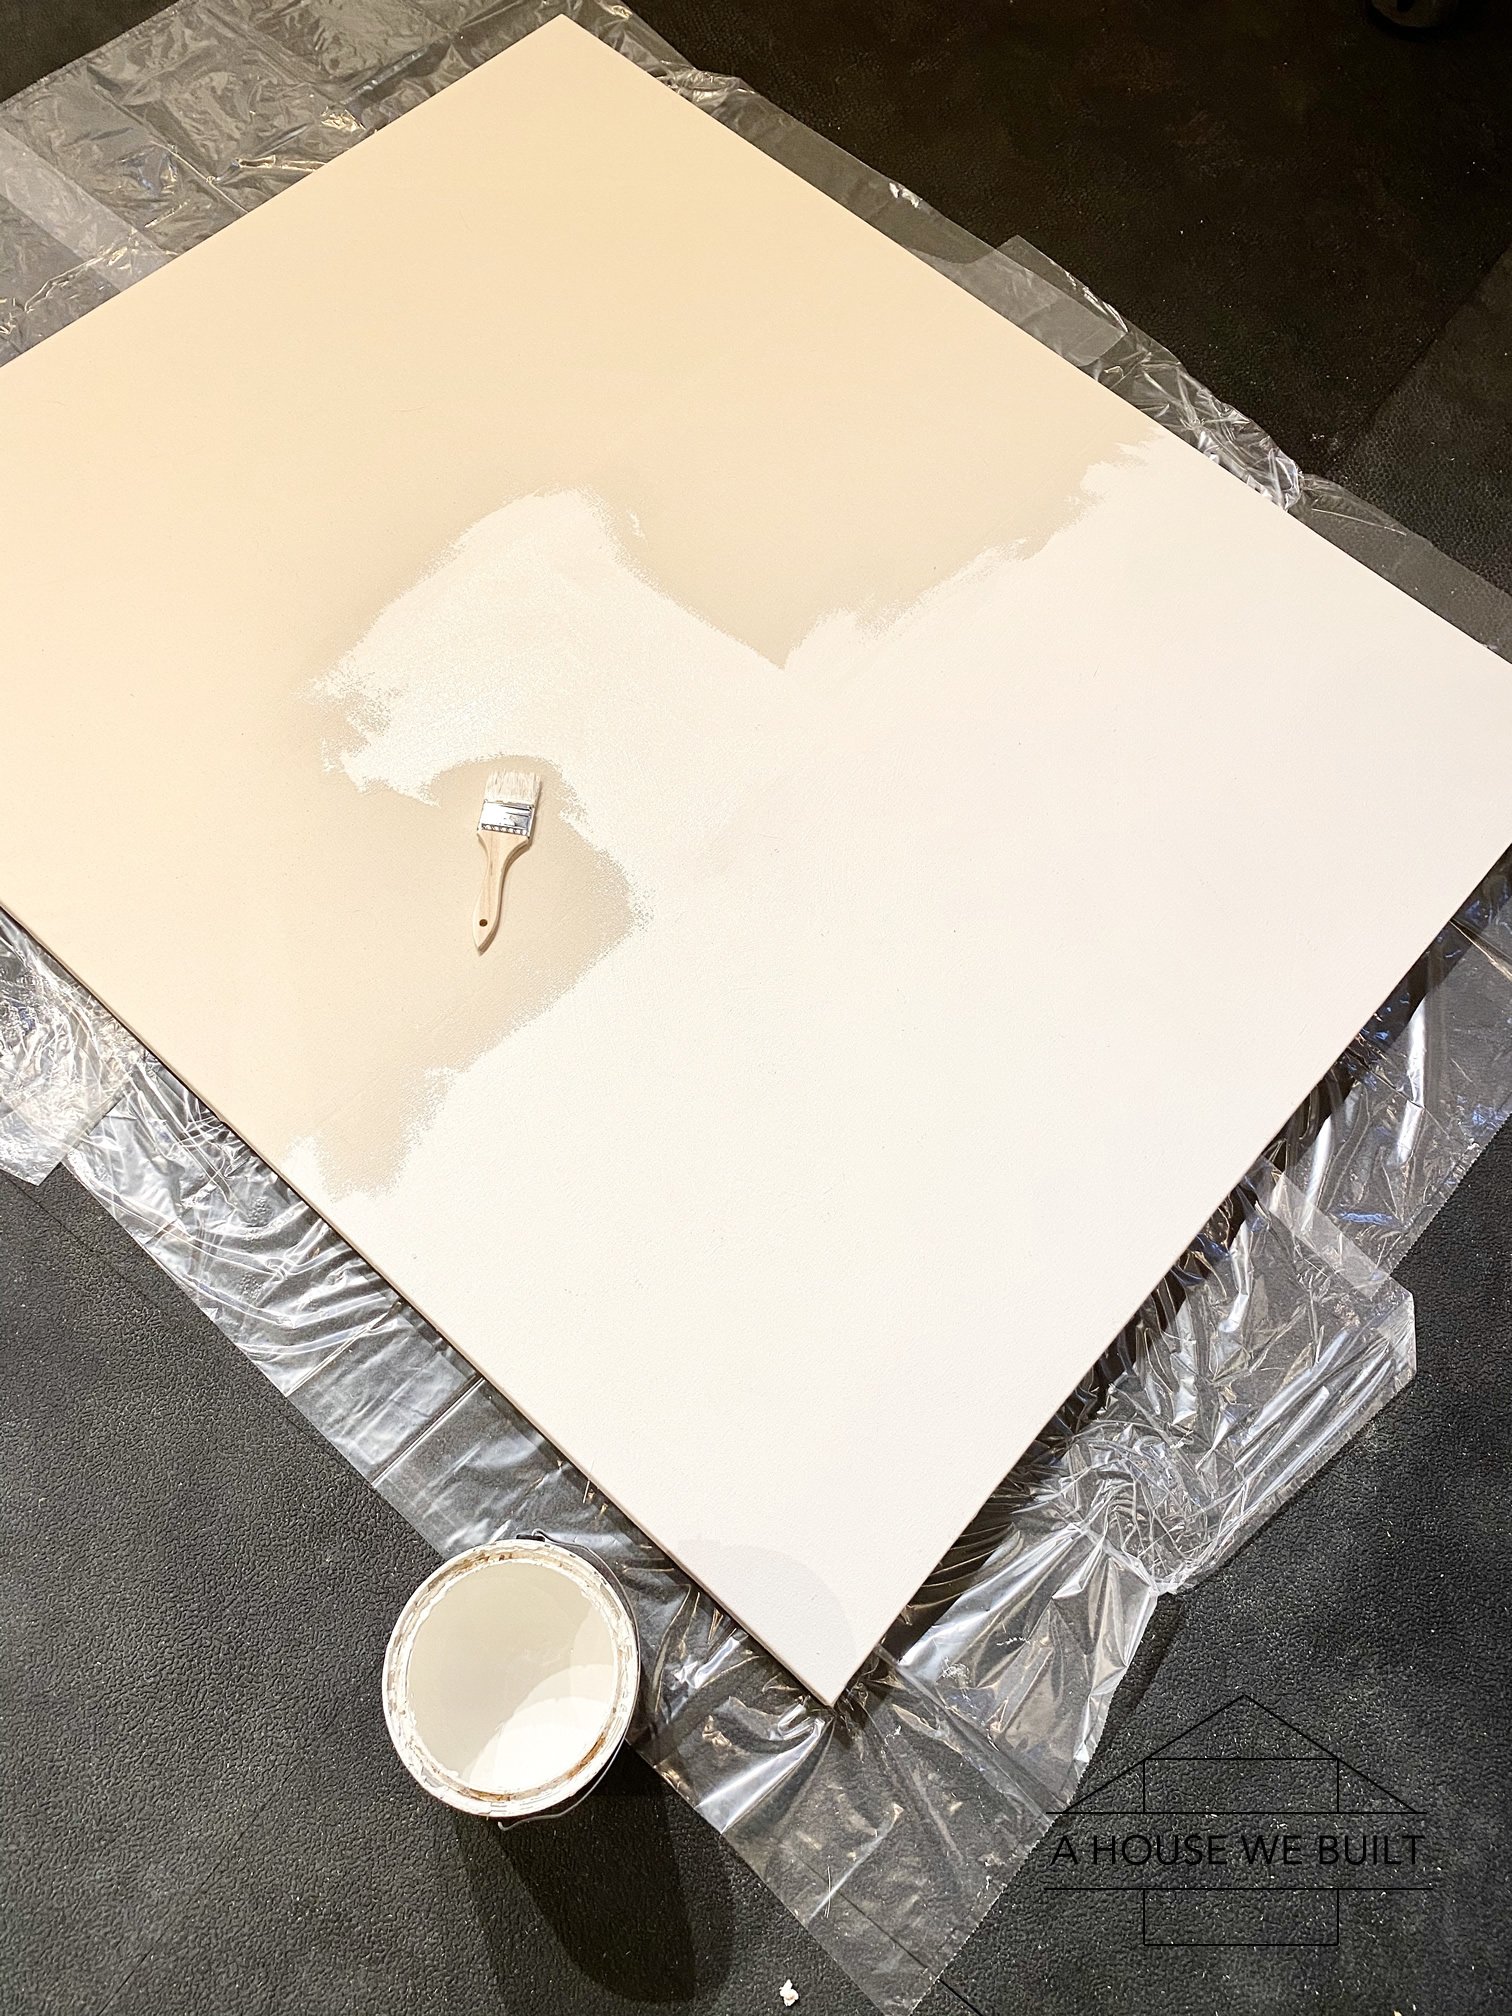
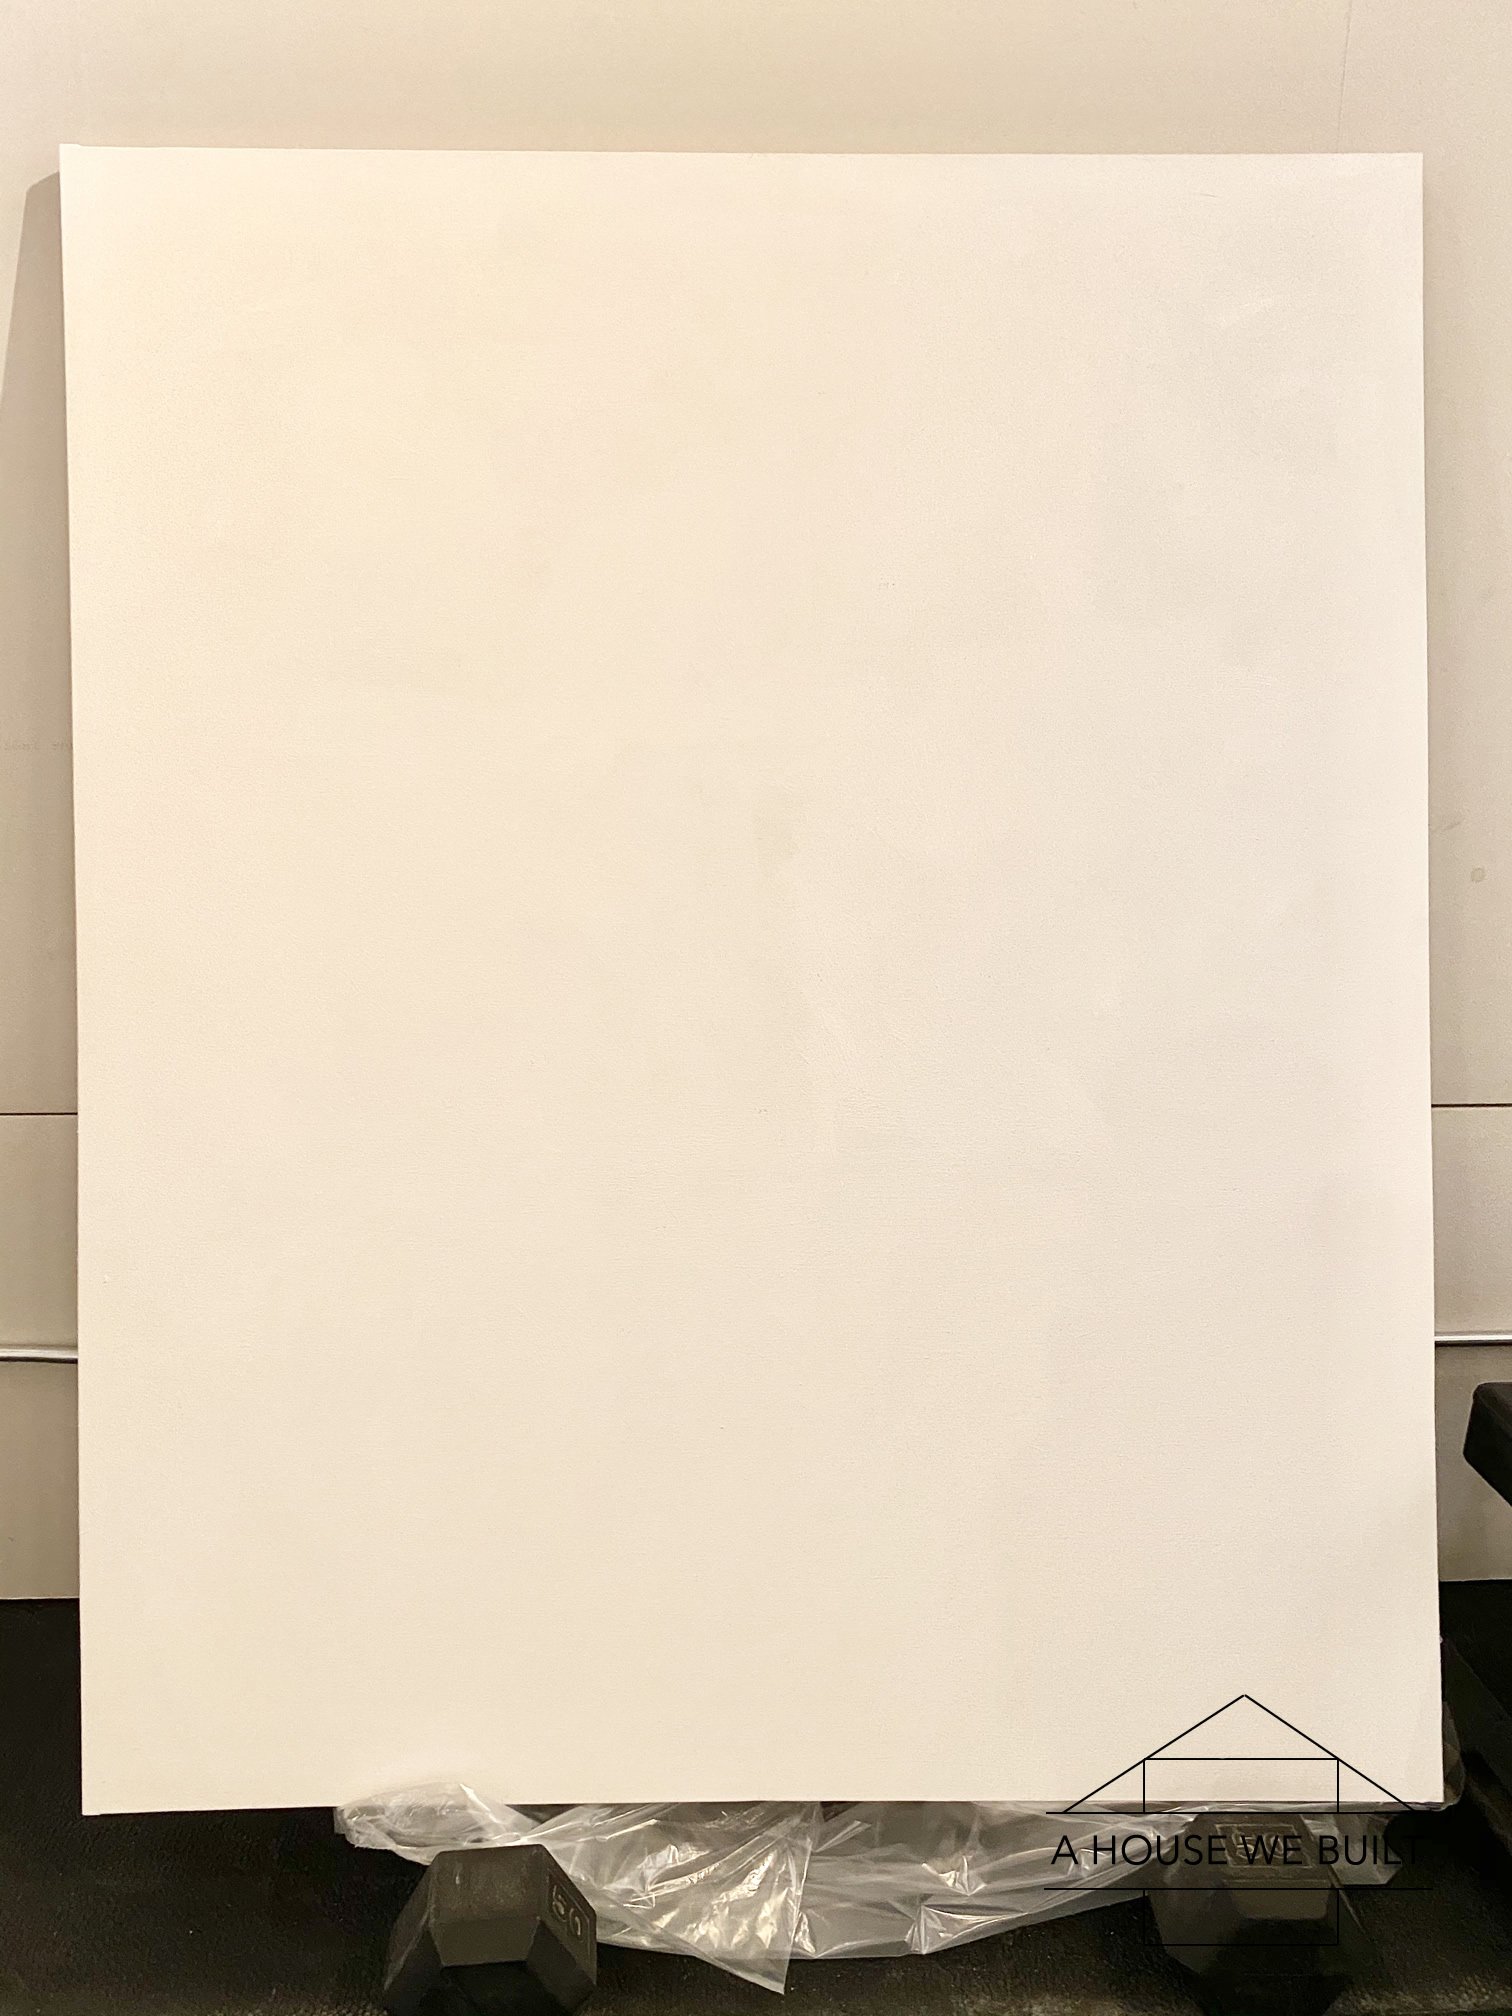
- Before you begin texturing your canvas, you’ll need to paint the entire canvas with any type of house paint you have on hand to essentially seal the canvas fabric. I saw that pros do this with something called “gesso” (?) but I figured that house paint would probably function the same and it worked for me. Basically the way I understand it is that the idea is to make it so that the fabric is a little stronger base to hold your mud and so that the moisture won’t sink into it as much. Anyhoo, just paint the whole thing and let it dry fully before starting anything else. I used matte wall paint and a paint brush – really making sure that I got the paint into the weave of the fabric.
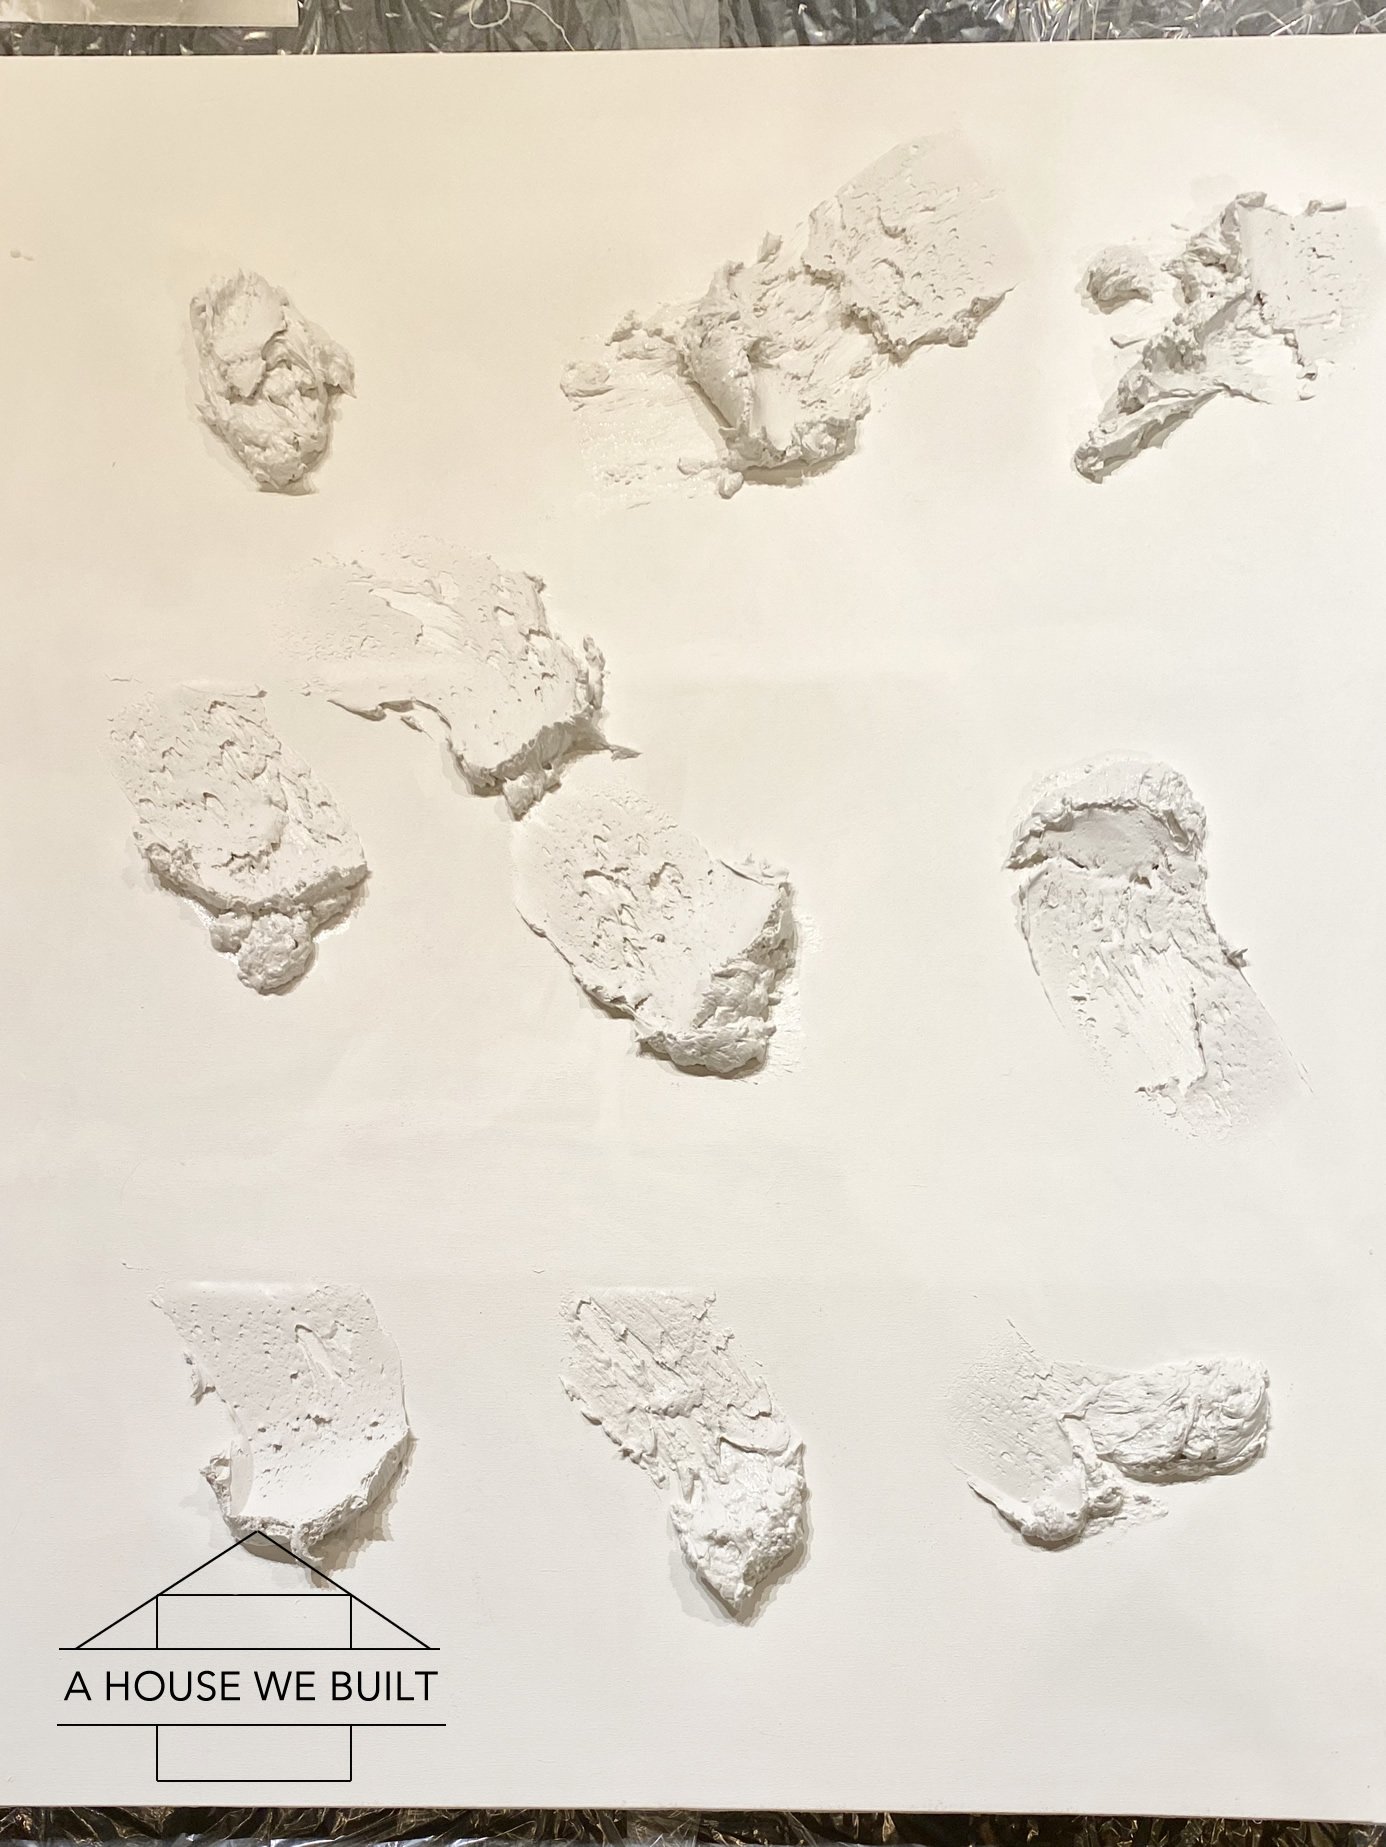
- Once your painted canvas is dry, it’s time to texture! There are no rules to this process. Just gloop a bunch of drywall mud onto the canvas and shape it until you’re happy with how it looks. [Tip #1: if you’ve never worked with drywall mud before, I would suggest practicing a little on a scrap board or something just so you get a feel for it. I’ve mudded and taped a ton of drywall at this point so I’m really familiar with how the mud goes on and what textures to look for but if I wasn’t, I think I would have liked to practice a little first. Tip #2: if you add a little water, you can create different consistencies in the mud, which in turn will look a little different as you smear it so play around with that. Tip #3: have a few different tools on hand. I actually just used my drywall taping knife and trowel so it doesn’t have to be fancy but I suggest at least two different sizes of tools.]
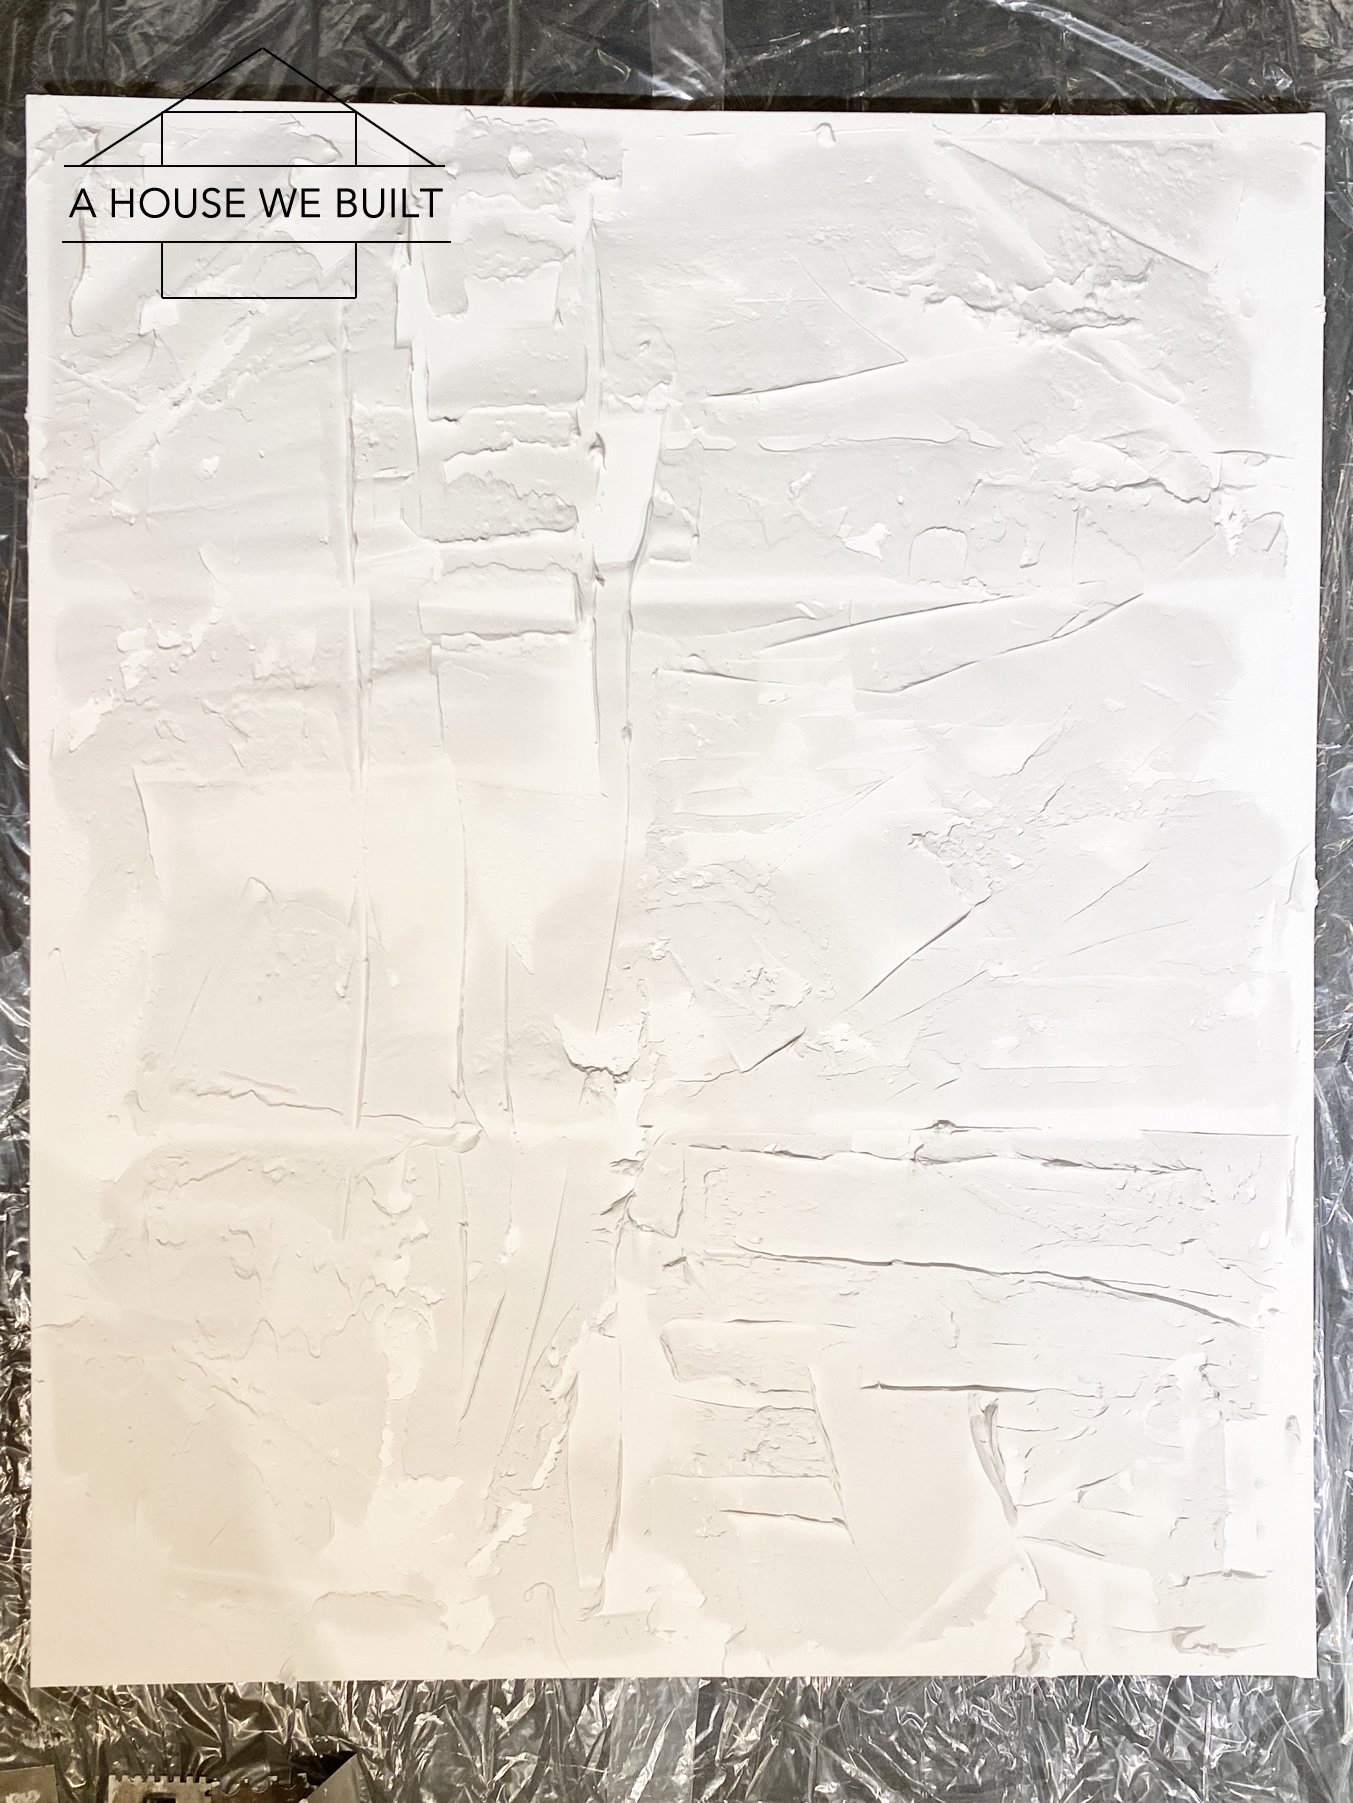
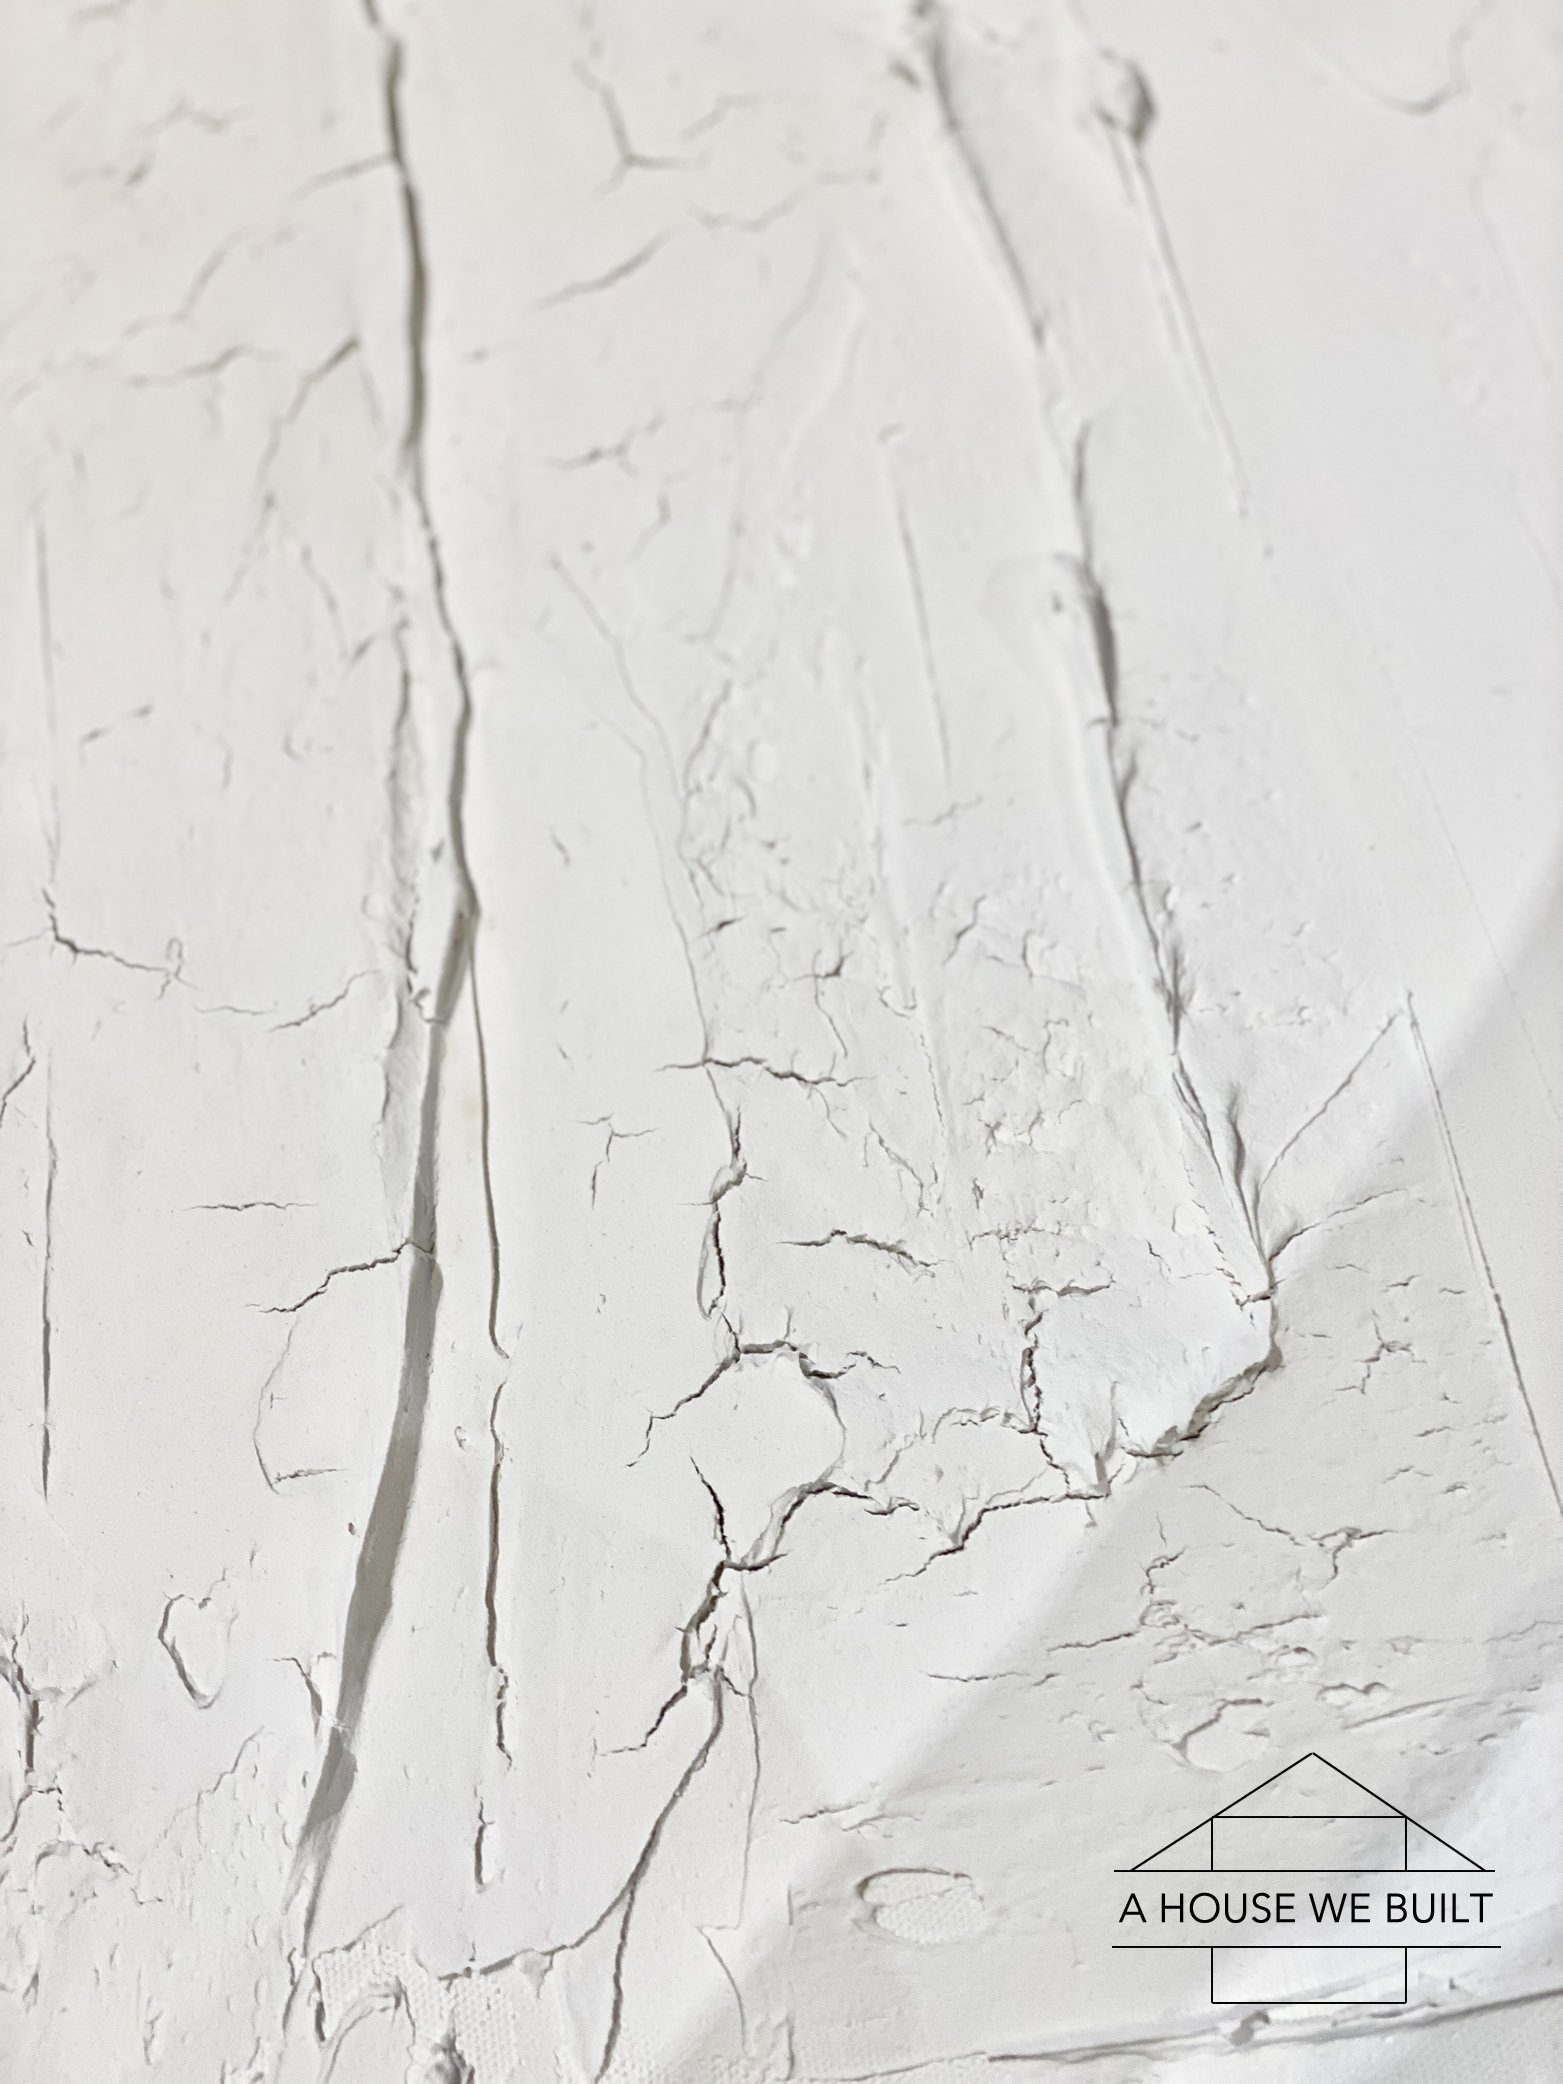
- Allow this to dry FULLY, especially if you have some thicker mud sections. I let mine dry for about 5 days before moving to the next step. Left pic below is after about 1 day of drying.
- After it’s fully dried, you may notice that sections of the mud have cracked. Don’t worry, this is normal. Just go in with a gloved hand and a little bit of mud and use your finger to *gently* repair the cracks by adding a small amount of more mud over the cracks (also if the crack is larger, fill in the gap with mud) but smooth it back over so you don’t lose the shape of the texture and lines you created. I did this in sections all over my entire canvas. The idea here is that you want your mud to be firmly secured to your canvas and if there are cracks, I’d be worried it would just crack and fall off once you moved it to a vertical position so I wanted to repair all the cracks to strengthen the overall mud structure. I’ve shown some before (middle) and after (right) pics below:
- Allow the crack repairs to dry FULLY. I let mine dry for 2 days.
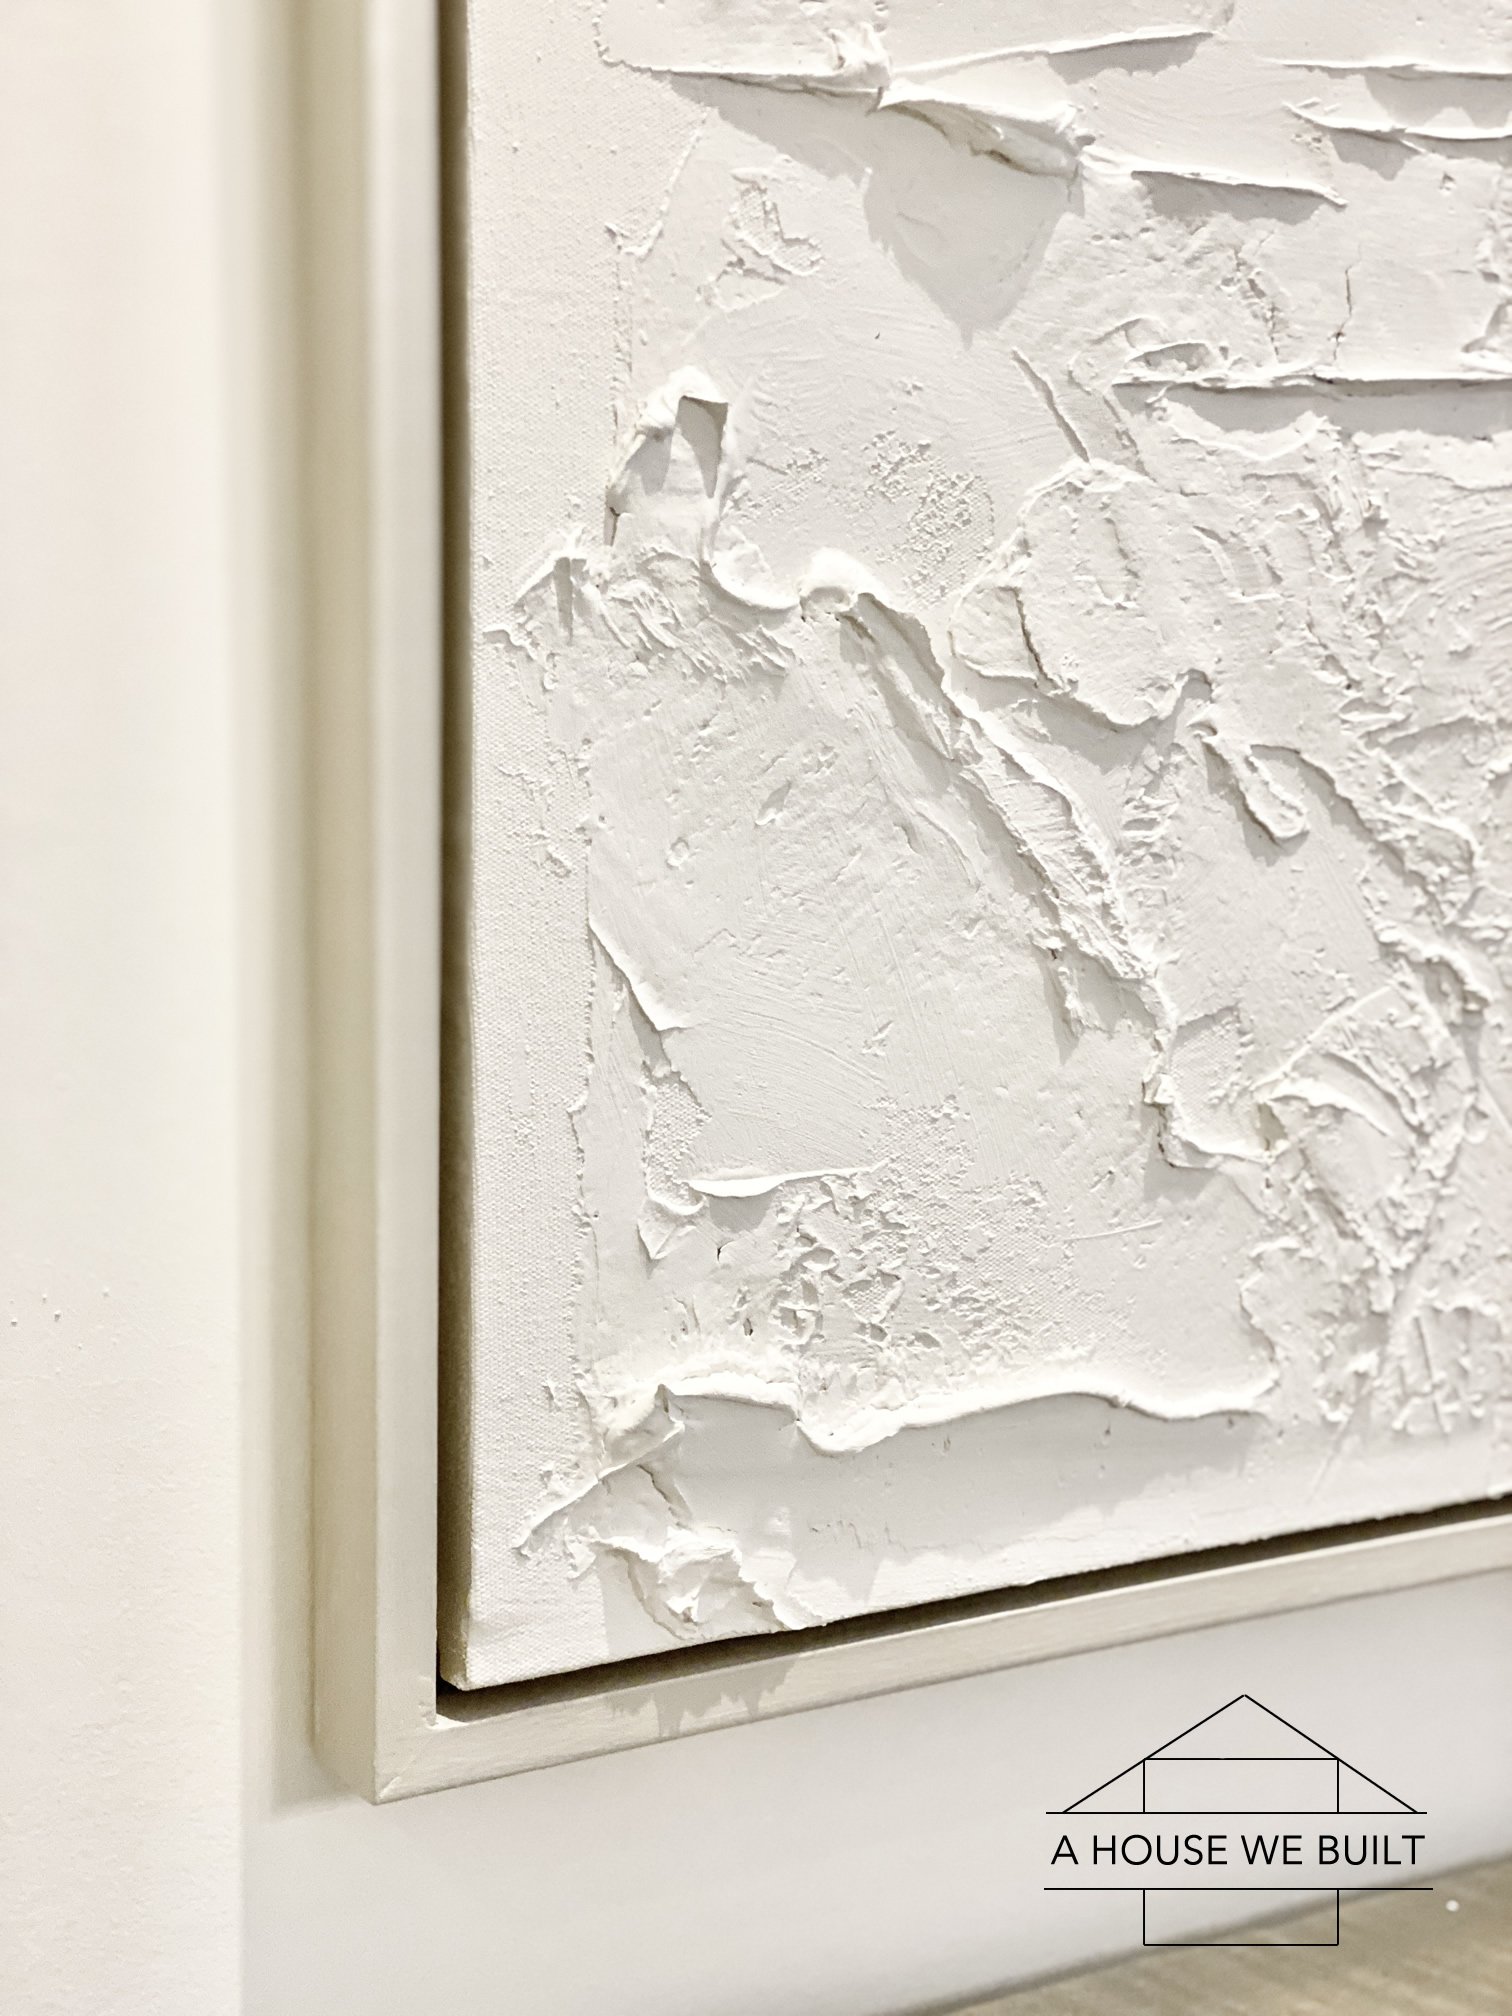
- Once dry, seal everything by painting over it with wall paint. I used the same matte paint that I used to seal the canvas prior to applying the mud. Paint it by hand with a paintbrush and CAREFULLY go over everything – like get right into any cracks and gently go around all the texture. You want to create a seal-coat without hiding any of the more subtle texture so this takes some attention. Also paint down the sides of the canvas too just to really seal it all up.
- Allow this to dry FULLY. I let mine dry for 24 hours.

STEP 3: HOW TO MAKE A FLOATING FRAME
Materials:
- 1/4″ strips of any material (I ripped down MDF)
- 1×2 wood (if you plan to stain it) or MDF (I used MDF)
- Paint (I used BM Revere Pewter in Satin) or Stain
Tools:
- Table saw: Home Depot | Amazon (if you need to rip down MDF)
- Nailer: Home Depot (& nails)
- Wood filler
- Sandpaper
Instructions for floating frame:
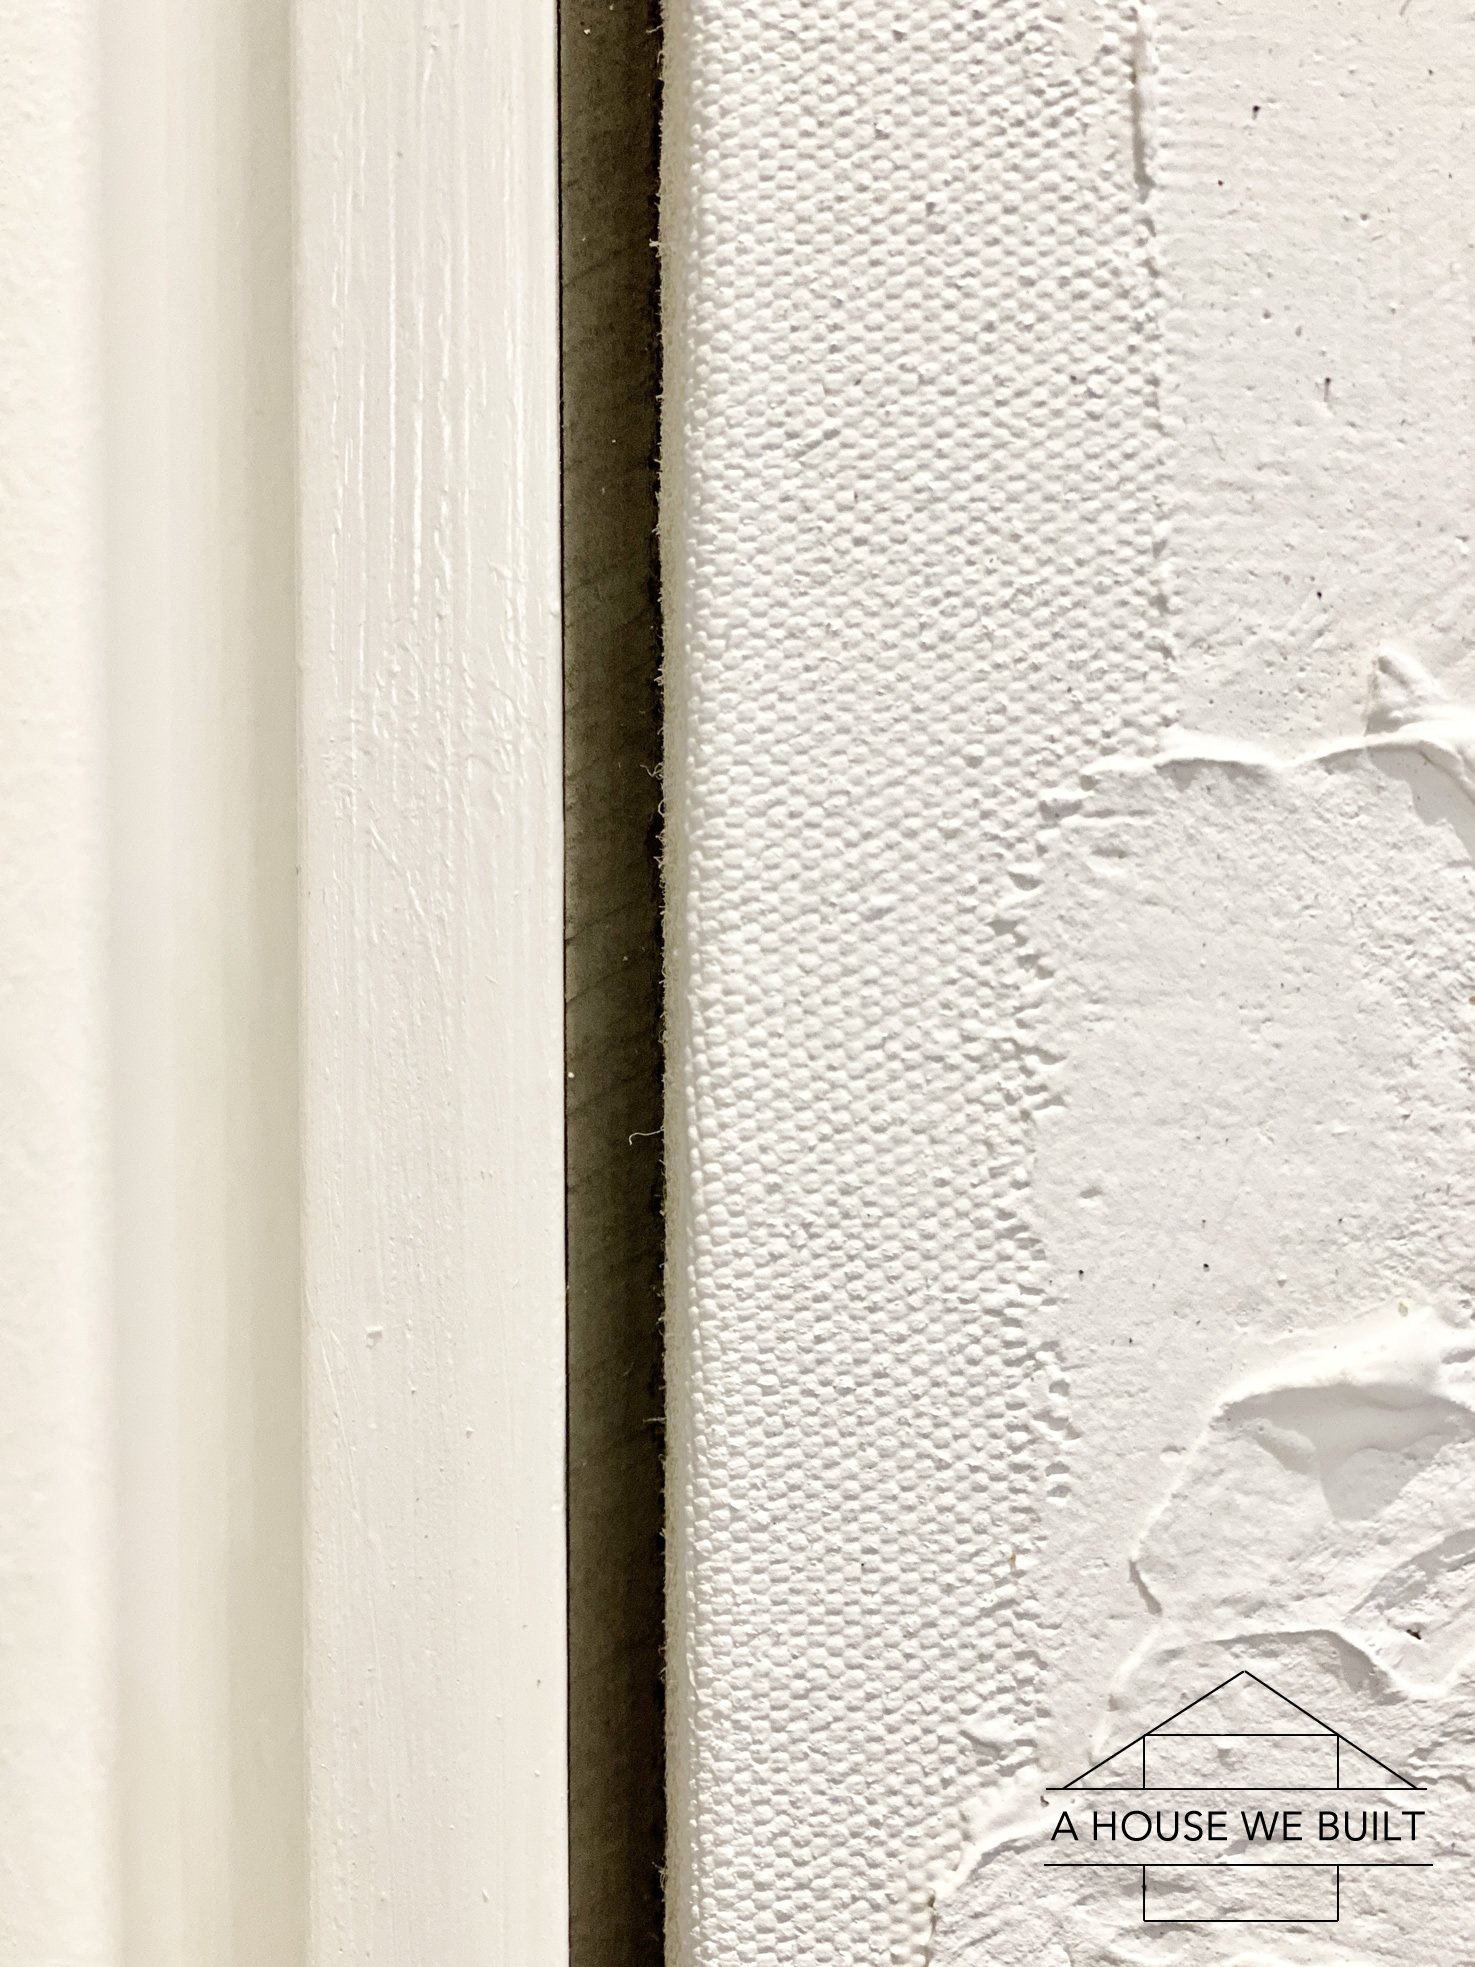
- Now, obviously this is totally optional and there are many ways to frame art, but if you want to create a floating frame, this is how I did mine: Essentially you need to create a gap (I did a 1/4″ gap) between the canvas and the exterior frame you’re going to build. My frame was made from 1×2 (meaning it had a depth of 1.5″ so the way I created the gap was to simply nail a strip of wood that was 1/4″ x 3/4″ between the canvas frame and the exterior frame. I created my strips by ripping down some MDF I had on hand but plywood would work fine or I think some hardware stores might have something already made that could work. There’s no rules for this, it just has to be a shallower depth then your frame to create the gap. And it doesn’t have to be perfect – the idea is that these strips won’t really ever show.
- Then you nail the strips to the canvas frame. I also painted mine a darker gray (black would work too) to accentuate the shadow line but that’s optional.
- Then measure & cut 1x2s for your final exterior frame (I mitered my corners but that’s optional) and nail them into place. I then wood-filler’ed the seams and once that was dry, I painted it all gray.
That’s it! Now your art piece is ready to hang!
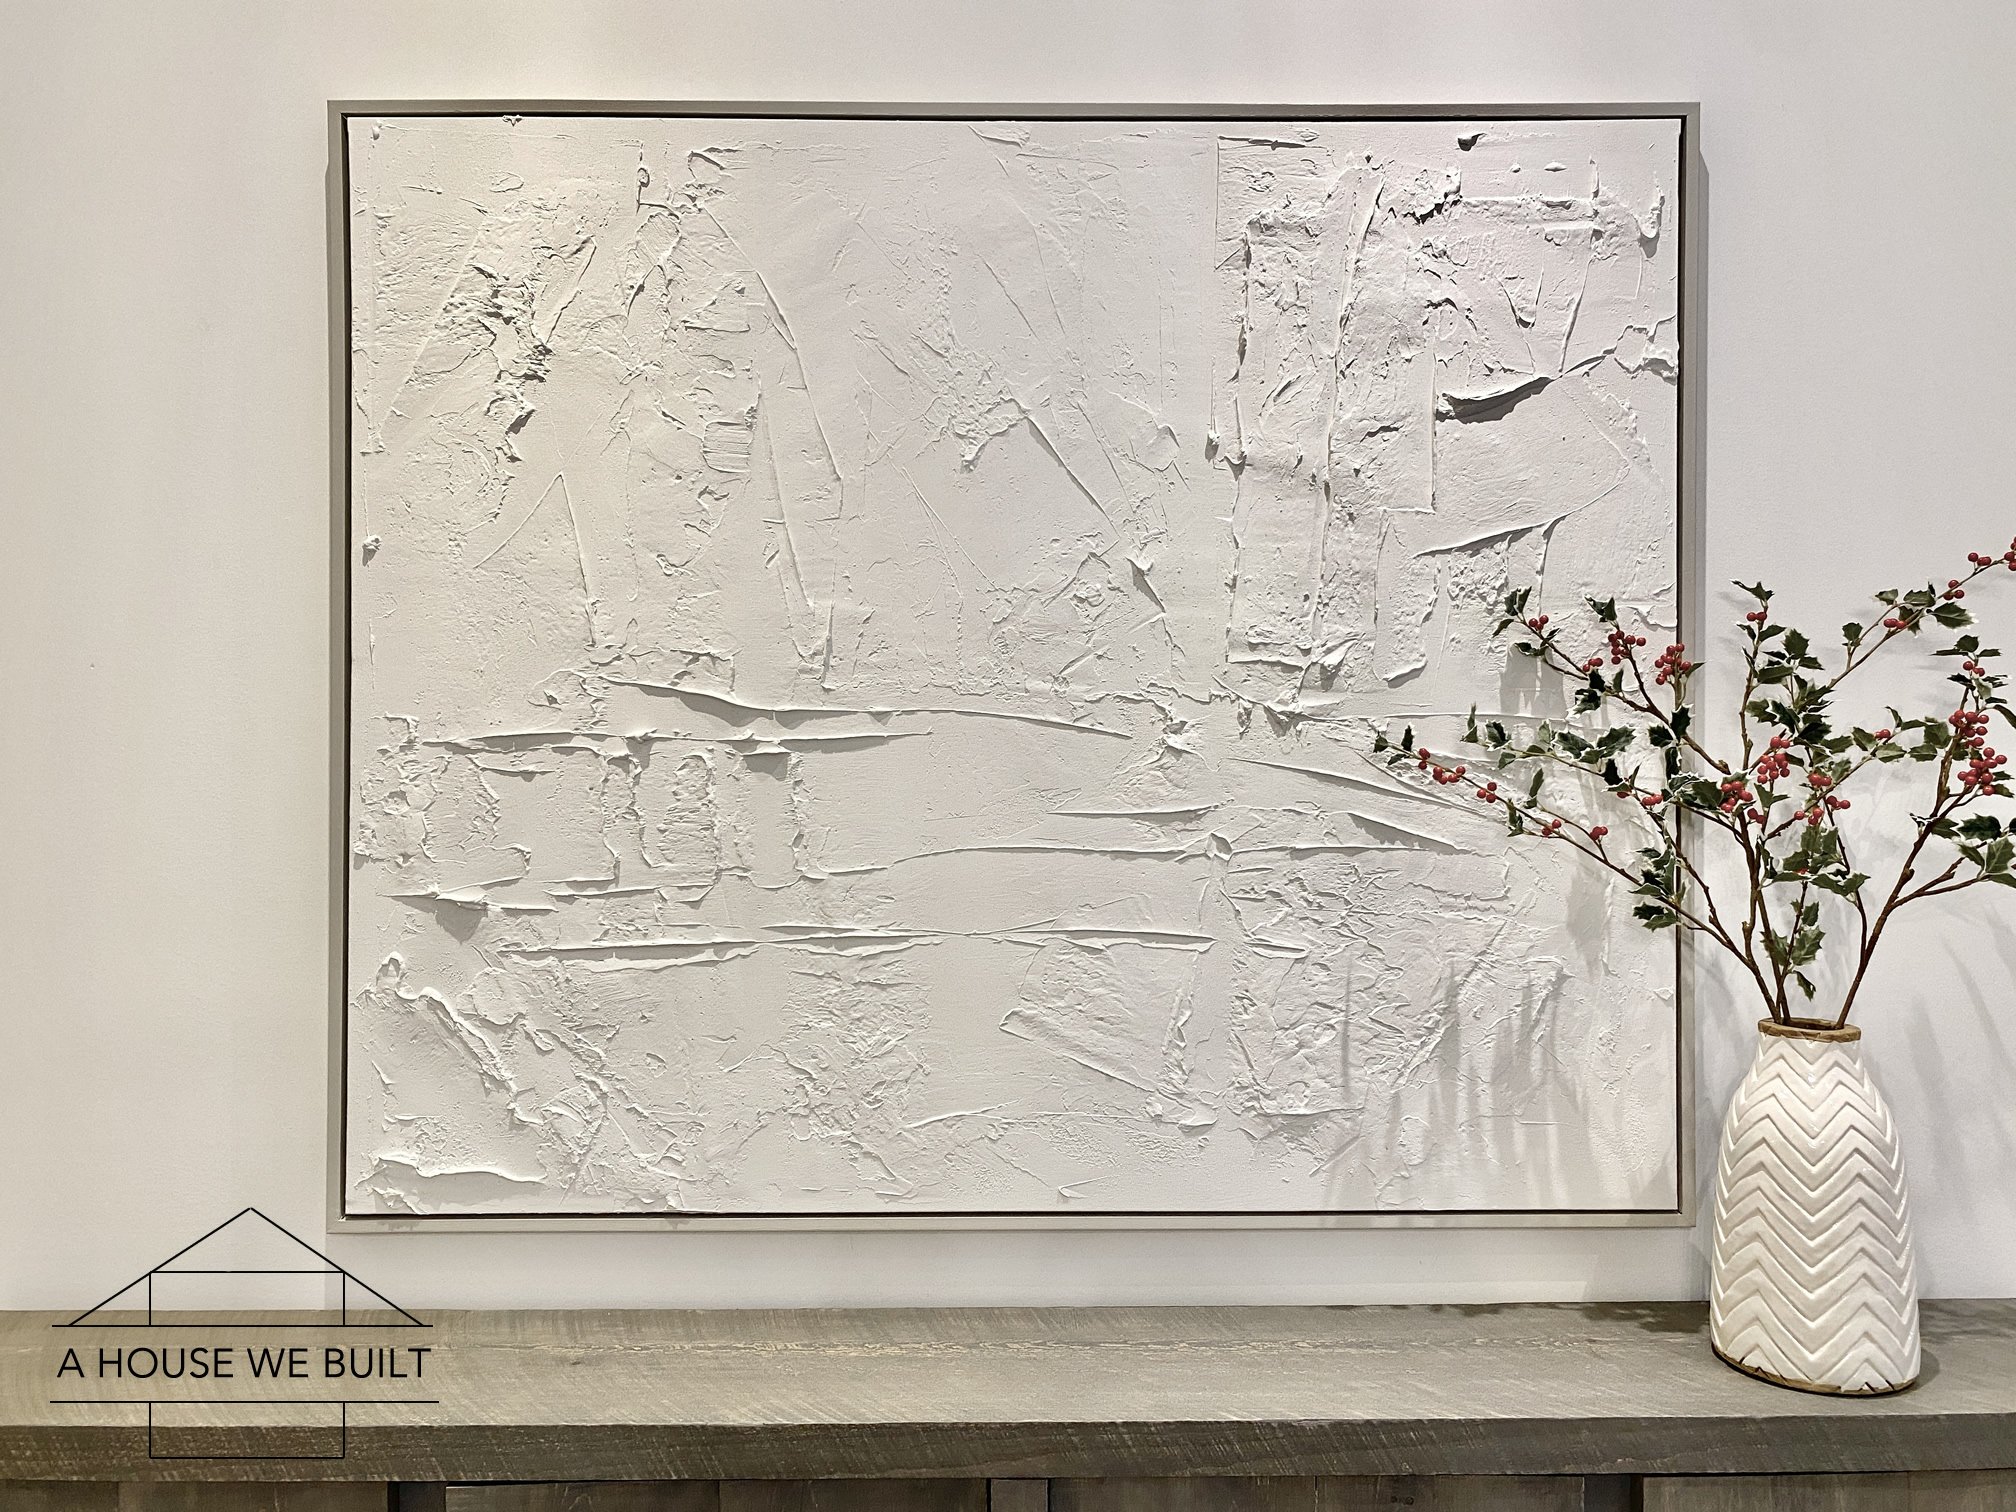
And if you’re following us on Instagram and familiar with the layout of our dining room and you’re wondering how on earth I got those straight pics of the art piece, I was sitting on our dining table lol! Finally, if you’re wondering why these pics are a little darker than my other pics, I took these at night so there’s no natural light so for those of you asking what our house looks like at night, this is an example.
SIMILAR OPTIONS
If you’re not into DIY or just not feeling particularly artistic, here are similar art pieces you can buy ready-made: McGee & Co (rectangular) | McGee & Co (square) | Crate & Barrel | Anthropologie | Pottery Barn.
Other sources from these pics:
- Chevron vase: Crate & Barrel
- Holly stems: Pottery Barn
- Sideboard: Tutorial | Similar: Wayfair | Crate & Barrel
For more sources from our Dining Room, click here.
For more of our DIY tutorials, click here.
To explore the other rooms in our house, click here.
Diana says
You guys are so cool, thanks for all the tutorials!!!
admin says
Ha – thanks! And, you’re welcome 🙂
Laure Bohn says
VERY TALENTED! MAYBE SOMEDAY I’LL TRY MY HAND AT THIS
Kenny says
Hell yeah. 43 year old lifetime artist and I work with everything associated with art. Mainly Im a mixed media type of artist and my faves are watercolor brushes, inks and color pencils. Never was good at painting until I tried and stuck to it. So sort awhile I was so far in debt that i started to puck up on digital art. It gives you all the tools you need for free but I couldn’t sell it like the traditional stuff I used to do. So this year Im painting and Im getting better at it each time. I have massive amounts of wood working materials and tools so I also build my own frames. Now I have tons of frames in all shapes and sizes. But I started a painting and the canvas is kinda like a PVC membrane coating, it was really hard to apply my mediums and you just gave me the answers Ive been looking for. I really enjoy working with mud in a construction setting with the textured look so its gonna be awesome when I go get some DAP because I love the depth and contrast that it brings to art. So, can I use a workable spray on fixatif over the mud? Sometimes I add different mediums that smudge, smear bleed through and never dry. It gums up my good expensive brush markers. But when I add a thin coating it gives me a brand new canvas to start with. You can go over it with more layers and paints so that it looks 3d. Thanks for the tips.
admin says
I’ll be honest, I don’t have sure answers to your questions mainly because I’m not actually an artist. I had experience with drywall mud though so for me, this art project was just an experiment that ended up working really well so I shared my process for anyone else who wanted to try.
However, my guess is that you probably could use a fixative spray, but I haven’t tried it myself. Ultimately though, the mud needs *something* overtop it as the final coat though to prevent the thicker parts from cracking and falling off the canvas. Since mine was monochromatic, I was able to use paint as the top coat, but if you plan to layer colors, you’d probably need to try some other kind of spray.
The only advice I specifically have is to make sure your spray is strong enough to provide some kind of proper support to the mud – it needs to kinda act as an adhesive to prevent cracking, especially in the heavily textured areas. Best of luck.
Mike says
I’ve done a few canvases with mud, being a ex-con(Crete) guy 👈😉🤣. I’ve never been able to satisfy my urge to play in the mud so in lieu of costly gels n paste I buy for my art I’ve decided to try it out aswell. Extremely satisfied and almost don’t wanna share the secret but it’s worked this far…just use gesso, few layers and definitely allow exaggerated dry times. I used sprays also (actually my first one) seemed so very logical but results were as you stated..NEVER DRIED, it remained tacky and just made mess. Science basically denies that combo, the gesso however once layered is decent however you obviously don’t have the tooth of the canvas so is more of…well a gesso board even with the grit in some textured areas its still is beyond smooth when applying my acrylics. I’m using a raphael “textura” brush which is for more impasto applications so there can be a little variable I’ve not thought much on idk…also p.s. if using acrylics I’d use a retarded paint or medium in the paint because even though that mud is sealed with gesso the paint seems to just set up even faster than on canvas.
Brigit says
This blog post is extremely helpful! You have inspired me to create one for our big wall in the living room. I looked you up on Instagram and I’m excited for follow more diy and design projects. Thank you!
admin says
That’s awesome! I’m really glad our tutorial was helpful 🙂
Mary says
Question: can you add color to the mud before you begin?
admin says
Maybe! I’ve never tried it myself but it should work in theory. Maybe do a small test on a scrap piece to see?
Alex says
Yes! You can. I’ve done it and it turned out great. I also painted the canvas bf applying the mud but I played With some antique gold color as well, and shines through beautifully in areas of the painting.
Maya says
What types of paint can you use to add to the mud?
Heidi says
Love this art piece! Very helpful.
admin says
Thank you! Glad it’s helpful.
Brandi says
Hopefully you’re still able to see these comments!
Approximately how many litres of mud did you use? I have a 36×48″ canvas and I’m not sure how much mud to order.
admin says
I buy mud in the huge containers so I’m not really sure exactly how much I used. It wasn’t all that much though – maybe a 1/4 of the bucket at most?
Lori says
Just stumbled upon your post while searching how to create textured art :). Loved your way of explaining everything. I was looking at Amazon for canvas but can not find anything big enough for ehat I have in mind (looks like Covid has created some supply chain issues in the arts space as well). Then I was just thinking “can this work by painting over an existing painting”. I have this 4’ x 5’ that the previous house owner have left behind and that I don’t care much about. But the dimensions are perfect for my dining room:). Do you think it will work? Any tips? Many thanks:)
admin says
It could work! I haven’t tried it myself but I know other people who have. The only thing I can think of is that you may need to reinforce it from the back with a few cross pieces as mud is heavier than paint and if your canvas just has a 4-sided frame it might not be enough. But if you add some bracing, I don’t see why it wouldn’t work. Btw, the frames I linked from Michaels in my post seem to be in stock too right now if that helps. They’re very similar to the one I made.
Best of luck 🙂
Lori says
Thank you! I’ll check Michael’s before venturing to destroy a painting (don’t feel very comfortable even though I don’t like it… someone else might feel completely the opposite) I appreciate the tip about the canvas weight!
admin says
Welcome! 🙂
Daniela says
Thank you! Very informative!
I never used drywall mud, but now I will.
I love mixed media and so far used sand , shells, mixed w glue covered w flat wall paint. .
Candice Little says
Hello! I just finished doing a DIY textured piece following your tutorial :). I just have one question — how thick was the mud on your canvas? I put mine quite thick and now I have very deep cracks ALL over. I’m wondering if this is due to thickness. Thanks!!
admin says
Probably no more than 1/4″ at the thickest parts, but usually closer to 1/8″. I address cracks in the tutorial and how to seal the canvas at the end so you may be able to repair them. 🙂
Janette says
Hi awesome explanation, curious to know what if I used dry wall tape on the canvas first I wanted to experiment as well. Trying to pull ideas outta my crazy brain for some pop out of the canvas art was wondering what I could come up with.
admin says
The tape would be an aesthetic choice you could use for artistic reasons, but it’s not functionally necessary.
Diana says
To avoid cracking use tile mastic instead of drywall mud, i.e. plaster. I started off using plaster and didn’t like all the cracks then found tile mastic, which can be found in the tile section of any hardware store right by the trowels , is absolutely perfect. After making quite a few very large pieces, I can say I’ve had zero cracks!
Also look for interesting objects to use in your art. Some of my favorites are a potato masher, wide tooth combs, decorative frosting tools, easy to squeeze plastic bottles with a hole in the cap (for making dots), and artist’s palette knives, and plastic lids of various sizes to make perfect circles just to name a few.
admin says
Yep, you can use any tools or medium to make this type of art. The cracks in drywall mud though can be sealed over – our final piece has no cracks – so either way works 🙂
Jeanine LeBlanc says
What can I use as a top coat clear spray for protection that won’t cause yellowing or any damage? Thank you..
admin says
If your final coat is paint (as mine was) then you don’t need a seal further to that.
Nana says
Thanks for the very helpful tutorial!
I was wondering – does this kind of art (textured and all-white) get dusty and grey quickly? How do you keep it looking good?
Bill Napoli says
I have used rock hard on canvases. It gives a really nice texture and I mix it with Elmer’s white glue instead of water and it holds really well to the canvas. The only problem is you need to take care as I bring the art around to the side of the canvas and you can’t bang it around as it will chip.